sensor JEEP RENEGADE 2015 1.G Owner's Manual
[x] Cancel search | Manufacturer: JEEP, Model Year: 2015, Model line: RENEGADE, Model: JEEP RENEGADE 2015 1.GPages: 220, PDF Size: 34.11 MB
Page 61 of 220
ParkSense® Sensors
The four ParkSense®sensors, located in the rear fascia/bumper, monitor the area
behind the vehicle that is within the sensors’ field of view. The sensors can detect
obstacles from approximately 12 in (30 cm) up to 59 in (150 cm) from the rear
fascia/bumper in the horizontal direction, depending on the location, type and
orientation of the obstacle.
Chime
By shifting the vehicle in REVERSE and in the case of the presence of a rear obstacle,
an acoustic signal that varies with the distance of the obstacle from the bumper is
activated.
The frequency of the acoustic signal:
• Increases with the distance between car and object decreases.
• Becomes continuous when the distance that separates the car from the obstacle
is less than approximately 12 inches (30 cm), while terminates immediately if the
distance to the obstacle increases.
• Remains constant if the distance between car and obstacle remains unchanged.
If this situation occurs for the side sensors, the signal is stopped after approxi-
mately three seconds to avoid, for example, it activates in case of maneuver along
a wall.
When the system emits a beeping sound, the volume of the Uconnect®system, if
turned on, is automatically lowered by ParkSense.
Detection Distances
If the sensors detect more obstacles, it is taken into account only what is the shorter
distance.
Instrument Cluster Display
ParkSense is displayed on the instrument cluster only if you have selected the item
"beep and display" inside the "Settings" menu of the Uconnect®system.
If an obstacle is detected in the center rear region, the display will show a single solid
arc in the center rear region and will produce a one-half second tone. As the vehicle
moves closer to the obstacle, the display will show the single arc moving closer to the
vehicle and the sound tone will change from slow, to fast, to continuous.
If an obstacle is detected in the left and/or right rear region, the display will show a
single flashing arc in the left and/or right rear region and will produce a fast sound
tone. As the vehicle moves closer to the obstacle, the display will show the single arc
moving closer to the vehicle and the tone will change from fast to continuous.
In general, the car is closest to the obstacle when the display shows only a flashing
arc and the chime becomes continuous.
The color on the display depends on the distance and location of the obstacle.
OPERATING YOUR VEHICLE
59
Page 62 of 220
Enabling And Disabling ParkSense®
ParkSense®can be enabled and disabled with the ParkSense®switch.
When the ParkSense®switch is pressed to disable the system, the instrument cluster
will display the “PARKSENSE OFF” message for approximately five seconds. Refer to
“Electronic Vehicle Information Center (EVIC)” or “Driver Information Display (DID)”
in “Getting To Know Your Instrument Panel” in your owner’s manual on the DVD for
further information. When the shift lever is moved to REVERSE and the system is
disabled, the EVIC/DID will display the “PARKSENSE OFF” message for as long as
the vehicle is in REVERSE.
The ParkSense®switch LED will be ON when ParkSense®is disabled or requires
service. The ParkSense®switch LED will be OFF when the system is enabled. If the
ParkSense®switch is pushed, and requires service, the ParkSense®switch LED will
blink momentarily, and then the LED will be ON.
ParkSense will remember the previous state when the vehicle is switch off.
CAUTION!
After turning off the ignition, the ParkSense®remains in this setting until the next
key cycle, even in the case of changing the setting of starting MAR/RUN to
STOP/OFF and then again in MAR/RUN.
Service The ParkSense® Rear Park Assist System
During vehicle start up, when the ParkSense®Rear Park Assist System has detected
a faulted condition, the instrument cluster will actuate a single chime, once per
ignition cycle, and it will display the “PARKSENSE UNAVAILABLE WIPE REAR
SENSORS” or the “PARKSENSE UNAVAILABLE SERVICE REQUIRED” message.
Refer to “Electronic Vehicle Information Center (EVIC) or Driver Information Display
(DID)” in your owner’s manual on the DVD for further information. When the shift
lever is moved to REVERSE and the system has detected a faulted condition, the
EVIC/DID will display the "PARKSENSE UNAVAILABLE WIPE REAR SENSORS" or
"PARKSENSE UNAVAILABLE SERVICE REQUIRED" message for as long as the
vehicle is in REVERSE. Under this condition, ParkSense®will not operate.
If “PARKSENSE UNAVAILABLE WIPE REAR SENSORS” appears in the Electronic
Vehicle Information Center (EVIC) or Driver Information Display (DID) make sure the
outer surface and the underside of the rear fascia/bumper is clean and clear of snow,
ice, mud, dirt or other obstructions and then cycle the ignition. If the message
continues to appear, see an authorized dealer.
If “PARKSENSE UNAVAILABLE SERVICE REQUIRED” appears in the EVIC/DID, see
an authorized dealer.
OPERATING YOUR VEHICLE
60
Page 63 of 220
Park Assist System Usage Precautions
NOTE:
• Ensure that the outer surface and the underside of the rear bumper is clean and
clear of snow, ice, mud, dirt or other obstruction to keep the Rear Park Assist
system operating properly.
• Jackhammers, large trucks, and other vibrations could affect the performance of
Rear Park Assist.
• Clean the Rear Park Assist sensors regularly, taking care not to scratch or damage
them. The sensors must not be covered with ice, snow, slush, mud, dirt or debris.
Failure to do so can result in the system not working properly. The Rear Park Assist
system might not detect an obstacle behind the fascia/bumper, or it could provide
a false indication that an obstacle is behind the fascia/bumper.
• Objects such as bicycle carriers, etc., must not be placed within 12 inches (30
cm) from the rear fascia/bumper while driving the vehicle. Failure to do so can
result in the system misinterpreting a close object as a sensor problem, causing a
failure indication to be displayed in the instrument cluster.
CAUTION!
• Rear Park Assist is only a parking aid and it is unable to recognize every
obstacle, including small obstacles. Parking curbs might be temporarily
detected or not detected at all. Obstacles located above or below the sensors
will not be detected when they are in close proximity.
• The vehicle must be driven slowly when using Rear Park Assist in order to be
able to stop in time when an obstacle is detected. It is recommended that the
driver looks over his/her shoulder when using Rear Park Assist.
WARNING!
• Drivers must be careful when backing up even when using ParkSense®. Always
check carefully behind your vehicle, look behind you, and be sure to check for
pedestrians, animals, other vehicles, obstructions, and blind spots before
backing up. You are responsible for safety and must continue to pay attention
to your surroundings. Failure to do so can result in serious injury or death.
• Before using ParkSense®, it is strongly recommended that the ball mount and
hitch ball assembly is disconnected from the vehicle when the vehicle is not
used for towing. Failure to do so can result in injury or damage to vehicles or
obstacles because the hitch ball will be much closer to the obstacle than the
rear fascia when the loudspeaker sounds the continuous tone. Also, the sensors
could detect the ball mount and hitch ball assembly, depending on its size and
shape, giving a false indication that an obstacle is behind the vehicle.
OPERATING YOUR VEHICLE
61
Page 64 of 220
If it’s necessary to keep the trailer hitch and hitch ball assembly mounted for a long
period, it is possible to filter out the trailer hitch and hitch ball assembly presence in
sensor field of view. The filtering operation must be performed only by an authorized
dealer.
PARKVIEW® REAR BACK UP CAMERA
The ParkView®Rear Back Up Camera that allows you to see an on-screen image of
your vehicle's rear surroundings when the shift lever is put into REVERSE. The image
will be displayed on the touchscreen display along with a note to “check entire
surroundings” across the top of the screen. After five seconds this note will
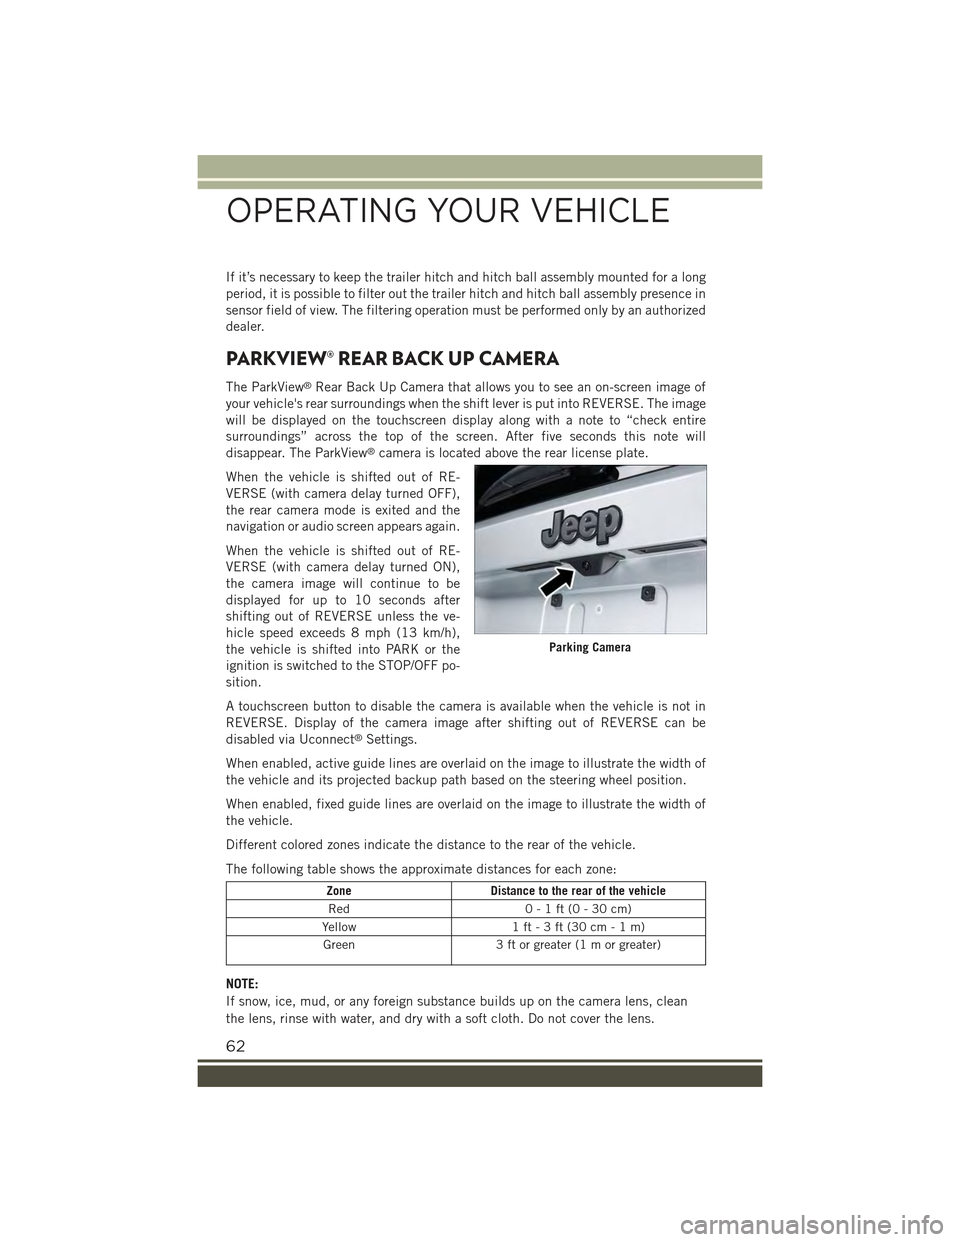
disappear. The ParkView®camera is located above the rear license plate.
When the vehicle is shifted out of RE-
VERSE (with camera delay turned OFF),
the rear camera mode is exited and the
navigation or audio screen appears again.
When the vehicle is shifted out of RE-
VERSE (with camera delay turned ON),
the camera image will continue to be
displayed for up to 10 seconds after
shifting out of REVERSE unless the ve-
hicle speed exceeds 8 mph (13 km/h),
the vehicle is shifted into PARK or the
ignition is switched to the STOP/OFF po-
sition.
A touchscreen button to disable the camera is available when the vehicle is not in
REVERSE. Display of the camera image after shifting out of REVERSE can be
disabled via Uconnect®Settings.
When enabled, active guide lines are overlaid on the image to illustrate the width of
the vehicle and its projected backup path based on the steering wheel position.
When enabled, fixed guide lines are overlaid on the image to illustrate the width of
the vehicle.
Different colored zones indicate the distance to the rear of the vehicle.
The following table shows the approximate distances for each zone:
ZoneDistance to the rear of the vehicle
Red0-1ft(0-30cm)
Yellow1 ft - 3 ft (30 cm - 1 m)
Green3 ft or greater (1 m or greater)
NOTE:
If snow, ice, mud, or any foreign substance builds up on the camera lens, clean
the lens, rinse with water, and dry with a soft cloth. Do not cover the lens.
Parking Camera
OPERATING YOUR VEHICLE
62
Page 146 of 220
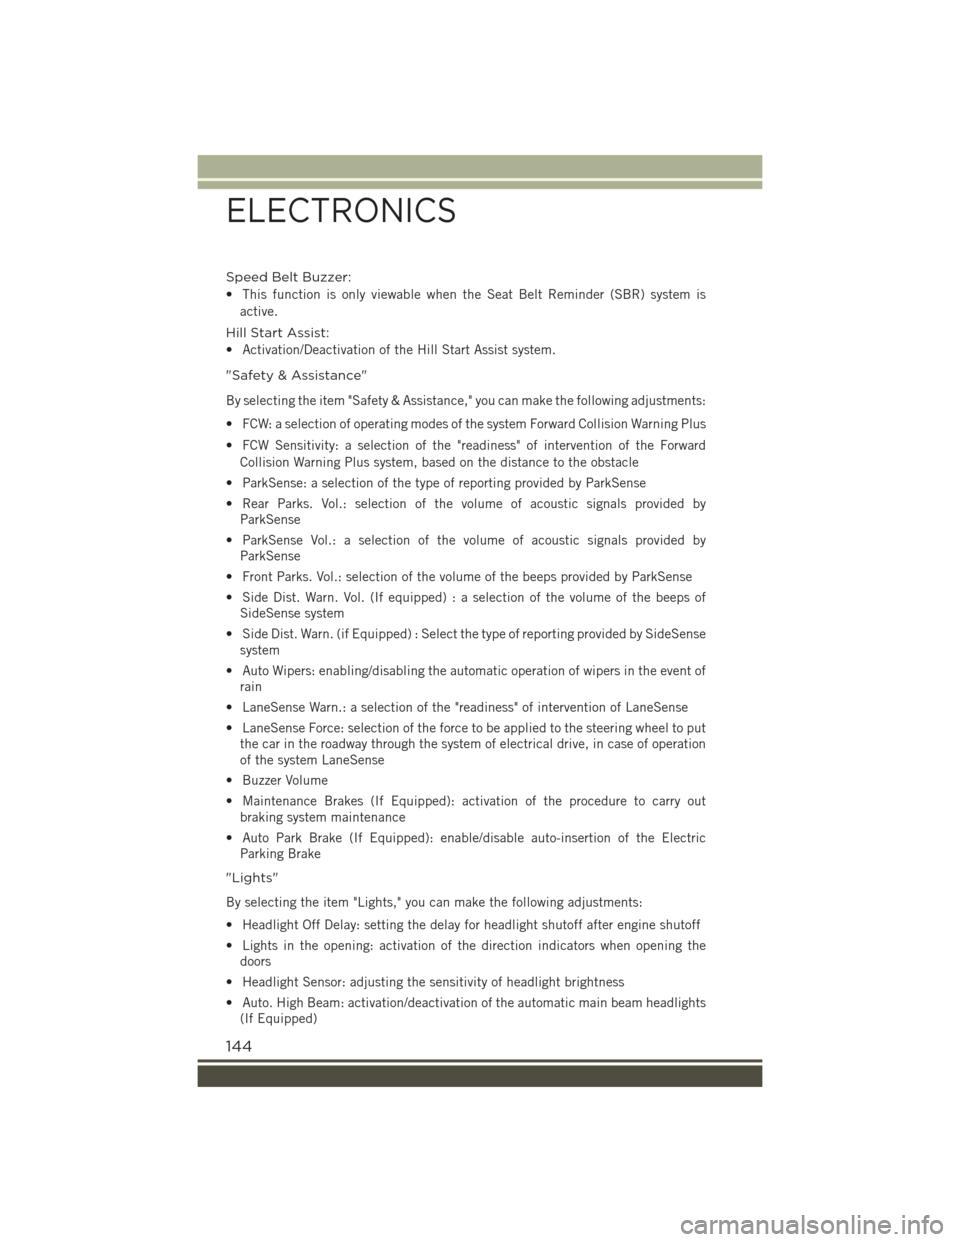
Speed Belt Buzzer:
• This function is only viewable when the Seat Belt Reminder (SBR) system is
active.
Hill Start Assist:
• Activation/Deactivation of the Hill Start Assist system.
"Safety & Assistance"
By selecting the item "Safety & Assistance," you can make the following adjustments:
• FCW: a selection of operating modes of the system Forward Collision Warning Plus
• FCW Sensitivity: a selection of the "readiness" of intervention of the Forward
Collision Warning Plus system, based on the distance to the obstacle
• ParkSense: a selection of the type of reporting provided by ParkSense
• Rear Parks. Vol.: selection of the volume of acoustic signals provided by
ParkSense
• ParkSense Vol.: a selection of the volume of acoustic signals provided by
ParkSense
• Front Parks. Vol.: selection of the volume of the beeps provided by ParkSense
• Side Dist. Warn. Vol. (If equipped) : a selection of the volume of the beeps of
SideSense system
• Side Dist. Warn. (if Equipped) : Select the type of reporting provided by SideSense
system
• Auto Wipers: enabling/disabling the automatic operation of wipers in the event of
rain
• LaneSense Warn.: a selection of the "readiness" of intervention of LaneSense
• LaneSense Force: selection of the force to be applied to the steering wheel to put
the car in the roadway through the system of electrical drive, in case of operation
of the system LaneSense
• Buzzer Volume
• Maintenance Brakes (If Equipped): activation of the procedure to carry out
braking system maintenance
• Auto Park Brake (If Equipped): enable/disable auto-insertion of the Electric
Parking Brake
"Lights"
By selecting the item "Lights," you can make the following adjustments:
• Headlight Off Delay: setting the delay for headlight shutoff after engine shutoff
• Lights in the opening: activation of the direction indicators when opening the
doors
• Headlight Sensor: adjusting the sensitivity of headlight brightness
• Auto. High Beam: activation/deactivation of the automatic main beam headlights
(If Equipped)
ELECTRONICS
144
Page 147 of 220
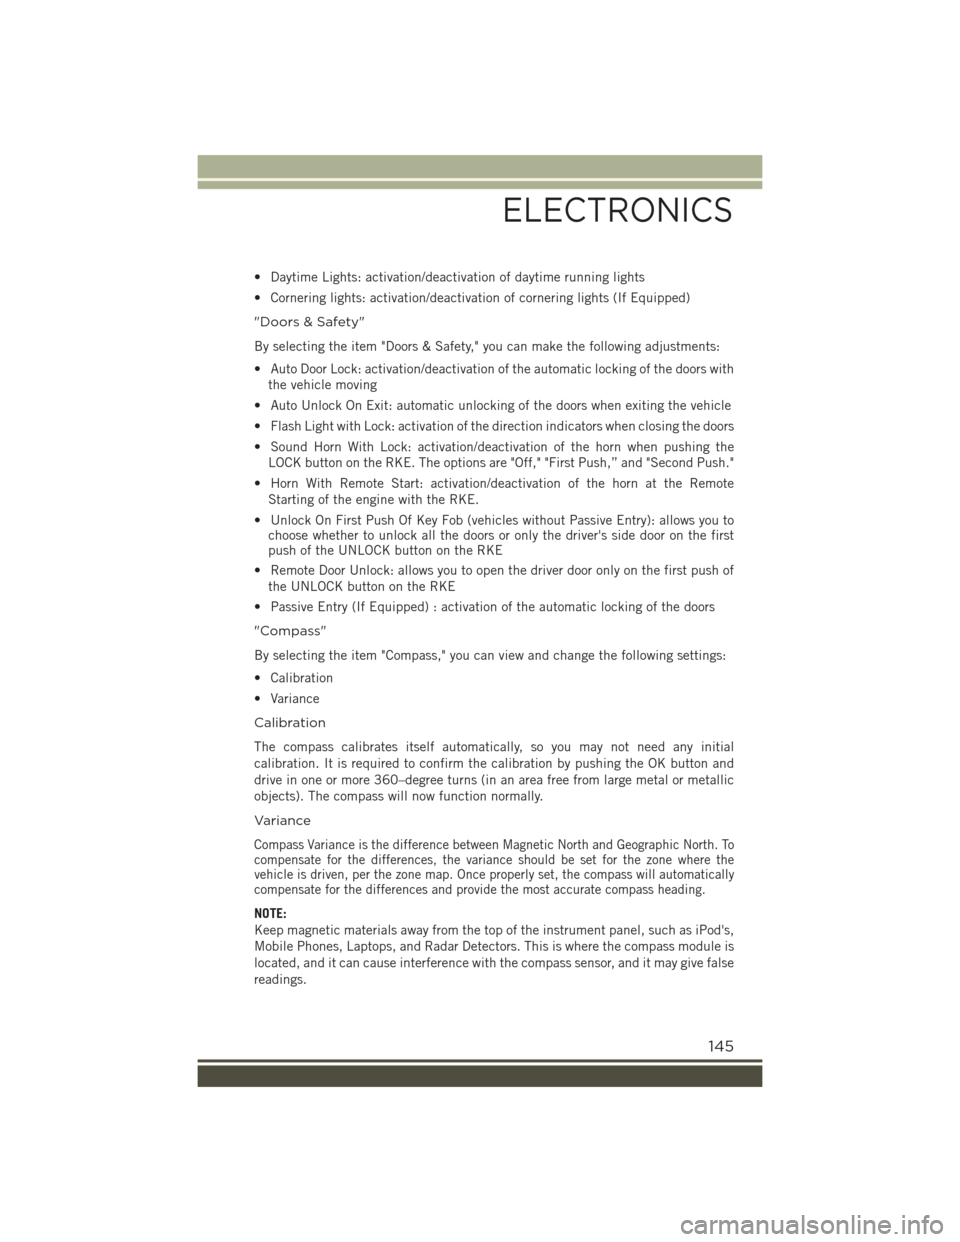
• Daytime Lights: activation/deactivation of daytime running lights
• Cornering lights: activation/deactivation of cornering lights (If Equipped)
"Doors & Safety"
By selecting the item "Doors & Safety," you can make the following adjustments:
• Auto Door Lock: activation/deactivation of the automatic locking of the doors with
the vehicle moving
• Auto Unlock On Exit: automatic unlocking of the doors when exiting the vehicle
• Flash Light with Lock: activation of the direction indicators when closing the doors
• Sound Horn With Lock: activation/deactivation of the horn when pushing the
LOCK button on the RKE. The options are "Off," "First Push,” and "Second Push."
• Horn With Remote Start: activation/deactivation of the horn at the Remote
Starting of the engine with the RKE.
• Unlock On First Push Of Key Fob (vehicles without Passive Entry): allows you tochoose whether to unlock all the doors or only the driver's side door on the firstpush of the UNLOCK button on the RKE
• Remote Door Unlock: allows you to open the driver door only on the first push of
the UNLOCK button on the RKE
• Passive Entry (If Equipped) : activation of the automatic locking of the doors
"Compass"
By selecting the item "Compass," you can view and change the following settings:
• Calibration
• Variance
Calibration
The compass calibrates itself automatically, so you may not need any initial
calibration. It is required to confirm the calibration by pushing the OK button and
drive in one or more 360–degree turns (in an area free from large metal or metallic
objects). The compass will now function normally.
Variance
Compass Variance is the difference between Magnetic North and Geographic North. Tocompensate for the differences, the variance should be set for the zone where thevehicle is driven, per the zone map. Once properly set, the compass will automaticallycompensate for the differences and provide the most accurate compass heading.
NOTE:
Keep magnetic materials away from the top of the instrument panel, such as iPod's,
Mobile Phones, Laptops, and Radar Detectors. This is where the compass module is
located, and it can cause interference with the compass sensor, and it may give false
readings.
ELECTRONICS
145
Page 160 of 220
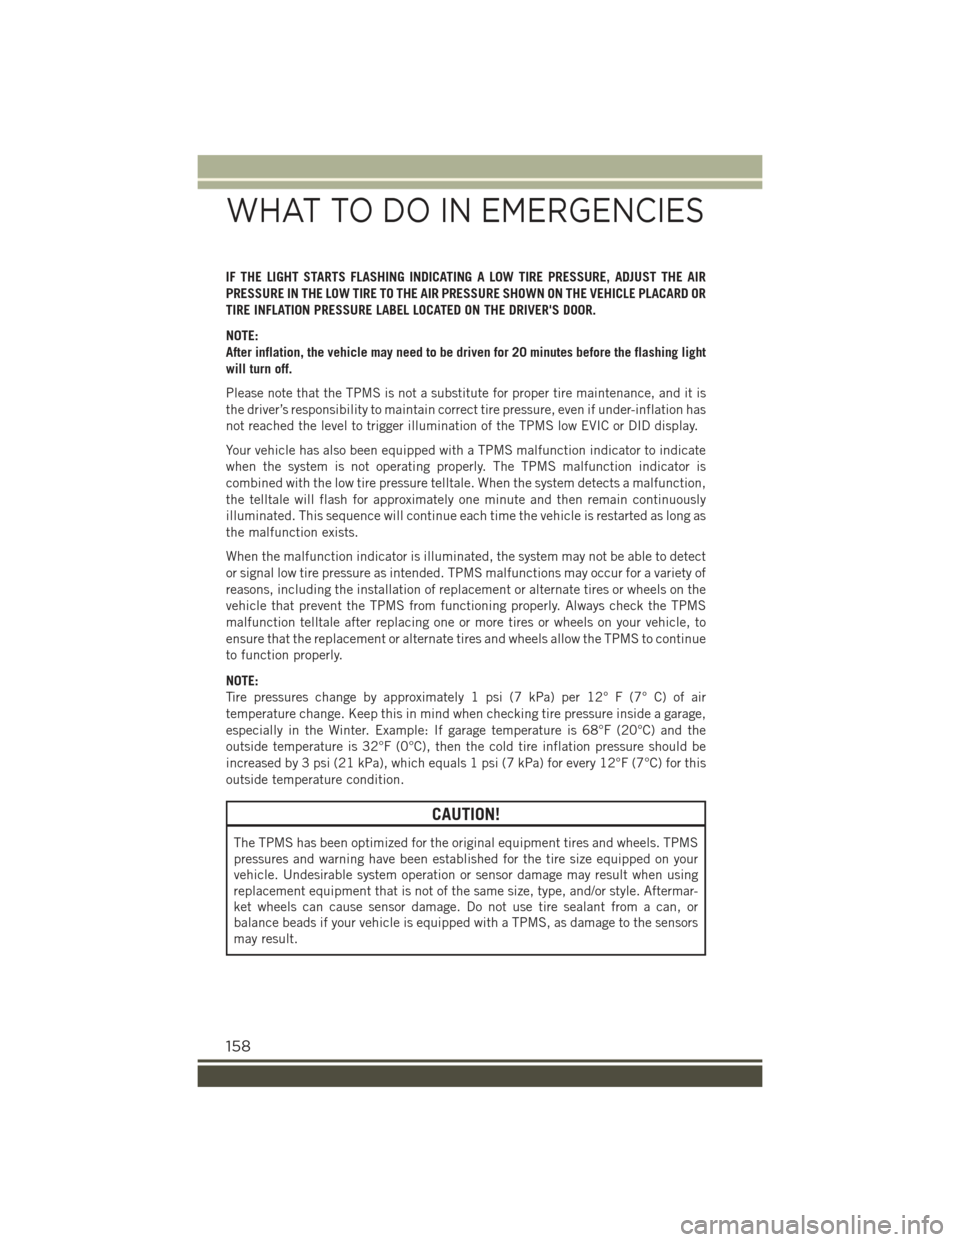
IF THE LIGHT STARTS FLASHING INDICATING A LOW TIRE PRESSURE, ADJUST THE AIR
PRESSURE IN THE LOW TIRE TO THE AIR PRESSURE SHOWN ON THE VEHICLE PLACARD OR
TIRE INFLATION PRESSURE LABEL LOCATED ON THE DRIVER'S DOOR.
NOTE:
After inflation, the vehicle may need to be driven for 20 minutes before the flashing light
will turn off.
Please note that the TPMS is not a substitute for proper tire maintenance, and it is
the driver’s responsibility to maintain correct tire pressure, even if under-inflation has
not reached the level to trigger illumination of the TPMS low EVIC or DID display.
Your vehicle has also been equipped with a TPMS malfunction indicator to indicate
when the system is not operating properly. The TPMS malfunction indicator is
combined with the low tire pressure telltale. When the system detects a malfunction,
the telltale will flash for approximately one minute and then remain continuously
illuminated. This sequence will continue each time the vehicle is restarted as long as
the malfunction exists.
When the malfunction indicator is illuminated, the system may not be able to detect
or signal low tire pressure as intended. TPMS malfunctions may occur for a variety of
reasons, including the installation of replacement or alternate tires or wheels on the
vehicle that prevent the TPMS from functioning properly. Always check the TPMS
malfunction telltale after replacing one or more tires or wheels on your vehicle, to
ensure that the replacement or alternate tires and wheels allow the TPMS to continue
to function properly.
NOTE:
Tire pressures change by approximately 1 psi (7 kPa) per 12° F (7° C) of air
temperature change. Keep this in mind when checking tire pressure inside a garage,
especially in the Winter. Example: If garage temperature is 68°F (20°C) and the
outside temperature is 32°F (0°C), then the cold tire inflation pressure should be
increased by 3 psi (21 kPa), which equals 1 psi (7 kPa) for every 12°F (7°C) for this
outside temperature condition.
CAUTION!
The TPMS has been optimized for the original equipment tires and wheels. TPMS
pressures and warning have been established for the tire size equipped on your
vehicle. Undesirable system operation or sensor damage may result when using
replacement equipment that is not of the same size, type, and/or style. Aftermar-
ket wheels can cause sensor damage. Do not use tire sealant from a can, or
balance beads if your vehicle is equipped with a TPMS, as damage to the sensors
may result.
WHAT TO DO IN EMERGENCIES
158
Page 198 of 220
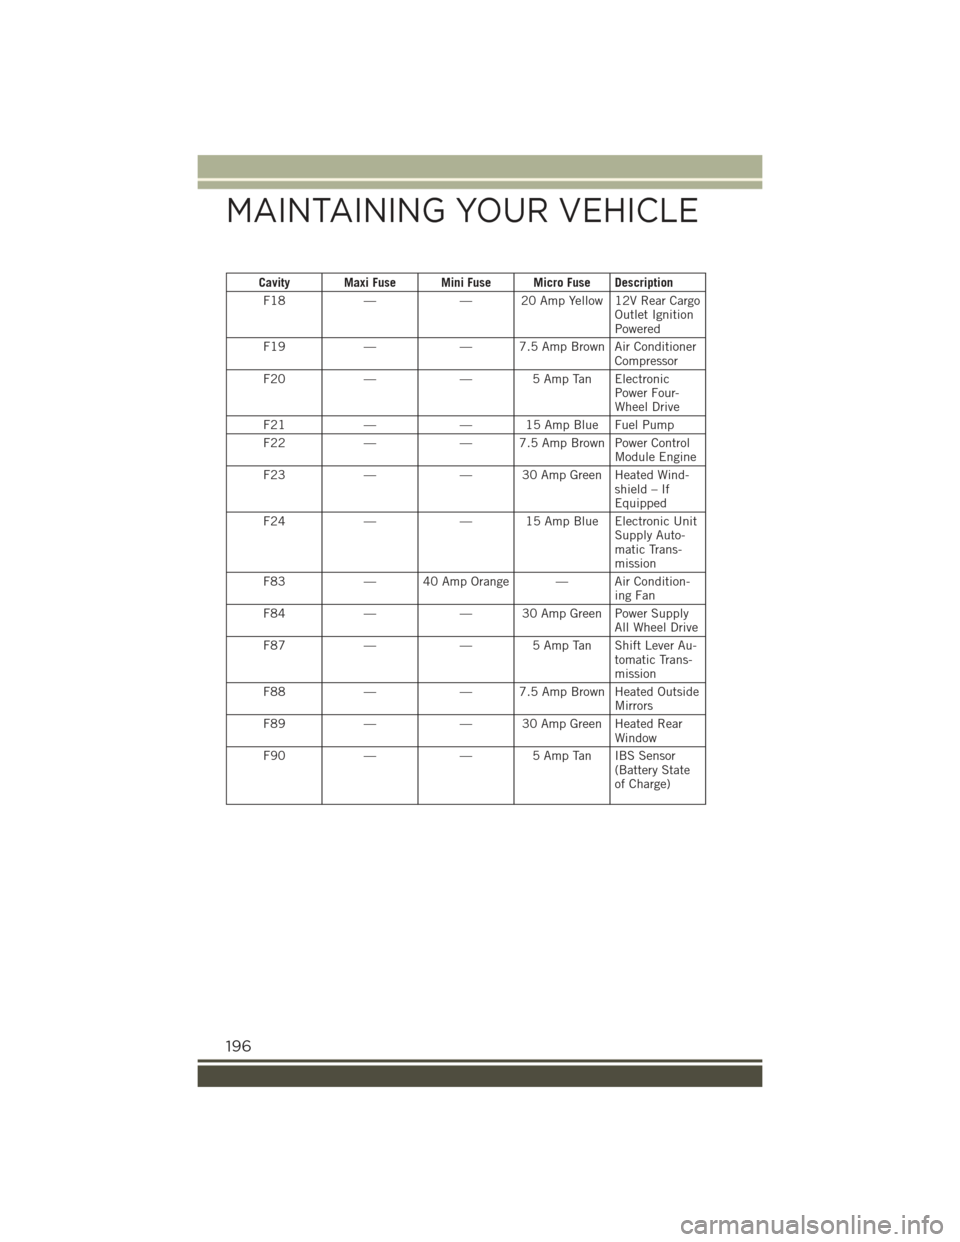
Cavity Maxi Fuse Mini Fuse Micro Fuse Description
F18——20AmpYellow12VRearCargoOutlet IgnitionPowered
F19——7.5AmpBrownAirConditionerCompressor
F20—— 5 Amp Tan ElectronicPower Four-Wheel Drive
F21——15AmpBlueFuelPump
F22——7.5AmpBrownPowerControlModule Engine
F23——30AmpGreenHeatedWind-shield – IfEquipped
F24——15AmpBlueElectronicUnitSupply Auto-matic Trans-mission
F83—40AmpOrange—AirCondition-ing Fan
F84——30AmpGreenPowerSupplyAll Wheel Drive
F87——5AmpTanShiftLeverAu-tomatic Trans-mission
F88——7.5AmpBrownHeatedOutsideMirrors
F89——30AmpGreenHeatedRearWindow
F90——5AmpTanIBSSensor(Battery Stateof Charge)
MAINTAINING YOUR VEHICLE
196
Page 208 of 220
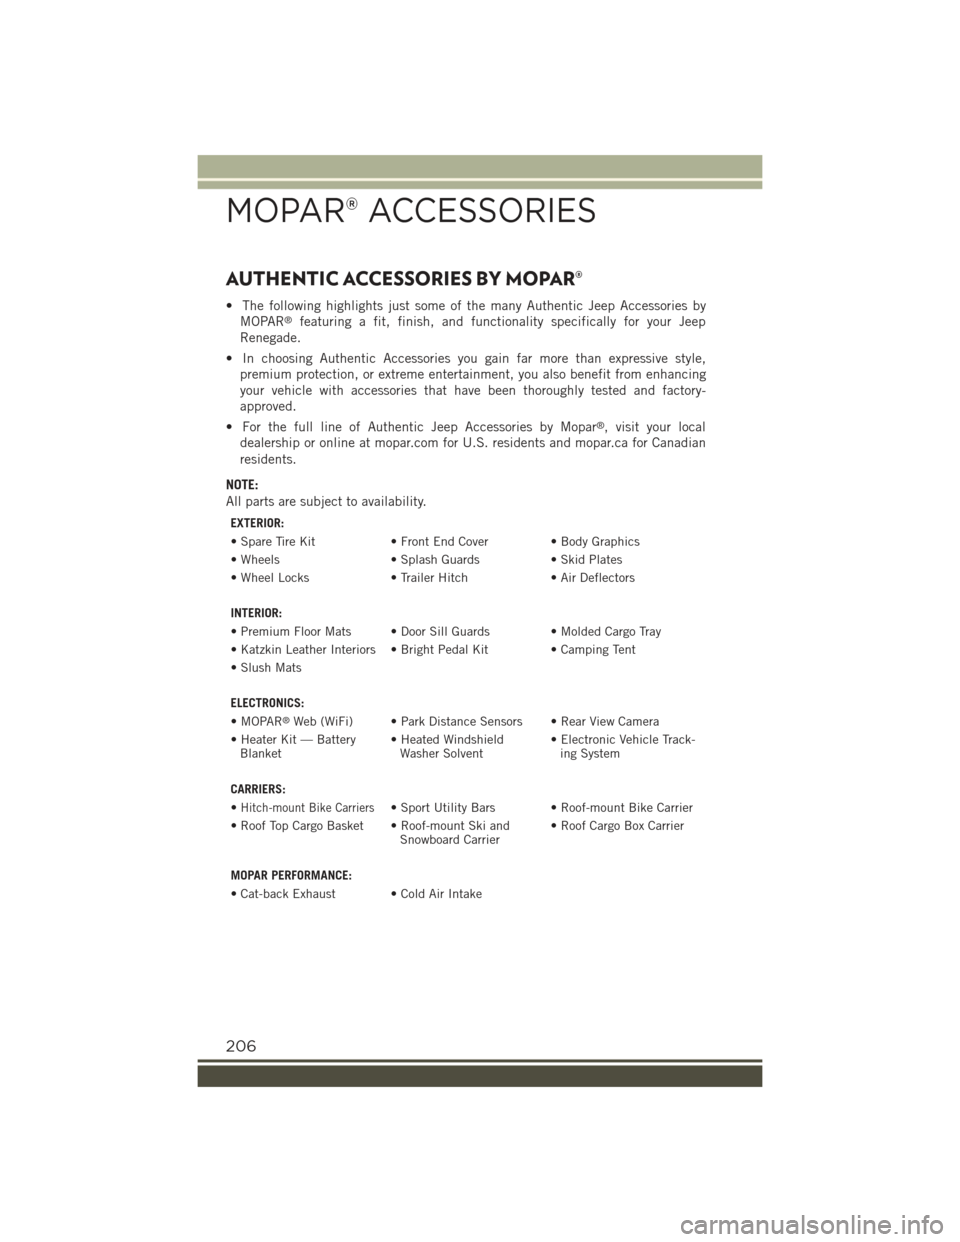
AUTHENTIC ACCESSORIES BY MOPAR®
• The following highlights just some of the many Authentic Jeep Accessories by
MOPAR®featuring a fit, finish, and functionality specifically for your Jeep
Renegade.
• In choosing Authentic Accessories you gain far more than expressive style,
premium protection, or extreme entertainment, you also benefit from enhancing
your vehicle with accessories that have been thoroughly tested and factory-
approved.
• For the full line of Authentic Jeep Accessories by Mopar®, visit your local
dealership or online at mopar.com for U.S. residents and mopar.ca for Canadian
residents.
NOTE:
All parts are subject to availability.
EXTERIOR:
• Spare Tire Kit• Front End Cover • Body Graphics
• Wheels• Splash Guards• Skid Plates
• Wheel Locks• Trailer Hitch• Air Deflectors
INTERIOR:
• Premium Floor Mats • Door Sill Guards • Molded Cargo Tray
• Katzkin Leather Interiors • Bright Pedal Kit • Camping Tent
• Slush Mats
ELECTRONICS:
•MOPAR®Web (WiFi) • Park Distance Sensors • Rear View Camera
• Heater Kit — BatteryBlanket• Heated WindshieldWasher Solvent• Electronic Vehicle Track-ing System
CARRIERS:
•Hitch-mount Bike Carriers• Sport Utility Bars • Roof-mount Bike Carrier
• Roof Top Cargo Basket • Roof-mount Ski andSnowboard Carrier• Roof Cargo Box Carrier
MOPAR PERFORMANCE:
• Cat-back Exhaust • Cold Air Intake
MOPAR® ACCESSORIES
206