spare tire JEEP RENEGADE 2015 1.G User Guide
[x] Cancel search | Manufacturer: JEEP, Model Year: 2015, Model line: RENEGADE, Model: JEEP RENEGADE 2015 1.GPages: 220, PDF Size: 34.11 MB
Page 3 of 220
INTRODUCTION/WELCOME
WELCOME FROM FCA US LLC...... 2
CONTROLS AT A GLANCE
DRIVER COCKPIT.............. 6INSTRUMENT CLUSTER.......... 8
GETTING STARTED
KEY FOB . . . . . . . . . . . . . . . . . . . 10REMOTE START............... 12VEHICLE SECURITY ALARM....... 13KEYLESS ENTER-N-GO™......... 14SEAT BELT SYSTEMS........... 17SUPPLEMENTAL RESTRAINT SYSTEM(SRS) — AIR BAGS............ 18CHILD RESTRAINTS............ 21HEAD RESTRAINTS............. 25SEATS . . . . . . . . . . . . . . . . . . . . . 27REAR SEATS................ 30HEATED STEERING WHEEL........ 32TILT/TELESCOPING STEERINGCOLUMN................... 33
OPERATING YOUR VEHICLE
ENGINE BREAK-INRECOMMENDATIONS........... 34EXTERIOR LIGHTS............. 34WINDSHIELD WIPER/WASHER...... 37ELECTRONIC SPEED CONTROL..... 40MANUAL CLIMATE CONTROLS...... 43AUTOMATIC TEMPERATURE CONTROLS(ATC) . . . . . . . . . . . . . . . . . . . . . . 44ELECTRIC PARK BRAKE (EPB)...... 45BLIND SPOT MONITORING (BSM).... 47FORWARD COLLISION WARNING (FCW)WITH MITIGATION . . . . . . . . . . . . . 51LANESENSE................. 55PA R K S E N S E®REAR PARK ASSIST . . . 58PARKVIEW®REAR BACK UP CAMERA.. 62RETRACTABLE ROOF (MY SKY)..... 63
ELECTRONICS
YOUR VEHICLE'S SOUND SYSTEM . . . 72IDENTIFYING YOUR RADIO........ 74Uconnect®ACCESS............. 75Uconnect®3.0 . . . . . . . . . . . . . . . . 91Uconnect®5.0 . . . . . . . . . . . . . . . . 94Uconnect®6.5AN . . . . . . . . . . . . . 106Uconnect®PHONE............ 128STEERING WHEEL AUDIO CONTROLS.. 138ELECTRONIC VEHICLE INFORMATIONCENTER (EVIC) AND DRIVER INFORMATIONDISPLAY (DID)............... 138PROGRAMMABLE FEATURES...... 146POWER INVERTER — IF EQUIPPED . . 146POWER OUTLET.............. 147
OFF-ROAD CAPABILITIES
FOUR WHEEL DRIVE — JEEP ACTIVEDRIVE (4WD) AND JEEP ACTIVE DRIVE LOW(4WD LOW)................. 150
SELEC-TERRAIN™............ 152
UTILITY
CARGO AREA FEATURES........ 153TRAILER TOWING............ 153RECREATIONAL TOWING........ 154
WHAT TO DO IN EMERGENCIES
ROADSIDE ASSISTANCE......... 156INSTRUMENT CLUSTER WARNINGLIGHTS................... 156INSTRUMENT CLUSTER INDICATORLIGHTS................... 161IF YOUR ENGINE OVERHEATS..... 164TIRE SERVICE KIT STORAGE...... 165JACKING AND TIRE CHANGING.... 168JUMP-STARTING PROCEDURES.... 174FREEING A STUCK VEHICLE...... 176EMERGENCY TOW HOOKS....... 177SHIFT LEVER OVERRIDE........ 178TOWING A DISABLED VEHICLE.... 179
MAINTAINING YOUR VEHICLE
TO OPEN AND CLOSE THE HOOD . . . 181ENGINE COMPARTMENT — 1.4LTURBO................... 182ENGINE COMPARTMENT — 2.4L . . . 184FLUID CAPACITIES............ 186FLUIDS, LUBRICANTS AND GENUINEPA RT S . . . . . . . . . . . . . . . . . . . . 1 8 6MAINTENANCE PROCEDURES..... 187MAINTENANCE SCHEDULE....... 187FUSES.................... 194ADDING FUEL............... 199TIRE PRESSURES............. 200SPARE TIRES — IF EQUIPPED..... 201WHEEL AND WHEEL TRIM CARE . . . 202BULB REPLACEMENT.......... 203
CUSTOMER ASSISTANCE
FCA US LLC CUSTOMER CENTER . . . 204CHRYSLER CANADA INC. CUSTOMERCENTER.................. 204ASSISTANCE FOR THE HEARINGIMPAIRED . . . . . . . . . . . . . . . . . 204PUBLICATIONS ORDERING....... 204REPORTING SAFETY DEFECTS IN THEUNITED STATES . . . . . . . . . . . . . . 205
MOPAR® ACCESSORIES
AUTHENTIC ACCESSORIES BYMOPAR®.................. 206
FAQ ’ s
FREQUENTLY ASKED QUESTIONS . . 207
INDEX.................. 208
TABLE OF CONTENTS
Page 155 of 220
CARGO AREA FEATURES
Cargo Load Floor
The vehicle is equipped with a load floor that can be adjusted as needed.
Position 1 (Floor Flush):
This position allows you to make the load floor flat for ease of loading/unloading
objects from the cargo area. This position also makes it possible to use the space
below as another compartment for storing fragile or smaller objects.
Position 2 (Elevated Position):
When the rear seatbacks and front passenger seat is folded flat, it will allow for
loading objects of long dimensions. It is recommended to use this position only
during the actual transporting of the objects.
Table Tilt Load
In addition to the two positions described above, the load floor can also be placed in
a tilted position (slanted toward the rear seatbacks as to ease the access to the
underlying zone of the luggage compartment (e.g. to pick up the spare tire or the Tire
Service Kit).
Place the load floor in a way that it rests at the supports 1 and 2 on the sides of the
cargo area.
The load floor provides securing of any cargo inside this position, so that the cargo
will slide in the case of sudden braking.
TRAILER TOWING
Tr a i l e r To w i n g W e i g h t s ( M a x i m u m Tr a i l e r W e i g h t R a t i n g s )
The following chart provides the maximum trailer weight ratings towable for your
given drivetrain.
1.4L Turbo Engine
Trailer towing is not recommended.
EngineMax. GTW (Gross Trailer Wt.) Max. Tongue Wt. (See Note)
2.4L2,000 lbs (900 kg)200 lbs (90 kg)
Refer to local laws for maximum trailer towing speeds.
NOTE: The trailer tongue weight must be considered as part of the combined weight of oc-cupants and cargo and should never exceed the weight referenced on the Tire and LoadingInformation placard. Refer to “Tire Safety Information” in “Starting And Operating” for fur-ther information.
UTILITY
153
Page 159 of 220
If the ABS light is on, the brake system should be serviced as soon as possible to
restore the benefits of Anti-Lock brakes. If the ABS light does not turn on when the
ignition switch is turned to the MAR/RUN position, have the light inspected by an
authorized dealer.
- Air Bag Warning Light
This light will turn on for four to eight seconds as a bulb check when the ignition
switch is first turned to the MAR/RUN position. If the light is either not on during
starting, stays on, or turns on while driving, have the system inspected at an
authorized dealer as soon as possible. Refer to “Occupant Restraints” in “Safety” in
your Owner’s Manual on the DVD for further information.
NOTE:
The Air Bag System is designed to be maintenance free.
- Electronic Throttle Control (ETC) Light
This light informs you of a problem with the Electronic Throttle Control (ETC) system.
If a problem is detected, the light will come on while the engine is running. Cycle the
ignition key when the vehicle has completely stopped and the shift lever/gear selector
is placed in the PARK position; the light should turn off.
If the light remains lit with the engine running, your vehicle will usually be drivable.
However, see an authorized service center immediately. If the light is flashing when
the engine is running, immediate service is required and you may experience reduced
performance, an elevated/rough idle or engine stall and your vehicle may require
towing.
-TirePressureMonitoringSystem(TPMS)Light
Each tire, including the spare (if provided), should be checked monthly, when cold
and inflated to the inflation pressure recommended by the vehicle manufacturer on
the vehicle placard or tire inflation pressure label. (If your vehicle has tires of a
different size than the size indicated on the vehicle placard or tire inflation pressure
label, you should determine the proper tire inflation pressure for those tires.)
As an added safety feature, your vehicle has been equipped with a Tire Pressure
Monitoring System (TPMS) which display in the Electronic Vehicle Information
Center (EVIC) or Driver Information Display (DID) when one or more of your tires is
significantly under-inflated. Accordingly, when the low tire pressure EVIC or DID
display illuminates, you should stop and check your tires as soon as possible, and
inflate them to the proper pressure. Driving on a significantly under-inflated tire
causes the tire to overheat and can lead to tire failure. Under-inflation also reduces
fuel efficiency and tire tread life, and may affect the vehicle’s handling and stopping
ability.
WHAT TO DO IN EMERGENCIES
157
Page 170 of 220
JACKING AND TIRE CHANGING
WARNING!
• Do not attempt to change a tire on the side of the vehicle close to moving
traffic. Pull far enough off the road to avoid the danger of being hit when
operating the jack or changing the wheel.
• Being under a jacked-up vehicle is dangerous. The vehicle could slip off the
jack and fall on you. You could be crushed. Never put any part of your body
under a vehicle that is on a jack. If you need to get under a raised vehicle, take
it to a service center where it can be raised on a lift.
• Never start or run the engine while the vehicle is on a jack.
• The jack is designed to be used as a tool for changing tires only. The jack
should not be used to lift the vehicle for service purposes. The vehicle should
be jacked on a firm level surface only. Avoid ice or slippery areas.
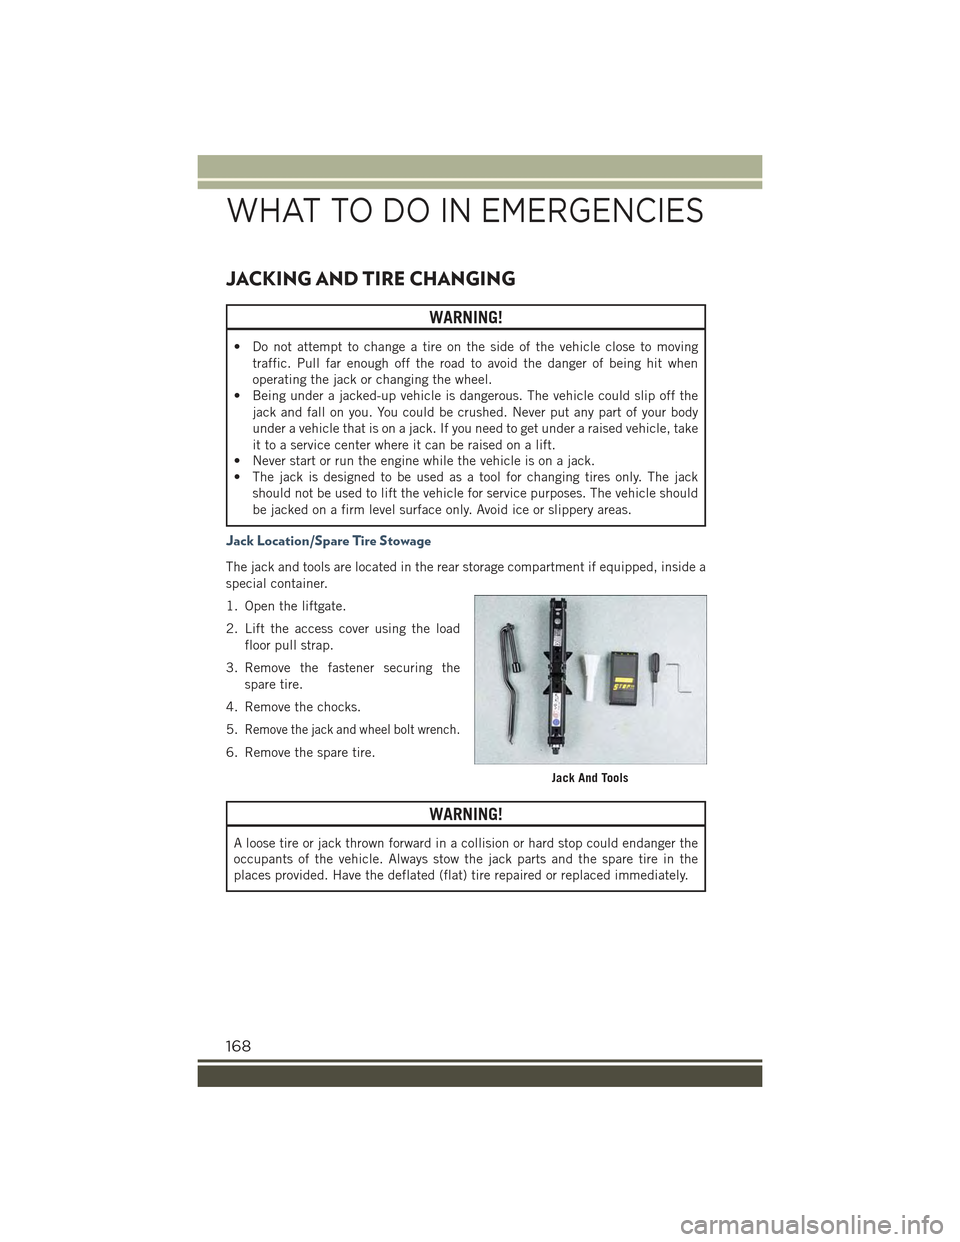
Jack Location/Spare Tire Stowage
The jack and tools are located in the rear storage compartment if equipped, inside a
special container.
1. Open the liftgate.
2. Lift the access cover using the load
floor pull strap.
3. Remove the fastener securing the
spare tire.
4. Remove the chocks.
5.Remove the jack and wheel bolt wrench.
6. Remove the spare tire.
WARNING!
A loose tire or jack thrown forward in a collision or hard stop could endanger the
occupants of the vehicle. Always stow the jack parts and the spare tire in the
places provided. Have the deflated (flat) tire repaired or replaced immediately.
Jack And Tools
WHAT TO DO IN EMERGENCIES
168
Page 172 of 220
Jacking Instructions
WARNING!
Carefully follow these tire changing warnings to help prevent personal injury or
damage to your vehicle:
• Always park on a firm, level surface as far from the edge of the roadway as
possible before raising the vehicle.
• Turn on the Hazard Warning flasher.
• Chock the wheel diagonally opposite the wheel to be raised.
• Apply the parking brake and place an automatic transmission in PARK.
• Never start or run the engine with the vehicle on a jack.
• Do not let anyone sit in the vehicle when it is on a jack.
• Do not get under the vehicle when it is on a jack. If you need to get under a
raised vehicle, take it to a service center where it can be raised on a lift.
• Only use the jack in the positions indicated and for lifting this vehicle during
a tire change.
• If working on or near a roadway, be extremely careful of motor traffic.
• To assure that spare tires, flat or inflated, are securely stowed, spares must be
stowed with the valve stem facing the ground.
CAUTION!
Do not attempt to raise the vehicle by jacking on locations other than those
indicated in the Jacking Instructions for this vehicle.
1. Remove the spare tire, jack, and wheel bolt wrench.
2. If equipped with wheels where the center cap covers the wheel bolts, use the
wheel bolt wrench to pry the center cap off carefully before raising the vehicle.
3. Before raising the vehicle, use the wheel bolt wrench to loosen, but not remove,
the wheel bolts on the wheel with the flat tire. Turn the wheel bolts counterclock-
wise one turn while the wheel is still on the ground.
4. Place the jack underneath the lift area that is closest to the flat tire. Turn the jack
screw clockwise to firmly engage the jack saddle with the lift area of the sill
flange, centering the jack saddle inside the cutout in the sill cladding.
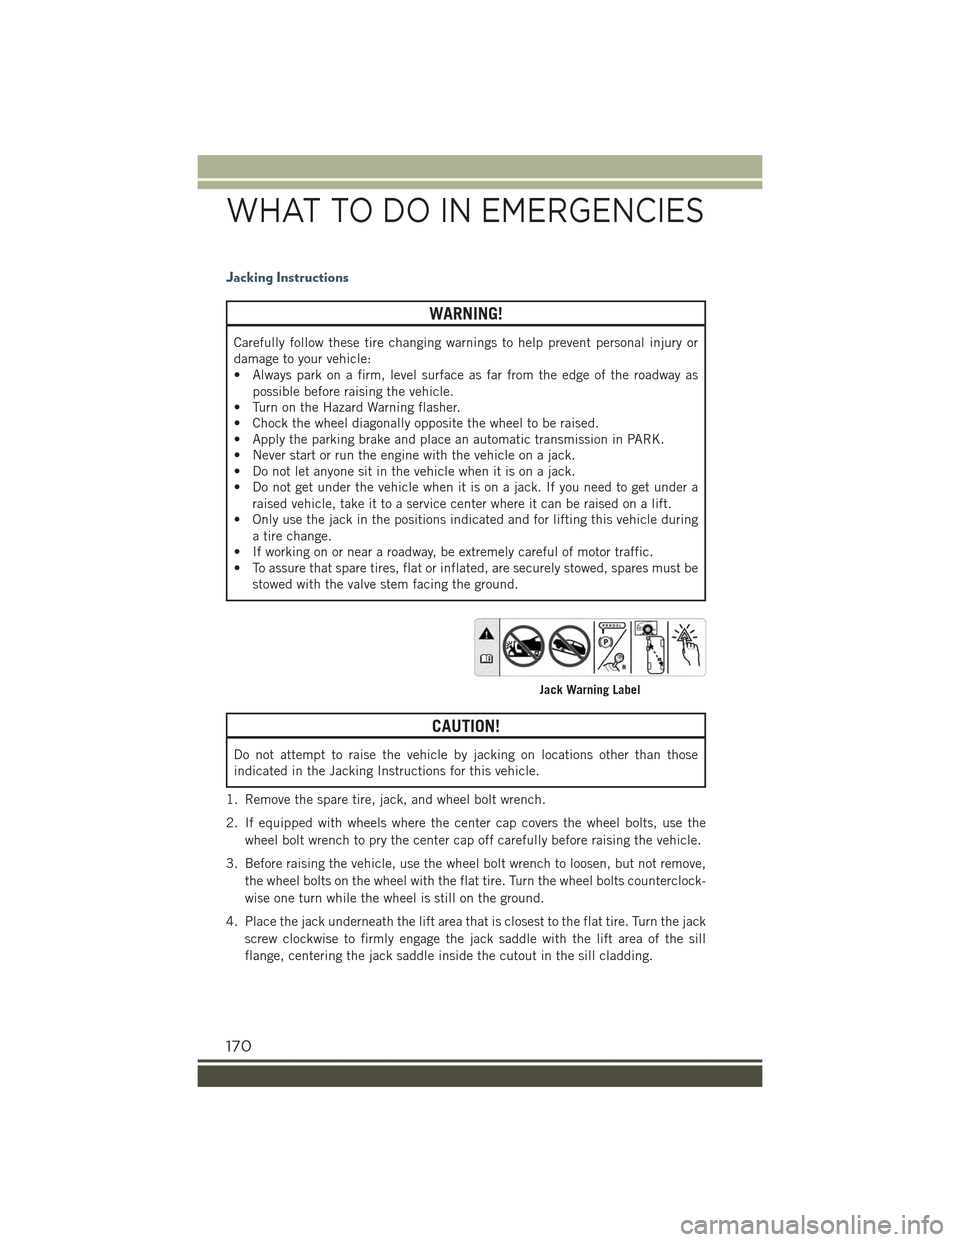
Jack Warning Label
WHAT TO DO IN EMERGENCIES
170
Page 174 of 220
WARNING!
Raising the vehicle higher than necessary can make the vehicle less stable. It
could slip off the jack and hurt someone near it. Raise the vehicle only enough to
remove the tire.
6. Remove the wheel bolts and tire.
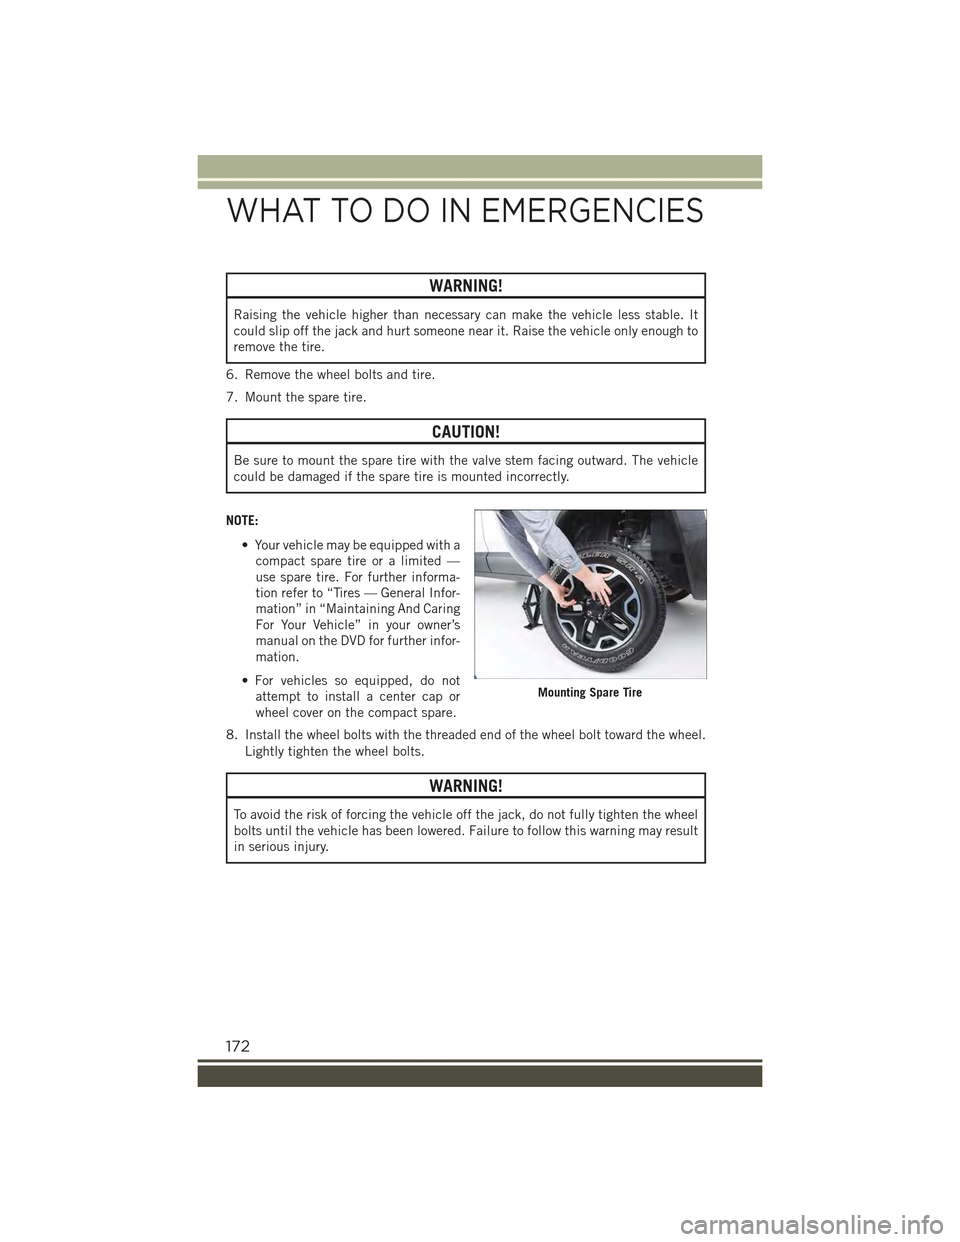
7. Mount the spare tire.
CAUTION!
Be sure to mount the spare tire with the valve stem facing outward. The vehicle
could be damaged if the spare tire is mounted incorrectly.
NOTE:
• Your vehicle may be equipped with a
compact spare tire or a limited —
use spare tire. For further informa-
tion refer to “Tires — General Infor-
mation” in “Maintaining And Caring
For Your Vehicle” in your owner’s
manual on the DVD for further infor-
mation.
• For vehicles so equipped, do not
attempt to install a center cap or
wheel cover on the compact spare.
8. Install the wheel bolts with the threaded end of the wheel bolt toward the wheel.
Lightly tighten the wheel bolts.
WARNING!
To avoid the risk of forcing the vehicle off the jack, do not fully tighten the wheel
bolts until the vehicle has been lowered. Failure to follow this warning may result
in serious injury.
Mounting Spare Tire
WHAT TO DO IN EMERGENCIES
172
Page 175 of 220
9. Lower the vehicle to the ground by turning the jack handle counterclockwise.
10. Finish tightening the wheel bolts. Push down on the wrench while at the end of
the handle for increased leverage. Tighten the wheel bolts in a star pattern until
each wheel bolt has been tightened twice. The correct torque specification for
the wheel bolts is 63 Ft-Lbs (86 Nm) for steel wheels and 89 Ft-Lbs (120 Nm)
for aluminum wheels. If in doubt about the correct tightness, have them
checked with a torque wrench by your authorized dealer or at a service station.
11. Securely stow the jack, tools, chocks and flat tire.
WARNING!
A loose tire or jack thrown forward in a collision or hard stop could endanger the
occupants of the vehicle. Always stow the jack parts and the spare tire in the
places provided. Have the deflated (flat) tire repaired or replaced immediately.
Road Tire Installation
1. Mount the road tire on the axle.
2. Install the remaining wheel bolts with the threaded end of the wheel bolt toward
the wheel. Lightly tighten the wheel bolts.
WARNING!
To avoid the risk of forcing the vehicle off the jack, do not tighten the lug nuts fully
until the vehicle has been lowered. Failure to follow this warning may result in
serious injury.
3. Lower the vehicle to the ground by turning the jack handle counterclockwise.
4. Finish tightening the wheel bolts. Push down on the wrench while at the end ofthe handle for increased leverage. Tighten the wheel bolts in a star pattern untileach wheel bolt has been tightened twice. The correct torque specification for thewheel bolts is 63 Ft-Lbs (86 Nm) for steel wheels and 89 Ft-Lbs (120 Nm) foraluminum wheels. If in doubt about the correct tightness, have them checkedwith a torque wrench by your authorized dealer or at a service station.
5. Lower the jack until it is free. Remove the wheel chocks. Stow the jack and tools
back in the proper storage location. Release the Electric Park Brake before driving
the vehicle.
6. After 25 miles (40 km) check the wheel bolt torque with a torque wrench to
ensure that all wheel bolts are properly seated against the wheel.
WHAT TO DO IN EMERGENCIES
173
Page 202 of 220
WARNING!
• Do not to affix objects/plugs to the end of the filler neck other than is provided
on the car.
• The use of objects/plugs do not comply with the vehicle and may cause
pressure increases inside the tank, creating dangerous conditions.
• Do not approach the neck of the tank with open flames or lit cigarettes its an
extreme fire hazard. Also, avoid close contact with the filler pipe with your face,
do not inhale harmful vapors.
• Do not use your mobile phone in the vicinity of the pump fuel nozzle, it can be
a possible risk of fire.
TIRE PRESSURES
Check the inflation pressure of each tire, including the spare tire (if equipped), at
least monthly and inflate to the recommended pressure for your vehicle.
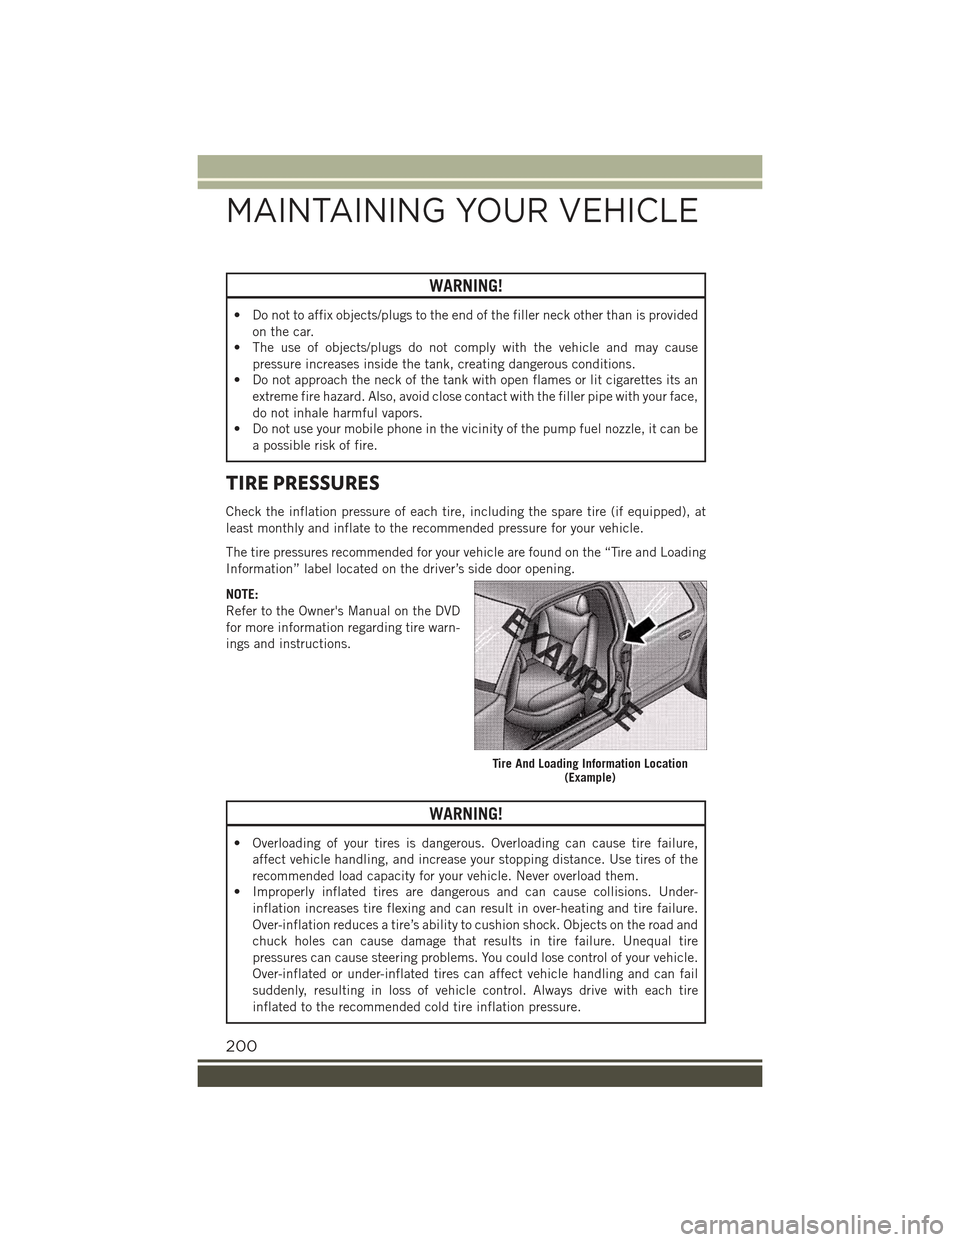
The tire pressures recommended for your vehicle are found on the “Tire and Loading
Information” label located on the driver’s side door opening.
NOTE:
Refer to the Owner's Manual on the DVD
for more information regarding tire warn-
ings and instructions.
WARNING!
• Overloading of your tires is dangerous. Overloading can cause tire failure,
affect vehicle handling, and increase your stopping distance. Use tires of the
recommended load capacity for your vehicle. Never overload them.
• Improperly inflated tires are dangerous and can cause collisions. Under-
inflation increases tire flexing and can result in over-heating and tire failure.
Over-inflation reduces a tire’s ability to cushion shock. Objects on the road and
chuck holes can cause damage that results in tire failure. Unequal tire
pressures can cause steering problems. You could lose control of your vehicle.
Over-inflated or under-inflated tires can affect vehicle handling and can fail
suddenly, resulting in loss of vehicle control. Always drive with each tire
inflated to the recommended cold tire inflation pressure.
Tire And Loading Information Location(Example)
MAINTAINING YOUR VEHICLE
200
Page 203 of 220
SPARE TIRES — IF EQUIPPED
NOTE:
For vehicles equipped with Tire Service Kit instead of a spare tire, please refer to “Tire
Service Kit” in “What To Do In Emergencies” on your DVD for further information.
CAUTION!
Because of the reduced ground clearance, do not take your vehicle through an
automatic car wash with a compact or limited-use temporary spare installed.
Damage to the vehicle may result.
Spare Tire Matching Original Equipped Tire And Wheel — If Equipped
Your vehicle may be equipped with a spare tire and wheel equivalent in look and
function to the original equipment tire and wheel found on the front or rear axle of
your vehicle. This spare tire may be used in the tire rotation for your vehicle. If your
vehicle has this option, refer to an authorized tire dealer for the recommended tire
rotation pattern.
Compact Spare Tire — If Equipped
The compact spare is for temporary emergency use only. You can identify if your
vehicle is equipped with a compact spare by looking at the spare tire description on
the Tire and Loading Information Placard located on the driver’s side door opening or
on the sidewall of the tire. Compact spare tire descriptions begin with the letter “T”
or “S” preceding the size designation. Example: T145/80D18 103M.
T, S = Temporary Spare Tire
Since this tire has limited tread life, the original equipment tire should be repaired
(or replaced) and reinstalled on your vehicle at the first opportunity.
Do not install a wheel cover or attempt to mount a conventional tire on the compact
spare wheel, since the wheel is designed specifically for the compact spare tire. Do
not install more than one compact spare tire and wheel on the vehicle at any given
time.
WARNING!
Compact spares are for temporary emergency use only. With these spares, do not
drive more than 50 mph (80 km/h). Temporary use spares have limited tread life.
When the tread is worn to the tread wear indicators, the temporary use spare tire
needs to be replaced. Be sure to follow the warnings, which apply to your spare.
Failure to do so could result in spare tire failure and loss of vehicle control.
MAINTAINING YOUR VEHICLE
201
Page 204 of 220
Full Size Spare — If Equipped
The full size spare is for temporary emergency use only. This tire may look like the
originally equipped tire on the front or rear axle of your vehicle, but it is not. This
spare tire may have limited tread life. When the tread is worn to the tread wear
indicators, the temporary use full size spare tire needs to be replaced. Since it is not
the same as your original equipment tire, replace (or repair) the original equipment
tire and reinstall on the vehicle at the first opportunity.
Limited-Use Spare — If Equipped
The limited-use spare tire is for temporary emergency use only. This tire is identified
by a label located on the limited-use spare wheel. This label contains the driving
limitations for this spare. This tire may look like the original equipped tire on the front
or rear axle of your vehicle, but it is not. Installation of this limited-use spare tire
affects vehicle handling. Since it is not the same as your original equipment tire,
replace (or repair) the original equipment tire and reinstall on the vehicle at the first
opportunity.
WARNING!
Limited-use spares are for emergency use only. Installation of this limited-use
spare tire affects vehicle handling. With this tire, do not drive more than the speed
listed on the limit-use spare wheel. Keep inflated to the cold tire inflation
pressures listed on your Tire and Loading Information Placard located on the
driver’s side B-Pillar or the rear edge of the driver’s side door. Replace (or repair)
the original equipment tire at the first opportunity and reinstall it on your vehicle.
Failure to do so could result in loss of vehicle control.
WHEEL AND WHEEL TRIM CARE
All wheels and wheel trim, especially aluminum and chrome plated wheels, should
be cleaned regularly with a mild soap and water to prevent corrosion.
To remove heavy soil and/or excessive brake dust, use MOPAR®Wheel Cleaner or
equivalent or select a non-abrasive, non-acidic cleaner.
CAUTION!
Do not use scouring pads, steel wool, a bristle brush, or metal polishes. Do not use
oven cleaner. These products may damage the wheel's protective finish. Avoid
automatic car washes that use acidic solutions or harsh brushes that may damage
the wheel's protective finish. Only MOPAR®Wheel Cleaner or equivalent is
recommended.
MAINTAINING YOUR VEHICLE
202