JEEP RENEGADE 2016 1.G Owners Manual
Manufacturer: JEEP, Model Year: 2016, Model line: RENEGADE, Model: JEEP RENEGADE 2016 1.GPages: 688, PDF Size: 7.09 MB
Page 111 of 688
for several wipe cycles after the lever is released, and
then resume the intermittent interval previously selected.
If the lever is pulled while the wipers are in the off
position, the wipers will operate for several wipe cycles,
then turn off.
WARNING!
Sudden loss of visibility through the windshield
could lead to a collision. You might not see other
vehicles or other obstacles. To avoid sudden icing of
the windshield during freezing weather, warm the
windshield with the defroster before and during
windshield washer use.Mist
Use this feature when weather conditions make occa-
sional usage of the wipers necessary. Push the lever
upward to the Mist position and release for a single
wiping cycle.
NOTE:The mist feature does not activate the washer
pump; therefore, no washer fluid will be sprayed on the
windshield. The wash function must be used in order to
spray the windshield with washer fluid.
Rain Sensing Wipers — If Equipped
This feature senses moisture on the windshield and
automatically activates the wipers for the driver. The
feature is especially useful for road splash or overspray
from the windshield washers of the vehicle ahead. Rotate
the end of the multifunction lever to one of the two
detent positions for intermittent settings, to activate this
feature.
4
GETTING TO KNOW YOUR VEHICLE 109
Page 112 of 688
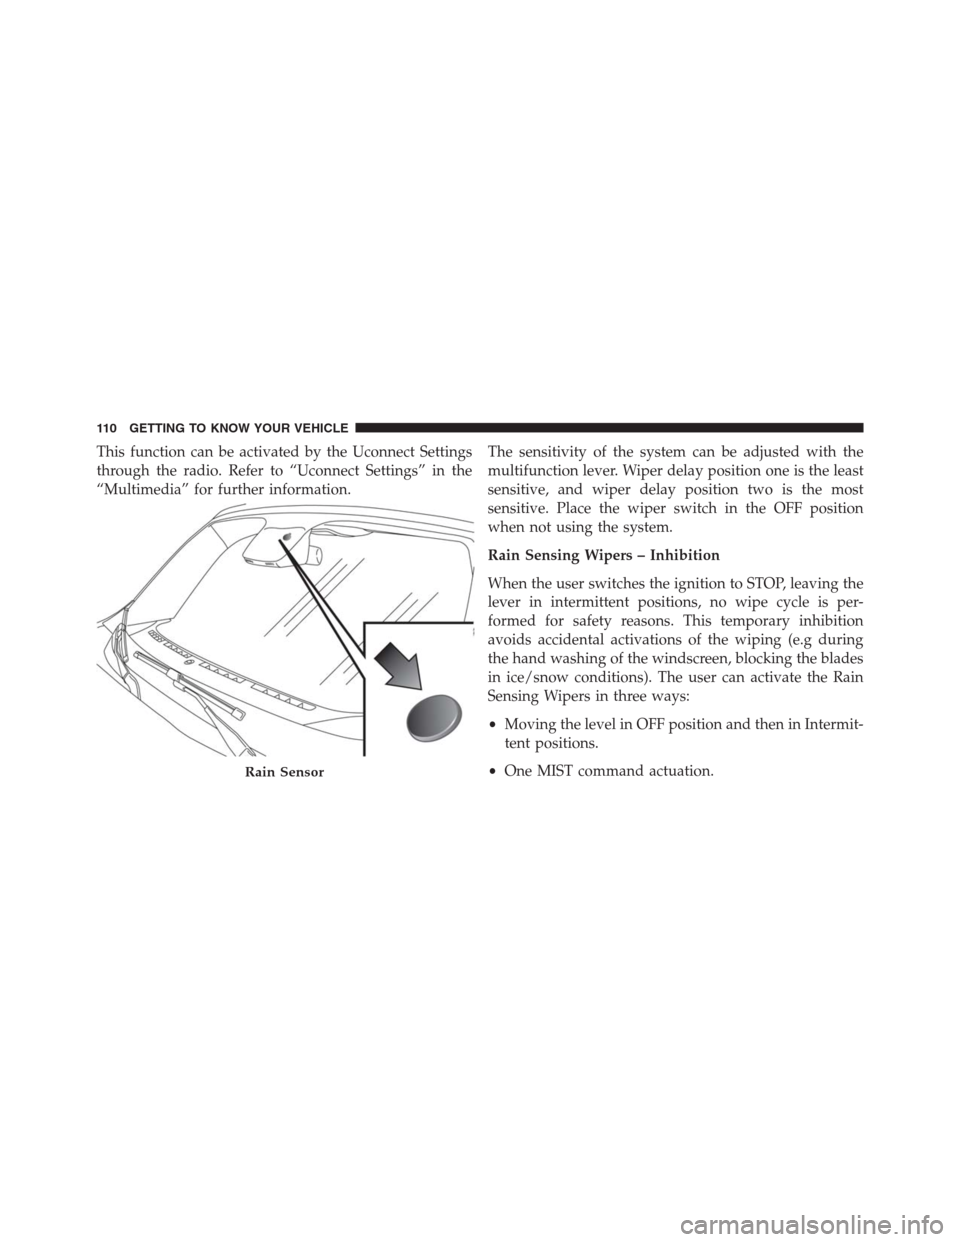
This function can be activated by the Uconnect Settings
through the radio. Refer to “Uconnect Settings” in the
“Multimedia” for further information.The sensitivity of the system can be adjusted with the
multifunction lever. Wiper delay position one is the least
sensitive, and wiper delay position two is the most
sensitive. Place the wiper switch in the OFF position
when not using the system.
Rain Sensing Wipers – Inhibition
When the user switches the ignition to STOP, leaving the
lever in intermittent positions, no wipe cycle is per-
formed for safety reasons. This temporary inhibition
avoids accidental activations of the wiping (e.g during
the hand washing of the windscreen, blocking the blades
in ice/snow conditions). The user can activate the Rain
Sensing Wipers in three ways:
•Moving the level in OFF position and then in Intermit-
tent positions.
•One MIST command actuation.
Rain Sensor
110 GETTING TO KNOW YOUR VEHICLE
Page 113 of 688
•The vehicle speed exceeds 3 mph (5 km/h) and the
rain sensor detects the presence of rain.
NOTE:
•The Rain Sensing feature will not operate when the
wiper switch is in the low or high-speed position.
•The Rain Sensing feature may not function properly
when ice, or dried salt water is present on the wind-
shield.
•Use of Rain-X or products containing wax or silicone
may reduce Rain Sensing performance.
•The Rain Sensing feature can be turned on and off
using the Uconnect System, refer to “Uconnect Set-
tings” in “Multimedia” for further information.Rear Wiper Operation
The rear wiper/washer controls are located on the lever
on the right side of the steering column. The rear
wiper/washer is operated by rotating a switch, located at
the middle of the lever.
Rotate the center portion of the lever upward to
the first detent for intermittent operation and to
the second detent for continuous rear wiper operation.
To use the washer, push the lever forward and
hold while spray is desired. If the lever is
pushed while in the intermittent setting, the
wiper will turn on and operate for several wipe
cycles after the end of the lever is released, and then
resume the intermittent interval previously selected.
If the lever is pushed while the wiper is in the off
position, the wiper will operate for several wipe cycles,
then turn off.
4
GETTING TO KNOW YOUR VEHICLE 111
Page 114 of 688
NOTE:As a protective measure, the pump will stop if
the switch is held for more than 30 seconds. Once the
lever is released, the pump will resume normal opera-
tion.
If the rear wiper is operating when the ignition is turned
to the STOP/OFF position, the wiper will automatically
return to the “park” position.
Rear Window Defroster
The rear window defroster button is located with
the Climate Controls on the instrument panel.
Push this button to turn on the rear window defroster. An
indicator in the button will illuminate when the rear
window defroster is on. The rear window defroster
automatically turns off after approximately 20 minutes.
To manually shut the defroster off, push the button a
second time.CAUTION!
Failure to follow these cautions can cause damage to
the heating elements:
•Use care when washing the inside of the rear
window. Do not use abrasive window cleaners on
the interior surface of the window. Use a soft cloth
and a mild washing solution, wiping parallel to the
heating elements. Labels can be peeled off after
soaking with warm water.
•Do not use scrapers, sharp instruments, or abrasive
window cleaners on the interior surface of the
window.
•Keep all objects a safe distance from the window.
112 GETTING TO KNOW YOUR VEHICLE
Page 115 of 688
Windshield Wiper De-Icer — If Equipped
Your vehicle may be equipped with a Windshield Wiper
De-Icer feature that may be activated under the following
conditions:
•Activation By Front Defrost— The Windshield Wiper
De-Icer will be activated automatically in the case of a
cold weather manual start with full front defrost, and
the ambient temperature is below 40° F (4.4° C).
•Activation By Rear Defrost— The Windshield Wiper
De-Icer will be activated automatically when the rear
defrost is turned on and the ambient temperature is
below 40° F (4.4° C).
•Activation By Remote Start Operation— When Re-
mote Start is active and the outside ambient tempera-
ture is less than 40° F (4.4° C), the Windshield Wiper
De-Icer will be enabled. Upon exiting remote start
mode the Windshield Wiper De-Icer will remain on.Auto-On Rear Window Defroster/Windshield Wiper
De-Icer— If Equipped
Turning On the car, the Rear Window Defroster and
Windshield Wiper De-Icer will automatically turn ON
when the outside ambient temperature is less than 40° F
(4.4° C).
The Rear Window Defroster and Windshield Wiper De-
Icer automatically turn off after approximately 20 min-
utes. To manually shut the defroster/windshield off,
push the button a second time.
4
GETTING TO KNOW YOUR VEHICLE 113
Page 116 of 688
WINDOWS
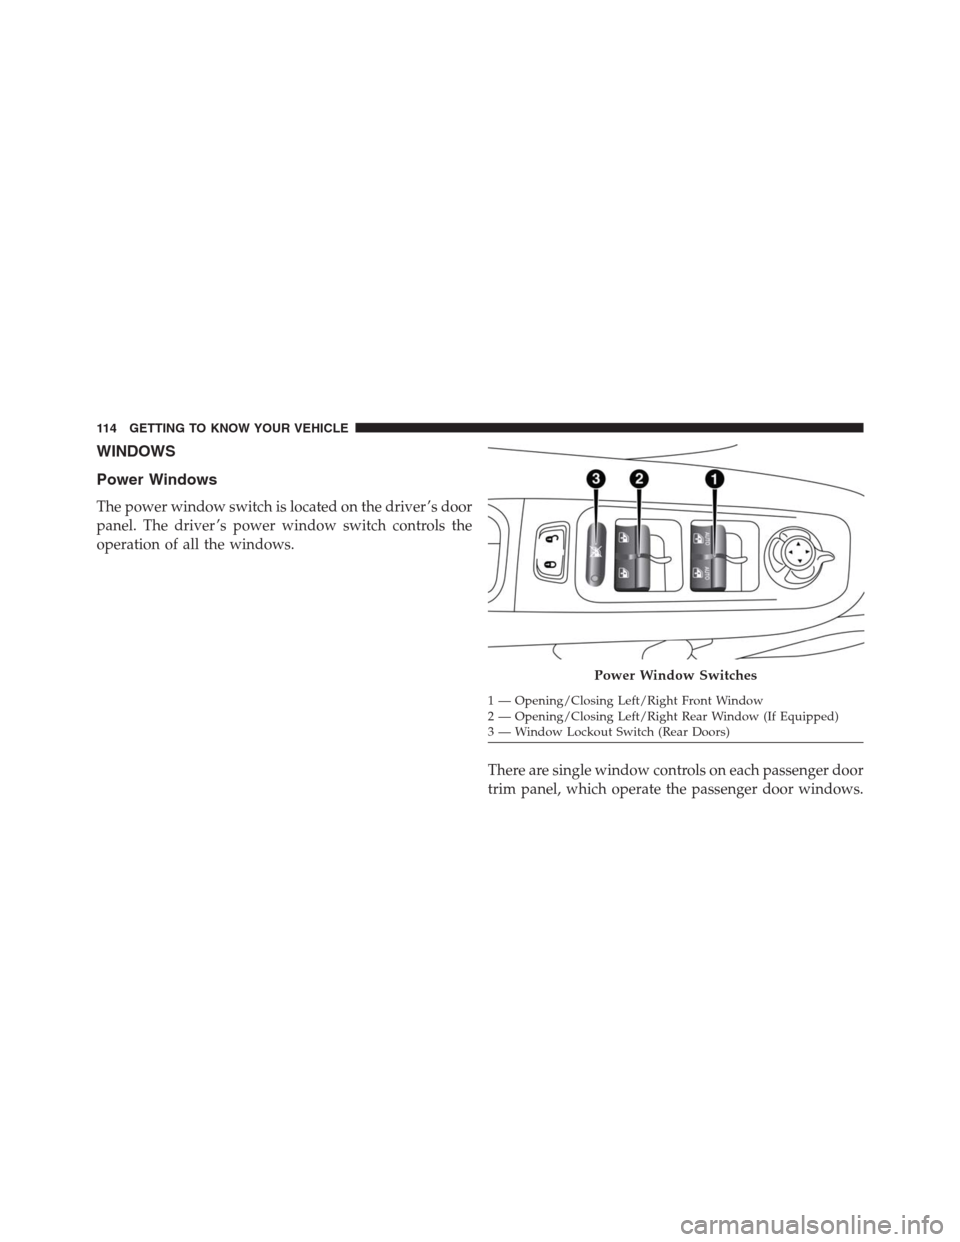
Power Windows
The power window switch is located on the driver ’s door
panel. The driver ’s power window switch controls the
operation of all the windows.
There are single window controls on each passenger door
trim panel, which operate the passenger door windows.
Power Window Switches
1 — Opening/Closing Left/Right Front Window
2 — Opening/Closing Left/Right Rear Window (If Equipped)
3 — Window Lockout Switch (Rear Doors) 114 GETTING TO KNOW YOUR VEHICLE
Page 117 of 688
The window controls will operate only when the ignition
is in the MAR/RUN or AVV/START position.
NOTE:For vehicles equipped with Uconnect, the power
window switches will remain active for up to three
minutes after the ignition is cycled to the STOP/OFF
position. Opening either front door will cancel this
feature. Refer to “Uconnect Settings” in “Multimedia” for
further information.
WARNING!
Never leave children unattended in a vehicle, and do
not let children play with power windows. Do not
leave the Key Fob in or near the vehicle, or in a
location accessible to children, and do not leave the
ignition of a vehicle equipped with Keyless Enter-
N-Go in the MAR/RUN mode. Occupants, particu-
larly unattended children, can become entrapped by
(Continued)
WARNING!(Continued)
the windows while operating the power window
switches. Such entrapment may result in serious
injury or death.
Controls
AUTO-Down Feature — If Equipped
The driver and passenger power window switches have
an AUTO-down feature. Push the switch for half a
second and release it, the window will go down auto-
matically.
To partially open the window, push the window switch
and release it when you want the window to stop.
To stop the window from going all the way down during
the AUTO-down operation, pull up on the switch briefly
when the when the window has reached the desired
position.
4
GETTING TO KNOW YOUR VEHICLE 115
Page 118 of 688
AUTO-Up Feature With Auto-Reverse Protection — If
Equipped
Lift and hold the window switch for half a second,
release, and the window will go up automatically.
To stop the window from going all the way up during the
AUTO operation, push down on the switch briefly.
To partially close the window, lift the window switch and
release it when you want the window to stop.
NOTE:
•If the window runs into any obstacle during auto-
closure, it will reverse direction and then go back
down. Remove the obstacle and use the window
switch again to close the window.•Any impact due to rough road conditions may trigger
the auto-reverse function unexpectedly during auto-
closure. If this happens, pull the switch lightly and
hold to close the window manually.
WARNING!
There is no Auto-Reverse protection when the win-
dow is almost closed. Be sure to clear all objects from
the window before closing.
Reset Auto-Up
Should the Auto Up feature stop working, the window
probably needs to be reset. To reset Auto Up:
1. Pull the window switch up to close the window
completely and continue to hold the switch up for an
additional two seconds after the window is closed.
116 GETTING TO KNOW YOUR VEHICLE
Page 119 of 688
Wind Buffeting
Wind buffeting can be described as the perception of
pressure on the ears or a helicopter-type sound in the
ears. Your vehicle may exhibit wind buffeting with the
windows down, or the sunroof in certain open or par-
tially open positions. This is a normal occurrence and can
be minimized. If the buffeting occurs with the rear
windows open, open the front and rear windows to-
gether to minimize the buffeting. If the buffeting occurs
with the sunroof open, adjust the sunroof opening to
minimize the buffeting or open any window.
CLIMATE CONTROLS
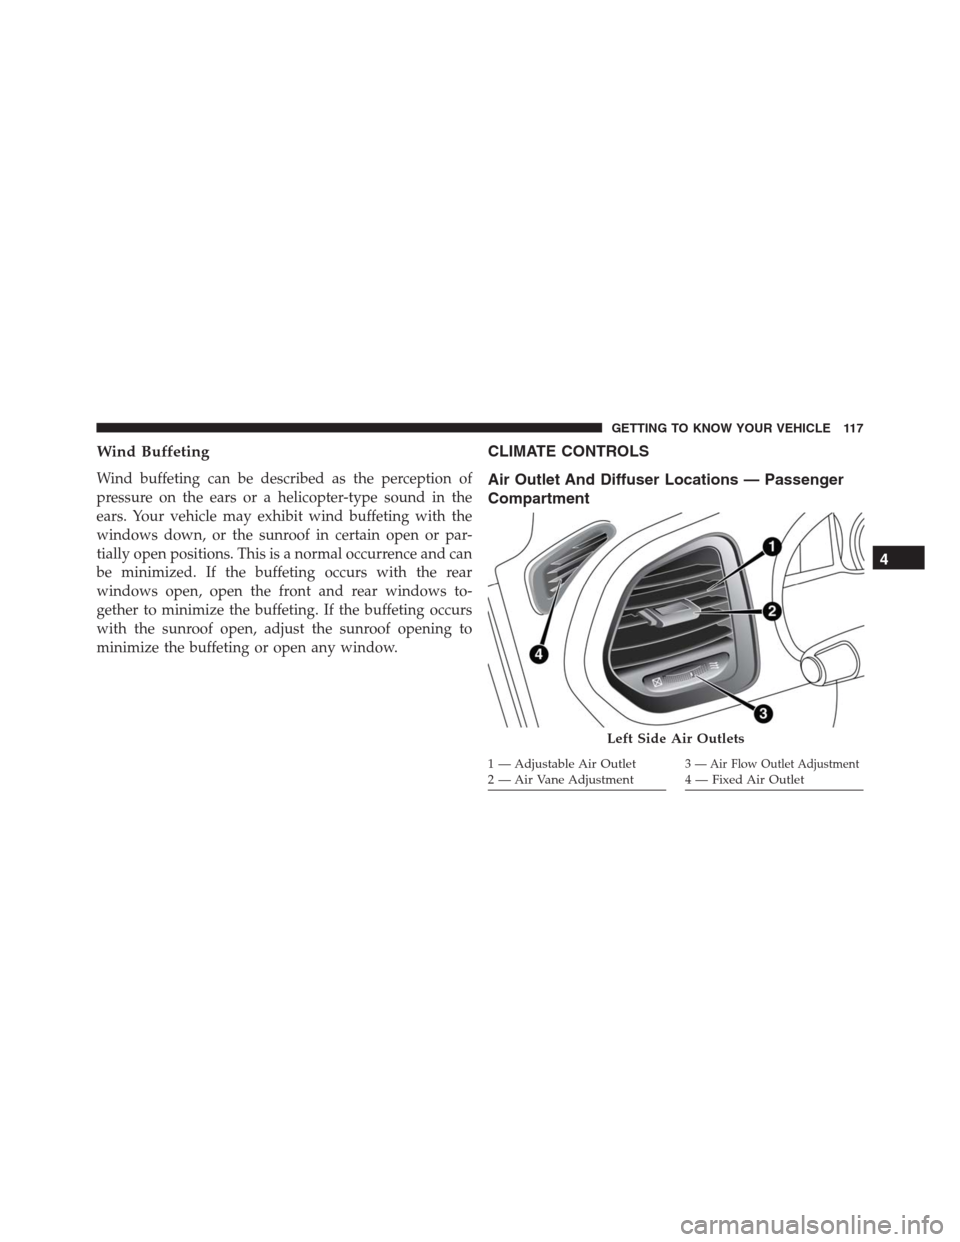
Air Outlet And Diffuser Locations — Passenger
Compartment
Left Side Air Outlets
1 — Adjustable Air Outlet
2 — Air Vane Adjustment3 — Air Flow Outlet Adjustment4 — Fixed Air Outlet
4
GETTING TO KNOW YOUR VEHICLE 117
Page 120 of 688
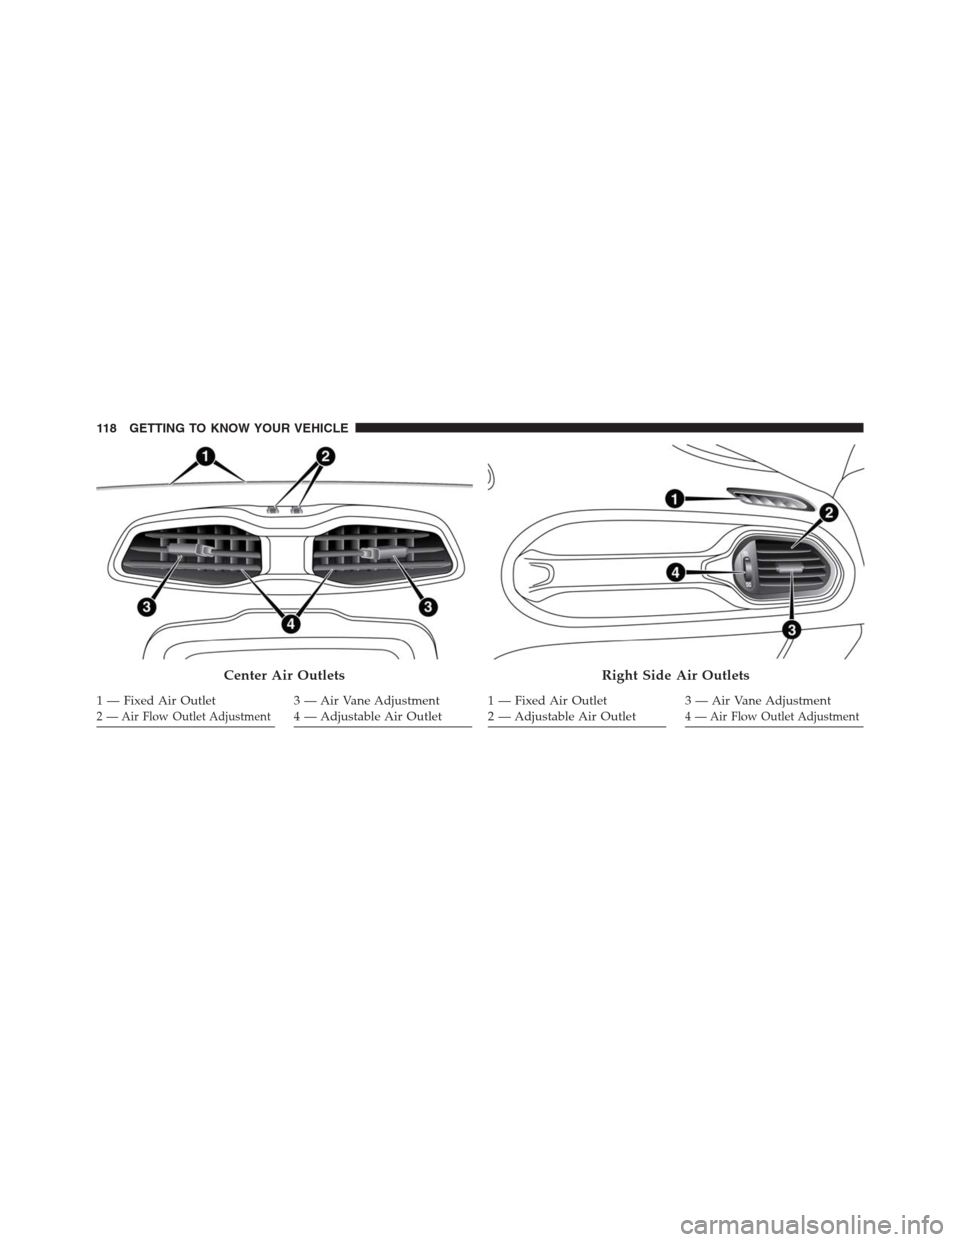
Center Air Outlets
1 — Fixed Air Outlet2 — Air Flow Outlet Adjustment3 — Air Vane Adjustment
4 — Adjustable Air Outlet
Right Side Air Outlets
1 — Fixed Air Outlet
2 — Adjustable Air Outlet3 — Air Vane Adjustment4 — Air Flow Outlet Adjustment
118 GETTING TO KNOW YOUR VEHICLE