Fluid JEEP RENEGADE 2016 1.G Owners Manual
[x] Cancel search | Manufacturer: JEEP, Model Year: 2016, Model line: RENEGADE, Model: JEEP RENEGADE 2016 1.GPages: 688, PDF Size: 7.09 MB
Page 16 of 688
Warranty expires. The manufacturer stands behind only
the manufacturer’s service contracts. If you purchased a
manufacturer’s service contract, you will receive Plan
Provisions and an Owner Identification Card in the mail
within three weeks of the vehicle delivery date. If you
have any questions about the service contract, call the
manufacturer’s Service Contract National Customer
Hotline at 1-800-521-9922 (Canadian residents, call (800)
465-2001 English / (800) 387-9983 French).
The manufacturer will not stand behind any service
contract that is not the manufacturer’s service contract. It
is not responsible for any service contract other than the
manufacturer’s service contract. If you purchased a ser-
vice contract that is not a manufacturer’s service contract,
and you require service after the manufacturer’s New
Vehicle Limited Warranty expires, please refer to the
contract documents, and contact the person listed in
those documents.We appreciate that you have made a major investment
when you purchased the vehicle. An authorized dealer
has also made a major investment in facilities, tools, and
training to assure that you are absolutely delighted with
the ownership experience. You will be pleased with their
sincere efforts to resolve any warranty issues or related
concerns.
WARNING!
Engine exhaust (internal combustion engines only),
some of its constituents, and certain vehicle compo-
nents contain, or emit, chemicals known to the State
of California to cause cancer and birth defects, or
other reproductive harm. In addition, certain fluids
contained in vehicles and certain products of compo-
nent wear contain, or emit, chemicals known to the
State of California to cause cancer and birth defects,
or other reproductive harm.
14 CUSTOMER ASSISTANCE
Page 64 of 688
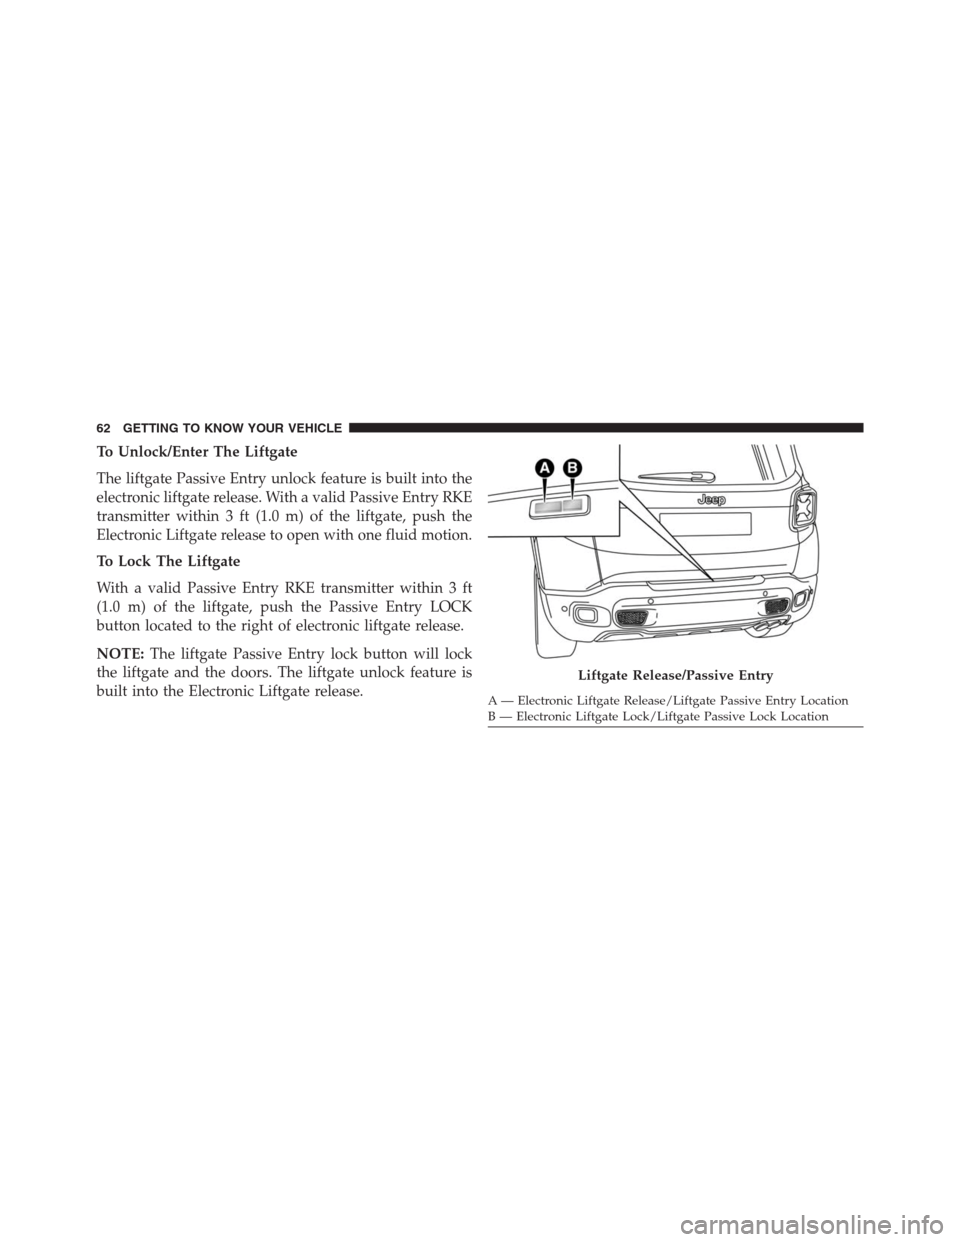
To Unlock/Enter The Liftgate
The liftgate Passive Entry unlock feature is built into the
electronic liftgate release. With a valid Passive Entry RKE
transmitter within 3 ft (1.0 m) of the liftgate, push the
Electronic Liftgate release to open with one fluid motion.
To Lock The Liftgate
With a valid Passive Entry RKE transmitter within 3 ft
(1.0 m) of the liftgate, push the Passive Entry LOCK
button located to the right of electronic liftgate release.
NOTE:The liftgate Passive Entry lock button will lock
the liftgate and the doors. The liftgate unlock feature is
built into the Electronic Liftgate release.
Liftgate Release/Passive Entry
A — Electronic Liftgate Release/Liftgate Passive Entry Location
B — Electronic Liftgate Lock/Liftgate Passive Lock Location 62 GETTING TO KNOW YOUR VEHICLE
Page 111 of 688
for several wipe cycles after the lever is released, and
then resume the intermittent interval previously selected.
If the lever is pulled while the wipers are in the off
position, the wipers will operate for several wipe cycles,
then turn off.
WARNING!
Sudden loss of visibility through the windshield
could lead to a collision. You might not see other
vehicles or other obstacles. To avoid sudden icing of
the windshield during freezing weather, warm the
windshield with the defroster before and during
windshield washer use.Mist
Use this feature when weather conditions make occa-
sional usage of the wipers necessary. Push the lever
upward to the Mist position and release for a single
wiping cycle.
NOTE:The mist feature does not activate the washer
pump; therefore, no washer fluid will be sprayed on the
windshield. The wash function must be used in order to
spray the windshield with washer fluid.
Rain Sensing Wipers — If Equipped
This feature senses moisture on the windshield and
automatically activates the wipers for the driver. The
feature is especially useful for road splash or overspray
from the windshield washers of the vehicle ahead. Rotate
the end of the multifunction lever to one of the two
detent positions for intermittent settings, to activate this
feature.
4
GETTING TO KNOW YOUR VEHICLE 109
Page 154 of 688
Closing
Hold up the hood with one hand and with the other hand
remove the support rod from its seat and reinsert it into
the locking tab.
Lower the hood to approximately 6 inches (15 cm) from
the engine compartment and drop it. Make sure that the
hood is completely closed.
CAUTION!
To prevent possible damage, do not slam the hood to
close it. Lower the hood until it is open approxi-
mately 6 inches (15 cm), and then drop it. This should
secure both latches. Never drive your vehicle unless
the hood is fully closed, with both latches engaged.
WARNING!
Be sure the hood is fully latched before driving your
vehicle. If the hood is not fully latched, it could open
when the vehicle is in motion and block your vision.
Failure to follow this warning could result in serious
injury or death.
LIFTGATE
Opening
To unlock the liftgate, use the Remote Keyless Entry
(RKE) transmitter or activate the power door lock
switches located on the driver door handle.
To open the liftgate, squeeze the electronic liftgate release
and pull the liftgate open with one fluid motion.
152 GETTING TO KNOW YOUR VEHICLE
Page 155 of 688
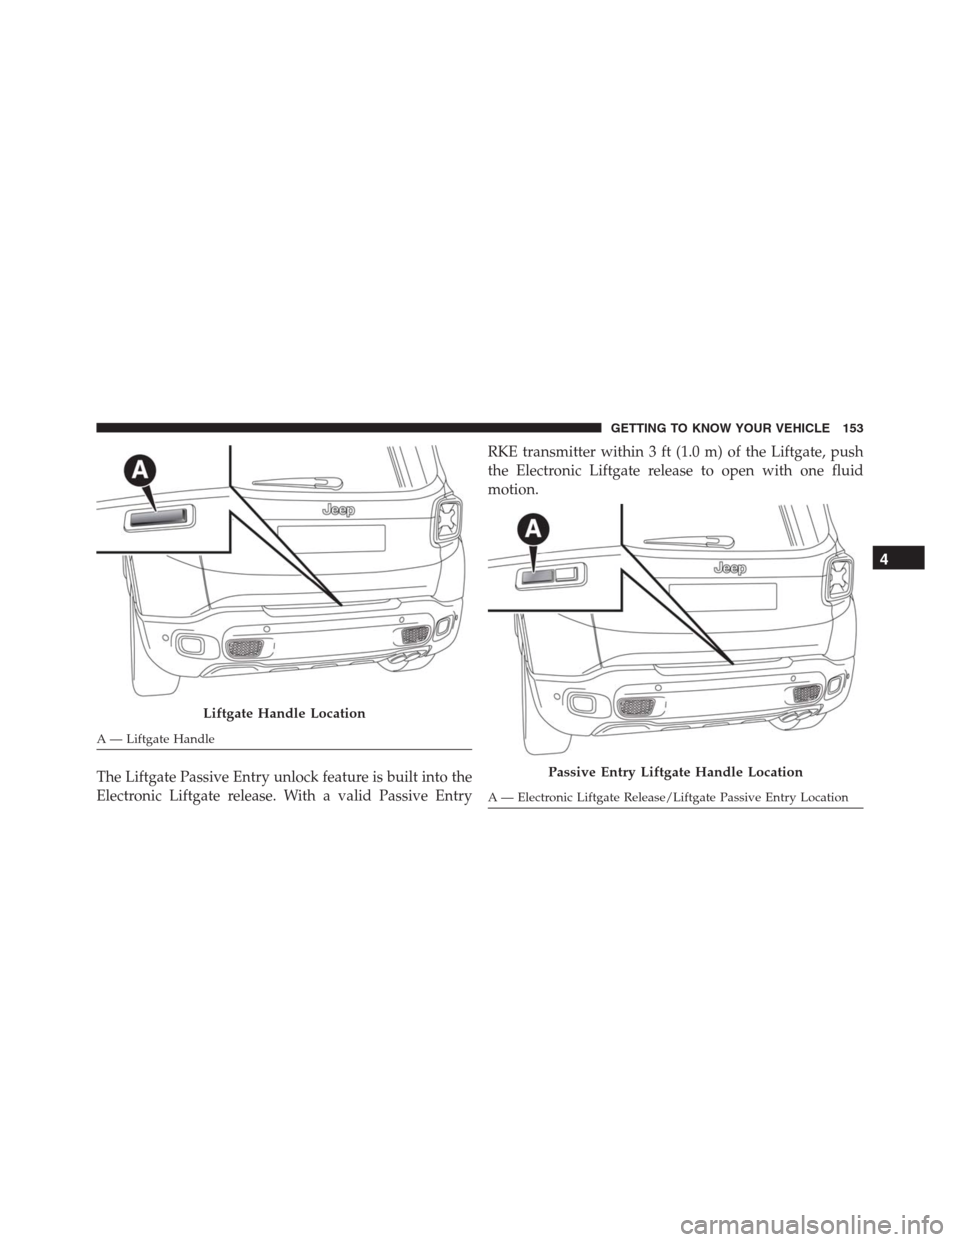
The Liftgate Passive Entry unlock feature is built into the
Electronic Liftgate release. With a valid Passive EntryRKE transmitter within 3 ft (1.0 m) of the Liftgate, push
the Electronic Liftgate release to open with one fluid
motion.
Liftgate Handle Location
A — Liftgate Handle
Passive Entry Liftgate Handle Location
A — Electronic Liftgate Release/Liftgate Passive Entry Location
4
GETTING TO KNOW YOUR VEHICLE 153
Page 156 of 688
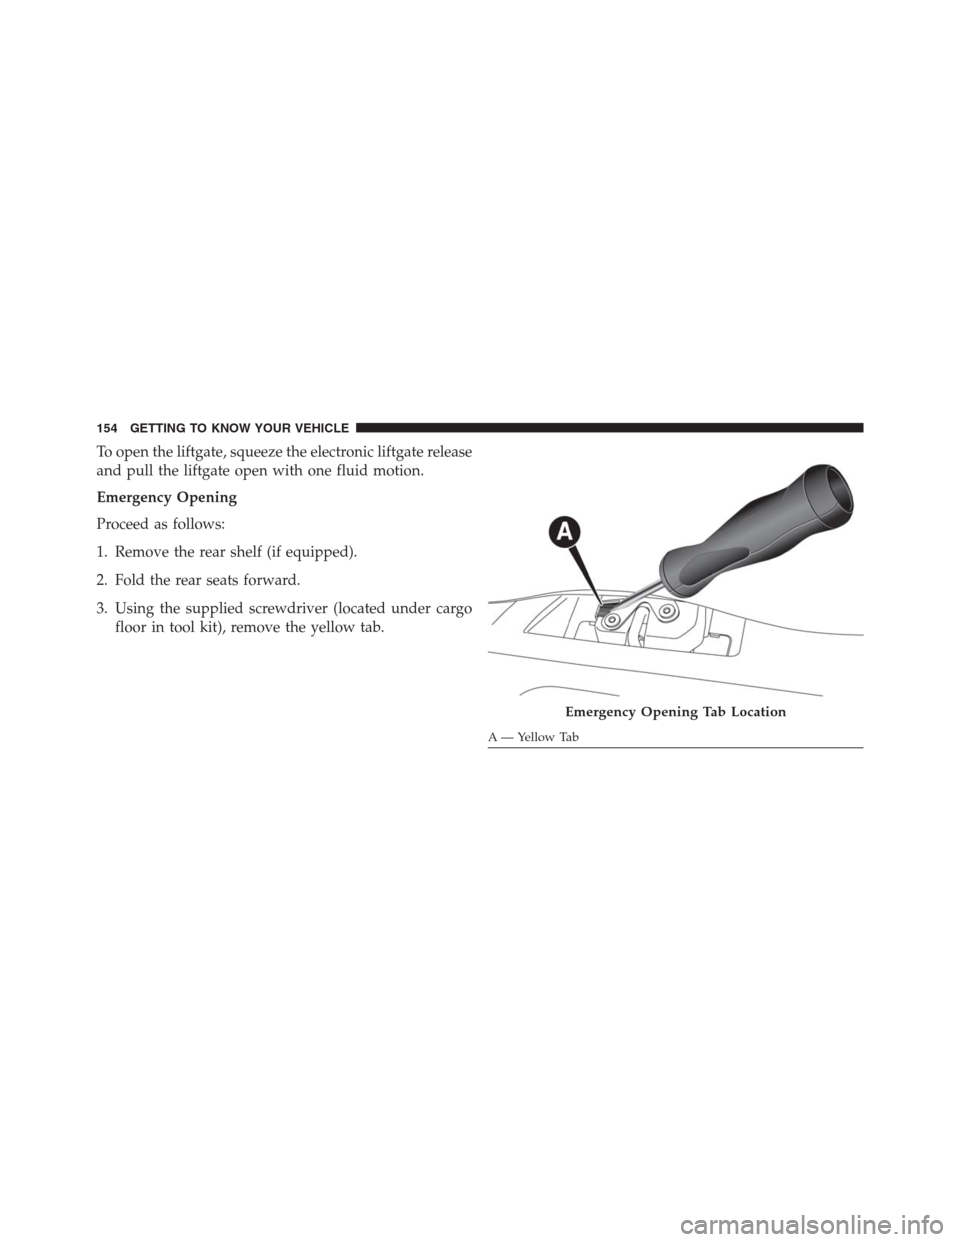
To open the liftgate, squeeze the electronic liftgate release
and pull the liftgate open with one fluid motion.
Emergency Opening
Proceed as follows:
1. Remove the rear shelf (if equipped).
2. Fold the rear seats forward.
3. Using the supplied screwdriver (located under cargo
floor in tool kit), remove the yellow tab.
Emergency Opening Tab Location
A — Yellow Tab 154 GETTING TO KNOW YOUR VEHICLE
Page 190 of 688
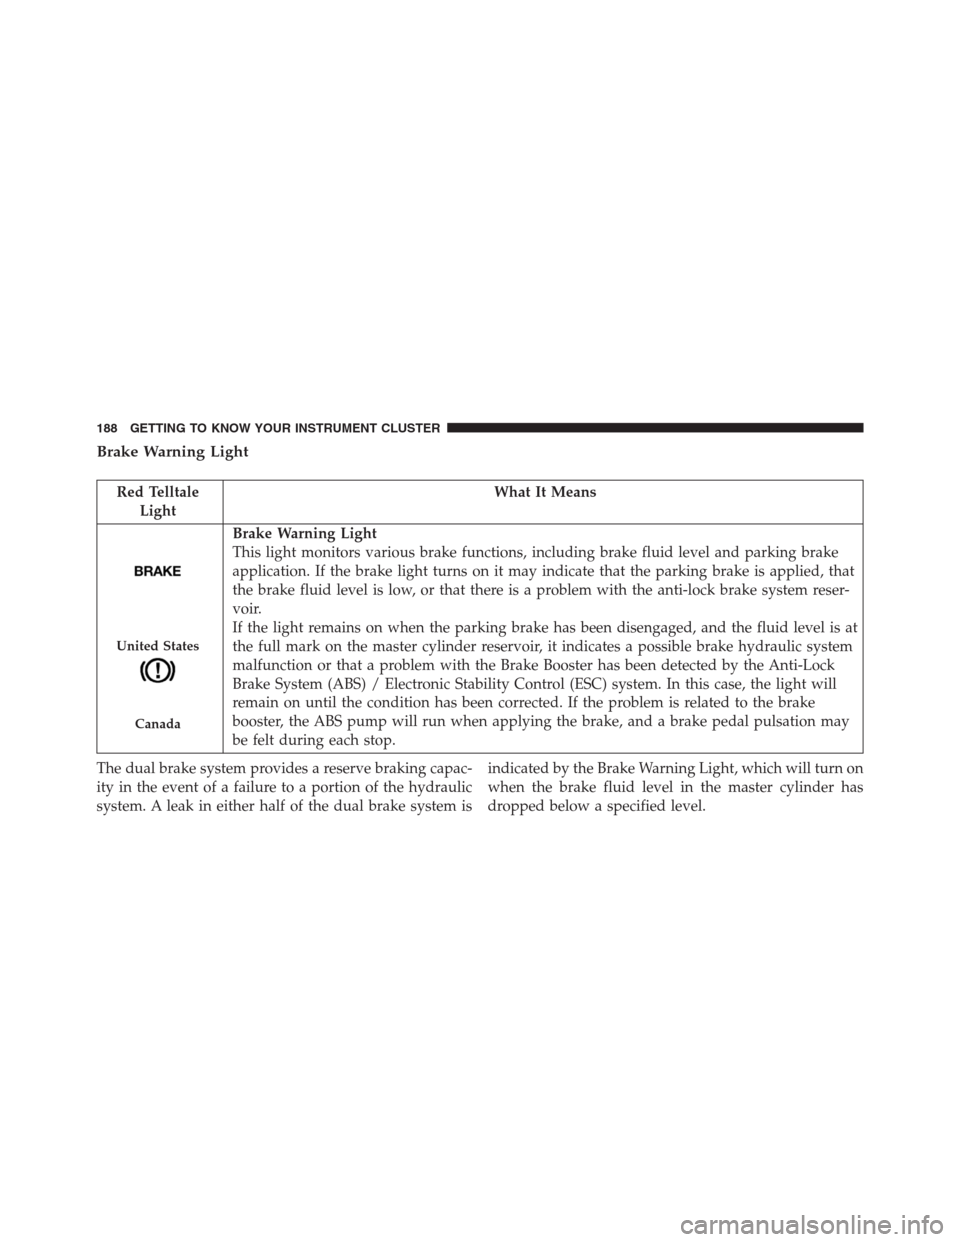
Brake Warning Light
Red Telltale
LightWhat It Means
United States
Canada
Brake Warning Light
This light monitors various brake functions, including brake fluid level and parking brake
application. If the brake light turns on it may indicate that the parking brake is applied, that
the brake fluid level is low, or that there is a problem with the anti-lock brake system reser-
voir.
If the light remains on when the parking brake has been disengaged, and the fluid level is at
the full mark on the master cylinder reservoir, it indicates a possible brake hydraulic system
malfunction or that a problem with the Brake Booster has been detected by the Anti-Lock
Brake System (ABS) / Electronic Stability Control (ESC) system. In this case, the light will
remain on until the condition has been corrected. If the problem is related to the brake
booster, the ABS pump will run when applying the brake, and a brake pedal pulsation may
be felt during each stop.
The dual brake system provides a reserve braking capac-
ity in the event of a failure to a portion of the hydraulic
system. A leak in either half of the dual brake system isindicated by the Brake Warning Light, which will turn on
when the brake fluid level in the master cylinder has
dropped below a specified level.
188 GETTING TO KNOW YOUR INSTRUMENT CLUSTER
Page 191 of 688
The light will remain on until the cause is corrected.
NOTE:The light may flash momentarily during sharp
cornering maneuvers, which change fluid level condi-
tions. The vehicle should have service performed, and
the brake fluid level checked.
If brake failure is indicated, immediate repair is neces-
sary.
WARNING!
Driving a vehicle with the red brake light on is
dangerous. Part of the brake system may have failed.
It will take longer to stop the vehicle. You could have
a collision. Have the vehicle checked immediately.
Vehicles equipped with the Anti-Lock Brake System
(ABS) are also equipped with Electronic Brake Force
Distribution (EBD). In the event of an EBD failure, theBrake Warning Light will turn on along with the ABS
Light. Immediate repair to the ABS system is required.
Operation of the Brake Warning Light can be checked by
turning the ignition switch from the OFF position to the
ON/RUN position. The light should illuminate for ap-
proximately two seconds. The light should then turn off
unless the parking brake is applied or a brake fault is
detected. If the light does not illuminate, have the light
inspected by an authorized dealer.
The light also will turn on when the parking brake is
applied with the ignition switch in the ON/RUN posi-
tion.
NOTE:This light shows only that the parking brake is
applied. It does not show the degree of brake application.
5
GETTING TO KNOW YOUR INSTRUMENT CLUSTER 189
Page 241 of 688
BRAKE SYSTEM
Your vehicle is equipped with dual hydraulic
brake systems. If either of the two hydraulic
systems loses normal capability, the remaining
system will still function. However, there will
be some loss of overall braking effectiveness. This will be
evident by increased pedal travel during application and
greater pedal force required to slow or stop the vehicle. In
addition, if the malfunction is caused by a leak in the
hydraulic system, the “Brake Warning Light” will turn on
as the brake fluid level drops in the master cylinder.
In the event power assist is lost for any reason (i.e.,
repeated brake applications with the engine OFF) the
brakes will still function. However, the effort required to
brake the vehicle will be much greater than that required
with the power system operating.
WARNING!
•Riding the brakes can lead to brake failure and
possibly a collision. Driving with your foot resting
or riding on the brake pedal can result in abnor-
mally high brake temperatures, excessive lining
wear, and possible brake damage. You would not
have your full braking capacity in an emergency.
•Driving a vehicle with the “Brake Warning Light”
on is dangerous. A significant decrease in braking
performance or vehicle stability during braking
may occur. It will take you longer to stop the
vehicle or will make your vehicle harder to control.
You could have a collision. Have the vehicle
checked immediately.
6
SAFETY 239
Page 318 of 688
Periodic Safety Checks You Should Make Outside
The Vehicle
Tires
Examine tires for excessive tread wear and uneven wear
patterns. Check for stones, nails, glass, or other objects
lodged in the tread or sidewall. Inspect the tread for cuts
and cracks. Inspect sidewalls for cuts, cracks, and bulges.
Check the wheel nuts for tightness. Check the tires
(including spare) for proper cold inflation pressure.
Lights
Have someone observe the operation of brake lights and
exterior lights while you work the controls. Check turn
signal and high beam indicator lights on the instrument
panel.
Door Latches
Check for proper closing, latching, and locking.
Fluid Leaks
Check area under vehicle after overnight parking for fuel,
engine coolant, oil, or other fluid leaks. Also, if gasoline
fumes are detected, or if fuel or brake fluid leaks are
suspected, the cause should be located and corrected
immediately.
316 SAFETY