warning JEEP RENEGADE LATITUDE 2017 Repair Manual
[x] Cancel search | Manufacturer: JEEP, Model Year: 2017, Model line: RENEGADE LATITUDE, Model: JEEP RENEGADE LATITUDE 2017Pages: 516, PDF Size: 5.3 MB
Page 303 of 516
WARNING!(Continued)
•Total weight must be distributed between the tow
vehicle and the trailer such that the following four
ratings are not exceeded:
1. GVWR
2. GTW
3. GAWR
4. Tongue weight rating for the trailer hitch utilized.
CAUTION!
• Do not tow a trailer at all during the first 500 miles
(805 km) the new vehicle is driven. The engine, axle
or other parts could be damaged.
• Then, during the first 500 miles (805 km) that a trailer
is towed, do not drive over 50 mph (80 km/h) and do
not make starts at full throttle. This helps the engine
and other parts of the vehicle wear in at the heavier
loads.
Towing Requirements — Tires
• Do not attempt to tow a trailer while using a compact
spare tire. •
Proper tire inflation pressures are essential to the safe
and satisfactory operation of your vehicle. Refer to
“Tires – General Information” in “Serving And Mainte-
nance” for proper tire inflation procedures.
• Check the trailer tires for proper tire inflation pressures
before trailer usage.
• Check for signs of tire wear or visible tire damage before
towing a trailer. Refer to “Tires – General Information”
in “Serving And Maintenance” for the proper inspection
procedure.
• When replacing tires, refer to “Tires – General Informa-
tion” in “Serving And Maintenance” for the proper tire
replacement procedures. Replacing tires with a higher
load carrying capacity will not increase the vehicle’s
GVWR and GAWR limits.
Towing Requirements — Trailer Brakes
•Do not interconnect the hydraulic brake system or
vacuum system of your vehicle with that of the trailer.
This could cause inadequate braking and possible per-
sonal injury.
6
STARTING AND OPERATING 301
Page 312 of 516
WARNING!
Abrasive material in any part of the brakes may cause
excessive wear or unpredictable braking. You might
not have full braking power when you need it to
prevent a collision. If you have been operating your
vehicle in dirty conditions, get your brakes checked
and cleaned as necessary.
• If you experience unusual vibration after driving in
mud, slush or similar conditions, check the wheels for
impacted material. Impacted material can cause a wheel
imbalance and freeing the wheels of it will correct the
situation.
310 STARTING AND OPERATING
Page 315 of 516
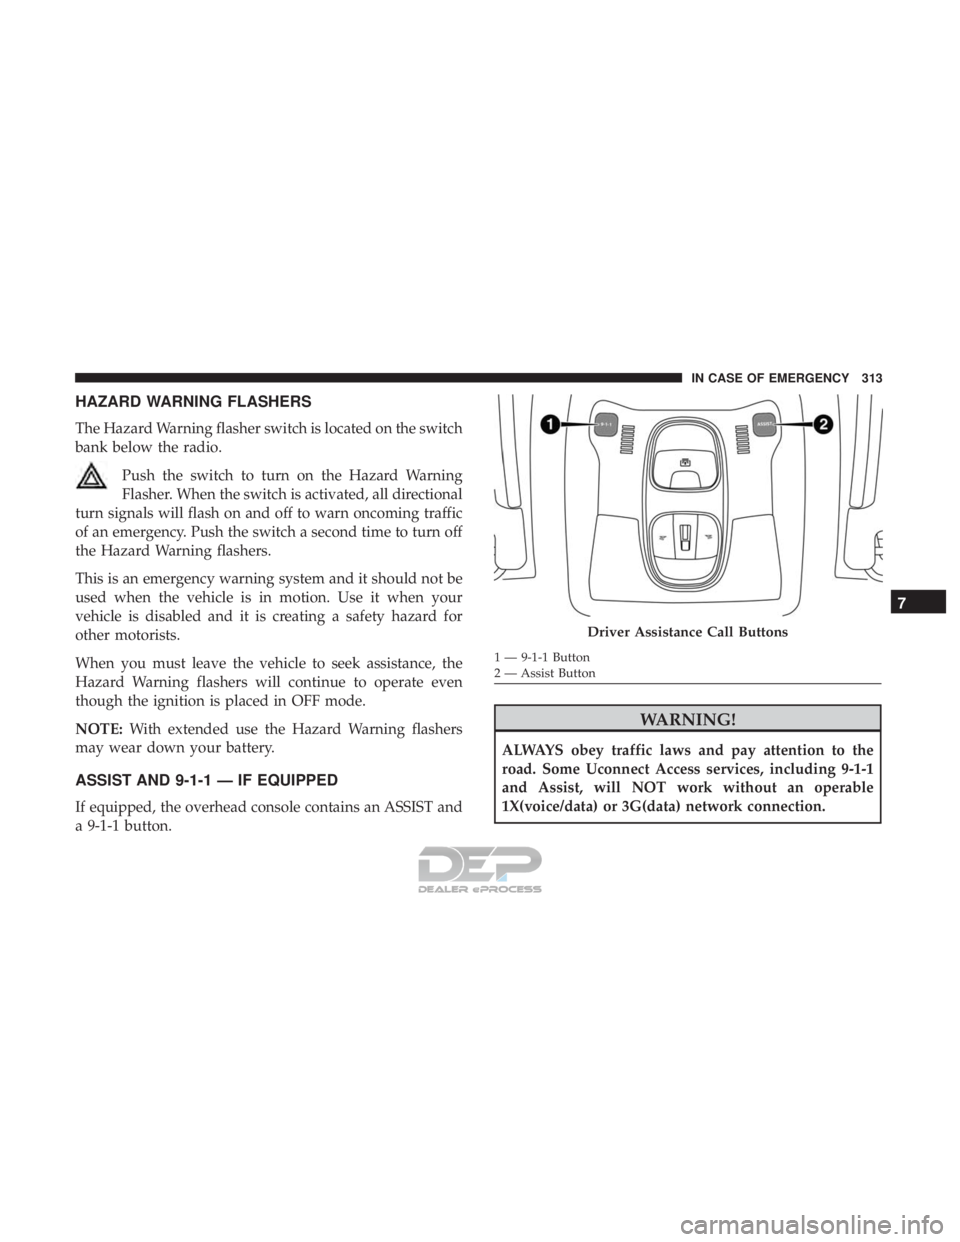
HAZARD WARNING FLASHERS
The Hazard Warning flasher switch is located on the switch
bank below the radio.Push the switch to turn on the Hazard Warning
Flasher. When the switch is activated, all directional
turn signals will flash on and off to warn oncoming traffic
of an emergency. Push the switch a second time to turn off
the Hazard Warning flashers.
This is an emergency warning system and it should not be
used when the vehicle is in motion. Use it when your
vehicle is disabled and it is creating a safety hazard for
other motorists.
When you must leave the vehicle to seek assistance, the
Hazard Warning flashers will continue to operate even
though the ignition is placed in OFF mode.
NOTE: With extended use the Hazard Warning flashers
may wear down your battery.
ASSIST AND 9-1-1 — IF EQUIPPED
If equipped, the overhead console contains an ASSIST and
a 9-1-1 button.
Driver Assistance Call Buttons
Page 318 of 516
WARNING!(Continued)
•Modifications to any part of the 9-1-1 Call system
could cause the air bag system to fail when you need
it. You could be injured if the air bag system is not
there to help protect you.
9-1-1 Call System Limitations
Vehicles sold in Canada and Mexico DO NOThave 9-1-1
Call system capabilities.
9-1-1 or other emergency line operators in Canada and
Mexico may not answer or respond to 9-1-1 system calls.
If the 9-1-1 Call system detects a malfunction, any of the
following may occur at the time the malfunction is de-
tected, and at the beginning of each ignition cycle:
• The overhead console lights located on the Assist and
9-1-1 buttons will continuously be illuminated red.
• The Device Screen will display the following message
“Vehicle Device Requires Service. Please Contact Your
Dealer.”
• An In-Vehicle Audio message will state “Vehicle Device
Requires Service. Please Contact Your Dealer.”
Page 340 of 516
WARNING!(Continued)
•Halogen lamps contain gas under pressure, in the
event of breakage be careful of the projection of
fragments of glass.
• Halogen lamps must be handled by touching only
the metallic part. If the transparent bulb is in contact
with the fingers, reduces the intensity of the emitted
light and you can also affect the life of the lamp. In
case of accidental contact, rub the bulb with a cloth
dampened with alcohol and allow to dry.
FUSES
Page 363 of 516
WARNING!
Store the sealant canister in its special compartment,
away from sources of heat. Failure to follow this
WARNING may result in sealant canister rupture and
serious injury or death.
JUMP STARTING
If your vehicle has a discharged battery it can be jump-
started using a set of jumper cables and a battery in another
vehicle or by using a portable battery booster pack. Jump
starting can be dangerous if done improperly so please
follow the procedures in this section carefully.
NOTE:When using a portable battery booster pack follow
the manufacturer ’s operating instructions and precautions.
CAUTION!
Do not use a portable battery booster pack or any other
booster source with a system voltage greater than
12 Volts or damage to the battery, starter motor, alter-
nator or electrical system may occur.
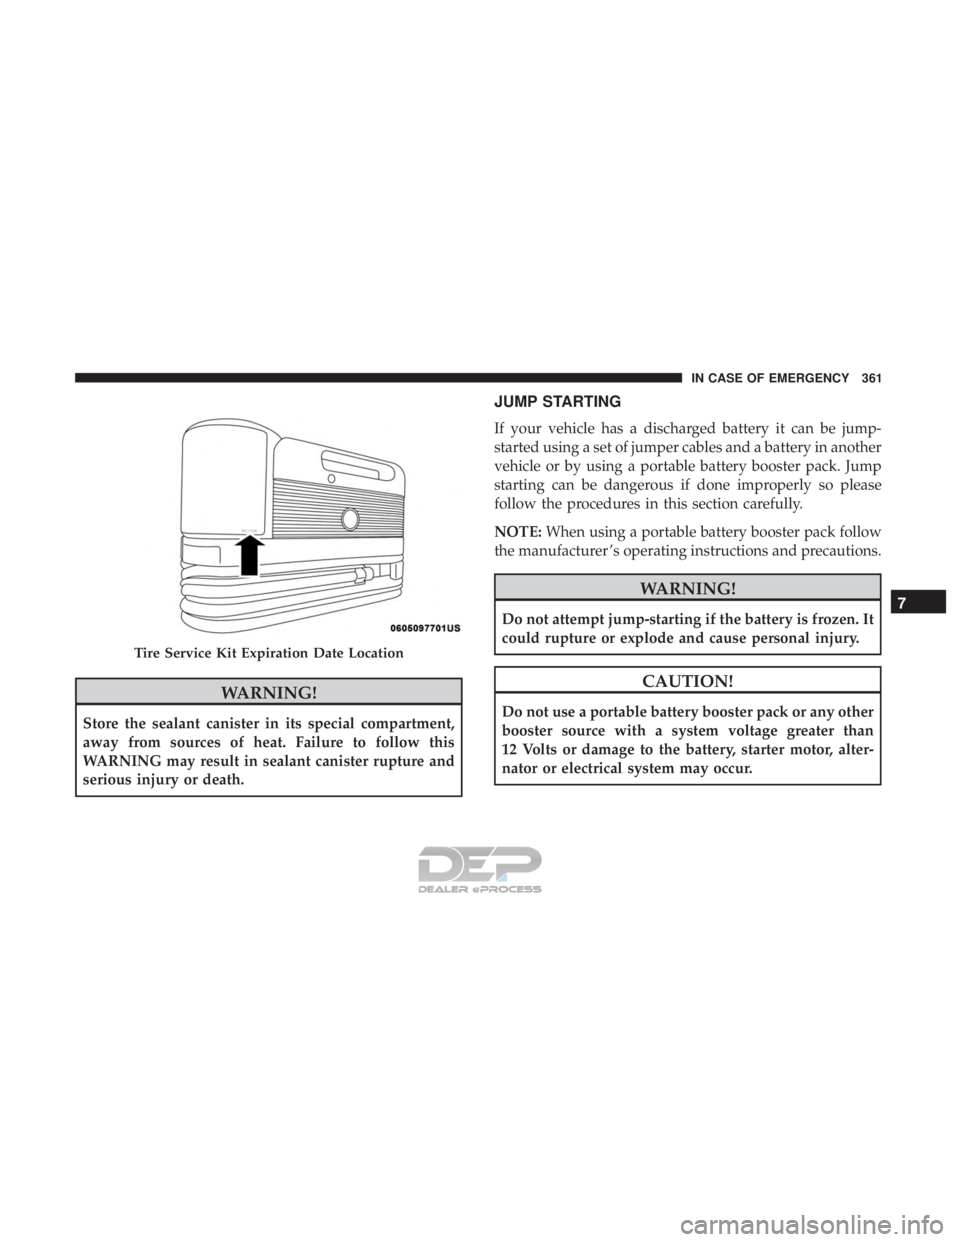
Tire Service Kit Expiration Date Location
7
IN CASE OF EMERGENCY 361
Page 365 of 516
WARNING!
Do not allow vehicles to touch each other as this could
establish a ground connection and personal injury
could result.
Jump Starting Procedure
CAUTION!
Failure to follow these procedures could result in
damage to the charging system of the booster vehicle
or the discharged vehicle.
Connecting The Jumper Cables
1. Connect the positive (+)end of the jumper cable to the
positive (+)post of the discharged vehicle.
2. Connect the opposite end of the positive (+)jumper
cable to the positive (+)post of the booster battery. 3. Connect the negative
(-)end of the jumper cable to the
negative (-)post of the booster battery.
4. Connect the opposite end of the negative (-)jumper
cable to a good engine ground (exposed metal part of
the discharged vehicle’s engine) away from the battery
and the fuel injection system.
Page 383 of 516
* The oil and oil filter replacement must be carried out
when indicated by a warning light or message on the
instrument panel, or in any case should not exceed 1 year
or 10,000 miles (16,000 km).
** The spark plug change is distance based only, yearly
intervals do not apply. The following are essential to ensure
correct operation and prevent serious damage to the en-
gine:
•Only use spark plugs of the same make and type which
are specially certified for such engines (refer to “Fluids
and Lubricants” in “Technical Specifications” for further
information).
• Strictly comply with the spark plug replacement interval
given in the “Maintenance Schedule” for spark plug
replacement.
• Contact your authorized dealer if you have any ques-
tions.
*** The brake fluid change interval is time based only,
mileage intervals do not apply.
Page 391 of 516
WARNING!
The air induction system (air cleaner, hoses, etc.) can
provide a measure of protection in the case of engine
backfire. Do not remove the air induction system (air
cleaner, hoses, etc.) unless such removal is necessary
for repair or maintenance. Make sure that no one is
near the engine compartment before starting the ve-
hicle with the air induction system (air cleaner, hoses,
etc.) removed. Failure to do so can result in serious
personal injury.
Air Conditioner Maintenance
For best possible performance, your air conditioner should
be checked and serviced by an authorized dealer at the
start of each warm season. This service should include
cleaning of the condenser fins and a performance test.
Drive belt tension should also be checked at this time.NOTE:
•
Use only refrigerants and compressor lubricants ap-
proved by the manufacturer for your air conditioning
system. Some unapproved refrigerants are flammable
and can explode, injuring you. Other unapproved refrig-
erants or lubricants can cause the system to fail, requir-
ing costly repairs. Refer to the Warranty Information
Book for further warranty information.
• Use only refrigerants and compressor lubricants ap-
proved by the manufacturer for your air conditioning
system. Some unapproved refrigerants are flammable
and can explode, injuring you. Other unapproved refrig-
erants or lubricants can cause the system to fail, requir-
ing costly repairs.
• The air conditioning system contains refrigerant under
high pressure. To avoid risk of personal injury or dam-
age to the system, adding refrigerant or any repair
requiring lines to be disconnected should be done by an
experienced technician.
8
SERVICING AND MAINTENANCE 389
Page 396 of 516
WARNING!(Continued)
•Keep hands, tools, clothing, and jewelry away from
the radiator cooling fan when the hood is raised. The
fan starts automatically and may start at any time,
whether the engine is running or not.
• When working near the radiator cooling fan, discon-
nect the fan motor lead or turn the ignition switch to
the OFF position. The fan is temperature controlled
and can start at any time the ignition switch is in the
ON position.
• You or others can be badly burned by hot engine
coolant (antifreeze) or steam from your radiator. If
you see or hear steam coming from under the hood,
do not open the hood until the radiator has had time
to cool. Never try to open a cooling system pressure
cap when the radiator is hot.
Coolant Checks
Check engine coolant (antifreeze) protection every 12
months (before the onset of freezing weather, where appli-
cable). If the engine coolant (antifreeze) is dirty or rusty in
appearance, the system should be drained, flushed and
refilled with fresh engine coolant (antifreeze). Check the
front of the A/C condenser for any accumulation of bugs, leaves, etc. If dirty, clean by gently spraying water from a
garden hose vertically down the face of the condenser.
Cooling System — Drain, Flush And Refill
NOTE:
Some vehicles require special tools to add coolant
properly. Failure to fill these systems properly could lead to
severe internal engine damage. If any coolant is needed to
be added to the system please contact your local autho-
rized dealer.
If the engine coolant (antifreeze) is dirty or contains visible
sediment, have an authorized dealer clean and flush with
OAT coolant (antifreeze) (conforming to MS.90032).
Refer to the “Maintenance Plan” in this section for the
proper maintenance intervals.
Selection Of Coolant
Refer to “Fluids And Lubricants” in “Technical Specifica-
tions” for further information.
394 SERVICING AND MAINTENANCE