Brake fluid JEEP WRANGLER 2004 TJ / 2.G Owners Manual
[x] Cancel search | Manufacturer: JEEP, Model Year: 2004, Model line: WRANGLER, Model: JEEP WRANGLER 2004 TJ / 2.GPages: 299, PDF Size: 6.82 MB
Page 119 of 299

19. Trip Odometer Button
Press and release this button to toggle between the
odometer and trip odometer displays. This button is also
used to reset the trip odometer to 0. While the display is
showing the trip odometer, press and hold the button for
approximately 2 seconds and the display will reset to 0.
20. Odometer/Trip Odometer
The odometer shows the total distance the vehicle has
been driven.
The odometer will ªilluminateº when the driver's door
has been opened, and will remain on for 20 seconds after
exiting the vehicle.
U.S. federal regulations require that upon transfer of
vehicle ownership, the seller certify to the purchaser the
correct mileage that the vehicle has been driven. There-
fore, if the odometer reading is changed during repair or
replacement, be sure to keep a record of the reading
before and after the service so the correct mileage can be
determined.The trip odometer shows individual mileage up to 999.9
miles (1 600 km). To switch from odometer to trip
odometer, press the trip odometer button.
21. Anti-Lock (ABS) Warning Light
After ignition is turned on, illuminates to indi-
cate function check at vehicle start-up. If light
remains on after start-up or comes on and stays on at
road speeds, it may indicate that the ABS has detected
a malfunction or has become inoperative. The system
reverts to standard non-anti-lock brakes.
If both the red BRAKE warning light and the amber ABS
warning light are on, see your dealer immediately. Refer
to ªAnti-Lock Brake Systemº in Section 5 of this manual.
22. Brake Warning Light
After ignition is turned on, illuminates to in-
dicate function check at vehicle start-up. Indi-
cates parking brake is applied. If the light stays
on when the parking brake is off, it indicates a possible
brake system fluid leak or low pressure level,see your
authorized dealer immediately.
UNDERSTANDING YOUR INSTRUMENT PANEL 119
4
Page 203 of 299
²The weight of any other type of cargo or equipment
put in or on your vehicle.
Remember that everything put in or on the trailer adds to
the load on your vehicle.
Warranty Requirements
The manufacturer's warranty will apply to vehicles used
to tow trailers for noncommercial use, however the
following conditions must be met:
²The ªDº Overdrive range can be selected when tow-
ing. However, if frequent shifting occurs move the
shift lever to the next lower position to eliminate
excessive automatic transmission shifting. This action
will also reduce the possibility of transmission over-
heating and provide better engine braking. Refer to
ªTransmission Shiftingº in this section for additional
information.
²A load equalizing hitch is recommended for loaded
trailer weights above 1,000 lbs (454 kg).
CAUTION!
If the trailer weighs more than 1,000 lbs (454 kg)
loaded, it should have its own brakes and they
should be of adequate capacity. Failure to do this
could lead to accelerated brake lining wear, higher
brake pedal effort, and longer stopping distances.
WARNING!
Connecting trailer brakes to your vehicle's hydraulic
brake lines can overload your brake system and
cause it to fail. You might not have brakes when you
need them and could have an accident.
²Whenever you pull a trailer, regardless of the trailer
size, stop lights and turn signals on the trailer are
mandatory for motoring safety.
²Follow the maintenance intervals in schedule ªBº for
changing the automatic transmission fluid and filter, if
you REGULARLY tow a trailer for more than 45
minutes of continuous operation.
STARTING AND OPERATING 203
5
Page 205 of 299
NOTE:Refer to ªRecommended Fluids, Lubricants,
and Genuine Partsº in Section 7 for axle differential
lubrication specifications for towing.
SNOW PLOW
Snow plowsshould notbe added to the front end of your
vehicle.
RECREATIONAL TOWING (BEHIND
MOTORHOME, ETC.)
CAUTION!
Internal damage to the transfer case will occur if a
front or rear wheel lift is used when recreational
towing.
NOTE:The transfer case must be shifted into N (Neu-
tral) for recreational towing.
Shifting Into Neutral (N)
Use the following procedure to prepare your vehicle for
recreational towing.
CAUTION!
It is necessary to follow these steps to be certain that
the transfer case is fully in N (Neutral) before
recreational towing to prevent damage to internal
parts.
1. Depress brake pedal.
2. Shift automatic transmission into N (Neutral) or de-
press clutch pedal on manual transmission.
3. Shift transfer case lever into N (Neutral).
4. Start engine.
5. Shift automatic transmission into D (Drive) or manual
transmission into gear.
STARTING AND OPERATING 205
5
Page 216 of 299
²Always park on a firm, level surface as far from the
edge of the roadway as possible before raising the
vehicle.
²Apply the parking brake firmly before jacking.
²Always block the wheel diagonally opposite the wheel
being raised.
²Do not raise the vehicle higher than is necessary to
remove the tire.
²Never start the engine with the vehicle on a jack.
²Do not let passengers sit in the vehicle when it is on a
jack.
²Do not get under the vehicle when it is on a jack.
²Failure to follow the ªTire Changing Procedureº may
result in personal injury or damage to your vehicle.
²Only use the jack in the positions indicated.
JUMP STARTING
WARNING!
To prevent personal injury or damage to clothing, do
not allow battery fluid to contact eyes, skin, or
fabrics. Do not lean over a battery when connecting
jumper cables or allow cable clamps to touch each
other. Keep open flames or sparks away from battery
vent holes. Always wear eye protection when work-
ing with batteries. Do not use a booster battery or
any other booster source that has a greater than
12±volt system, i.e. do not use a 24±volt power
source.
Your vehicle is equipped with a 12±volt battery. If it
becomes necessary to use a booster battery, with jumper
cables, to start the vehicle's engine because it's battery is
discharged, the following procedure should be followed:
216 WHAT TO DO IN EMERGENCIES
Page 222 of 299

NWindshield Washers...................238
NExhaust System......................238
NCooling System.......................239
NHoses And Vacuum/Vapor Harnesses.......242
NBrake System........................243
NAutomatic Transmission................245
NHydraulic Clutch Fluid Ð
Manual Transmission..................246
NManual Transmission..................246
NTransfer Case........................247
NFront/Rear Axle Fluid..................248
NAppearance Care And Protection
From Corrosion......................248mFuse Panel...........................254
NInterior Fuses........................254
NUnderhood Fuses
(Power Distribution Center)..............256
mVehicle Storage........................256
mReplacement Bulbs Ð If Equipped.........257
mFluid Capacities.......................258
mRecommended Fluids, Lubricants And
Genuine Parts
.........................259
NEngine.............................259
NChassis............................260
222 MAINTAINING YOUR VEHICLE
Page 244 of 299
WARNING!
Worn brake hoses can burst and cause brake failure.
You could have an accident. If you see any signs of
cracking, scuffing, or worn spots, have the brake
hoses replaced immediately.
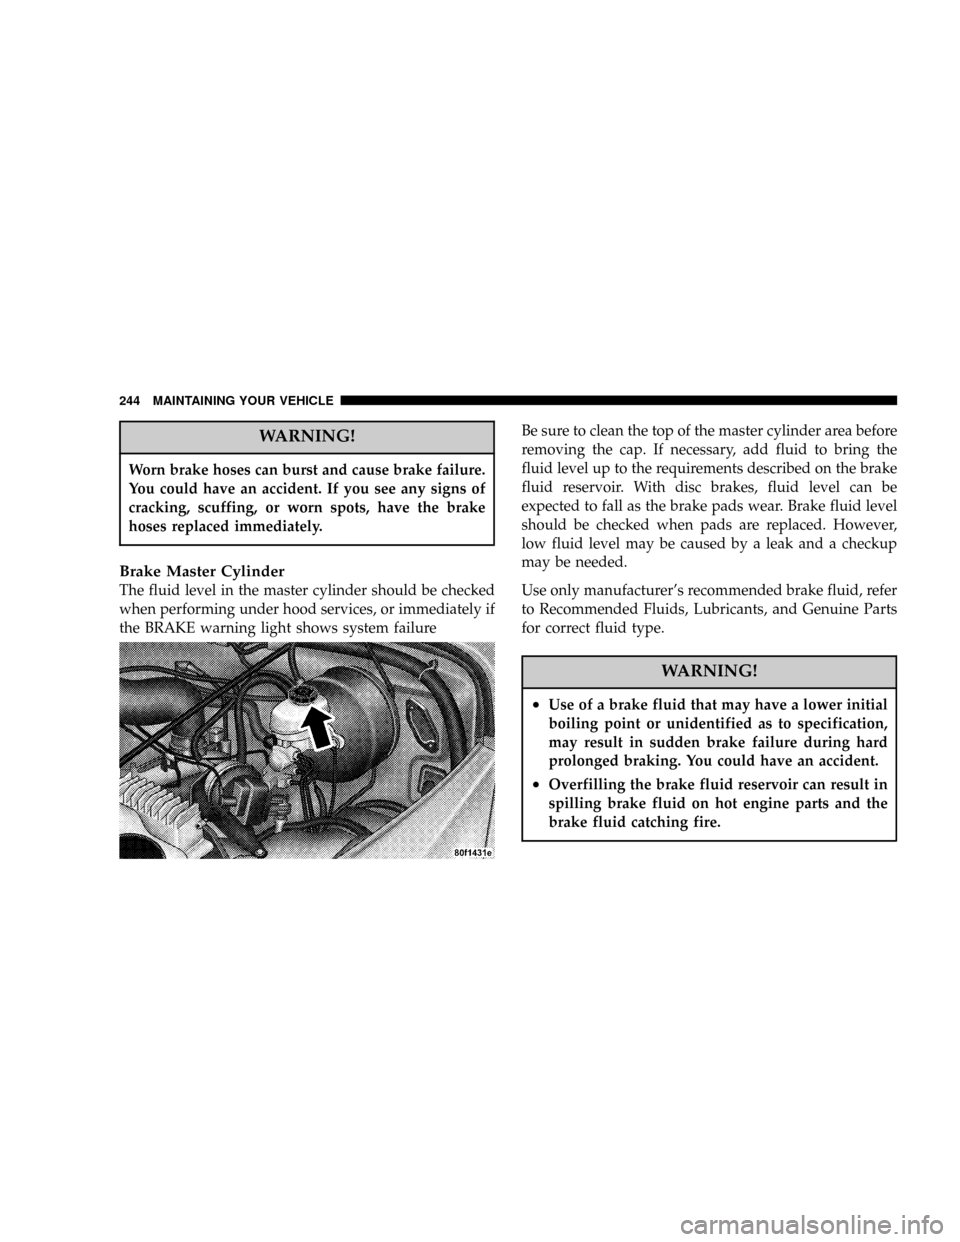
Brake Master Cylinder
The fluid level in the master cylinder should be checked
when performing under hood services, or immediately if
the BRAKE warning light shows system failureBe sure to clean the top of the master cylinder area before
removing the cap. If necessary, add fluid to bring the
fluid level up to the requirements described on the brake
fluid reservoir. With disc brakes, fluid level can be
expected to fall as the brake pads wear. Brake fluid level
should be checked when pads are replaced. However,
low fluid level may be caused by a leak and a checkup
may be needed.
Use only manufacturer's recommended brake fluid, refer
to Recommended Fluids, Lubricants, and Genuine Parts
for correct fluid type.
WARNING!
²Use of a brake fluid that may have a lower initial
boiling point or unidentified as to specification,
may result in sudden brake failure during hard
prolonged braking. You could have an accident.
²Overfilling the brake fluid reservoir can result in
spilling brake fluid on hot engine parts and the
brake fluid catching fire.
244 MAINTAINING YOUR VEHICLE
Page 245 of 299
Use only brake fluid that has been in a tightly closed
container to avoid contamination from foreign matter. Do
not allow petroleum base fluid to contaminate the brake
fluid as seal damage will result.
Automatic Transmission
Selection of Lubricant
It is important that the proper lubricant is used in the
transmission to assure optimum transmission perfor-
mance. Use only manufacturer's recommended transmis-
sion fluid, refer to Recommended Fluids, Lubricants, and
Genuine Parts for correct fluid type. It is important that
the transmission fluid be maintained at the prescribed
level using the recommended fluid.
CAUTION!
Using a transmission fluid other than the manufac-
turer's recommended fluid may cause deterioration
in transmission shift quality and/or torque converter
shudder. Using a transmission fluid other than the
manufacturer's recommended fluid will result in
more frequent fluid and filter changes. Refer to
Recommended Fluids, Lubricants, and Genuine
Parts for correct fluid type.
Fluid Level Check Ð 42RLE
This fluid level should be checked when the engine is
fully warmed up and the fluid in the transmission is
heated to its normal operating temperature. Operation of
the transmission with an improper fluid level will greatly
reduce the life of the transmission and of the fluid.
To check the automatic transmission fluid level properly,
the following procedure must be used:
1. The vehicle must be on level ground.
MAINTAINING YOUR VEHICLE 245
7
Page 246 of 299

2. The engine should be running at curb idle speed for a
minimum of 60 seconds.
3. Fully apply parking brake.
4. Apply the brakes and shift the transmission into P
(Park).
5. The fluidMUSTbe checked with the transmission in
P (Park) to be sure that the fluid level is accurate.
6. Wipe the dipstick clean and reinsert until seated.
Remove dipstick and note reading.
At normal operating temperature (approximately 180É F
(82É C), the fluid level is correct if it is in the HOT region
(cross-hatched area) on the oil level indicator. The fluid
level indicator should be in the COLD region at 70É F (21É
C) fluid temperature.
If the fluid level is low, add sufficient fluid to bring to the
proper level. Refer to Recommended Fluids, Lubricants
and Genuine Parts for correct fluid type.
Fluid is added through the dipstick tube.NOTE:To prevent dirt and water from entering the
transmission after checking or replenishing fluid, make
certain that the dipstick cap is properly reseated.
Special Additives
The manufacturer strongly recommends against the ad-
dition of any additives to the transmission. The only
exception to this policy is the use of special dyes to aid in
detecting fluid leaks. The use of transmission sealers
should be avoided as they may adversely affect seals.
Hydraulic Clutch Fluid Ð Manual Transmission
The clutch hydraulic system is a sealed maintenance free
system. In the event of leakage or other malfunction, the
system must be replaced.
Manual Transmission
Selection of Lubricant
Use only manufacturer's recommended manual trans-
mission fluid, refer to Recommended Fluids, Lubricants,
and Genuine Parts for correct fluid type.
246 MAINTAINING YOUR VEHICLE
Page 260 of 299
Chassis
Component Fluid, Lubricant, or Genuine Part
Automatic Transmission MopartATF+4 Automatic Transmission Fluid.
Manual Transmission MopartManual Transmission Lubricant or equivalent.
Transfer Case MopartATF+4 Automatic Transmission Fluid.
Axle Differential (front-rear) MopartHypoid Gear Lubricant (SAE 80W-90) (API GL5) or equivalent. For
trailer towing, use a SAE 75W-140 Synthetic Gear Lubricant. Models
equipped with Trac-Lok require an additive.
Brake Master Cylinder MopartDOT 3, SAE J1703 should be used. If DOT 3, SAE J1703 brake fluid
is not available, then DOT 4 is acceptable. Use only recommended brake flu-
ids.
Power Steering Reservoir MopartATF+4 Automatic Transmission Fluid.
Steering Gear & Linkage, Ball
Joints, Prop Shafts & Yokes, Wheel
BearingsMopartMulti-Purpose Lubricant NLGI Grade 2 EP, GC-LB
260 MAINTAINING YOUR VEHICLE
Page 263 of 299
NOTE:Most vehicles are operated under the conditions
listed for Schedule ªB.º
Second is ScheduleªAº. It is for vehicles that are not
operated under any of the conditions listed under Sched-
ule ªB.º
Use the schedule that best describes your driving condi-
tions. Where time and mileage are listed, follow the
interval that occurs first.
CAUTION!
Failure to perform the required maintenance items
may result in damage to the vehicle.
At Each Stop for Fuel
²
Check the engine oil level about 5 minutes after a fully
warmed engine is shut off. Checking the oil level while
the vehicle is on level ground will improve the accu-
racy of the oil level reading. Add oil only when the
level is at or below the ADD or MIN mark.
²Check the windshield washer solvent, add as required.
Once a Month
²
Check the tire pressure and look for unusual wear or
damage.
²Inspect the battery and clean and tighten the terminals
as required.
²Check the fluid levels of the coolant reservoir, brake
master cylinder, and transmission, and add as needed.
²Check all lights and all other electrical items for correct
operation.
At Each Oil Change
²
Change the engine oil filter.
²Inspect the exhaust system.
²Inspect brake hoses.
²Check the coolant level, hoses, and clamps.
²Inspect manual transmission fluid level Ð if
equipped.
MAINTENANCE SCHEDULES 263
8
M
A
I
N
T
E
N
A
N
C
E
S
C
H
E
D
U
L
E
S