spare tire JEEP WRANGLER 2004 TJ / 2.G Owners Manual
[x] Cancel search | Manufacturer: JEEP, Model Year: 2004, Model line: WRANGLER, Model: JEEP WRANGLER 2004 TJ / 2.GPages: 299, PDF Size: 6.82 MB
Page 41 of 299

Safety Checks You Should Make Inside The
Vehicle
Seat Belts
Inspect the belt system periodically, checking for cuts,
frays and loose parts. Damaged parts must be replaced
immediately. Do not disassemble or modify the system.
Seat belt assemblies must be replaced after an accident if
they have been damaged (bent retractor, torn webbing,
etc.). If there is any question regarding belt or retractor
condition, replace the belt.
Airbag Warning Light
The light should come on and remain on for 6 to 8
seconds as a indicator check when the ignition switch is
first turned on. If the indicator is not lit during starting,
have it serviced. If the light stays on or comes on while
driving, have the system checked by an authorized
dealer.
Defrosters
Check operation by selecting the defrost mode and place
the blower control on high speed. You should feel the air
directed against the windshield.
Safety Checks You Should Make Outside The
Vehicle
Tires
Examine tires for excessive tread wear or uneven wear
patterns. Check for stones, nails, glass, or other objects
lodged in the tread. Inspect for tread cuts or sidewall
cracks. Check wheel nuts for tightness and tires (includ-
ing spare) for proper pressure.
Lights
Have someone observe the operation of all exterior lights
while you work the controls. Check turn signal and high
beam indicator lights on the instrument panel.
Fluid Leaks
Check area under vehicle after overnight parking for fuel,
coolant, oil, or other fluid leaks. Also, if gasoline fumes
are detected, the cause should be located and corrected
immediately.
THINGS TO KNOW BEFORE STARTING YOUR VEHICLE 41
2
Page 78 of 299

26. Close the header latches and position the sun visor.HARD TOP
CAUTION!
²The hard top is not designed to carry any addi-
tional loads such as roof racks, spare tires, build-
ing, hunting, or camping supplies, and/or lug-
gage, etc. Also, it was not designed as a structural
member of the vehicle, and thus cannot properly
carry any additional loads other than environmen-
tal (rain, snow, etc.).
²The hard top does not include any devices to
properly secure any loads on the roof, and any
damage (structural or surface finish) that occurs
due to any additional loading to the top area will
void the vehicle warranty.
78 UNDERSTANDING THE FEATURES OF YOUR VEHICLE
Page 82 of 299

NOTE:If the doors are to be removed, pull the #4 fuse
from the fuse block to prevent dome lamp illumination.
Hard Top Installation
NOTE:
If the door frames are installed from soft top
usage, they must be removed prior to installation of the
hard top.
1. Inspect the hard top seals for damage and replace if
necessary.
2. Install the hard top using the same steps for removal
in reverse order.
NOTE:The hard top must be positioned properly to
ensure sealing. Set the hard top on the windshield frame
so that there is no overhang. Also, make sure that the
hard top is sitting flush with the body at the sides and
check to ensure that there is a uniform gap between the
lift glass and hard top.
SOFT TOP
CAUTION!
²The soft top is not designed to carry any addi-
tional loads such as roof racks, spare tires, build-
ing, hunting, or camping supplies, and/or lug-
gage, etc. Also, it was not designed as a structural
member of the vehicle, and thus cannot properly
carry any additional loads other than environmen-
tal (rain, snow, etc.).
²The soft top does not include any devices to
properly secure any loads on the roof, and any
damage (structural or surface finish) that occurs
due to any additional loading to the top area will
void any vehicle warranty.
82 UNDERSTANDING THE FEATURES OF YOUR VEHICLE
Page 184 of 299

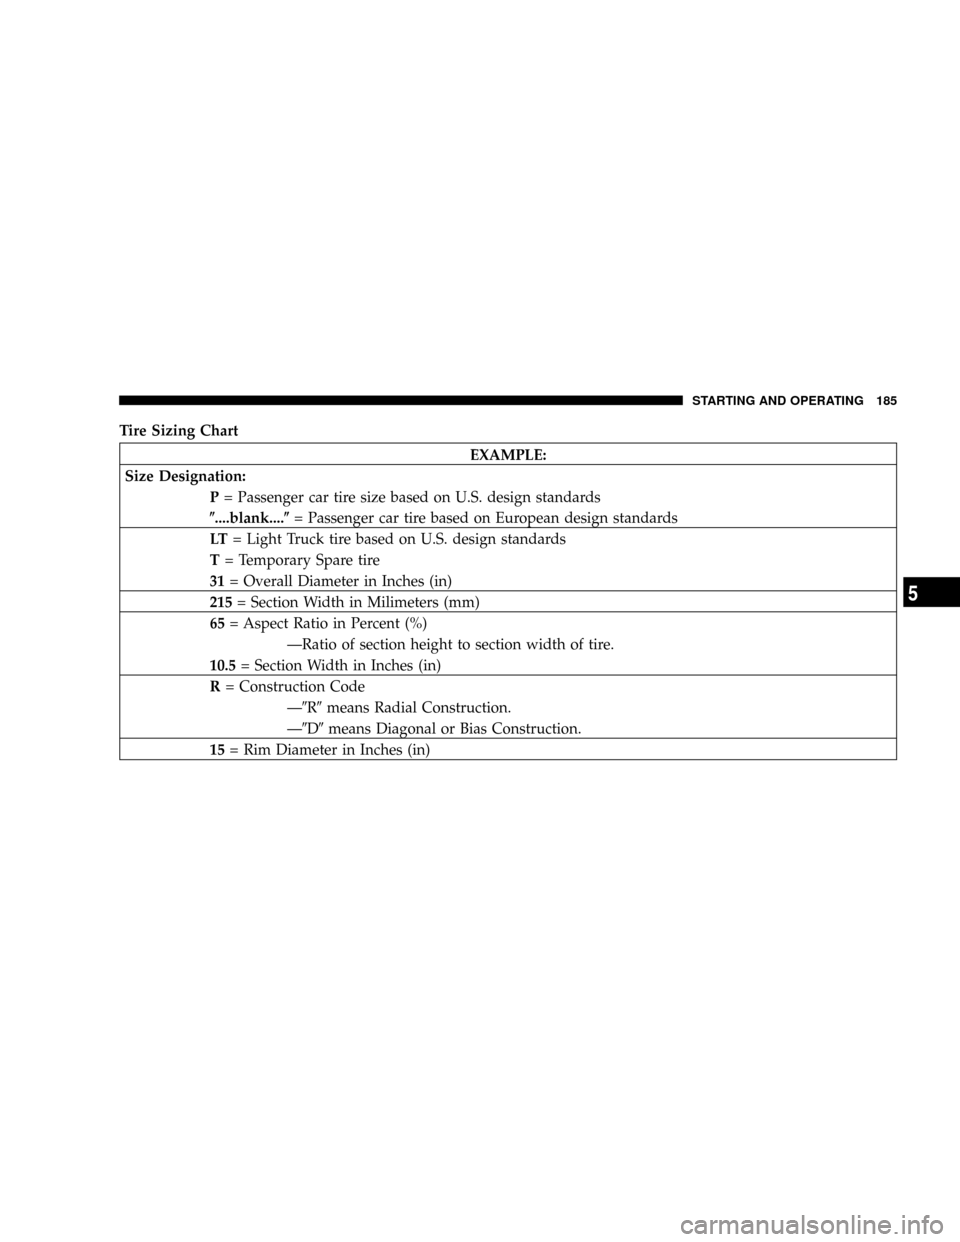
TIRE SAFETY INFORMATION
Tire Markings
NOTE:
P(Passenger)-Metric tire sizing is based on U.S.
design standards. P-Metric tires have the letter ªPº
molded into the sidewall preceding the size designation.
Example: P215/65R15 95H.
NOTE:European Metric tire sizing is based on Euro-
pean design standards. Tires designed to this standard
have the tire size molded into the sidewall beginning
with the section width. The letter9P9is absent from this
tire size designation. Example: 215/65R15 96H
NOTE:LT(Light Truck)-Metric tire sizing is based on
U.S. design standards. The size designation for LT-Metric
tires is the same as for P-Metric tires except for the letters
ªLTº that are molded into the sidewall preceding the size
designation. Example: LT235/85R16.
NOTE:Temporary Spare tires are high pressure com-
pact spares designed for temporary emergency use only.
Tires designed to this standard have the letter ªTº
molded into the sidewall preceding the size designation.
Example: T145/80D18 103M.
NOTE:High Flotation tire sizing is based on U.S.
design standards and begins with the tire diameter
molded into the sidewall. Example: 31x10.5 R15 LT.
184 STARTING AND OPERATING
Page 185 of 299

Tire Sizing Chart
EXAMPLE:
Size Designation:
P= Passenger car tire size based on U.S. design standards
(....blank....(= Passenger car tire based on European design standards
LT= Light Truck tire based on U.S. design standards
T= Temporary Spare tire
31= Overall Diameter in Inches (in)
215= Section Width in Milimeters (mm)
65= Aspect Ratio in Percent (%)
ÐRatio of section height to section width of tire.
10.5= Section Width in Inches (in)
R= Construction Code
Ð9R9means Radial Construction.
Ð9D9means Diagonal or Bias Construction.
15= Rim Diameter in Inches (in)
STARTING AND OPERATING 185
5
Page 188 of 299

Tire Loading and Tire Pressure
Tire Placard Location
NOTE:
The tire placard is located on the lower driver's
side instrument panel.
Tire and Loading Information Placard
This placard tells you important information about
the,
1) number of people that can be carried in the vehicle
2) the total weight your vehicle can carry3) the tire size designed for your vehicle
4) the cold tire inflation pressures for the front, rear
and spare tires.
Loading
The vehicle maximum load on the tire must not exceed
the load carrying capacity of the tire on your vehicle. You
will not exceed the tire's load carrying capacity if you
adhere to the loading conditions, tire size and cold tire
inflation pressures specified on the Tire and Loading
Information placard and the Vehicle Loading section of
this manual.
NOTE:Under a maximum loaded vehicle condition,
gross axle weight ratings (GAWR's) for the front and rear
axles must not be exceeded. For further information on
GAWR's, vehicle loading and trailer towing, see the
Vehicle Loading section of this manual.
To determine the maximum loading conditions of your
vehicle, locate the statement ªThe combined weight of
occupants and cargo should never exceed XXX kg or XXX
lbs.º on the Tire and Loading Information placard. The
188 STARTING AND OPERATING
Page 196 of 299

Improper alignment will not cause vehicle vibration,
which may be a result of tire and wheel out-of-balance.
Proper balancing will reduce vibration and avoid tire
cupping and spotty wear.
TIRE CHAINS
Install chains on rear tires only. Tire chains may be
installed on all models except Sahara. Follow these
recommendations to guard against damage and exces-
sive tire and chain wear:
²Use chains on P205/75R15 or P215/75R15 tires only.
P225/75R15, LT30 x 9.50R15, and LT245/75R16 tires
do not provide adequate clearance.
²Use SAE class ªSº tire chains or traction devices only.
²Chains must be the proper size for the vehicle, as
recommended by the chain manufacturer.
²Follow tire chain manufacturer's instructions for
mounting chains.
²Install chains snugly and tighten after.6 mile (1 km) of
driving.
²Do notexceed 30 mph (48 km/h).
²Drive cautiously, avoiding large bumps, potholes and
extreme driving maneuvers.
²Do notuse chains or traction devices on the Poly-spare
tire.
TIRE ROTATION RECOMMENDATIONS
Tires on the front and rear axles of vehicles operate at
different loads and perform different steering, handling,
and braking functions. For these reasons, they wear at
unequal rates, and develop irregular wear patterns.
These effects can be reduced by timely rotation of tires.
The benefits of rotation are especially worthwhile with
aggressive tread designs such as those on On/Off Road
type tires. Rotation will increase tread life, help to main-
tain mud, snow, and wet traction levels, and contribute to
a smooth, quiet ride.
196 STARTING AND OPERATING
Page 209 of 299

WHAT TO DO IN EMERGENCIES
CONTENTS
mHazard Warning Flasher.................210
mIf Your Engine Overheats................210
mChanging A Flat Tire...................211
NTool Kit Location.....................211
NJack Location........................211NSpare Tire Location....................213
NTire Changing Procedures...............213mJump Starting.........................216
mTowing A Disabled Vehicle...............2196
Page 212 of 299

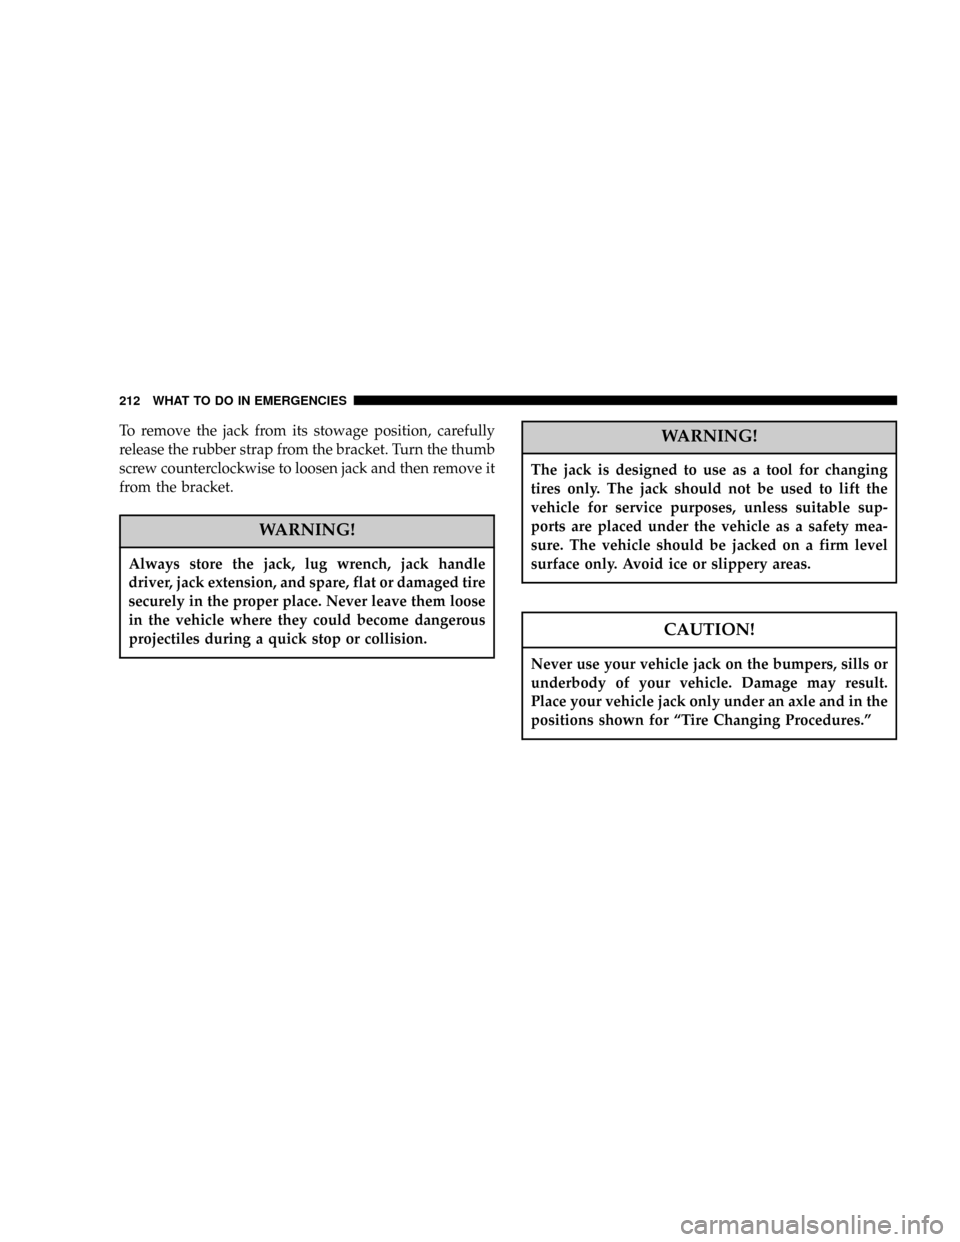
To remove the jack from its stowage position, carefully
release the rubber strap from the bracket. Turn the thumb
screw counterclockwise to loosen jack and then remove it
from the bracket.
WARNING!
Always store the jack, lug wrench, jack handle
driver, jack extension, and spare, flat or damaged tire
securely in the proper place. Never leave them loose
in the vehicle where they could become dangerous
projectiles during a quick stop or collision.
WARNING!
The jack is designed to use as a tool for changing
tires only. The jack should not be used to lift the
vehicle for service purposes, unless suitable sup-
ports are placed under the vehicle as a safety mea-
sure. The vehicle should be jacked on a firm level
surface only. Avoid ice or slippery areas.
CAUTION!
Never use your vehicle jack on the bumpers, sills or
underbody of your vehicle. Damage may result.
Place your vehicle jack only under an axle and in the
positions shown for ªTire Changing Procedures.º
212 WHAT TO DO IN EMERGENCIES
Page 213 of 299

Spare Tire Location
To remove the spare tire from the carrier, remove the tire
cover, if equipped, and remove the lug nuts with the lug
wrench turning them counterclockwise. If equipped with
an anti-theft lug nut (A), use the ªKeyº (B) and the lug
wrench. The ªKeyº is stored in the glove box.
NOTE:If you have added aftermarket accessories to the
spare tire mounted carrier, it cannot exceed a gross
weight of 50 lbs (23 kg) including the weight of the spare
tire.
Tire Changing Procedures
WARNING!
You can be injured or killed if you try to change a
wheel too close to moving traffic. Pull far enough off
the road to avoid being hit when operating the jack
or changing the wheel.
Preparation
²
Park on a firm, level surface well off the road, to
provide ample work space. Place automatic transmis-
sion in P (Park), or manual transmission in R (Re-
verse), and stop engine. Set parking brake firmly and
activate hazard warning flasher.
WHAT TO DO IN EMERGENCIES 213
6