warning light JEEP WRANGLER 2007 JK / 3.G Owner's Manual
[x] Cancel search | Manufacturer: JEEP, Model Year: 2007, Model line: WRANGLER, Model: JEEP WRANGLER 2007 JK / 3.GPages: 467, PDF Size: 8.83 MB
Page 203 of 467
6. Front Axle Lock Indicator Light — If Equipped
Indicates when the front axle lock has been
activated.
7. Seat Belt Indicator Light
A warning chime and an indicator light will alert
you to buckle the seat belts. When the belt is
buckled, the chime will stop, but the light will stay
on until it times out (about 6 seconds).
8. Turn Signal Indicator Lights
The arrows will flash with the exterior turn signals
when the turn signal lever is operated. A tone will
chime if the turn signals are left on for more than 1 mile
(2 km).
9. Oil Pressure Warning Light
Shows low engine oil pressure. The light will come
on and remain on when the ignition switch isturned from the OFF to the ON position, and the light
will turn off after the engine is started. If the bulb does
not come on, have the system checked by your autho-
rized dealer.
If the warning light comes on and remains on while
driving, stop the vehicle and shut off the engine. DO
NOT OPERATE THE VEHICLE UNTIL THE CAUSE IS
CORRECTED. Also, a single chime will sound.
10. High Beam Indicator Light
This light shows that the headlights are on high
beam. Pull the turn signal lever towards the
steering wheel to switch the headlights from high or low.
If the driver’s door is open, and the headlights or
parklights are left on, the “High Beam Indicator Light”
will flash and a chime will sound.
UNDERSTANDING YOUR INSTRUMENT PANEL 203
4
Page 204 of 467
11. Brake Warning Light
After ignition is turned on, illuminates to indicate
function check at vehicle start-up. Indicates park-
ing brake is applied. If the light stays on when the
parking brake is off, it indicates a possible brake system
fluid leak or low pressure level,see your authorized
dealer immediately.
If the parking brake is applied and the vehicle is in
motion, the red BRAKE warning light will “flash” and a
chime will sound.
The operation of the BRAKE warning light can be
checked by turning the ignition switch from the OFF
position to the ON position. The light should illuminate
for approximately two seconds. The light should then
turn off unless the parking brake is applied or a brake
fault is detected. If the light does not illuminate, have the
light inspected by an authorized dealer.12. Anti-Lock (ABS) Warning Light
After ignition is turned on, illuminates to indicate
function check at vehicle start-up. If light remains
on after start-up or comes on and stays on at road speeds,
it may indicate that the ABS has detected a malfunction
or has become inoperative. The system reverts to stan-
dard non-anti-lock brakes.
If both the red BRAKE warning light and the amber ABS
warning light are on, see your dealer immediately. Refer
to “Anti-Lock Brake System” in Section 5 of this manual.
13. Airbag Warning Light
This indicator lights and remains lit for 6 to 8
seconds when the ignition is first turned on. If
the light does not come on for 6 to 8 seconds,
stays on or comes on while driving, have the
airbag system checked by an authorized dealer.
204 UNDERSTANDING YOUR INSTRUMENT PANEL
Page 205 of 467
14. Rear Axle Lock Indicator Light — If Equipped
Indicates when the rear axle lock has been
activated.
15. Tachometer
Indicates the engine speed in revolutions per minute
(RPM).
CAUTION!
Do not operate the engine with the tachometer
pointer in the red area. Engine damage will occur.
16. Engine Coolant Temperature Warning Light
This light warns of an overheated engine condi-
tion. If the engine is critically hot, a warning chime
will sound 10 times. After the chime turns off, the
engine will still be critically hot until the light goes out.17. Sentry Key/Security Alarm Indicator Light — If
Equipped
Refer to “Sentry Key Immobilizer System” or “Vehicle
Security Alarm” in Section 2 of this manual.
18. Coolant Temperature Gauge
Indicates engine coolant temperature. The red
zone to the far right indicates possible overheat-
ing. Seek authorized service immediately if the
gauge operates in the red zone. In U.S. vehicles, tempera-
ture is indicated in degrees fahrenheit; in Canadian
vehicles in degrees centigrade.
19. Cruise Indicator Light
This light shows when the electronic speed
control system is turned on.
UNDERSTANDING YOUR INSTRUMENT PANEL 205
4
Page 207 of 467
can lead to tire failure. Under-inflation also reduces fuel
efficiency and tire tread life, and may affect the vehicle’s
handling and stopping ability.
Please note that the TPMS is not a substitute for proper
tire maintenance, and it is the driver ’s responsibility to
maintain correct tire pressure, even if under-inflation has
not reached the level to trigger illumination of the TPMS
low tire pressure telltale.
The “Tire Pressure Monitoring Telltale Light” will illumi-
nate in the instrument cluster, and an audible chime will
be activated when one or more tire pressures is low. The
“Tire Pressure Monitoring Telltale Light” will flash on
and off for 60 seconds when a system fault is detected.
The flash cycle will repeat every ten minutes or until the
fault condition is removed and reset.CAUTION!
The TPMS has been optimized for the original
equipment tires and wheels. TPMS pressures and
warnings have been established for the tire size
equipped on your vehicle. Undesirable system opera-
tion or sensor damage may result when using re-
placement equipment that is not of the same size,
type, and/or style. After-market wheels can cause
sensor damage. Do not use tire sealant from a can, or
balance beads if your vehicle is equipped with a
TPMS, as damage to the sensors may result.
UNDERSTANDING YOUR INSTRUMENT PANEL 207
4
Page 209 of 467
up on the accelerator and apply as little throttle as
possible. Be sure to adapt your speed and driving to the
prevailing road conditions. The “ESP/TCS Indicator
Light” will flash any time the ESP or TCS is active and
helping to improve vehicle stability. If the “ESP/TCS
Indicator Light” is on solid, the ESP system has been
turned off by the driver or a temporary condition exists
that will not allow full ESP function.
27. O/D (Overdrive) Off Indicator Light
This light will illuminate when the O/D OFF
button has been selected. The O/D OFF button is
located on the gear shift lever.
28. Sway Bar Indicator Light — If Equipped
This light will illuminate when the front sway
bar is disconnected.29. Electronic Stability Program (ESP) Warning
Light/Brake Assist System (BAS) Warning Light
The ESP/BAS warning light in the instrument
cluster comes on when the ignition switch is
turned to the “ON” position. The light should
go out with the engine running. If the ESP/
BAS warning light comes on continuously with the
engine running, a malfunction has been detected in either
the ESP or the BAS system. If this light stays illuminated,
have the ESP and BAS checked at your authorized dealer
as soon as possible. Refer to “Electronic Brake Control
System” in Section 5 for more information.
UNDERSTANDING YOUR INSTRUMENT PANEL 209
4
Page 210 of 467
30. Electronic Throttle Control (ETC) Warning Light —
If Equipped
This light informs you of a problem with the
Electronic Throttle Control System. If a prob-
lem is detected while the engine is running, the
light will either stay on or flash depending on
the nature of the problem. Cycle the ignition key when
the vehicle is safely and completely stopped and the gear
selector is placed in the P (Park) position. The light
should turn off. If the light remains on with the engine
running, your vehicle will usually be drivable, however,
see your dealer for service as soon as possible.
If the light continues to flash when the engine is running,
immediate service is required and you may experience
reduced performance, an elevated / rough idle, or engine
stall and your vehicle may require towing. The light will
come on when the ignition is first turned on and remainon briefly as a bulb check. If the light does not come on
during starting, have the system checked by an autho-
rized dealer.
31. Compass/Mini-Trip Computer Display — If
Equipped
When the appropriate conditions exist, this display
shows the Mini-Trip Computer messages. Refer to “Mini-
Trip Computer” later in this section.
32. Compass/Mini-Trip Computer Button—If Equipped
Press this button to switch between the different func-
tions.
210 UNDERSTANDING YOUR INSTRUMENT PANEL
Page 265 of 467
STARTING PROCEDURES
Before starting your vehicle, adjust your seat, adjust both
inside and outside mirrors, and fasten your seat belts.
WARNING!
Never leave children alone in a vehicle. Leaving
children in a vehicle unattended is dangerous for a
number of reasons. A child or others could be seri-
ously or fatally injured. Do not leave the keys in the
ignition. A child could operate power windows,
other controls, or move the vehicle.
Manual Transmission
Apply the parking brake, place the gearshift control lever
in N (Neutral) and depress the clutch pedal before
starting vehicle. This vehicle is equipped with a clutch
interlocking ignition system. It will not start unless the
clutch pedal is pressed to the floor.4WD Models Only
In 4L mode, this vehicle will start regardless of whether
or not the clutch pedal is pressed to the floor. This feature
enhances off-road performance by allowing the vehicle to
start when in 4L without having to depress the clutch
pedal. The “4WD Indicator Light” will illuminate when
the transfer case has been shifted into this mode.
Automatic Transmission
Start the engine with the selector lever in the N (Neutral)
or P (Park) position. Apply the brake before shifting to
any driving range.
Normal Starting
Normal starting of either a cold or a warm engine is
obtained without pumping or depressing the accelerator
pedal. Turn the key to the START position and release
when the engine starts. If the engine fails to start within
10 seconds, turn the key to the OFF position, wait 5
seconds, then repeat the normal starting procedure.
STARTING AND OPERATING 265
5
Page 270 of 467
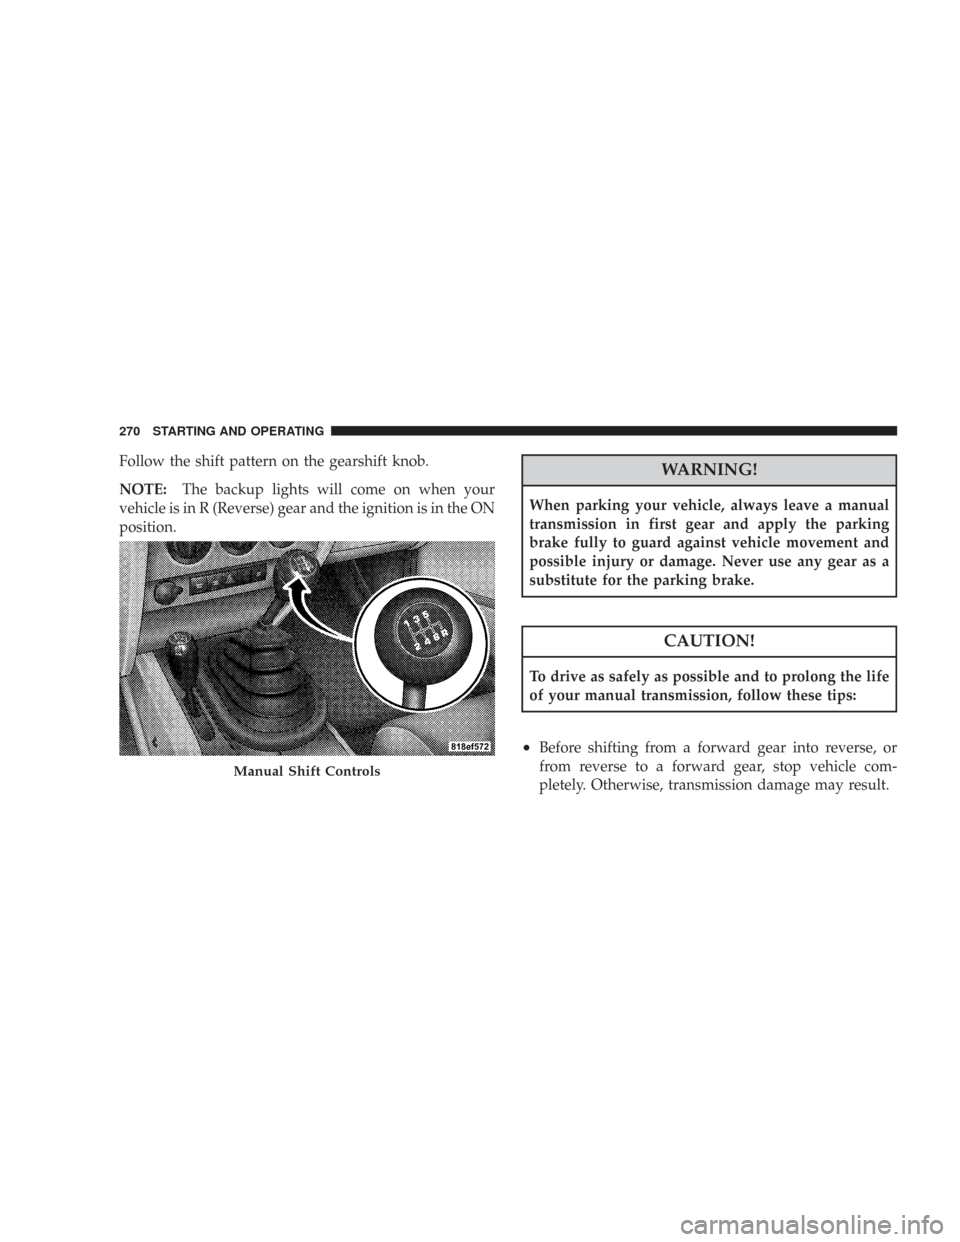
Follow the shift pattern on the gearshift knob.
NOTE:The backup lights will come on when your
vehicle is in R (Reverse) gear and the ignition is in the ON
position.WARNING!
When parking your vehicle, always leave a manual
transmission in first gear and apply the parking
brake fully to guard against vehicle movement and
possible injury or damage. Never use any gear as a
substitute for the parking brake.
CAUTION!
To drive as safely as possible and to prolong the life
of your manual transmission, follow these tips:
•Before shifting from a forward gear into reverse, or
from reverse to a forward gear, stop vehicle com-
pletely. Otherwise, transmission damage may result.
Manual Shift Controls
270 STARTING AND OPERATING
Page 285 of 467
Trac-Lok™ is especially helpful during slippery driving
conditions. With both rear wheels on a slippery surface, a
slight application of the accelerator will supply maxi-
mum traction.
WARNING!
On vehicles equipped with a limited-slip differen-
tial, never run the engine with one rear wheel off the
ground. The vehicle may drive through the rear
wheel remaining on the ground and cause you to lose
control of your vehicle.
AXLE LOCK (TRU–LOK™) — RUBICON MODELS
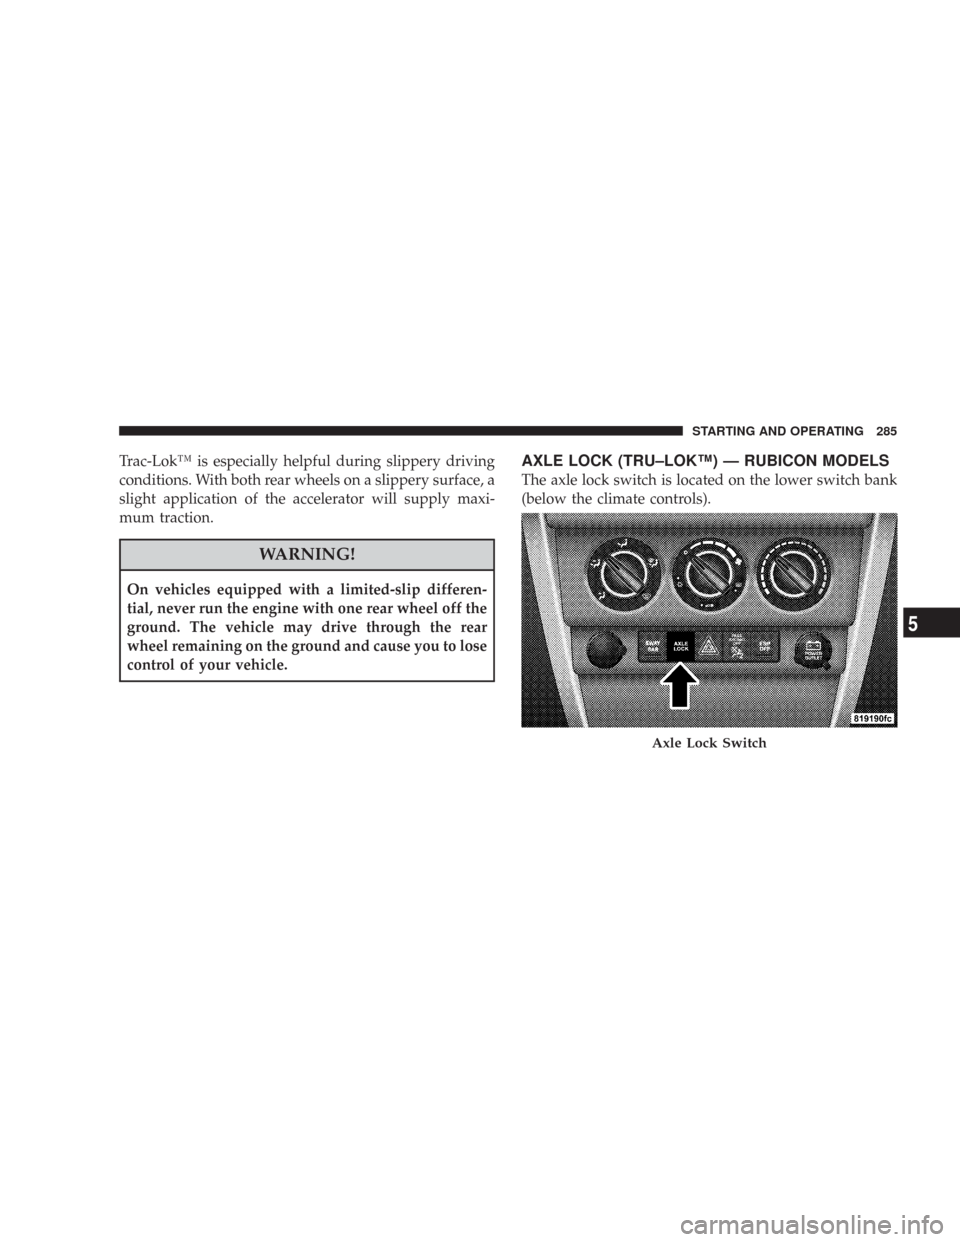
The axle lock switch is located on the lower switch bank
(below the climate controls).
Axle Lock Switch
STARTING AND OPERATING 285
5
Page 288 of 467
when activation conditions are not met. The stabilizer/
sway bar should remain in on-road mode during normal
driving conditions.
WARNING!
Do not disconnect the stabilizer bar and drive on
hard surfaced roads or at speeds above 18 mph (29
km/h), you may lose control of the vehicle, which
could result in serious injury. The front stabilizer bar
enhances vehicle stability and is necessary for main-
taining control of the vehicle. The system monitors
vehicle speed and will attempt to reconnect the
stabilizer bar at speeds over 18 mph (29 km/h). This is
indicated by a flashing or solid “Sway Bar Indicator
Light.” Once vehicle speed is reduced below 14 mph
(22 km/h), the system will once again attempt to
return to off road mode.To disconnect the stabilizer/sway bar, shift to either 4HI
or 4LO (refer to “Four Wheel Drive Operation” in this
section) and press the stabilizer/sway bar button to
obtain the off-road position. The amber indicator light
will flash until the stabilizer/sway bar has been fully
disconnected.
NOTE:The stabilizer/sway bar may be torque locked
due to left and right suspension height differences. This
condition is due to driving surface differences or vehicle
loading. In order for the stabilizer/sway bar to
disconnect/reconnect, the right and left halves of the bar
must be aligned. This alignment may require that the
vehicle be driven onto level ground or rocked from side
to side.
To return to on-road mode, press the stabilizer/sway bar
button again.
288 STARTING AND OPERATING