key JEEP WRANGLER 2007 JK / 3.G Owner's Guide
[x] Cancel search | Manufacturer: JEEP, Model Year: 2007, Model line: WRANGLER, Model: JEEP WRANGLER 2007 JK / 3.GPages: 467, PDF Size: 8.83 MB
Page 266 of 467
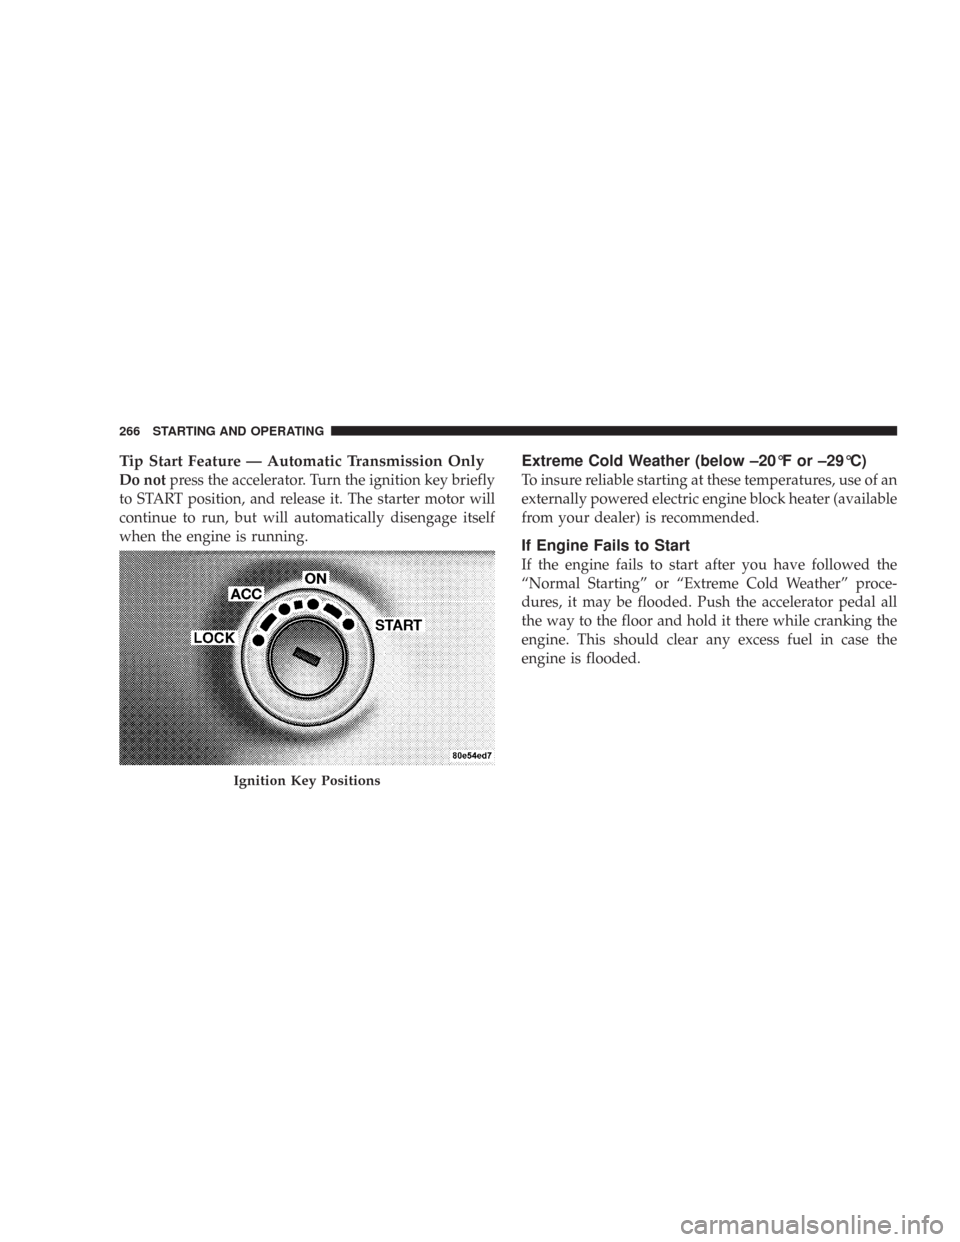
Tip Start Feature — Automatic Transmission Only
Do notpress the accelerator. Turn the ignition key briefly
to START position, and release it. The starter motor will
continue to run, but will automatically disengage itself
when the engine is running.
Extreme Cold Weather (below –20°F or –29°C)
To insure reliable starting at these temperatures, use of an
externally powered electric engine block heater (available
from your dealer) is recommended.
If Engine Fails to Start
If the engine fails to start after you have followed the
“Normal Starting” or “Extreme Cold Weather” proce-
dures, it may be flooded. Push the accelerator pedal all
the way to the floor and hold it there while cranking the
engine. This should clear any excess fuel in case the
engine is flooded.
Ignition Key Positions
266 STARTING AND OPERATING
Page 268 of 467
If the engine has been flooded, it may start to run, but not
have enough power to continue running when the key is
released. If this occurs, continue cranking with the accel-
erator pedal pushed all the way to the floor. Release the
accelerator pedal and the key once the engine is running
smoothly.
If the engine shows no sign of starting after two 15
second periods of cranking with the accelerator pedal
held to the floor, the “Normal Starting” or “Extreme Cold
Weather” procedures should be repeated.
After Starting
The idle speed will automatically decrease as the engine
warms up.
WARNING!
Never leave children alone in a vehicle. Leaving
children in a vehicle unattended is dangerous for a
number of reasons. A child or others could be seri-
ously or fatally injured. Do not leave the keys in the
ignition. A child could operate power windows,
other controls, or move the vehicle.
268 STARTING AND OPERATING
Page 274 of 467
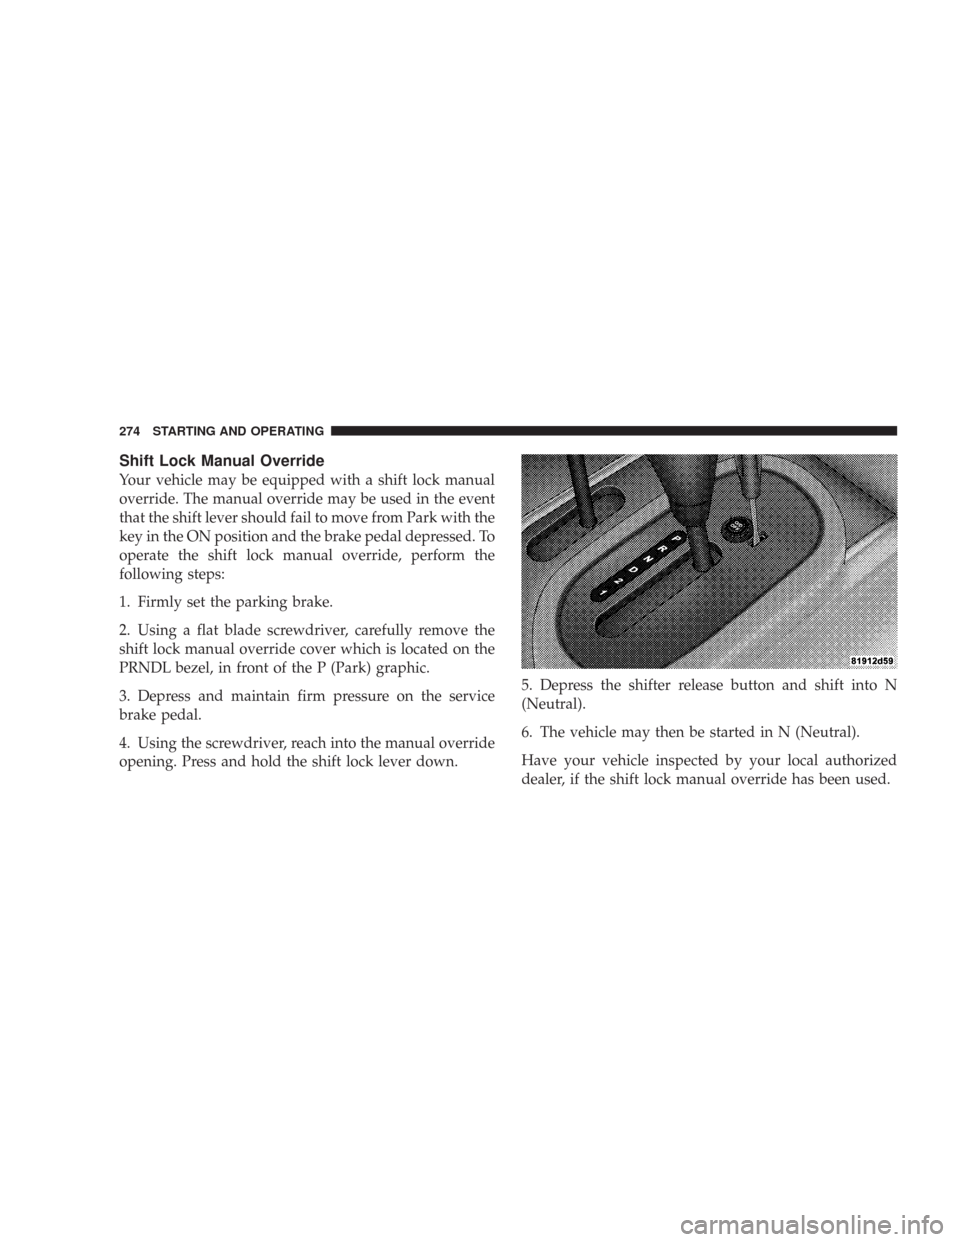
Shift Lock Manual Override
Your vehicle may be equipped with a shift lock manual
override. The manual override may be used in the event
that the shift lever should fail to move from Park with the
key in the ON position and the brake pedal depressed. To
operate the shift lock manual override, perform the
following steps:
1. Firmly set the parking brake.
2. Using a flat blade screwdriver, carefully remove the
shift lock manual override cover which is located on the
PRNDL bezel, in front of the P (Park) graphic.
3. Depress and maintain firm pressure on the service
brake pedal.
4. Using the screwdriver, reach into the manual override
opening. Press and hold the shift lock lever down.5. Depress the shifter release button and shift into N
(Neutral).
6. The vehicle may then be started in N (Neutral).
Have your vehicle inspected by your local authorized
dealer, if the shift lock manual override has been used.
274 STARTING AND OPERATING
Page 286 of 467
This feature will only activate when the following con-
ditions are met:
•Key in ignition, vehicle in 4L (Low) range.
•Vehicle speed should be 10 mph (16 km/h) or less.
To activate the system, press the bottom of the switch
once to lock the rear axle only (the “Rear Axle Lock
Indicator Light” will illuminate), press the bottom of the
switch again to lock the front axle (the “Front Axle Lock
Indicator Light” will illuminate). Once the rear axle is
locked, pressing the switch again will lock or unlock the
front axle.
NOTE:The indicator lights will flash until the axles are
fully locked or unlocked.
To unlock the axles, push the top of the switch.
Axle lock will disengage if the vehicle is taken out of 4L
(Low) range, or the ignition switch is turned to the OFF
position.
REAR AXLE LOCK — 4WD NON-RUBICON
MODELS (IF EQUIPPED)
The rear axle lock switch is located on the lower switch
bank (below the climate controls).
This feature will only activate when the following con-
ditions are met:
•Key in ignition, vehicle in 4L (Low) range.
•Vehicle speed should be 10 mph (16 km/h) or less.
To activate the system, press the switch down to lock the
rear axle (the “Rear Axle Lock Indicator Light” will
illuminate), press the switch up to unlock the rear axle.
NOTE:The indicator lights will flash until the axle is
fully locked or unlocked.
The rear axle lock will disengage if the vehicle is taken
out of 4L (Low) range, or the ignition switch is turned to
the OFF position.
286 STARTING AND OPERATING
Page 296 of 467
(Park), otherwise the load on the transmission locking
mechanism may make it difficult to move the selector out
of P (Park).
WARNING!
•Always fully apply the parking brake when leav-
ing your vehicle, or it may roll and cause damage
or injury. Also, be certain to leave an automatic
transmission in P (Park), a manual transmission in
R (Reverse) or 1st gear. Failure to do so may allow
the vehicle to roll and cause damage or injury.
•Never leave children alone in a vehicle. Leaving
children in a vehicle unattended is dangerous for a
number of reasons. A child or others could be
seriously or fatally injured. Do not leave the keys
in the ignition. A child could operate power win-
dows, other controls, or move the vehicle.When parking on a hill, turn the front wheels toward the
curb on a downhill grade and away from the curb on an
uphill grade.
The parking brake should always be applied whenever
the driver is not in the vehicle.
ANTI-LOCK BRAKE SYSTEM
The Anti-Lock Brake System is designed to aid the driver
in maintaining vehicle control under adverse braking
conditions. The system operates with a separate com-
puter to modulate hydraulic pressure to prevent wheel
lock-up and help avoid skidding on slippery surfaces.
All vehicle wheels and tires must be the same size and
type and tires must be properly inflated to produce
accurate signals for the computer.
296 STARTING AND OPERATING
Page 319 of 467
The “Tire Pressure Monitoring Telltale Light” will
illuminate in the instrument cluster, and an au-
dible chime will be activated when one or more of
the four active road tire pressures are low. The audible
chime will sound once every ignition cycle for each
condition that it detects. Should this occur, you should
stop as soon as possible, check the inflation pressure of
each tire on your vehicle, and inflate each tire to the
pressure recommended by the vehicle manufacturer. The
system will automatically update and the “Tire Pressure
Monitoring Telltale Light” will extinguish once the up-
dated tire pressures have been received. The vehicle may
need to be driven for up to 10 minutes above 15 mph (25
km/h) to receive this information. A low spare tire will
not cause the “Tire Pressure Monitoring Telltale Light” to
illuminate or the chime to sound.The “Tire Pressure Monitoring Telltale Light” will flash
on and off for 60 seconds, and an audible chime will
sound when a system fault is detected. The flash cycle
will repeat every ten minutes, without an audible chime,
until the fault condition no longer exists. If the ignition
key is cycled, this sequence will repeat, providing the
system fault still exists.
NOTE:In the event that the matching full size spare tire
is swapped with a low pressure road tire, the next
ignition key cycle will still show the “Tire Pressure
Monitoring Telltale Light” to be ON, and a chime to
sound. Driving the vehicle for up to 10 minutes above 15
mph (25 kph) will turn OFF the “Tire Pressure Monitor-
ing Telltale Light” as long as the spare tire or any other
road tire(s) are not below the low pressure warning
threshold.
STARTING AND OPERATING 319
5
Page 347 of 467
4. Start engine.
5. Shift automatic transmission into D (Drive) or manual
transmission into gear.
6. Release brake pedal and ensure that there is no vehicle
movement.
7. Shut the engine off and place the ignition key into the
ACC position.
8. Shift automatic transmission into P (Park).
9. Apply parking brake.
10. Attach vehicle to the tow vehicle with tow bar.
11. Release parking brake.
12. Disconnect the negative battery cable, and secure it
away from the negative battery post.CAUTION!
Damage to the transmission may occur if the trans-
mission is shifted into P (Park) with the transfer case
in N (Neutral) and the engine running. With the
transfer case in N (Neutral) ensure that the engine is
off prior to shifting the transmission into P (Park)
(refer to steps 7 – 8 above).
Shifting Out Of Neutral (N)
Use the following procedure to prepare your vehicle for
normal usage.
1. Shift automatic transmission into N (Neutral) or de-
press clutch pedal on manual transmission.
2. Shift transfer case lever into desired position.
STARTING AND OPERATING 347
5
Page 367 of 467
Your vehicle has a simple ignition key actuated test,
which you can use prior to going to the test station. To
check if your vehicle’s OBD system is ready, you must do
the following:
1. Insert your ignition key into the ignition switch.
2. Turn the ignition to the ON position, but do not crank
or start the engine.
3. If you crank or start the engine, you will have to start
this test over.
4. As soon as you turn your key to the ON position, you
will see your MIL symbol come on as part of a normal
bulb check.
5. Approximately 15 seconds later, one of two things will
happen:
a. The MIL will flash for about 10 seconds and then
return to being fully illuminated until you turn off theignition key or start the engine. This means that your
vehicle’s OBD system isnot readyand you shouldnot
proceed to the I/M station.
b. The MIL will not flash at all and will remain fully
illuminated until you turn off the ignition key or start
the engine. This means that your vehicle’s OBD system
isreadyand you can proceed to the I/M station.
If your OBD system isnot ready,you should see your
authorized dealer or repair facility. If your vehicle was
recently serviced or had a battery failure or replacement,
you may need to do nothing more than drive your
vehicle as you normally would in order for your OBD
system to update. A recheck with the above test routine
may then indicate that the system is now ready.
Regardless of whether your vehicle’s OBD system is
ready or not ready, if the MIL symbol is illuminated
during normal vehicle operation, you should have your
MAINTAINING YOUR VEHICLE 367
7
Page 451 of 467
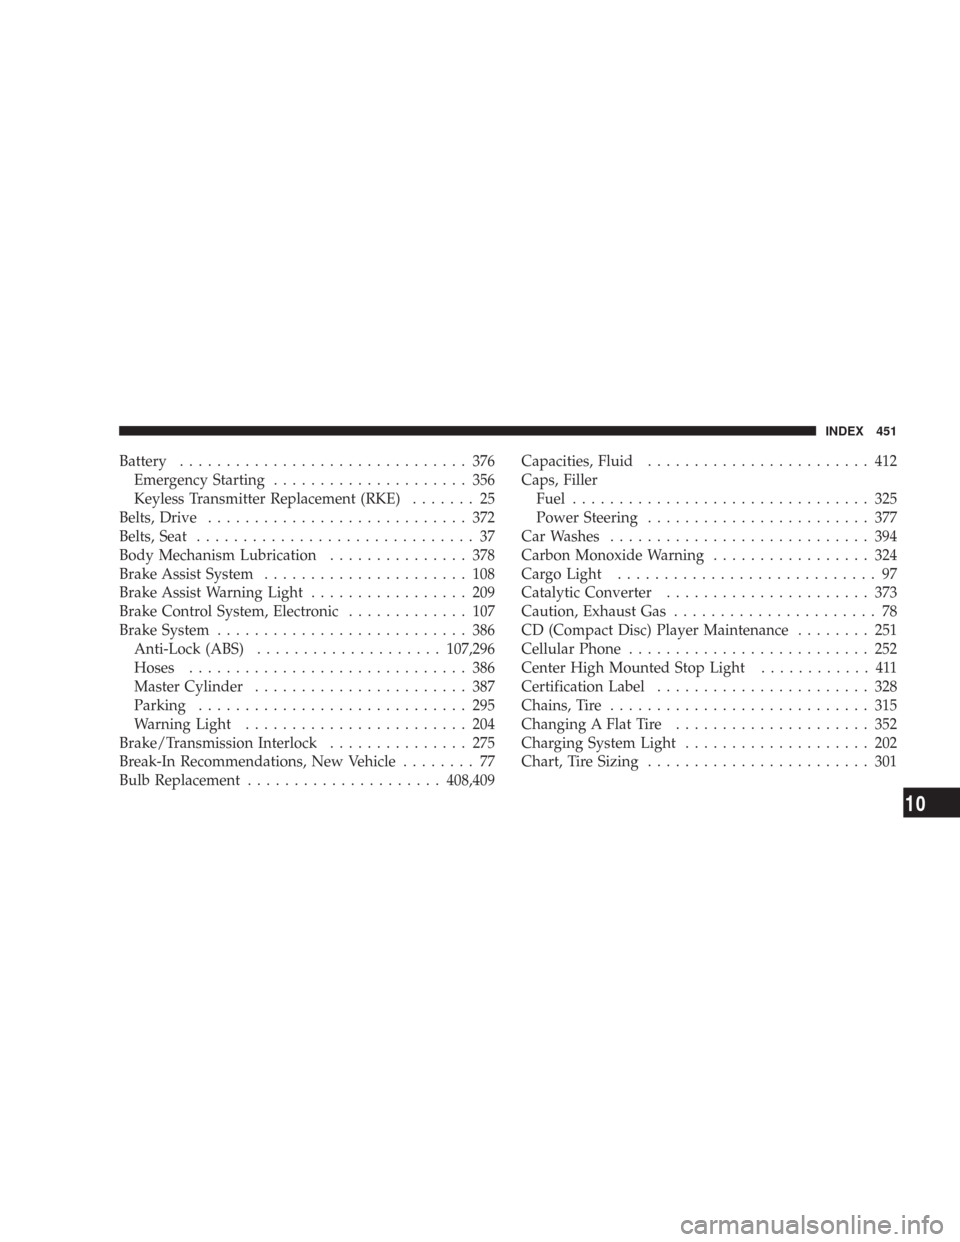
Battery............................... 376
Emergency Starting..................... 356
Keyless Transmitter Replacement (RKE)....... 25
Belts, Drive............................ 372
Belts, Seat.............................. 37
Body Mechanism Lubrication............... 378
Brake Assist System...................... 108
Brake Assist Warning Light................. 209
Brake Control System, Electronic............. 107
Brake System........................... 386
Anti-Lock (ABS)....................107,296
Hoses.............................. 386
Master Cylinder....................... 387
Parking............................. 295
Warning Light........................ 204
Brake/Transmission Interlock............... 275
Break-In Recommendations, New Vehicle........ 77
Bulb Replacement.....................408,409Capacities, Fluid........................ 412
Caps, Filler
Fuel................................ 325
Power Steering........................ 377
Car Washes............................ 394
Carbon Monoxide Warning................. 324
Cargo Light............................ 97
Catalytic Converter...................... 373
Caution, Exhaust Gas...................... 78
CD (Compact Disc) Player Maintenance........ 251
Cellular Phone.......................... 252
Center High Mounted Stop Light............ 411
Certification Label....................... 328
Chains, Tire............................ 315
Changing A Flat Tire..................... 352
Charging System Light.................... 202
Chart, Tire Sizing........................ 301
INDEX 451
10
Page 456 of 467
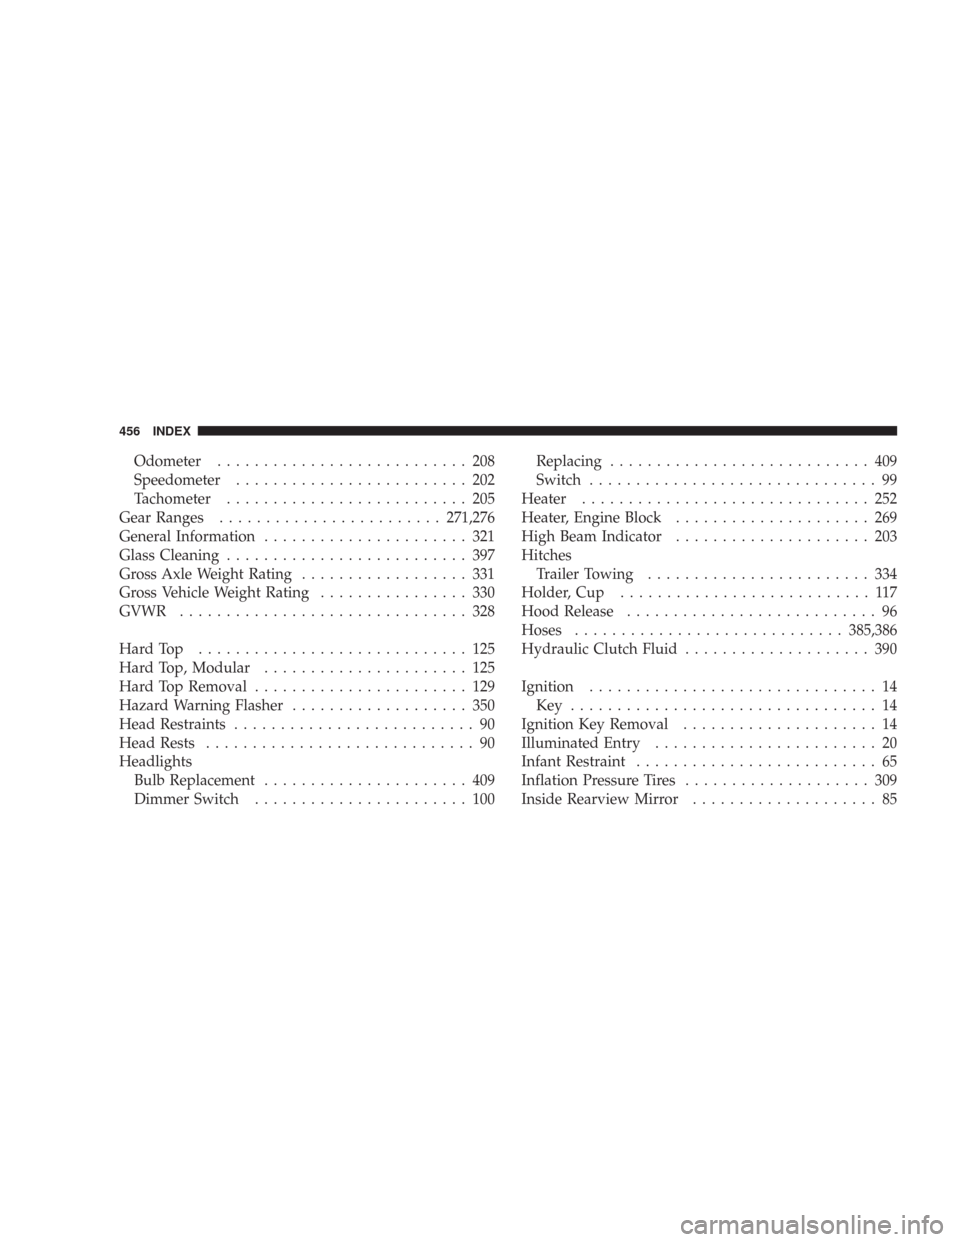
Odometer........................... 208
Speedometer......................... 202
Tachometer.......................... 205
Gear Ranges........................271,276
General Information...................... 321
Glass Cleaning.......................... 397
Gross Axle Weight Rating.................. 331
Gross Vehicle Weight Rating................ 330
GVWR............................... 328
HardTop ............................. 125
Hard Top, Modular...................... 125
Hard Top Removal....................... 129
Hazard Warning Flasher................... 350
Head Restraints.......................... 90
Head Rests............................. 90
Headlights
Bulb Replacement...................... 409
Dimmer Switch....................... 100Replacing............................ 409
Switch............................... 99
Heater............................... 252
Heater, Engine Block..................... 269
High Beam Indicator..................... 203
Hitches
Trailer Towing........................ 334
Holder, Cup........................... 117
Hood Release........................... 96
Hoses.............................385,386
Hydraulic Clutch Fluid.................... 390
Ignition............................... 14
Key ................................. 14
Ignition Key Removal..................... 14
Illuminated Entry........................ 20
Infant Restraint.......................... 65
Inflation Pressure Tires.................... 309
Inside Rearview Mirror.................... 85
456 INDEX