warning JEEP WRANGLER 2010 JK / 3.G Owner's Manual
[x] Cancel search | Manufacturer: JEEP, Model Year: 2010, Model line: WRANGLER, Model: JEEP WRANGLER 2010 JK / 3.GPages: 72, PDF Size: 16.2 MB
Page 49 of 72
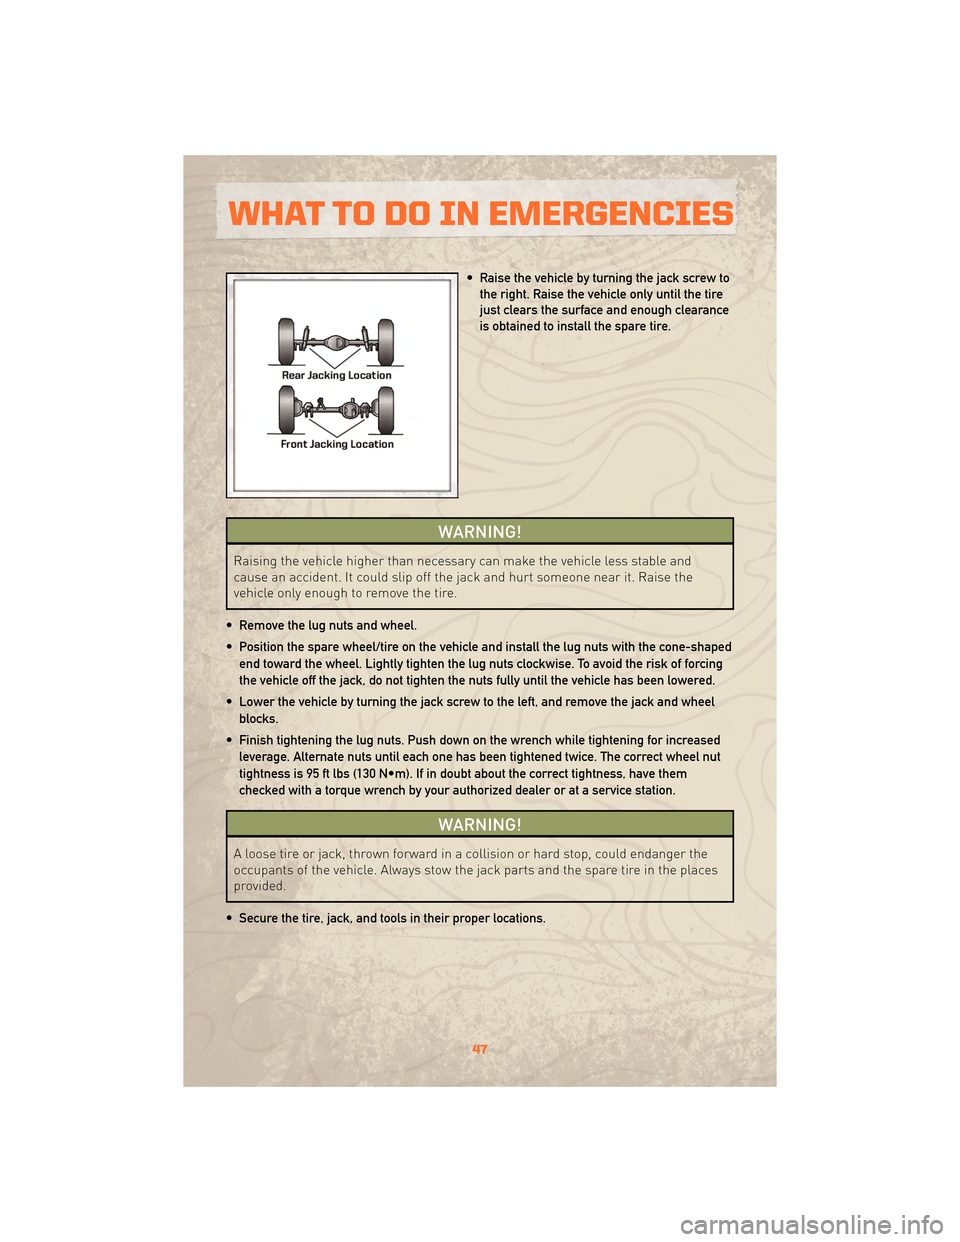
• Raise the vehicle by turning the jack screw tothe right. Raise the vehicle only until the tire
just clears the surface and enough clearance
is obtained to install the spare tire.
WARNING!
Raising the vehicle higher than necessary can make the vehicle less stable and
cause an accident. It could slip off the jack and hurt someone near it. Raise the
vehicle only enough to remove the tire.
• Remove the lug nuts and wheel.
• Position the spare wheel/tire on the vehicle and install the lug nuts with the cone-shaped end toward the wheel. Lightly tighten the lug nuts clockwise. To avoid the risk of forcing
the vehicle off the jack, do not tighten the nuts fully until the vehicle has been lowered.
• Lower the vehicle by turning the jack screw to the left, and remove the jack and wheel blocks.
• Finish tightening the lug nuts. Push down on the wrench while tightening for increased leverage. Alternate nuts until each one has been tightened twice. The correct wheel nut
tightness is 95 ft lbs (130 N•m). If in doubt about the correct tightness, have them
checked with a torque wrench by your authorized dealer or at a service station.
WARNING!
A loose tire or jack, thrown forward in a collision or hard stop, could endanger the
occupants of the vehicle. Always stow the jack parts and the spare tire in the places
provided.
• Secure the tire, jack, and tools in their proper locations.
47
WHAT TO DO IN EMERGENCIES
Page 50 of 72
JUMP-STARTING
• If your vehicle has a discharged battery it can be jumpstarted using a set of jumpercables and a battery in another vehicle or by using a portable battery booster pack.
• Jump-starting can be dangerous if done improperly so please follow the procedures in this section carefully.
NOTE: When using a portable battery booster pack follow the manufacturer’s operating
instructions and precautions.
CAUTION!
Do not use a portable battery booster pack or any other booster source with a
system voltage greater than 12 Volts or damage to the battery, starter motor,
alternator or electrical system may occur.
WARNING!
When temperatures are below the freezing point, electrolyte in a discharged battery
may freeze. Do not attempt jump-starting because the battery could rupture or
explode and cause personal injury. Battery temperature must be brought above
freezing point before attempting a jump-start.
Preparations for Jump-Start
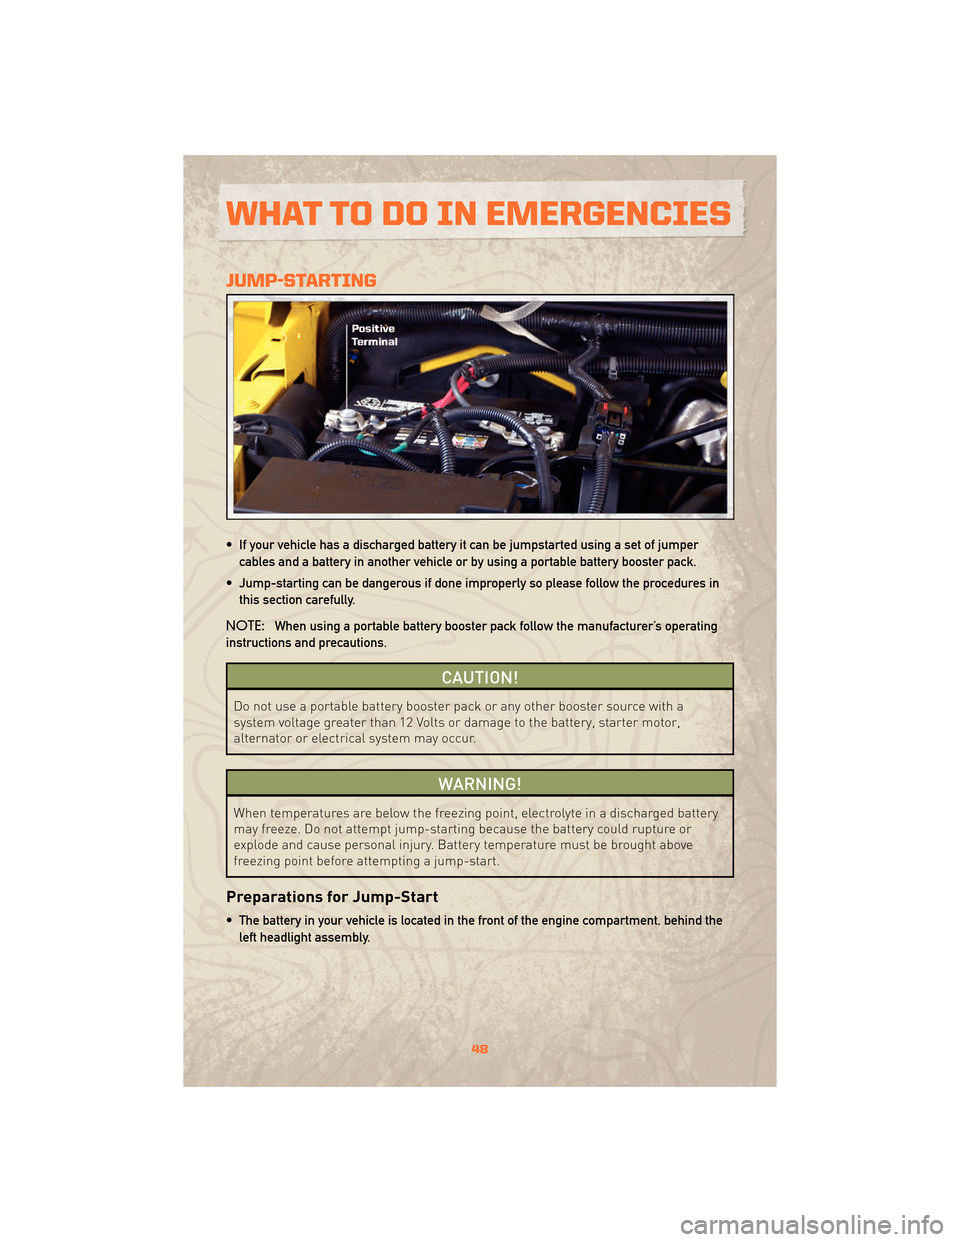
• The battery in your vehicle is located in the front of the engine compartment, behind the left headlight assembly.
WHAT TO DO IN EMERGENCIES
48
Page 51 of 72
WARNING!
• Take care to avoid the radiator cooling fan whenever the hood is raised. It can startanytime the ignition switch is on. You can be injured by moving fan blades.
• Remove any metal jewelry such as watch bands or bracelets that might make an inadvertent electrical contact. You could be seriously injured.
• Batteries contain sulfuric acid that can burn your skin or eyes and generate hydrogen gas which is flammable and explosive. Keep open flames or sparks
away from the battery.
• Set the parking brake, shift the automatic transmission into PARK and turn the ignition to LOCK.
• Turn off the heater, radio, and all unnecessary electrical accessories.
• If using a another vehicle to jump-start the battery, park the vehicle within the jumper cables reach, set the parking brake and make sure the ignition is OFF.
WARNING!
Do not allow vehicles to touch each other as this could establish a ground
connection and personal injury could result.
Jump-Starting Procedure
WARNING!
Failure to follow this procedure could result in personal injury or property damage
due to battery explosion.
CAUTION!
Failure to follow these procedures could result in damage to the charging system of
the booster vehicle or the discharged vehicle.
• Connect the positive (+) end of the jumper cable to the positive (+) post of the discharged vehicle.
• Connect the opposite end of the positive (+) jumper cable to the positive (+) post of the booster battery.
• Connect the negative end (-) of the jumper cable to the negative (-) post of the booster battery.
• Connect the opposite end of the negative (-) jumper cable to a good engine ground (exposed metal part of the discharged vehicle’s engine) away from the battery and the
fuel injection system.
49
WHAT TO DO IN EMERGENCIES
Page 52 of 72
WARNING!
Do not connect the cable to the negative post (-) of the discharged battery. The
resulting electrical spark could cause the battery to explode and could result in
personal injury.
• Start the engine in the vehicle that has the booster battery, let the engine idle a few minutes, and then start the engine in the vehicle with the discharged battery.
• Once the engine is started, remove the jumper cables in the reverse sequence:
• Disconnect the negative (-) jumper cable from the engine ground of the vehicle with the discharged battery.
• Disconnect the negative end (-) of the jumper cable from the negative (-) post of the booster battery.
• Disconnect the opposite end of the positive (+) jumper cable from the positive (+) post of the booster battery.
• Disconnect the positive (+) end of the jumper cable from the positive (+) post of the discharged vehicle.
• Reinstall the air intake duct.
• If frequent jump-starting is required to start your vehicle you should have the battery and charging system inspected at your authorized dealer.
CAUTION!
Accessories that can be plugged into the vehicle power outlets draw power from the
vehicle’s battery, even when not in use (i.e., cellular phones, etc.). Eventually, if
plugged in long enough, the vehicle’s battery will discharge sufficiently to degrade
battery life and/or prevent the engine from starting.
EMERGENCY TOW HOOKS
• If your vehicle is equipped with tow hooks, they are mounted in the front and the rear.
NOTE: For off-road recovery, it is recommended to use both of the front tow hooks to
minimize the risk of damage to the vehicle.
WARNING!
• Chains are not recommended for freeing a stuck vehicle. Chains may break, causing serious injury or death.
• Stand clear of vehicles when pulling with tow hooks. Tow straps and chains may break, causing serious injury.
WHAT TO DO IN EMERGENCIES
50
Page 54 of 72
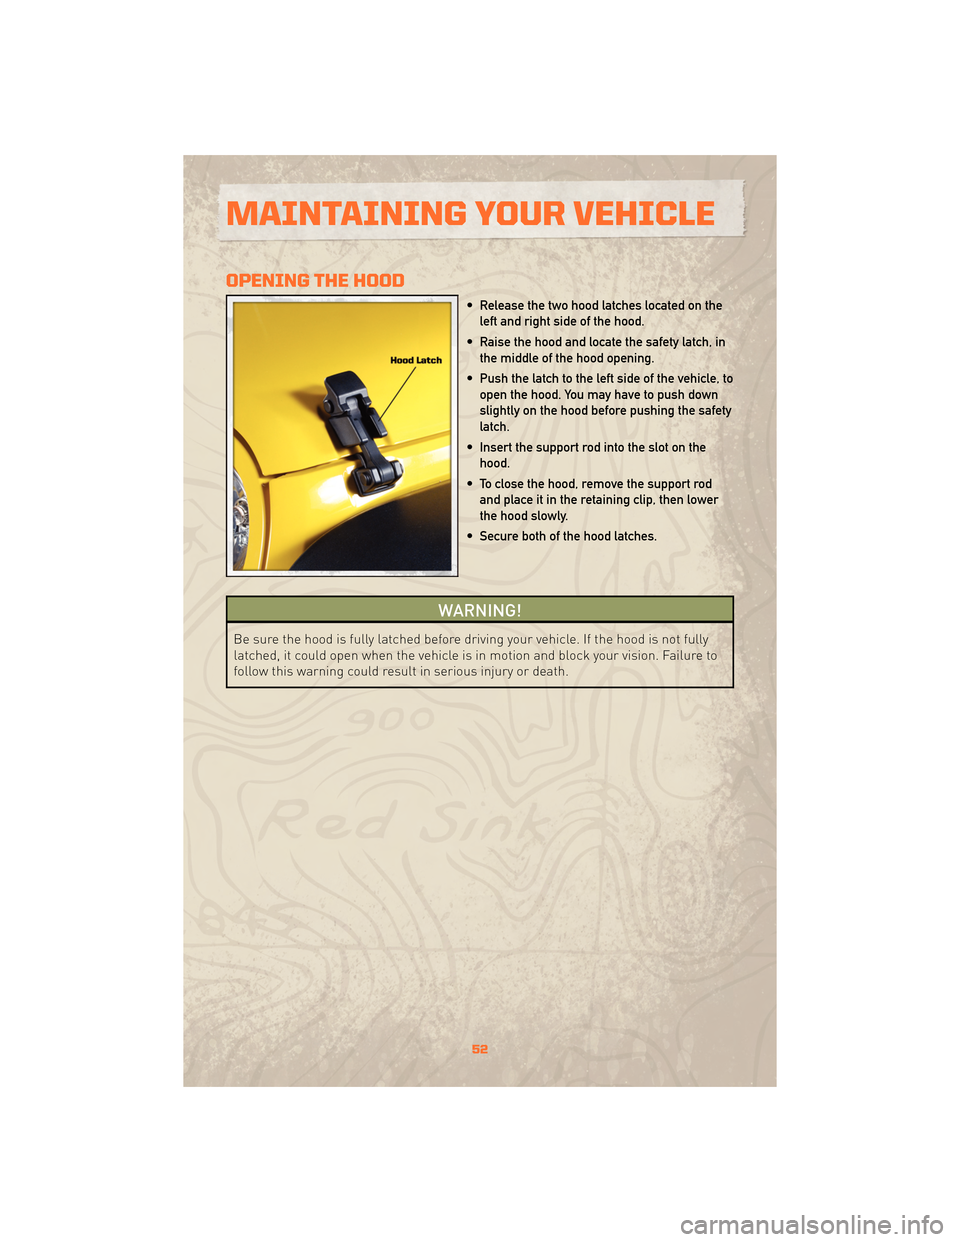
OPENING THE HOOD
• Release the two hood latches located on theleft and right side of the hood.
• Raise the hood and locate the safety latch, in the middle of the hood opening.
• Push the latch to the left side of the vehicle, to open the hood. You may have to push down
slightly on the hood before pushing the safety
latch.
• Insert the support rod into the slot on the hood.
• To close the hood, remove the support rod and place it in the retaining clip, then lower
the hood slowly.
• Secure both of the hood latches.
WARNING!
Be sure the hood is fully latched before driving your vehicle. If the hood is not fully
latched, it could open when the vehicle is in motion and block your vision. Failure to
follow this warning could result in serious injury or death.
MAINTAINING YOUR VEHICLE
52
Page 63 of 72
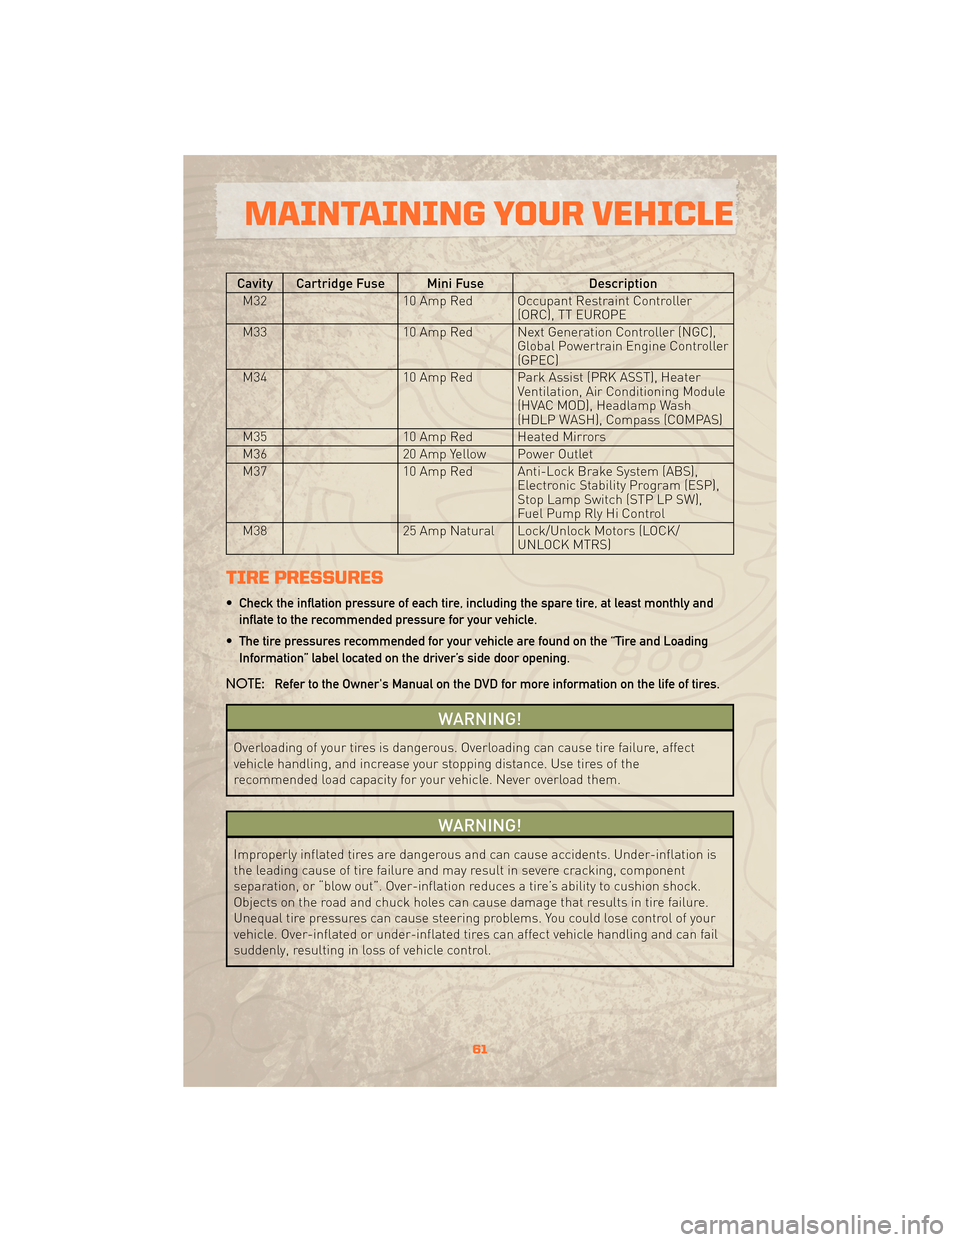
Cavity Cartridge Fuse Mini FuseDescription
M32 10 Amp Red Occupant Restraint Controller
(ORC), TT EUROPE
M33 10 Amp Red Next Generation Controller (NGC),
Global Powertrain Engine Controller
(GPEC)
M34 10 Amp Red Park Assist (PRK ASST), Heater
Ventilation, Air Conditioning Module
(HVAC MOD), Headlamp Wash
(HDLP WASH), Compass (COMPAS)
M35 10 Amp Red Heated Mirrors
M36 20 Amp Yellow Power Outlet
M37 10 Amp Red Anti-Lock Brake System (ABS),
Electronic Stability Program (ESP),
Stop Lamp Switch (STP LP SW),
Fuel Pump Rly Hi Control
M38 25 Amp Natural Lock/Unlock Motors (LOCK/
UNLOCK MTRS)
TIRE PRESSURES
• Check the inflation pressure of each tire, including the spare tire, at least monthly and
inflate to the recommended pressure for your vehicle.
• The tire pressures recommended for your vehicle are found on the “Tire and Loading Information” label located on the driver’s side door opening.
NOTE: Refer to the Owner's Manual on the DVD for more information on the life of tires.
WARNING!
Overloading of your tires is dangerous. Overloading can cause tire failure, affect
vehicle handling, and increase your stopping distance. Use tires of the
recommended load capacity for your vehicle. Never overload them.
WARNING!
Improperly inflated tires are dangerous and can cause accidents. Under-inflation is
the leading cause of tire failure and may result in severe cracking, component
separation, or “blow out”. Over-inflation reduces a tire’s ability to cushion shock.
Objects on the road and chuck holes can cause damage that results in tire failure.
Unequal tire pressures can cause steering problems. You could lose control of your
vehicle. Over-inflated or under-inflated tires can affect vehicle handling and can fail
suddenly, resulting in loss of vehicle control.
61
MAINTAINING YOUR VEHICLE
Page 65 of 72
CHRYSLER GROUP LLC
CUSTOMER CENTER
P.O. Box 21–8004
Auburn Hills, MI 48321–8004
Phone: 1–800–992–1997
CHRYSLER CANADA INC.
CUSTOMER CENTER
P.O. Box 1621
Windsor, Ontario N9A 4H6
Phone: 1–800–465–2001
ASSISTANCE FOR THE
HEARING IMPAIRED
• To assist customers who have hearingdifficulties, the manufacturer has
installed special TDD
(Telecommunication Devices for the
Deaf) equipment at its customer center.
Any hearing or speech impaired
customer, who has access to a TDD or
a conventional teletypewriter (TTY) in
the United States, can communicate
with the manufacturer by dialing
1–800–380–CHRY. Canadian residents
with hearing difficulties that require
assistance can use the special needs
relay service offered by Bell Canada.
For TTY teletypewriter users, dial 711
and for Voice callers, dial
1–800–855–0511 to connect with a Bell
Relay Service operator.
WARNING!
Engine exhaust, some of its
constituents, and certain vehicle
components contain, or emit,
chemicals known to the State of
California to cause cancer and birth
defects, or other reproductive harm.
In addition, certain fluids contained
in vehicles and certain products of
component wear contain, or emit,
chemicals known to the State of
California to cause cancer and birth
defects, or other reproductive harm.
PUBLICATIONS
ORDERING
• If you are the first registered retailowner of your vehicle, you may obtain a
free printed copy of the Owner's
Manual, Warranty Booklet or Radio
Manuals on your DVD by calling
1–800–992–1997 (U.S.) or
1–800–387–1143 (Canada) or by
contacting your dealer.
• Replacement User Guides or DVDs or, if you prefer, a printed copy of the
Owner's Manual, Warranty Booklet or
Radio Manuals may be purchased by
visiting www.techauthority.com or by
calling 1–800–890–4038 (U.S.) or
1–800–387–1143 (Canada). Visa, Master
Card, American Express and Discover
orders are accepted. If you prefer
mailing your order, please call the
above numbers for an order form.
NOTE: A street address is required
when ordering manuals (no P.O. Boxes).
NOTE:
• The Owner's Manual and User Guide electronic files are also available on the
Chrysler, Jeep and Dodge websites.
• Click on the "For Owners" tab, select "Owner/Service Manuals", then select
your desired model year and vehicle
from the drop down lists.
63
CONSUMER ASSISTANCE
Page 67 of 72
Disclaimer:
• THE TIRE MANUFACTURER’S LIMITEDWARRANTY PROGRAM, THE DETAILS
OF WHICH CAN BE FOUND, ON THE
OWNERS MANUAL DVD, THE TIRE
MANUFACTURER’S WEBSITE OR AT
ANY AUTHORIZED SERVICE CENTER
ARE IN LIEU OF ALL OTHER REMEDIES
OR WARRANTIES, EXPRESS OR
IMPLIED, ARISING BY LAW OR
OTHERWISE, INCLUDING FITNESS FOR
A PARTICULAR PURPOSE OR
MERCHANTABILITY. THE TIRE
MANUFACTURER EXPRESSLY
DISCLAIMS LIABILITY FOR INDIRECT,
SPECIAL, INCIDENTAL OR
CONSEQUENTIAL DAMAGES, LOST
PROFIT, LOSS OF BUSINESS, LOSS OF
GOODWILL, LOSS OF REPUTATION,
PUNITIVE OR ANY OTHER DAMAGE,
COST OR LOSS OF ANY KIND. SOME
STATES AND PROVINCES DO NOT
ALLOW THE EXCLUSION OR
LIMITATION OF INCIDENTAL OR
CONSEQUENTIAL DAMAGES, SO THE
ABOVE LIMITATION OR EXCLUSION
MAY NOT APPLY TO YOU.
WARNING!
NOTE: Refer to the Owner’s Manual
on the DVD for complete warning
information that could prevent
accidents, injuries and even deaths.
WARNING!
Death, serious injury and/or property
damage may result from:
• Tire failure due to impact damage and/or improper maintenance.
(Continued)
WARNING!(Continued)
• Tires should be inspectedregularly by a qualified technician
for signs of damage, such as
punctures, impacts,
under-inflation or overloading.
• Progressive air loss may result from punctures, cuts, curbing,
impacts or partial bead unseating.
Some fitment causes for air loss are:
• Incomplete bead seating.
• Bead tearing caused by a machine tool due to insufficient lubrication
or improper adjustment.
• Leaking valve core or rubber valve components (these should be
replaced when problems are
detected and whenever tires are
replaced).
• Tire failure due to improper repairs.
• See Rubber Manufacturer’s Association (RMA) established
repair procedures at www.rma.org
for information on proper repair
procedures. Never perform a
temporary repair or use an inner
tube as a substitute for a proper
repair. Only qualified persons
should repair tires.
• Explosion of tire/rim assembly due to improper mounting.
• Only specially trained persons should mount tires.
• Failure to mount tires on approved rims.
• Failure to deflate single or dual assemblies completely before
demounting.
65
CONSUMER ASSISTANCE
Page 68 of 72
Using Lift Kits
• Use of lift kits with some vehicle/tirecombinations can cause instability or
loss of control. When changing tire
sizes, always consult an installer for
optimum rim width and carefully check
vehicle/tire clearances.
Check Your Tires For Damage
• Frequent (at least monthly) inspectionof your tires for signs of damage,
uneven tread wear and their general
condition is important for safety.
Impacts, penetrations, cracks, knots,
bulges or air loss always require tire
removal and expert inspection.
Tire Service Life
• The service life of a tire is dependentupon varying factors including, but not
limited to, your driving style, tire
pressure and distance driven.
WARNING!
Tires and the spare tire should be
replaced after six years, regardless
of the remaining tread. Failure to
follow this warning can result in
sudden tire failure. You could lose
control and have an accident
resulting in serious injury or death.
• Keep dismounted tires in a cool, dry place with as little exposure to the light
as possible.
• Protect tires from contact with oil, grease, and gasoline.
NOTE: All tire warranties are made by
the tire manufacturer. Tires are not
covered under your Chrysler New Vehicle
Limited Warranty.
CONSUMER ASSISTANCE
66
Page 72 of 72
10JK72-926-AAWrangler
Se\bond Printing User Guide
This guide has been prepared to help you get qui\fkly a\fquainted with your
new Jeep and to pro\bide a \fon\benient referen\fe sour\fe for \fommon
questions. Howe\ber, it is not a substitute for your Owner’s Manual.
For \fomplete operational instru\ftions, maintenan\fe pro\fedures and
important safety messages, please \fonsult your Owner’s Manual,
Na\bigation Radio User Manual, Multimedia User Manual and other Warning
Labels in your \behi\fle.
Not all features shown in this guide may apply to your \behi\fle. For
additional information on a\f\fessories to help personalize your \behi\fle,
\bisit www.mopar.\fom or your lo\fal Jeep dealer.