audio JEEP WRANGLER 2010 JK / 3.G User Guide
[x] Cancel search | Manufacturer: JEEP, Model Year: 2010, Model line: WRANGLER, Model: JEEP WRANGLER 2010 JK / 3.GPages: 72, PDF Size: 16.2 MB
Page 31 of 72
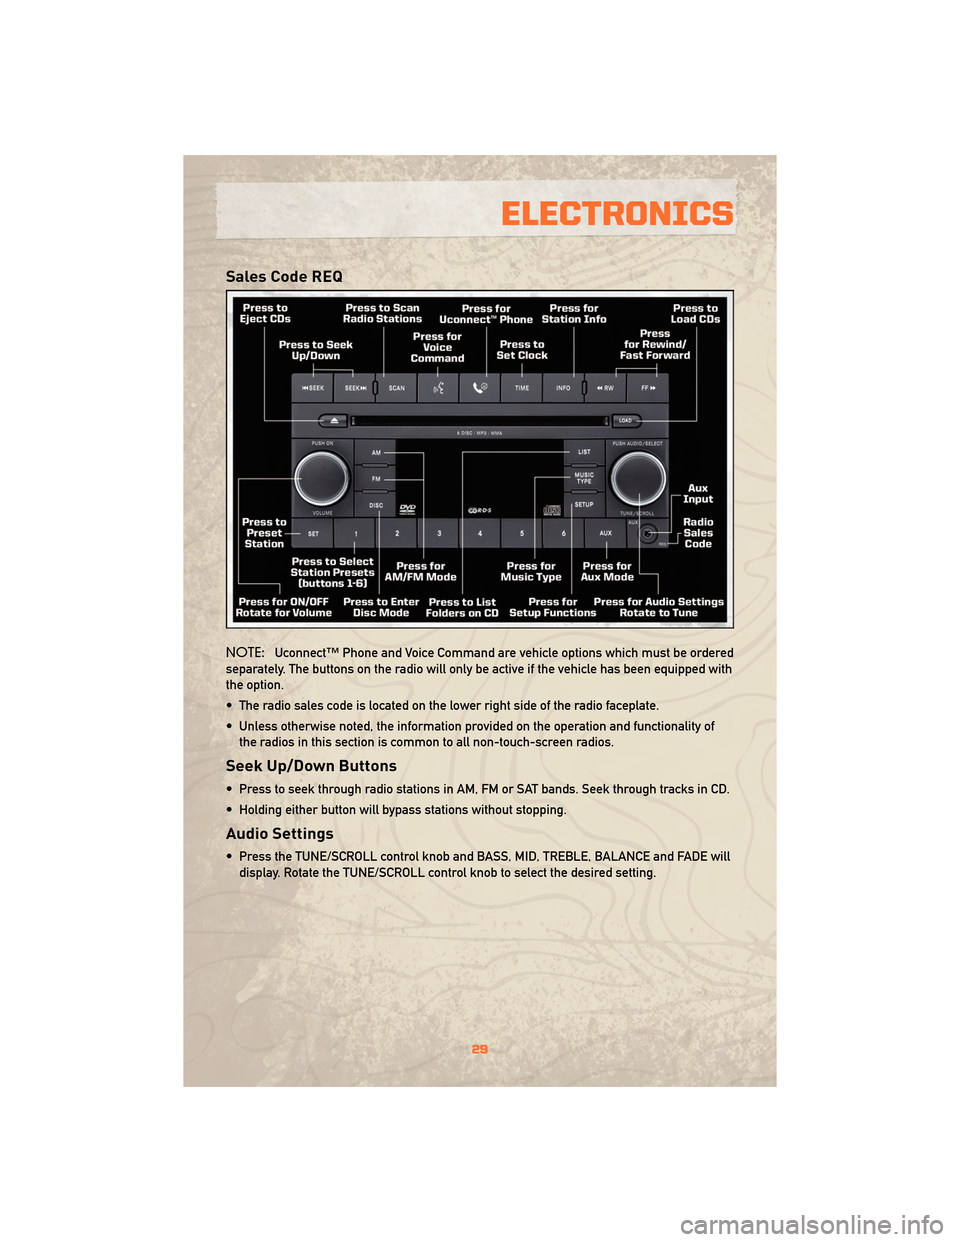
Sales Code REQ
NOTE:Uconnect™ Phone and Voice Command are vehicle options which must be ordered
separately. The buttons on the radio will only be active if the vehicle has been equipped with
the option.
• The radio sales code is located on the lower right side of the radio faceplate.
• Unless otherwise noted, the information provided on the operation and functionality of the radios in this section is common to all non-touch-screen radios.
Seek Up/Down Buttons
• Press to seek through radio stations in AM, FM or SAT bands. Seek through tracks in CD.
• Holding either button will bypass stations without stopping.
Audio Settings
• Press the TUNE/SCROLL control knob and BASS, MID, TREBLE, BALANCE and FADE willdisplay. Rotate the TUNE/SCROLL control knob to select the desired setting.
29
ELECTRONICS
Page 32 of 72
Auxiliary Mode
• The auxiliary (AUX) jack allows a portable device, such as an MP3 player or a cassetteplayer, to be plugged into the radio and utilize the vehicle’s audio system to amplify the
source and play through the vehicle speakers.
• Pressing the AUX button will change the mode to auxiliary device if the AUX jack is connected.
• The control of the external device cannot be provided by the radio; use the device controls instead.
Clock Setting
• Press and hold the TIME button until the hours blink; turn the TUNE/SCROLL controlknob to set the hours.
• Press the TUNE/SCROLL control knob until the minutes begin to blink; turn the TUNE/SCROLL control knob to set the minutes.
• Press the TUNE/SCROLL control knob to save the time change.
• To exit, press any button/knob or wait five seconds.
Station Presets
• Press the SET/RND button once and SET 1 will show in the display. Then select the button (1–6).
• A second station may be added to each push button. Press the SET/RND button twice and SET 2 will show in the display, then select button (1–6).
How To Load Multiple CDs/DVDs
REQ Radio Only
• Press the LOAD button and then press the button with the corresponding number (1–6)where the CD is being loaded. The radio will display PLEASE WAIT and prompt when to
INSERT DISC.
• After the radio displays INSERT DISC, insert the CD into the player. The radio display will show LOADING DISC when the disc is loading and “READING DISC” when the radio is
reading the disc.
• Press the eject button and then the corresponding number (1–6) to eject the desired disc.
ELECTRONICS
30
Page 33 of 72
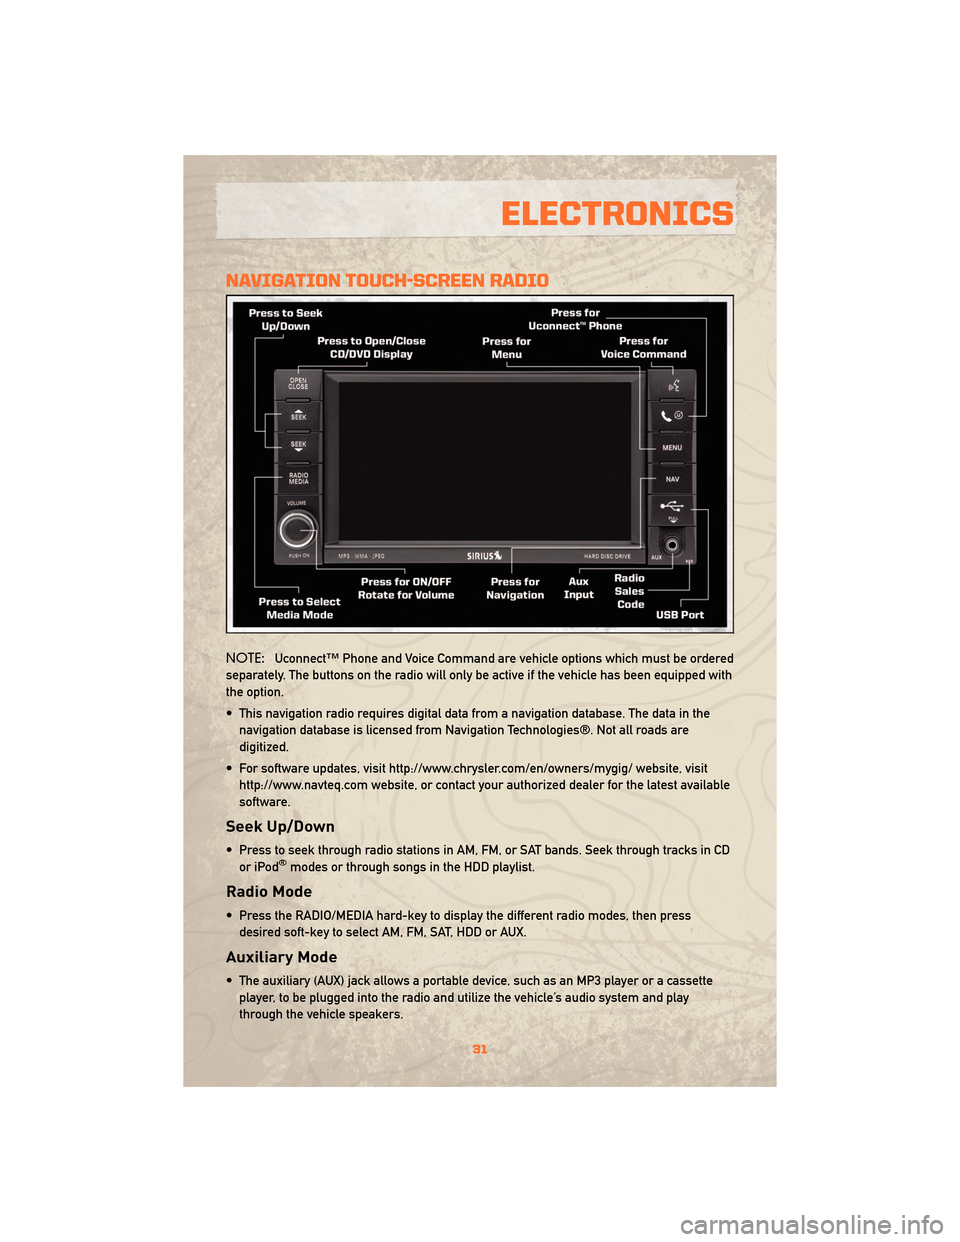
NAVIGATION TOUCH-SCREEN RADIO
NOTE:Uconnect™ Phone and Voice Command are vehicle options which must be ordered
separately. The buttons on the radio will only be active if the vehicle has been equipped with
the option.
• This navigation radio requires digital data from a navigation database. The data in the navigation database is licensed from Navigation Technologies®. Not all roads are
digitized.
• For software updates, visit http://www.chrysler.com/en/owners/mygig/ website, visit http://www.navteq.com website, or contact your authorized dealer for the latest available
software.
Seek Up/Down
• Press to seek through radio stations in AM, FM, or SAT bands. Seek through tracks in CDor iPod®modes or through songs in the HDD playlist.
Radio Mode
• Press the RADIO/MEDIA hard-key to display the different radio modes, then pressdesired soft-key to select AM, FM, SAT, HDD or AUX.
Auxiliary Mode
• The auxiliary (AUX) jack allows a portable device, such as an MP3 player or a cassetteplayer, to be plugged into the radio and utilize the vehicle’s audio system and play
through the vehicle speakers.
31
ELECTRONICS
Page 34 of 72
Clock Setting
Manually Adjust Time
• Turn the radio on, then touch the screen where the time is displayed.
• Touch the USER CLOCK soft-key.
• To adjust the hours, touch either the HOUR FORWARD or HOUR BACKWARD soft-key.
• To adjust the minutes, touch either the MINUTE FORWARD or MINUTE BACKWARDsoft-key.
• To save the new time setting, touch the screen where the word “Save” is displayed.
Store Radio Presets
• Press the RADIO/MEDIA hard-key repeatedly until AM FM SAT is displayed in the upper left corner of the screen.
• Select the radio band by touching either the AM, FM, or SAT soft-key.
• Find the station to store by either pressing the SEEK UP/DOWN hard-key, or touch the SCAN soft-key, DIRECT TUNE soft-key or the left and right arrows.
• Once the station is found, touch and hold one of the PRESET soft-keys in the list to the right until you hear a confirmation beep.
Hard Disc Drive Operation
Copy Complete Audio Disc To Hard-Drive
• Press the OPEN/CLOSE hard-key and insert a disc, then press the MENU hard-key.
• Touch the MY FILES soft-key then select MY MUSIC.
• Touch the IMPORT MUSIC FILES soft-key then touch the FROM DISC soft-key.
Copying From USB
• Insert a USB device then select MY MUSIC.
• Touch the IMPORT MUSIC FILES soft-key, then touch the FROM USB soft-key in the nextscreen.
• Select the folders or titles you would like to copy, then touch the DONE soft-key to start the copy process.
Copy Pictures To The Hard-Drive
• Insert either a CD or a USB device containing your pictures.
• Touch the MY PICTURES soft-key to get an overview of the currently stored images.
• Press one of the ADD PICTURES soft-keys, then select the type of media inserted.
• Use the PAGE soft-keys to page through a list of pictures and press the picture you wouldlike to import.
• Confirm your selection by touching the YES soft-key. The imported picture is now available in the MANAGE MY PICTURES screen.
• In order to display the imported picture in the radio screen, touch the desired picture soft-key.
• Select this picture by pressing the PICTURE VIEW soft-key. A check mark indicates the currently used picture.
ELECTRONICS
32
Page 37 of 72
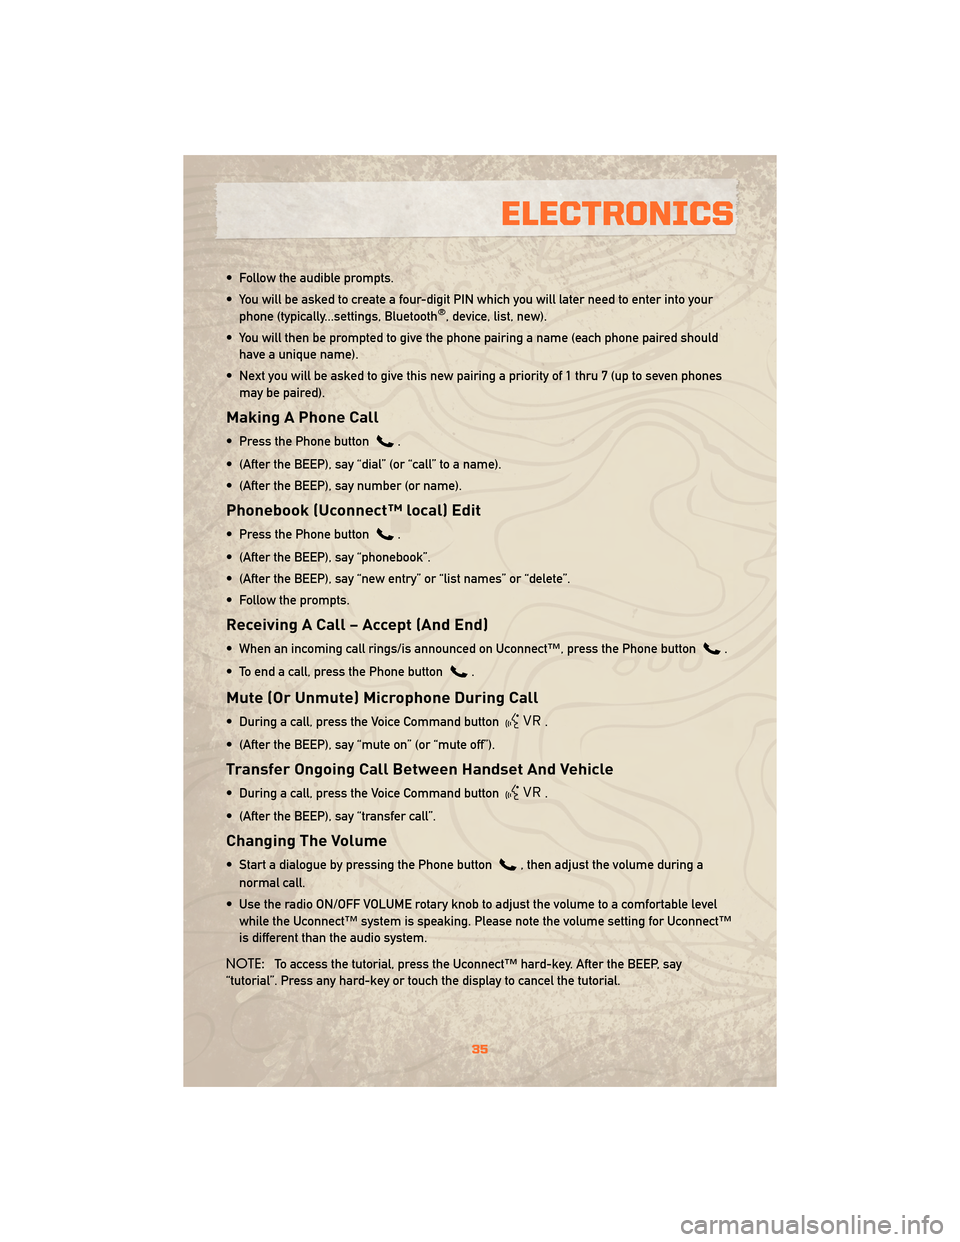
• Follow the audible prompts.
• You will be asked to create a four-digit PIN which you will later need to enter into yourphone (typically...settings, Bluetooth
®, device, list, new).
• You will then be prompted to give the phone pairing a name (each phone paired should have a unique name).
• Next you will be asked to give this new pairing a priority of 1 thru 7 (up to seven phones may be paired).
Making A Phone Call
• Press the Phone button.
• (After the BEEP), say “dial” (or “call” to a name).
• (After the BEEP), say number (or name).
Phonebook (Uconnect™ local) Edit
• Press the Phone button.
• (After the BEEP), say “phonebook”.
• (After the BEEP), say “new entry” or “list names” or “delete”.
• Follow the prompts.
Receiving A Call – Accept (And End)
• When an incoming call rings/is announced on Uconnect™, press the Phone button.
• To end a call, press the Phone button
.
Mute (Or Unmute) Microphone During Call
• During a call, press the Voice Command button.
• (After the BEEP), say “mute on” (or “mute off”).
Transfer Ongoing Call Between Handset And Vehicle
• During a call, press the Voice Command button.
• (After the BEEP), say “transfer call”.
Changing The Volume
• Start a dialogue by pressing the Phone button, then adjust the volume during a
normal call.
• Use the radio ON/OFF VOLUME rotary knob to adjust the volume to a comfortable level while the Uconnect™ system is speaking. Please note the volume setting for Uconnect™
is different than the audio system.
NOTE: To access the tutorial, press the Uconnect™ hard-key. After the BEEP, say
“tutorial”. Press any hard-key or touch the display to cancel the tutorial.
35
ELECTRONICS
Page 38 of 72
VOICE COMMAND
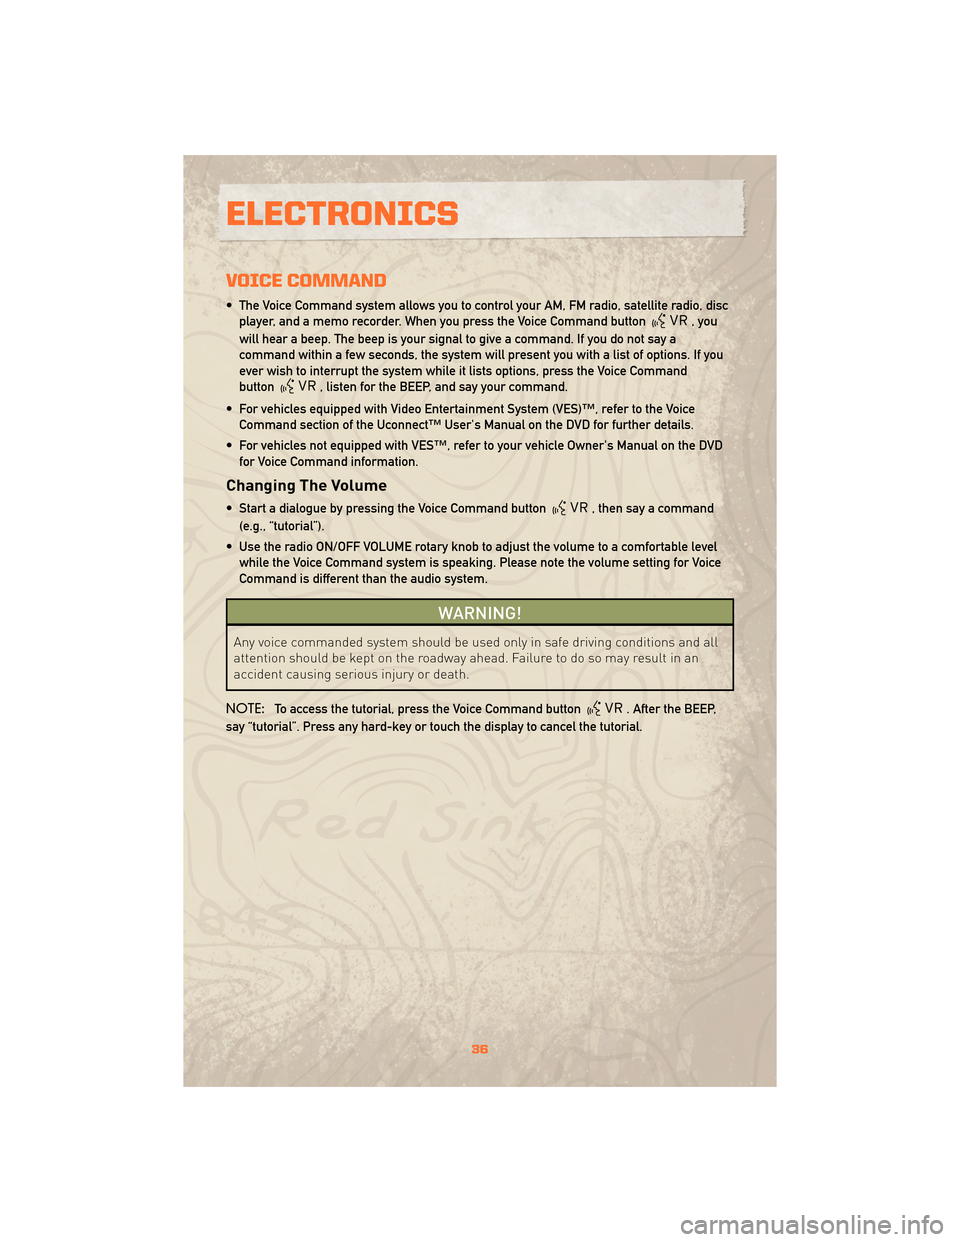
• The Voice Command system allows you to control your AM, FM radio, satellite radio, discplayer, and a memo recorder. When you press the Voice Command button
,you
will hear a beep. The beep is your signal to give a command. If you do not say a
command within a few seconds, the system will present you with a list of options. If you
ever wish to interrupt the system while it lists options, press the Voice Command
button
, listen for the BEEP, and say your command.
• For vehicles equipped with Video Entertainment System (VES)™, refer to the Voice Command section of the Uconnect™ User's Manual on the DVD for further details.
• For vehicles not equipped with VES™, refer to your vehicle Owner's Manual on the DVD for Voice Command information.
Changing The Volume
• Start a dialogue by pressing the Voice Command button, then say a command
(e.g., “tutorial”).
• Use the radio ON/OFF VOLUME rotary knob to adjust the volume to a comfortable level while the Voice Command system is speaking. Please note the volume setting for Voice
Command is different than the audio system.
WARNING!
Any voice commanded system should be used only in safe driving conditions and all
attention should be kept on the roadway ahead. Failure to do so may result in an
accident causing serious injury or death.
NOTE: To access the tutorial, press the Voice Command button
. After the BEEP,
say “tutorial”. Press any hard-key or touch the display to cancel the tutorial.
ELECTRONICS
36
Page 61 of 72
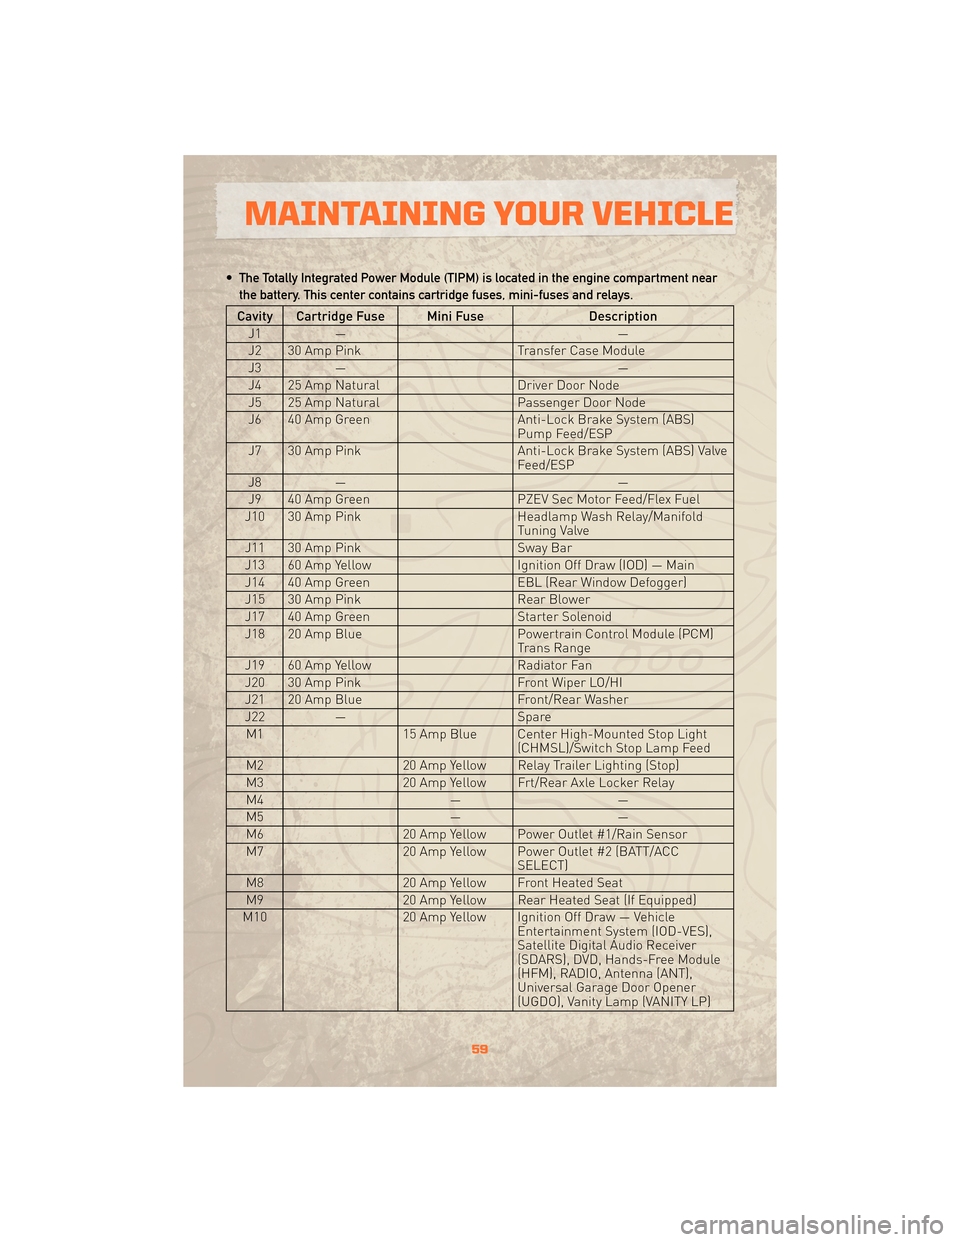
• The Totally Integrated Power Module (TIPM) is located in the engine compartment nearthe battery. This center contains cartridge fuses, mini-fuses and relays.
Cavity Cartridge Fuse Mini Fuse Description
J1 — —
J2 30 Amp Pink Transfer Case Module
J3 — —
J4 25 Amp Natural Driver Door Node
J5 25 Amp Natural Passenger Door Node
J6 40 Amp Green Anti-Lock Brake System (ABS)
Pump Feed/ESP
J7 30 Amp Pink Anti-Lock Brake System (ABS) Valve
Feed/ESP
J8 — —
J9 40 Amp Green PZEV Sec Motor Feed/Flex Fuel
J10 30 Amp Pink Headlamp Wash Relay/Manifold
Tuning Valve
J11 30 Amp Pink Sway Bar
J13 60 Amp Yellow Ignition Off Draw (IOD) — Main
J14 40 Amp Green EBL (Rear Window Defogger)
J15 30 Amp Pink Rear Blower
J17 40 Amp Green Starter Solenoid
J18 20 Amp Blue Powertrain Control Module (PCM)
Trans Range
J19 60 Amp Yellow Radiator Fan
J20 30 Amp Pink Front Wiper LO/HI
J21 20 Amp Blue Front/Rear Washer
J22 — Spare
M1 15 Amp Blue Center High-Mounted Stop Light
(CHMSL)/Switch Stop Lamp Feed
M2 20 Amp Yellow Relay Trailer Lighting (Stop)
M3 20 Amp Yellow Frt/Rear Axle Locker Relay
M4 ——
M5 ——
M6 20 Amp Yellow Power Outlet #1/Rain Sensor
M7 20 Amp Yellow Power Outlet #2 (BATT/ACC
SELECT)
M8 20 Amp Yellow Front Heated Seat
M9 20 Amp Yellow Rear Heated Seat (If Equipped)
M10 20 Amp Yellow Ignition Off Draw — Vehicle
Entertainment System (IOD-VES),
Satellite Digital Audio Receiver
(SDARS), DVD, Hands-Free Module
(HFM), RADIO, Antenna (ANT),
Universal Garage Door Opener
(UGDO), Vanity Lamp (VANITY LP)
59
MAINTAINING YOUR VEHICLE