wheel JEEP WRANGLER 2010 JK / 3.G User Guide
[x] Cancel search | Manufacturer: JEEP, Model Year: 2010, Model line: WRANGLER, Model: JEEP WRANGLER 2010 JK / 3.GPages: 72, PDF Size: 16.2 MB
Page 3 of 72
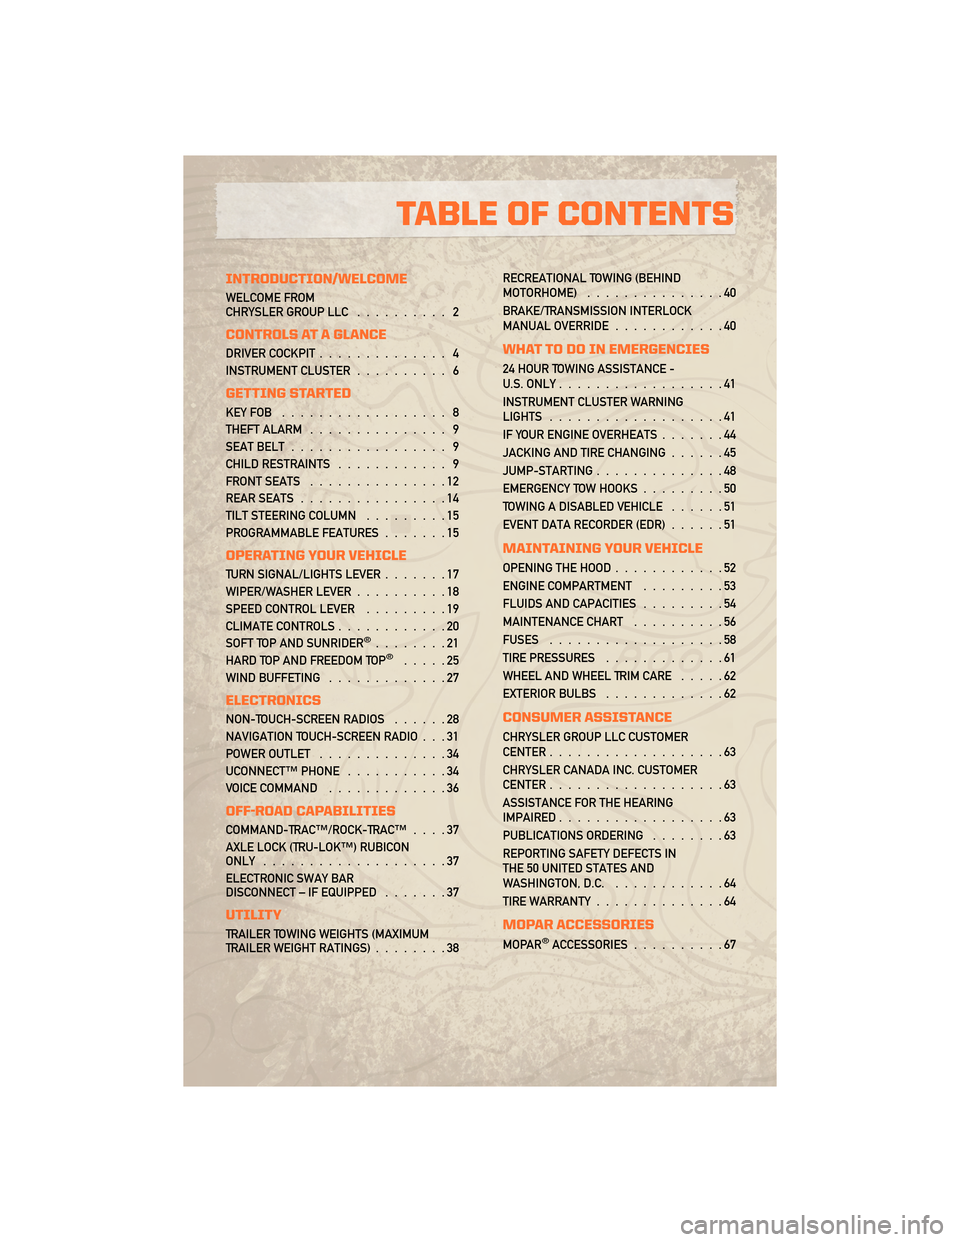
INTRODUCTION/WELCOME
WELCOME FROM
CHRYSLER GROUP LLC.......... 2
CONTROLS AT A GLANCE
DRIVER COCKPIT.............. 4
INSTRUMENT CLUSTER .......... 6
GETTING STARTED
KEYFOB .................. 8
THEFT ALARM............... 9
SEAT BELT ................. 9
CHILD RESTRAINTS ............ 9
FRONT SEATS ...............12
REAR SEATS ................14
TILT STEERING COLUMN .........15
PROGRAMMABLE FEATURES .......15
OPERATING YOUR VEHICLE
TURN SIGNAL/LIGHTS LEVER .......17
WIPER/WASHER LEVER ..........18
SPEED CONTROL LEVER .........19
CLIMATE CONTROLS ............20
SOFT TOP AND SUNRIDER
®........21
HARD TOP AND FREEDOM TOP®.....25
WIND BUFFETING .............27
ELECTRONICS
NON-TOUCH-SCREEN RADIOS ......28
NAVIGATION TOUCH-SCREEN RADIO . . . 31
POWER OUTLET ..............34
UCONNECT™ PHONE ...........34
VOICE COMMAND .............36
OFF-ROAD CAPABILITIES
COMMAND-TRAC™/ROCK-TRAC™ ....37
AXLE LOCK (TRU-LOK™) RUBICON
ONLY ....................37
ELECTRONIC SWAY BAR
DISCONNECT – IF EQUIPPED .......37
UTILITY
TRAILER TOWING WEIGHTS (MAXIMUM
TRAILER WEIGHT RATINGS)........38RECREATIONAL TOWING (BEHIND
MOTORHOME)
...............40
BRAKE/TRANSMISSION INTERLOCK
MANUAL OVERRIDE ............40
WHAT TO DO IN EMERGENCIES
24 HOUR TOWING ASSISTANCE -
U.S. ONLY..................41
INSTRUMENT CLUSTER WARNING
LIGHTS ...................41
IF YOUR ENGINE OVERHEATS .......44
JACKING AND TIRE CHANGING ......45
JUMP-STARTING ..............48
EMERGENCY TOW HOOKS .........50
TOWING A DISABLED VEHICLE ......51
EVENT DATA RECORDER (EDR) ......51
MAINTAINING YOUR VEHICLE
OPENING THE HOOD............52
ENGINE COMPARTMENT .........53
FLUIDS AND CAPACITIES .........54
MAINTENANCE CHART ..........56
FUSES ...................58
TIRE PRESSURES .............61
WHEEL AND WHEEL TRIM CARE .....62
EXTERIOR BULBS .............62
CONSUMER ASSISTANCE
CHRYSLER GROUP LLC CUSTOMER
CENTER...................63
CHRYSLER CANADA INC. CUSTOMER
CENTER ...................63
ASSISTANCE FOR THE HEARING
IMPAIRED ..................63
PUBLICATIONS ORDERING ........63
REPORTING SAFETY DEFECTS IN
THE 50 UNITED STATES AND
WASHINGTON, D.C. ............64
TIRE WARRANTY ..............64
MOPAR ACCESSORIES
MOPAR®ACCESSORIES..........67
TABLE OF CONTENTS
Page 4 of 72
WELCOME FROM CHRYSLER GROUP LLC
Congratulations on selecting your new Chrysler Group LLC vehicle. Be assured that it
represents precision workmanship, distinctive styling, and high quality - all essentials that
are traditional to our vehicles.
IMPORTANT: This User Guide is intended to familiarize you with the important features of
your vehicle. The DVD enclosed contains your Owner’s Manual, Warranty Booklets, Tire
Warranty, and 24-Hour Towing Assistance (new vehicles purchased in the U.S.) or Roadside
Assistance (new vehicles purchased in Canada) in electronic format. We hope you find it
useful. Retail customers may obtain a printed copy of any of these booklets; call
1-800-890-4038 (U.S.) or 1-800-387-1143 (Canada) or ask your dealer.
For complete owner information, refer to the DVD in the owner’s kit provided at the time of
new vehicle purchase. For your convenience, the information contained on the DVD may
also be printed and saved for future reference.
Not all features shown in this guide may apply to your vehicle.
Chrysler Group LLC is committed to protecting our environment and natural resources. By
converting from paper to electronic delivery for the majority of the user information for your
vehicle, together we greatly reduce the demand for tree-based products and lessen the
stress on our environment.
This is a specialized utility vehicle designed for both on-road and off-road use. It can go
places and perform tasks for which conventional two-wheel drive enclosed vehicles were
not intended. It handles and maneuvers differently from many passenger cars both on-road
and off-road, so take time to become familiar with your vehicle.
Vehicles Sold In Canada
With respect to any Vehicles Sold in Canada, the name Chrysler Group LLC shall be deemed
to be deleted and the name Chrysler Canada Inc. used in substitution therefore.
Driving And Alcohol
Drunken driving is one of the most frequent causes of accidents.
Your driving ability can be seriously impaired with blood alcohol levels far below the legal
minimum. If you are drinking, don’t drive. Ride with a designated non-drinking driver, call a
cab, a friend, or use public transportation.
WARNING!
Driving after drinking can lead to an accident. Your perceptions are less sharp, your
reflexes are slower, and your judgment is impaired when you have been drinking.
Never drink and then drive.
INTRODUCTION/WELCOME
2
Page 17 of 72
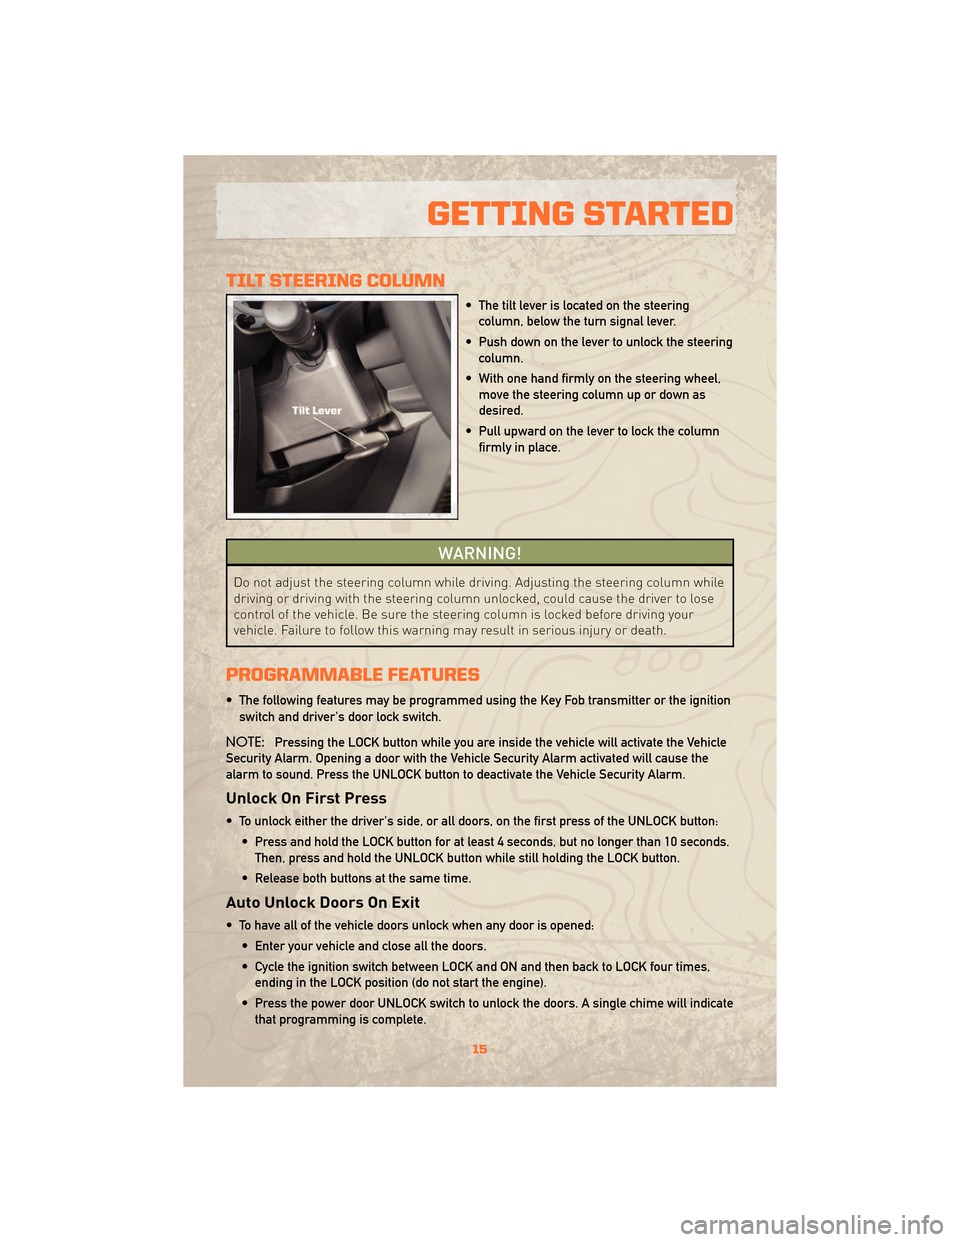
TILT STEERING COLUMN
• The tilt lever is located on the steeringcolumn, below the turn signal lever.
• Push down on the lever to unlock the steering column.
• With one hand firmly on the steering wheel, move the steering column up or down as
desired.
• Pull upward on the lever to lock the column firmly in place.
WARNING!
Do not adjust the steering column while driving. Adjusting the steering column while
driving or driving with the steering column unlocked, could cause the driver to lose
control of the vehicle. Be sure the steering column is locked before driving your
vehicle. Failure to follow this warning may result in serious injury or death.
PROGRAMMABLE FEATURES
• The following features may be programmed using the Key Fob transmitter or the ignition
switch and driver's door lock switch.
NOTE: Pressing the LOCK button while you are inside the vehicle will activate the Vehicle
Security Alarm. Opening a door with the Vehicle Security Alarm activated will cause the
alarm to sound. Press the UNLOCK button to deactivate the Vehicle Security Alarm.
Unlock On First Press
• To unlock either the driver's side, or all doors, on the first press of the UNLOCK button:
• Press and hold the LOCK button for at least 4 seconds, but no longer than 10 seconds.Then, press and hold the UNLOCK button while still holding the LOCK button.
• Release both buttons at the same time.
Auto Unlock Doors On Exit
• To have all of the vehicle doors unlock when any door is opened: • Enter your vehicle and close all the doors.
• Cycle the ignition switch between LOCK and ON and then back to LOCK four times,ending in the LOCK position (do not start the engine).
• Press the power door UNLOCK switch to unlock the doors. A single chime will indicate that programming is complete.
15
GETTING STARTED
Page 39 of 72
COMMAND-TRAC™/
ROCK-TRAC™
• The transfer case provides four modepositions: 2H (Two-wheel drive high
range), 4H (Four-wheel drive high
range), N (Neutral), and 4L (Four-wheel
drive low range).
• The transfer case is intended to be driven in the 2H position for normal
street and highway conditions such as
hard-surfaced roads.
• Shifting between 2H and 4H can be made with the vehicle stopped or in
motion. Shift the transfer case lever
firmly to 4H at any speed up to 50 mph
(80 km/h).
• Shifting between 4H and 4L can be made with the vehicle rolling at 2 to
3 mph (3 to 5 km/h), shift the automatic
transmission in NEUTRAL or fully
depress the clutch pedal on a manual
transmission. Shift the transfer case
lever firmly to 4L (do not pause with the
transfer case in NEUTRAL).
NOTE: To enhance off-road
performance in 4L mode, manual
transmission vehicles will start
regardless of whether or not the clutch
pedal is depressed.
AXLE LOCK (TRU-LOK™)
RUBICON ONLY
• The AXLE LOCK switch is located on the lower switch bank below the
climate controls.
• This feature will only activate when the following conditions are met:
• Key in ignition, vehicle in 4L (Low) range.
• Vehicle speed at 10 mph (16 km/h) or less. • Press the bottom of the AXLE LOCK
switch once to lock the rear axle only
and a second time to lock the front axle
(the rear and front axle lock indicator
lights will illuminate).
• To unlock the axles, press the top of the AXLE LOCK switch.
• The indicator light will flash until the axles are fully locked or unlocked.
ELECTRONIC SWAY BAR
DISCONNECT – IF
EQUIPPED
Off-Road
• Press the SWAY BAR switch, located onthe lower switch bank, once to
disconnect the Sway Bar.
• The Sway Bar indicator light will illuminate in the instrument cluster.
On-Road
• Press the SWAY BAR switch a secondtime to reconnect the Sway Bar.
• The Sway Bar should remain in on-road mode during normal driving
conditions.
37
OFF-ROAD CAPABILITIES
Page 42 of 72
RECREATIONAL TOWING
(BEHIND MOTORHOME)
Towing - Two-Wheel Drive
Models
• Recreational towing with all fourwheels on the ground is allowed ONLY
if the rear driveshaft is removed. See
your authorized dealer or refer to the
Service Manual. Towing with the rear
wheels on the ground while the
driveshaft is connected can result in
severe transmission damage.
WARNING!
If the driveshaft is removed, the
vehicle can roll even if the
transmission is in PARK, which could
cause serious injury or death.
• The parking brake must be firmly engaged and the wheels chocked
during driveshaft removal and
installation. The parking brake must
remain engaged unless the vehicle is
securely and properly connected to the
tow vehicle, or the driveshaft is
completely reinstalled. See your
authorized dealer for proper driveshaft
removal and reinstallation procedures,
including flange orientation/alignment,
use of thread-locking compound,
proper bolt torque specifications, etc.
Towing - Four-Wheel Drive
Models
• Turn off engine and depress brakepedal.
• Shift automatic transmission into NEUTRAL or depress clutch pedal on
manual transmission.
• Shift transfer case to N (Neutral).
• Start the engine, shift into drive or 1st gear and ensure there is no vehicle
movement. • Shut off the engine, place ignition into
ACC position and shift automatic
transmission into PARK, manual
transmission into NEUTRAL.
• Apply the parking brake, attach vehicle to tow vehicle and release the parking
brake.
• Disconnect negative battery cable.
• Refer to your Owner's Manual on the DVD for further details.
BRAKE/TRANSMISSION
INTERLOCK MANUAL
OVERRIDE
• Your vehicle may be equipped with ashift lock manual override.
• The manual override may be used in the event that the shift lever should fail
to move from PARK with the Key Fob in
the ON position and the brake pedal
pressed.
• To operate the shift lock manual override, perform the following steps:
• Turn the Key Fob to the ON position but do not start the engine.
• Firmly set the parking brake.
• Using a flat-bladed screwdriver, carefully remove the shift lock
manual override cover which is
located on the PRNDL bezel.
• Press and maintain firm pressure on the brake pedal.
• Using a screwdriver, reach into the manual override opening. Press and
hold the shift lock lever down.
• Move the shift lever into the NEUTRAL position and start the
vehicle.
• Reinstall the override cover.
• Have your vehicle inspected by your local authorized dealer if the shift lock
manual override has been used.
UTILITY
40
Page 47 of 72
WARNING!
You or others can be badly burned by hot engine coolant (antifreeze) or steam from
your radiator. If you see or hear steam coming from under the hood, do not open the
hood until the radiator has had time to cool. Never try to open a cooling system
pressure cap when the radiator or coolant bottle is hot.
JACKING AND TIRE CHANGING
WARNING!
• Do not attempt to change a tire on the side of the vehicle close to moving traffic.Pull far enough off the road to avoid the danger of being hit when operating the
jack or changing the wheel.
• Getting under a jacked-up vehicle is dangerous. The vehicle could slip off the jack and fall on you. You could be crushed. Never get any part of your body under a
vehicle that is on a jack. If you need to get under a raised vehicle, take it to a
service center where it can be raised on a lift.
• The jack is designed to use as a tool for changing tires only. The jack should not be used to lift the vehicle for service purposes. The vehicle should be jacked on a
firm, level surface only. Avoid ice or slippery areas.
Jack Location
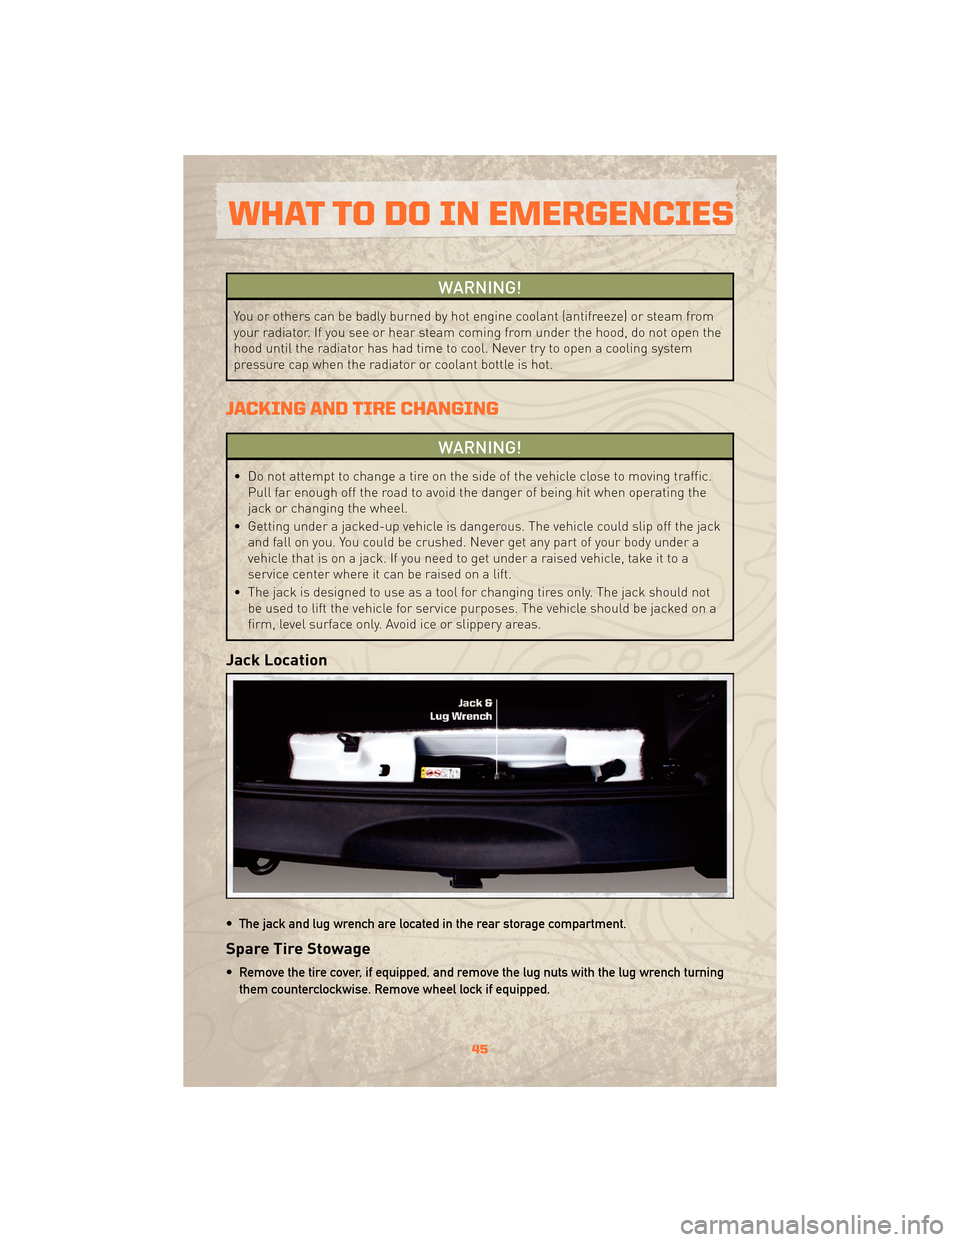
• The jack and lug wrench are located in the rear storage compartment.
Spare Tire Stowage
• Remove the tire cover, if equipped, and remove the lug nuts with the lug wrench turning
them counterclockwise. Remove wheel lock if equipped.
45
WHAT TO DO IN EMERGENCIES
Page 48 of 72
Preparations For Jacking
• Park on a firm, level surface. Avoid ice or slippery areas.
• Set the parking brake and shift the automatic transmission into PARK, or a manualtransmission into REVERSE.
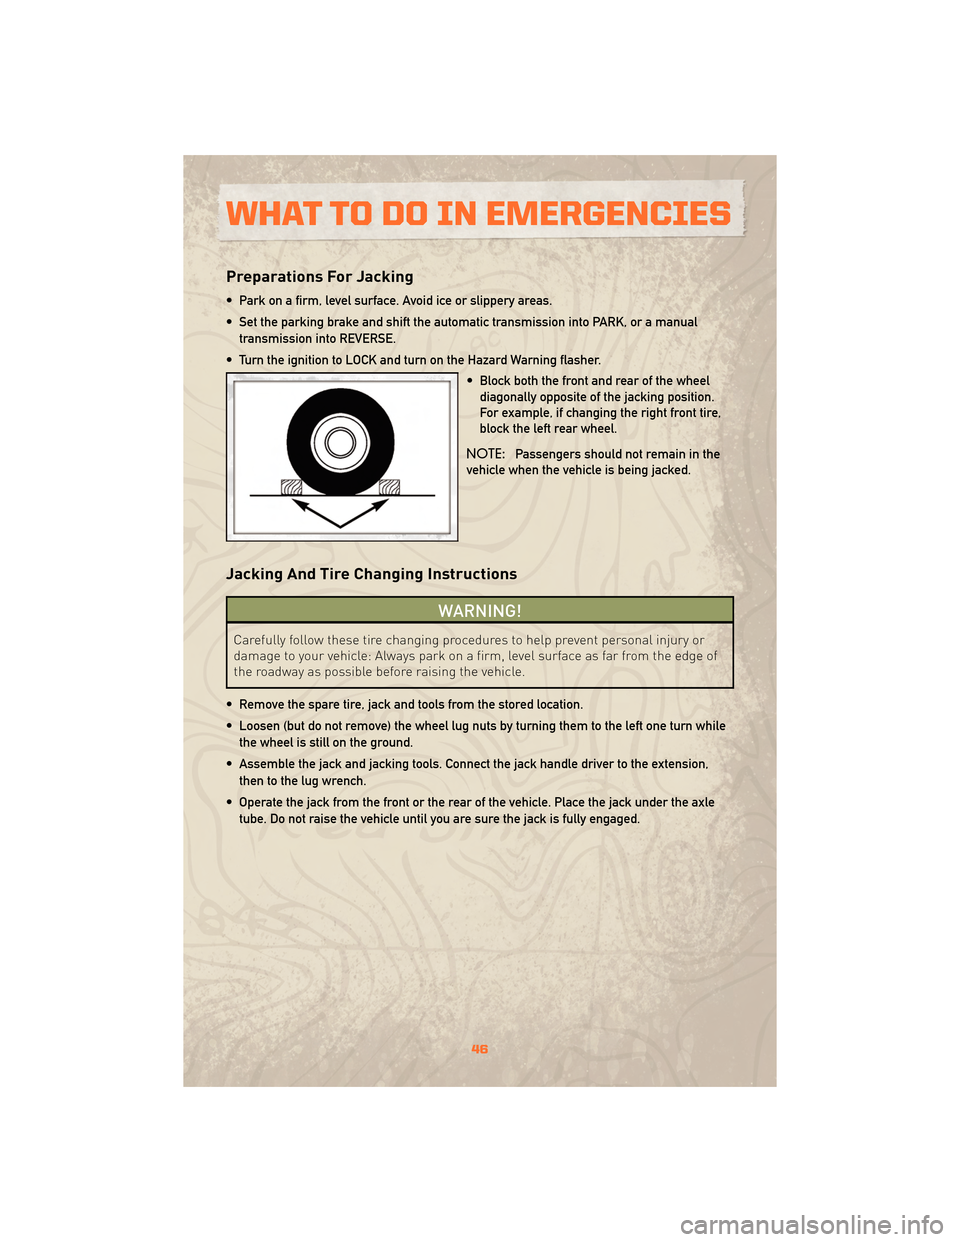
• Turn the ignition to LOCK and turn on the Hazard Warning flasher. • Block both the front and rear of the wheeldiagonally opposite of the jacking position.
For example, if changing the right front tire,
block the left rear wheel.
NOTE: Passengers should not remain in the
vehicle when the vehicle is being jacked.
Jacking And Tire Changing Instructions
WARNING!
Carefully follow these tire changing procedures to help prevent personal injury or
damage to your vehicle: Always park on a firm, level surface as far from the edge of
the roadway as possible before raising the vehicle.
• Remove the spare tire, jack and tools from the stored location.
• Loosen (but do not remove) the wheel lug nuts by turning them to the left one turn while the wheel is still on the ground.
• Assemble the jack and jacking tools. Connect the jack handle driver to the extension, then to the lug wrench.
• Operate the jack from the front or the rear of the vehicle. Place the jack under the axle tube. Do not raise the vehicle until you are sure the jack is fully engaged.
WHAT TO DO IN EMERGENCIES
46
Page 49 of 72
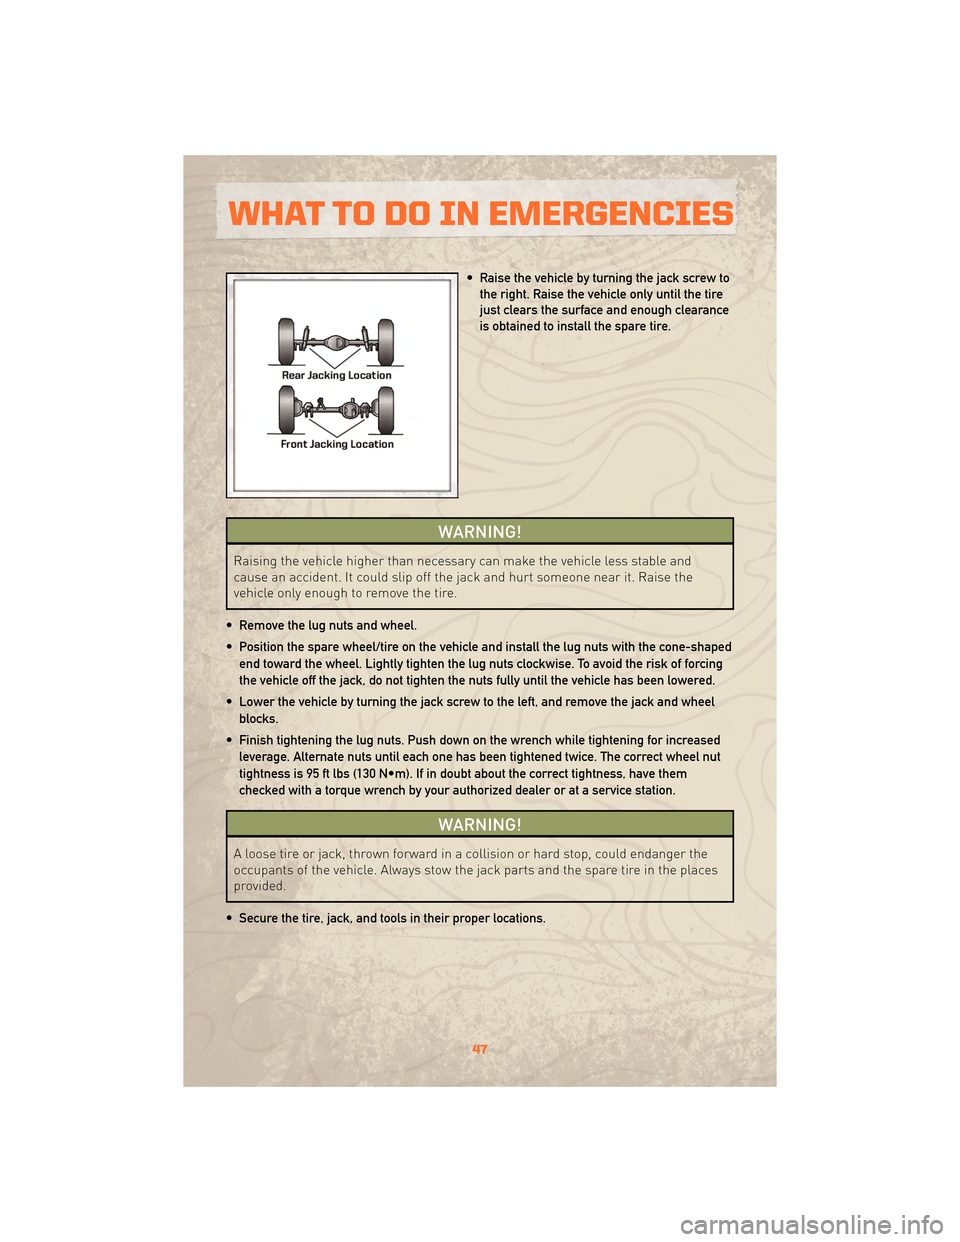
• Raise the vehicle by turning the jack screw tothe right. Raise the vehicle only until the tire
just clears the surface and enough clearance
is obtained to install the spare tire.
WARNING!
Raising the vehicle higher than necessary can make the vehicle less stable and
cause an accident. It could slip off the jack and hurt someone near it. Raise the
vehicle only enough to remove the tire.
• Remove the lug nuts and wheel.
• Position the spare wheel/tire on the vehicle and install the lug nuts with the cone-shaped end toward the wheel. Lightly tighten the lug nuts clockwise. To avoid the risk of forcing
the vehicle off the jack, do not tighten the nuts fully until the vehicle has been lowered.
• Lower the vehicle by turning the jack screw to the left, and remove the jack and wheel blocks.
• Finish tightening the lug nuts. Push down on the wrench while tightening for increased leverage. Alternate nuts until each one has been tightened twice. The correct wheel nut
tightness is 95 ft lbs (130 N•m). If in doubt about the correct tightness, have them
checked with a torque wrench by your authorized dealer or at a service station.
WARNING!
A loose tire or jack, thrown forward in a collision or hard stop, could endanger the
occupants of the vehicle. Always stow the jack parts and the spare tire in the places
provided.
• Secure the tire, jack, and tools in their proper locations.
47
WHAT TO DO IN EMERGENCIES
Page 53 of 72
CAUTION!
Tow hooks are for emergency use only, to rescue a vehicle stranded off road. Do not
use tow hooks for tow truck hookup or highway towing. You could damage your
vehicle. Tow straps are recommended when towing the vehicle; chains may cause
vehicle damage.
TOWING A DISABLED VEHICLE
• The manufacturer requires towing your vehicle with all four wheelsOFFthe ground
using a flatbed.
CAUTION!
Towing this vehicle using any other method could result in extensive damage to the
transfer case and/or transmission.
EVENT DATA RECORDER (EDR)
• This vehicle is equipped with an Event Data Recorder (EDR). The main purpose of an EDR is to record, in certain crash or near crash-like situations, such as an air bag deployment
or hitting a road obstacle, data that will assist in understanding how a vehicle's systems
performed. The EDR is designed to record data related to vehicle dynamics and safety
systems for a short period of time, typically 30 seconds or less. The EDR in this vehicle is
designed to record such data as:
• How various systems in your vehicle were operating;
• Whether or not the driver and passenger safety belts were buckled/fastened;
• How far (if at all) the driver was depressing the accelerator and/or brake pedal; and,
• How fast the vehicle was traveling.
• This data can help provide a better understanding of the circumstances in which a crash and injuries occur. NOTE: EDR data is recorded by your vehicle only if a non-trivial crash
situation occurs; no data is recorded by the EDR under normal driving conditions and no
personal data (e.g., name, gender, age, and crash location) is recorded. However, other
parties, such as law enforcement, could combine the EDR data with the type of
personally identifying data routinely acquired during a crash investigation.
• To read data recorded by an EDR, special equipment is required, and access to the vehicle or the EDR is needed. In addition to the vehicle manufacturer, other parties, such
as law enforcement, that have the special equipment, can read the information if they
have access to the vehicle or the EDR.
51
WHAT TO DO IN EMERGENCIES
Page 58 of 72
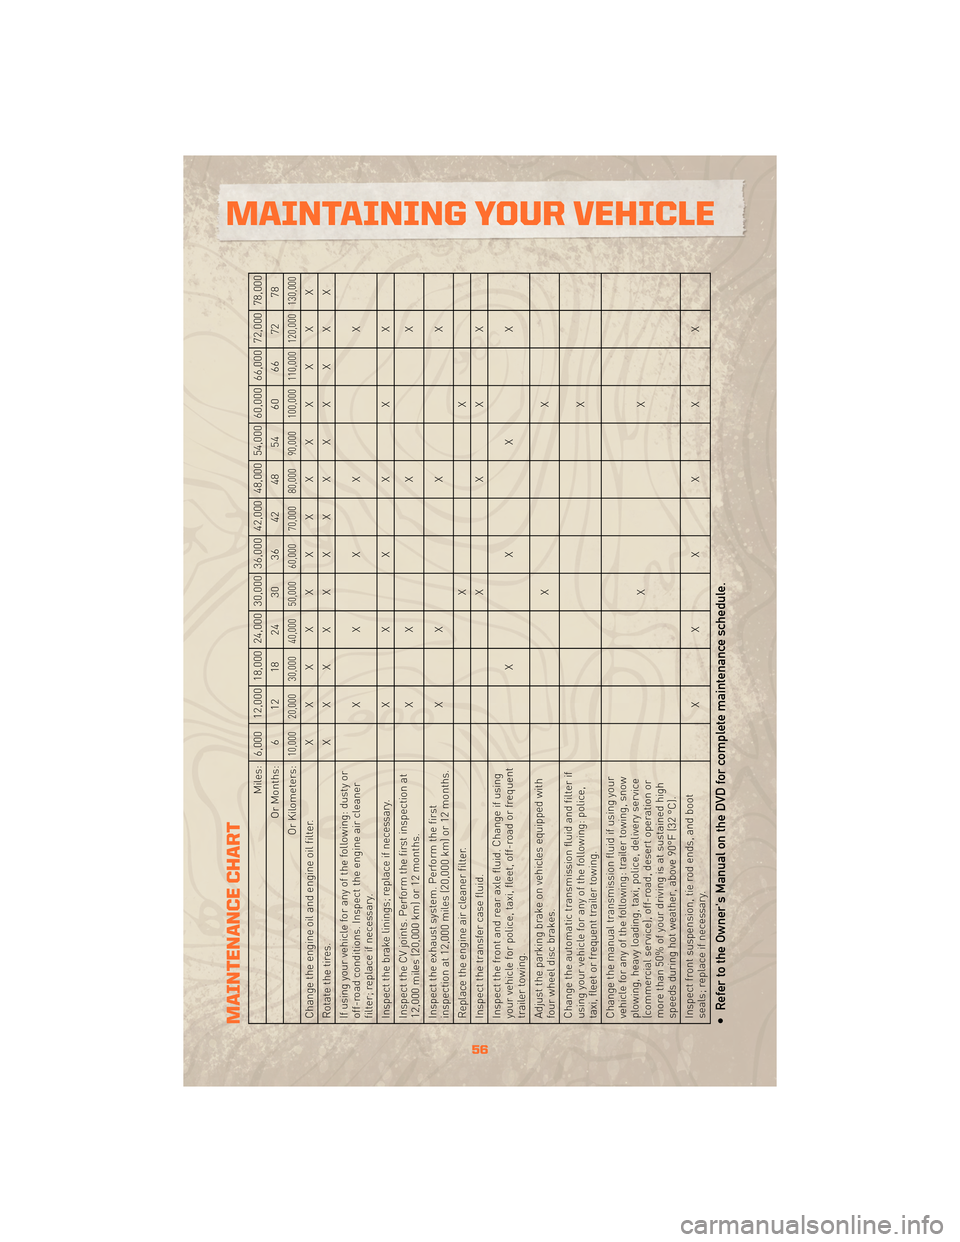
MAINTENANCE CHART
Miles: 6,000 12,000 18,000 24,000 30,000 36,000 42,000 48,000 54,000 60,000 66,000 72,000 78,000
Or Months: 6 12 18 24 30 36 42 48 54 60 66 72 78
Or Kilometers:
10,000 20,000 30,000 40,000 50,000 60,000 70,000 80,000 90,000 100,000 110,000 120,000 130,000
Change the engine oil and engine oil filter. XXXXXXXXXXXXX
Rotatethetires. XXXXXXXXXXXXX
If using your vehicle for any of the following: dusty or
off-road conditions. Inspect the engine air cleaner
filter; replace if necessary. XXXX
X
Inspect the brake linings; replace if necessary. XXXXXX
Inspect the CV joints. Perform the first inspection at
12,000 miles (20,000 km) or 12 months. X
XXX
Inspect the exhaust system. Perform the first
inspection at 12,000 miles (20,000 km) or 12 months. X
XXX
Replace the engine air cleaner filter. XX
Inspect the transfer case fluid. XXXX
Inspect the front and rear axle fluid. Change if using
your vehicle for police, taxi, fleet, off-road or frequent
trailer towing. XXXX
Adjust the parking brake on vehicles equipped with
four wheel disc brakes. XX
Change the automatic transmission fluid and filter if
using your vehicle for any of the following: police,
taxi, fleet or frequent trailer towing. X
Change the manual transmission fluid if using your
vehicle for any of the following: trailer towing, snow
plowing, heavy loading, taxi, police, delivery service
(commercial service), off-road, desert operation or
more than 50% of your driving is at sustained high
speeds during hot weather, above 90°F (32 °C). XX
Inspect front suspension, tie rod ends, and boot
seals; replace if necessary. XXXXXX• Refer to the Owner's Manual on the DVD for complete maintenance schedule.
56
MAINTAINING YOUR VEHICLE