JEEP WRANGLER 2010 Repair Manual
WRANGLER 2010
JEEP
JEEP
https://www.carmanualsonline.info/img/16/56059/w960_56059-0.png
JEEP WRANGLER 2010 Repair Manual
Trending: refrigerant type, fuel, mileage, oil, parking brake, differential, spare tire location
Page 61 of 554
Maintaining Your Airbag System
Page 62 of 554
Page 63 of 554
Children 12 years and under should ride properly buck-
led up in a rear seat, if available. According to crash
statistics, children are safer when properly restrained in
the rear seats, rather than in the front.
There are different sizes and types of restraints for
children from newborn size to the child almost large
enough for an adult safety belt. Always check the child
seat owner’s manual to ensure you have the correct seat
for your child. Use the restraint that is correct for your
child.
Page 64 of 554
Page 65 of 554
Here are some tips for getting the most out of your child
restraint:
•Before buying any restraint system, make sure that it
has a label certifying that it meets all applicable Safety
Standards. The manufacturer also recommends that
you try a child restraint in the vehicle seats where you
will use it before you buy it.
•The restraint must be appropriate for your child’s
weight and height. Check the label on the restraint for
weight and height limits.
•Carefully follow the instructions that come with the
restraint. If you install the restraint improperly, it may
not work when you need it.
•The seat belts in the passenger seating positions are
equipped with either an Automatic Locking Retractor
(ALR) or a cinching latch plate or both. Both types of
seat belts are designed to keep the lap portion of the
seat belt tight around the child restraint so that it is notnecessary to use a locking clip. The ALR will make a
ratcheting noise if you extract the entire belt from the
retractor and then allow the belt to retract into the
retractor. For additional information on ALR, refer to
“Automatic Locking Mode”.
•In the rear seat, you may have trouble tightening the
lap/shoulder belt on the child restraint because the
buckle or latch plate is too close to the belt path
opening on the restraint. Disconnect the latch plate
from the buckle and twist the short buckle-end belt
several times to shorten it. Insert the latch plate into
the buckle with the release button facing out.
•If the belt still cannot be tightened, or if pulling and
pushing on the restraint loosens the belt, disconnect
the latch plate from the buckle, turn the buckle
around, and insert the latch plate into the buckle
again. If you still cannot make the child restraint
secure, try a different seating position.
64 THINGS TO KNOW BEFORE STARTING YOUR VEHICLE
Page 66 of 554
Page 67 of 554
•Check belt fit periodically. A child’s squirming or
slouching can move the belt out of position.
•If the shoulder belt contacts the face or neck, move the
child closer to the center of the vehicle. Never allow a
child to put the shoulder belt under an arm or behind
the back.
NOTE: For additional information, refer to
www.seatcheck.org or call 1–866–SEATCHECK. Cana-
dian residents, should refer to Transport Canada’s web-
site for additional information. http://www.tc.gc.ca/
roadsafety/safedrivers/childsafety/index.htm
Installing the Child Restraint System
We urge you to carefully follow the directions of the
manufacturer when installing your child restraint. Many,
but not all, restraint systems will be equipped with
separate straps on each side, with each having a hook or
connector for attachment to the lower anchorage, and a means for adjusting the tension of the strap. Forward-
facing toddler restraints and some rearward-facing infant
restraints will also be equipped with a tether strap having
a hook for attachment to the tether strap anchorage, and
a means for adjusting the tension of the strap.
In general, you will first loosen the adjusters on the lower
and tether straps so that you can more easily attach the
hook or connector to the lower and tether anchorages.
The tether strap should be routed under the center of the
head restraint and attached to the tether anchor on the
rear of the seatback. Then tighten all three straps as you
push the child restraint rearward and downward into the
seat.
Not all child restraint systems will be installed as we
have described here. Again, carefully follow the instruc-
tions that come with the child restraint system.
66 THINGS TO KNOW BEFORE STARTING YOUR VEHICLE
Page 68 of 554
Page 69 of 554
NOTE:When using the LATCH attaching system to
install a child restraint, please ensure that all seat belts
not being used for occupant restraints are stowed and out
of reach of children. It is recommended that before
installing the child restraint, buckle the seat belt so the
seat belt is tucked behind the child restraint and out of
reach. If the buckled seat belt interferes with the child
restraint installation, instead of tucking the seat belt
behind the child restraint, route the seat belt through the
child restraint belt path and then buckle it. This should
stow the seat belt out of the reach of an inquisitive child.
Remind all children in the vehicle that the seat belts are
not toys and should not be played with, and never leave
an unattended child in the vehicle.
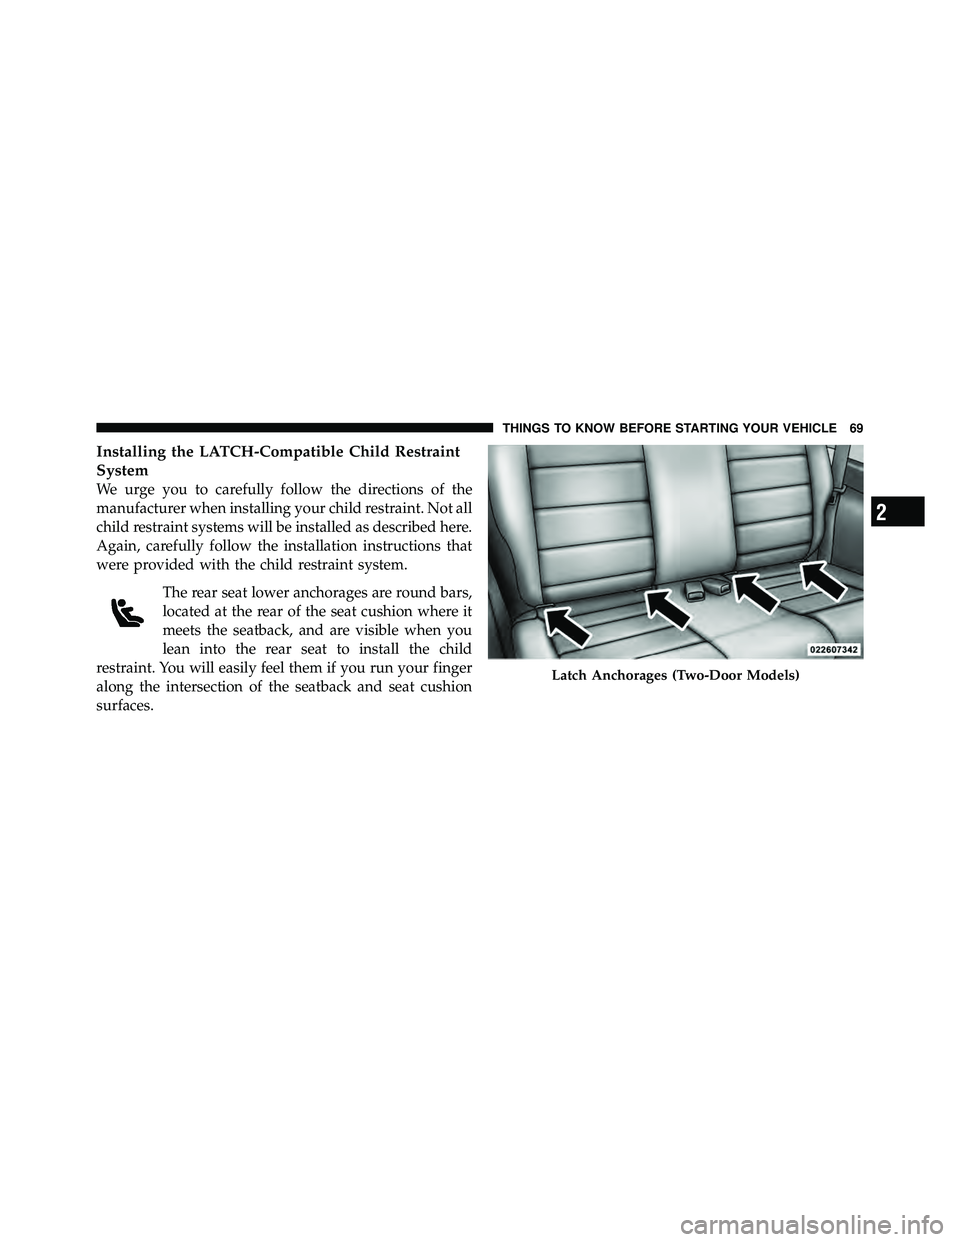
All three rear seating positions of the four door model
have lower anchorages that are capable of accommodat-
ing LATCH-compatible child seats having flexible,
webbing-mounted lower attachments. The two door
model can accommodate flexible LATCH-compatible child seats in the two outboard seating positions only.
The two door model does not have a center seating
position. Child seats with fixed lower attachments must
be installed in the outboard positions only in both the
two door and four door models. Regardless of the
specific type of lower attachment, NEVER install
LATCH-compatible child seats such that two seats share
a common lower anchorage.
If you are installing LATCH-compatible child restraints
in adjacent rear seating positions, you can use the
LATCH anchors or the vehicle’s seat belt for the outboard
position, but you must use the vehicle’s seat belt at the
center position. If your child restraints are not LATCH-
compatible, you can only install the child restraints using
the vehicle’s seat belts. Please refer to “Installing Child
Restraints Using the Vehicle Seat Belt” for typical instal-
lation instructions.
68 THINGS TO KNOW BEFORE STARTING YOUR VEHICLE
Page 70 of 554
Trending: tow, steering wheel, ABS, driver seat adjustment, oil pressure, reset, low oil pressure
