flat tire JEEP WRANGLER 2010 Owners Manual
[x] Cancel search | Manufacturer: JEEP, Model Year: 2010, Model line: WRANGLER, Model: JEEP WRANGLER 2010Pages: 554, PDF Size: 10.16 MB
Page 253 of 554
21. Odometer / Trip Odometer / ECO (Fuel Saver
Indicator) Button
Press this button to change the display from odometer to
either of the two trip odometer settings or the “ECO”
display. Trip A or Trip B will appear when in the trip
odometer mode. Press and hold the button for two
seconds to reset the trip odometer to 0 miles or kilome-
ters. The odometer must be in trip mode to reset.
22. Shift Lever Indicator
The Shift Lever Indicator is self-contained within the
instrument cluster. It displays the gear position of the
automatic transmission.
23. Tire Pressure Monitoring Telltale LightEach tire, including the spare (if provided),
should be checked monthly, when cold and
inflated to the inflation pressure recommended
by the vehicle manufacturer on the vehicle
placard or tire inflation pressure label. (If your vehicle has tires of a different size than the size indicated on the
vehicle placard or tire inflation pressure label, you should
determine the proper tire inflation pressure for those
tires.)
As an added safety feature, your vehicle has been
equipped with a Tire Pressure Monitoring System
(TPMS) that illuminates a low tire pressure telltale when
one or more of your tires is significantly under-inflated.
Accordingly, when the low tire pressure telltale illumi-
nates, you should stop and check your tires as soon as
possible, and inflate them to the proper pressure. Driving
on a significantly under-inflated tire causes the tire to
overheat and can lead to tire failure. Under-inflation also
reduces fuel efficiency and tire tread life, and may affect
the vehicle’s handling and stopping ability.
Please note that the TPMS is not a substitute for proper
tire maintenance, and it is the driver ’s responsibility to
Page 359 of 554
previous vehicles getting stuck. As a good practice before
entering any mud hole, get out and determine how deep
it is, if there are any hidden obstacles and if the vehicle
can be safely recovered if stuck.
Sand
Soft sand is very difficult to travel through with full tire
pressure. When crossing soft, sandy spots in a trail,
maintain your vehicle’s momentum and do not stop. The
key to driving in soft sand is using the appropriate tire
pressure, accelerating slowly, avoiding abrupt maneu-
vers and maintaining the vehicle’s momentum. If you are
going to be driving on large soft sandy areas or dunes,
reduce your tire pressure to a minimum of 15 psi
(103 kPa) to allow for a greater tire surface area. Reduced
tire pressure will drastically improve your traction and
handling while driving on the soft sand, but you must
return the tires to normal air pressure before driving on
pavement or other hard surfaces. Be sure you have a way
to reinflate the tires prior to reducing the pressure.
Page 391 of 554
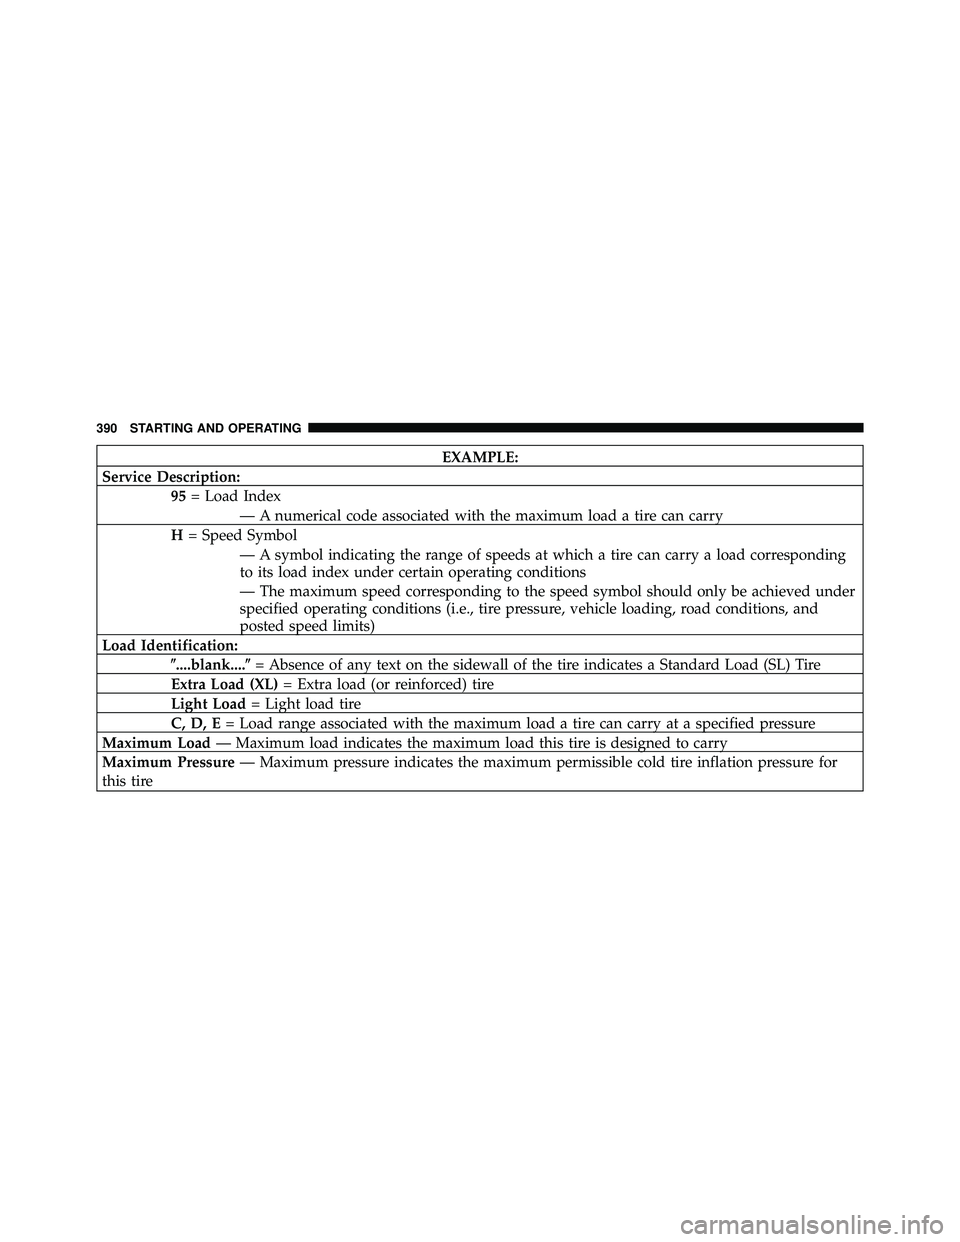
EXAMPLE:
Service Description: 95= Load Index
— A numerical code associated with the maximum load a tire can carry
H = Speed Symbol
— A symbol indicating the range of speeds at which a tire can carry a load corresponding
to its load index under certain operating conditions
— The maximum speed corresponding to the speed symbol should only be achieved under
specified operating conditions (i.e., tire pressure, vehicle loading, road conditions, and
posted speed limits)
Load Identification: \b....blank....\b = Absence of any text on the sidewall of the tire indicates a Standard Load (SL) Tire
Extra Load (XL) = Extra load (or reinforced) tire
Light Load = Light load tire
C, D, E = Load range associated with the maximum load a tire can carry at a specified pressure
Maximum Load — Maximum load indicates the maximum load this tire is designed to carry
Maximum Pressure — Maximum pressure indicates the maximum permissible cold tire inflation pressure for
this tire
390 STARTING AND OPERATING
Page 395 of 554
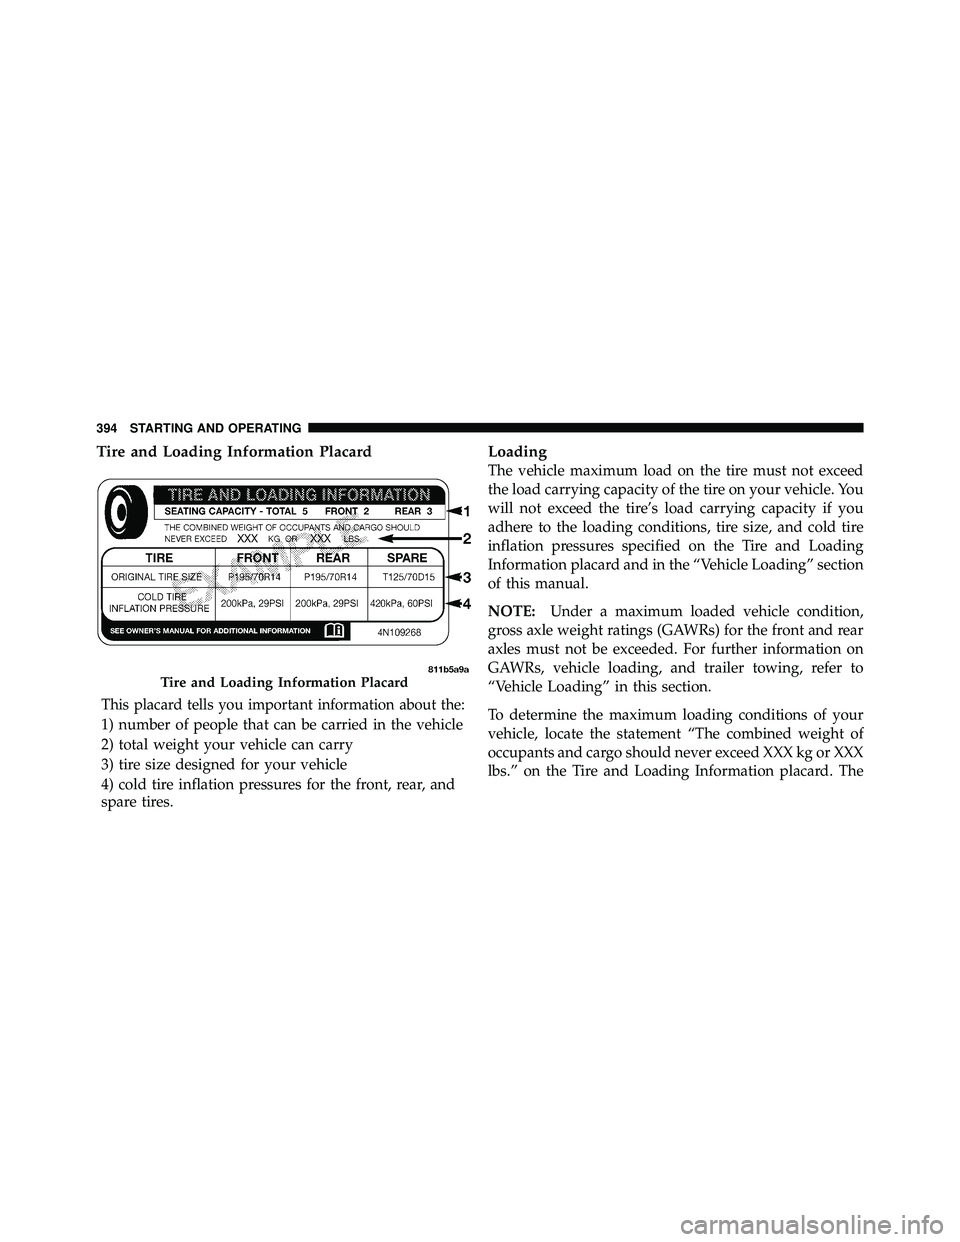
Tire and Loading Information Placard
This placard tells you important information about the:
1) number of people that can be carried in the vehicle
2) total weight your vehicle can carry
3) tire size designed for your vehicle
4) cold tire inflation pressures for the front, rear, and
spare tires.
Loading
The vehicle maximum load on the tire must not exceed
the load carrying capacity of the tire on your vehicle. You
will not exceed the tire’s load carrying capacity if you
adhere to the loading conditions, tire size, and cold tire
inflation pressures specified on the Tire and Loading
Information placard and in the “Vehicle Loading” section
of this manual.
NOTE:Under a maximum loaded vehicle condition,
gross axle weight ratings (GAWRs) for the front and rear
axles must not be exceeded. For further information on
GAWRs, vehicle loading, and trailer towing, refer to
“Vehicle Loading” in this section.
To determine the maximum loading conditions of your
vehicle, locate the statement “The combined weight of
occupants and cargo should never exceed XXX kg or XXX
lbs.” on the Tire and Loading Information placard. The
Page 399 of 554
Economy
Improper inflation pressures can cause uneven wear
patterns to develop across the tire tread. These abnormal
wear patterns will reduce tread life resulting in a need for
earlier tire replacement. Under-inflation also increases
tire rolling resistance and results in higher fuel
consumption.
Ride Comfort and Vehicle Stability
Proper tire inflation contributes to a comfortable ride.
Over-inflation produces a jarring and uncomfortable
ride.
Tire Inflation Pressures
Page 401 of 554
Tire pressures change by approximately 1 psi (7 kPa) per
12° F (7° C) of air temperature change. Keep this in mind
when checking tire pressure inside a garage, especially in
the Winter.
Example: If garage temperature = 68° F (20° C) and the
outside temperature = 32° F (0° C) then the cold tire
inflation pressure should be increased by 3 psi (21 kPa),
which equals 1 psi (7 kPa) for every 12° F (7° C) for this
outside temperature condition.
Tire pressure may increase from 2 to 6 psi (13 to 40 kPa)
during operation. DO NOT reduce this normal pressure
buildup or your tire pressure will be too low.
Tire Pressures for High-Speed Operation
The manufacturer advocates driving at safe speeds
within posted speed limits. Where speed limits or condi-
tions are such that the vehicle can be driven at highspeeds, maintaining correct tire inflation pressure is very
important. Increased tire pressure and reduced vehicle
loading may be required for high-speed vehicle opera-
tion. Refer to original equipment or an authorized tire
dealer for recommended safe operating speeds, loading
and cold tire inflation pressures.
Page 407 of 554
TIRE PRESSURE MONITOR SYSTEM (TPMS)
The Tire Pressure Monitoring System (TPMS) will warn
the driver of a low tire pressure based on the vehicle
recommended cold placard pressure.
The tire pressure will vary with temperature by about
1 psi (6.9 kPa) for every 12°F (6.5°C). This means that
when the outside temperature decreases, the tire pressure
will decrease. Tire pressure should always be set based
on cold inflation tire pressure. This is defined as the tire
pressure after a vehicle has not been driven for more than
three hours, or driven less than 1 mile (1.6 km) after a
three-hour period.Refer to “Tires – General Informa-
tion” in “Starting and Operating” for information on
how to properly inflate the vehicle’s tires. The tire
pressure will also increase as the vehicle is driven; this is
normal and there should be no adjustment for this
increased pressure. The TPMS will warn the driver of a low tire pressure if
the tire pressure falls below the low pressure warning
threshold for any reason, including low temperature
effects, or natural pressure loss through the tire.
The TPMS will continue to warn the driver of low tire
pressure as long as the condition exists, and will not turn
off until the tire pressure is at or above recommended
cold placard pressure. Once the “Tire Pressure Monitor-
ing Telltale Light” has been illuminated, the tire pressure
must be increased to the recommended cold placard
pressure in order for the “Tire Pressure Monitoring
Telltale Light” to be turned OFF. The system will auto-
matically update and the “Tire Pressure Monitoring
Telltale Light” will extinguish once the updated tire
pressures have been received. The vehicle may need to be
driven for up to 20 minutes above 15 mph (25 km/h) to
receive this information.
406 STARTING AND OPERATING
Page 409 of 554
NOTE:
•The TPMS is not intended to replace normal tire care
and maintenance, nor to provide warning of a tire
failure or condition.
•The TPMS should not be used as a tire pressure gauge
while adjusting your tire pressure.
•Driving on a significantly under-inflated tire causes
the tire to overheat and can lead to tire failure.
Under-inflation also reduces fuel efficiency and tire
tread life, and may affect the vehicle’s handling and
stopping ability.
•The TPMS is not a substitute for proper tire mainte-
nance, and it is the driver ’s responsibility to maintain
correct tire pressure, even if under-inflation has not
reached the level to trigger illumination of the “Tire
Pressure Monitoring Telltale Light.”
•Seasonal temperature changes will affect tire pressure,
and the TPMS will monitor the actual tire pressure in
the tire.
Base System
The Tire Pressure Monitor System (TPMS) uses wireless
technology with wheel rim-mounted electronic sensors to
monitor tire pressure levels. Sensors, mounted to each
wheel as part of the valve stem, transmit tire pressure
readings to the Receiver Module.
NOTE:It is particularly important for you to check the
tire pressure in all of your tires regularly and to maintain
the proper pressure.
The Tire Pressure Monitor System (TPMS) consists of the
following components:
•Receiver Module
•Four Tire Pressure Monitoring Sensors
408 STARTING AND OPERATING
Page 543 of 554
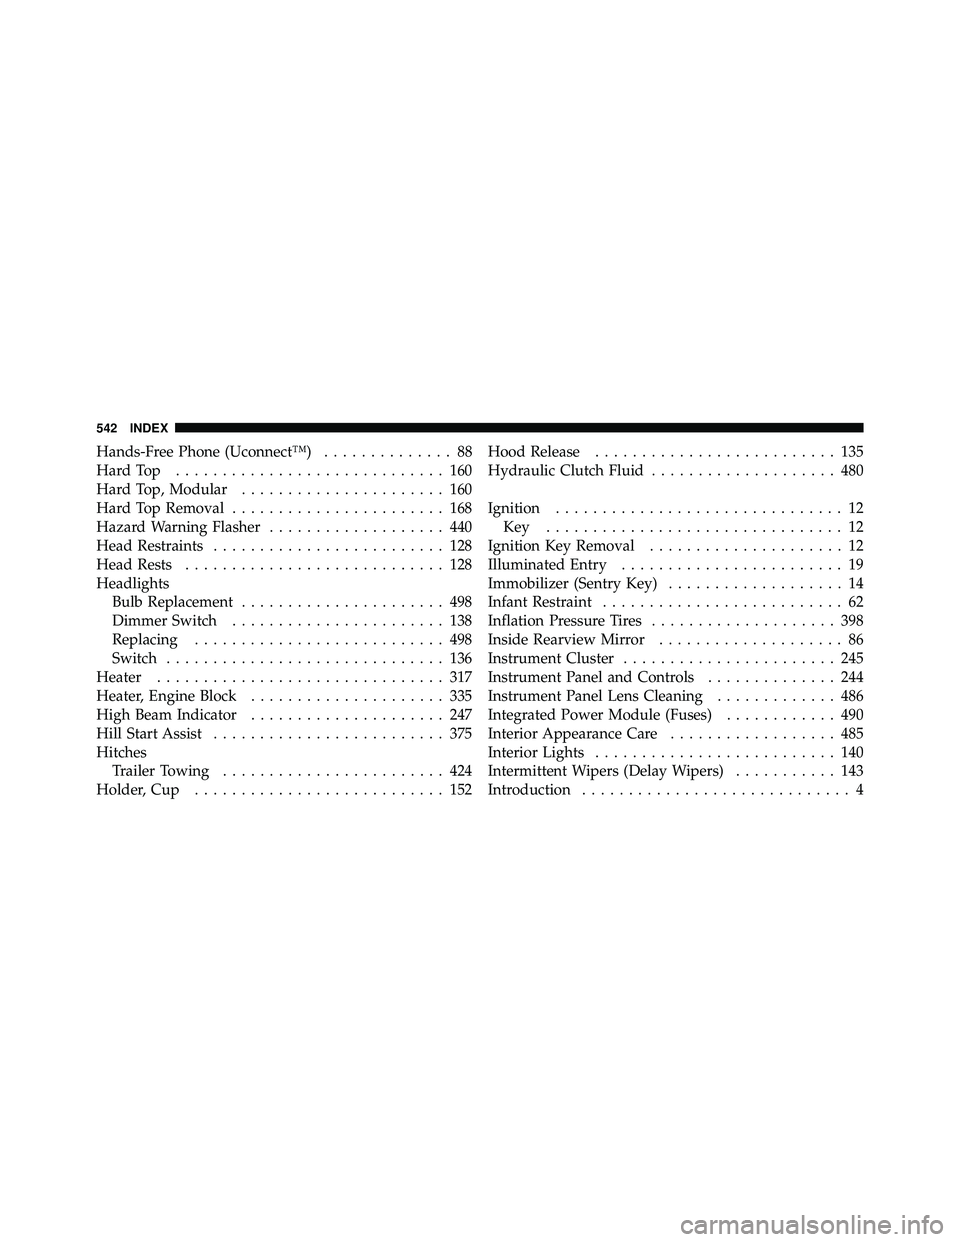
Hands-Free Phone (Uconnect™).............. 88
HardTop ............................. 160
Hard Top, Modular ...................... 160
Hard Top Removal ....................... 168
Hazard Warning Flasher ................... 440
Head Restraints ......................... 128
Head Rests ............................ 128
Headlights Bulb Replacement ...................... 498
Dimmer Switch ....................... 138
Replacing ........................... 498
Switch .............................. 136
Heater ............................... 317
Heater, Engine Block ..................... 335
High Beam Indicator ..................... 247
Hill Start Assist ......................... 375
Hitches Trailer Towing ........................ 424
Holder, Cup ........................... 152 Hood Release
.......................... 135
Hydraulic Clutch Fluid .................... 480
Ignition ............................... 12
Key ................................ 12
Ignition Key Removal ..................... 12
Illuminated Entry ........................ 19
Immobilizer (Sentry Key) ................... 14
Infant Restraint .......................... 62
Inflation Pressure Tires .................... 398
Inside Rearview Mirror .................... 86
Instrument Cluster ....................... 245
Instrument Panel and Controls .............. 244
Instrument Panel Lens Cleaning ............. 486
Integrated Power Module (Fuses) ............ 490
Interior Appearance Care .................. 485
Interior Lights .......................... 140
Intermittent Wipers (Delay Wipers) ........... 143
Introduction ............................. 4
542 INDEX