center console JEEP WRANGLER 2011 JK / 3.G User Guide
[x] Cancel search | Manufacturer: JEEP, Model Year: 2011, Model line: WRANGLER, Model: JEEP WRANGLER 2011 JK / 3.GPages: 88, PDF Size: 3.52 MB
Page 40 of 88
USB Port
• The USB Port on the radio allows you to copy songs from a connected USB drive orsupported media device onto your Media Center hard drive. You can also playback
music from your USB device through the USB Port on the radio. The USB Port on a
Media Center 730N allows you to support iPod
®devices or USB drives for music
playback, charging, control through radio or steering wheel buttons, voice
commands and song selection by voice.
• The USB port located in the center console also offers the ability to play songs from connected USB drives, or supported media devices. Supported devices may be
controlled through the vehicles steering wheel or radio controls, or even with voice
commands, and may be charged through the USB port. If equipped, you may also
select songs by name.
Navigation – Media Center 730N (Sales Code RHR) Only
• Navigation radios require digital data from a navigation database. The data in thenavigation database is licensed from Navigation Technologies®. Not all roads are
digitized.
• For software updates, visit http://www.navteq.com website, or contact your authorized dealer for the latest available software.
NOTE: Many features of this radio are speed dependent. For your own safety, it is not
possible to use the touch-screen keyboard to enter a name (e.g., street name) while the
vehicle is in motion. Pull over at a safe location to complete your task or use Voice
Command.
• The Navigation system receives GPS signals from satellites to display the position ofyour vehicle.
Map • Press the NAV hard-key to access the Navigation Main Menu.
• Touch the MAP soft-key to display a map of your current position.
New Destination • Press the NAV hard-key to access the Navigation Main Menu.
• Touch the NEW DESTINATION soft-key to program a destination, then select the destination soft-key of your choice.
• Media Center 730N allows destinations to be input by voice while in motion. Press the Voice Command button on the radio to begin.
Program/Storing Home Address • Press the NAV hard-key to access the Navigation Main Menu.
• Touch the GUIDE ME HOME soft-key, then touch the STREET ADDRESS soft-key.
• Touch the STATE soft-key, then enter your state name into the speller; select your state from the list and press the CHANGE soft-key.
•
Touch the INPUT STREET NAME soft-key and enter your street name into the speller.
• Touch the CONTINUE soft-key and enter your address into the speller; touch the CONTINUE soft-key again.
• Touch the city name and touch the SAVE soft-key to complete programming.
ELECTRONICS
38
Page 46 of 88
Voice Command for Text Messaging
• If equipped with Uconnect™ Voice Command, your Media Center 430N radio maybe able to play incoming SMS messages through the vehicle sound system.
• It also allows you to respond by selecting from various pre-defined phrases.
• Not all phones are compatible with this feature. Refer to the phone compatibility list at www.jeep.com/uconnect. Connected mobile phones must be bluetooth-
compatible, and paired with your radio.
Changing The Volume
• Start a dialogue by pressing the Voice Command button,thensaya
command (for example, “tutorial”).
• Use the radio ON/OFF VOLUME rotary knob to adjust the volume to a comfortable level while the Voice Command system is speaking. The volume setting for Voice
Command is different than the audio system.
• For vehicles equipped with Video Entertainment System (VES)™, refer to the Uconnect™ Voice Command section of the Uconnect™ User's Manual on the DVD
for further details.
• For vehicles not equipped with VES™, refer to your vehicle Owner's Manual on the DVD for Uconnect™ Voice Command information.
NOTE: To access the tutorial, press the Voice Command button
. After the
BEEP, say “tutorial”. Press any hard-key/button or touch the display (Touch-Screen radio)
to cancel the tutorial.
WARNING!
Any voice commanded system should be used only in safe driving conditions
following local laws and phone use. All attention should be kept on the roadway
ahead. Failure to do so may result in a collision causing you and others to be
severely injured or killed.
iPod®/USB/MP3 CONTROL
• There are many ways to play music from iPod®players or other portable devices
through your vehicle's speakers. Your choices depend on what radio your vehicle is
equipped with.
• The radio sales code is located on the lower right side of the radio faceplate.
If Equipped with Media Center 130 with Satellite Radio (Sales
Code RES + RSC) or Media Center 430/430N (Sales Code
RBZ/RHB)
• The USB port located within the center console, allows you to plug an iPod®into the
vehicle's sound system.
• To hear audio from devices connected to this port from a non-touch-screen radio, press the AUX button on the radio faceplate. From a touch-screen radio, press the
MEDIA hard-key, then touch the AUX or iPod
®soft-key.
ELECTRONICS
44
Page 49 of 88
Flashing Lights With Lock• The turn signal lights flashing, when the doors are locked or unlocked, feature can be turned on or off. To turn this feature on or off:
• Press and hold the UNLOCK button for at least 4 seconds, but no longer than
10 seconds. Then, press and hold the LOCK button while still holding the
UNLOCK button.
• Release both buttons at the same time.
POWER INVERTER
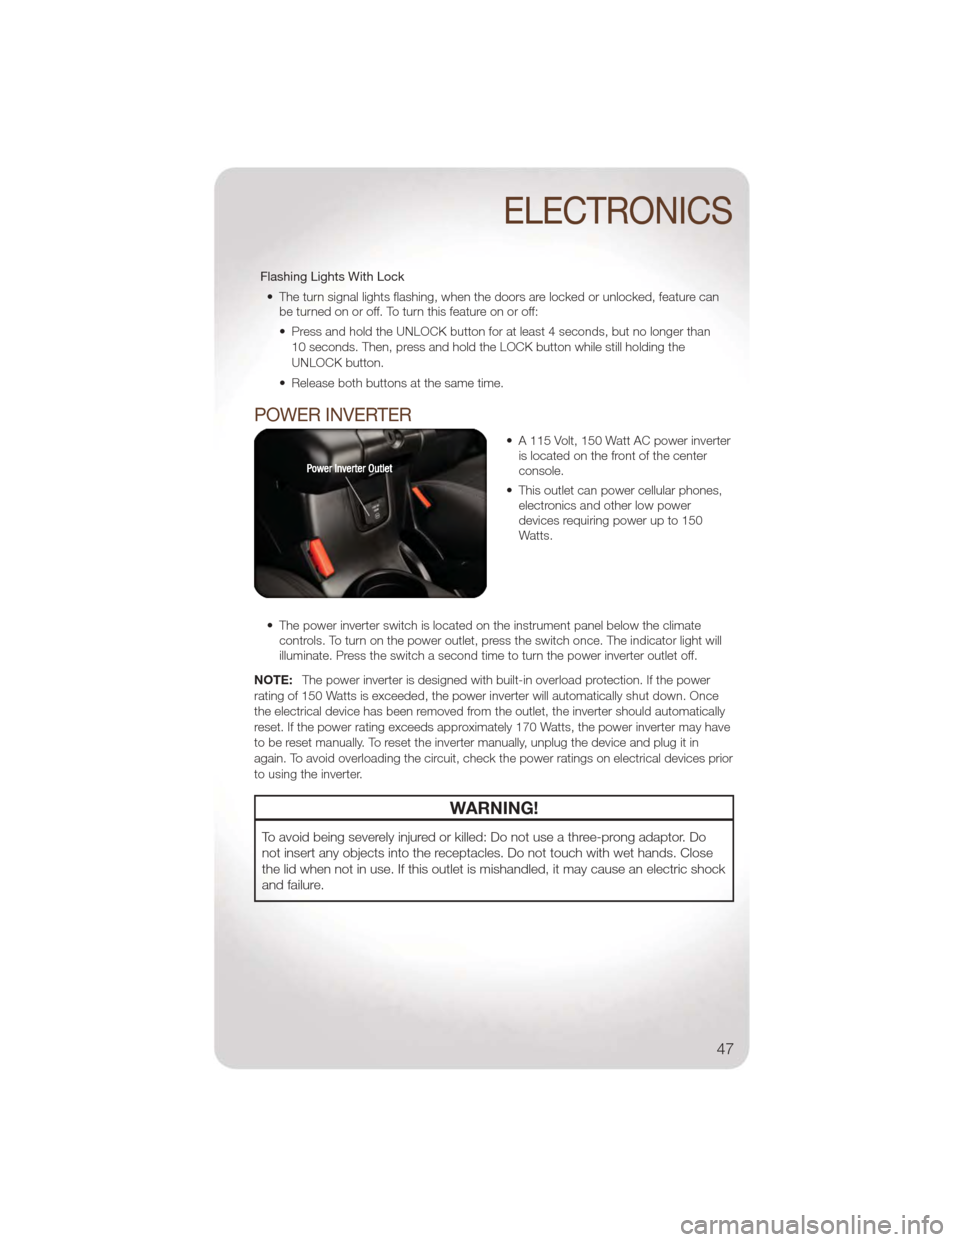
• A 115 Volt, 150 Watt AC power inverter is located on the front of the center
console.
• This outlet can power cellular phones, electronics and other low power
devices requiring power up to 150
Watts.
• The power inverter switch is located on the instrument panel below the climate controls. To turn on the power outlet, press the switch once. The indicator light will
illuminate. Press the switch a second time to turn the power inverter outlet off.
NOTE: The power inverter is designed with built-in overload protection. If the power
rating of 150 Watts is exceeded, the power inverter will automatically shut down. Once
the electrical device has been removed from the outlet, the inverter should automatically
reset. If the power rating exceeds approximately 170 Watts, the power inverter may have
to be reset manually. To reset the inverter manually, unplug the device and plug it in
again. To avoid overloading the circuit, check the power ratings on electrical devices prior
to using the inverter.
WARNING!
To avoid being severely injured or killed: Do not use a three-prong adaptor. Do
not insert any objects into the receptacles. Do not touch with wet hands. Close
the lid when not in use. If this outlet is mishandled, it may cause an electric shock
and failure.
ELECTRONICS
47
Page 50 of 88

POWER OUTLETS
• There are three possible 12–Volt Power Outlets in this vehicle.
• The front power outlet, located in the lower portion of the instrument panel, ispowered when the key is in the ON or ACC position.
• A second power outlet is located inside the center console bin and is powered directly from the vehicle battery.
• On vehicles equipped with a rear subwoofer, there is a power outlet located in the right rear cargo area.
NOTE:
• Do not exceed the maximum power of 160 Watts (13 Amps) at 12 Volts. If the 160 Watt (13 Amp) power rating is exceeded the fuse protecting the system will need to be
replaced.
• Power outlets are designed for accessory plugs only. Do not insert any other object in the power outlet as this will damage the outlet and blow the fuse. Improper use of the
power outlet can cause damage not covered by your warranty.
ELECTRONICS
48
Page 54 of 88
OVERDRIVE OFF SWITCH
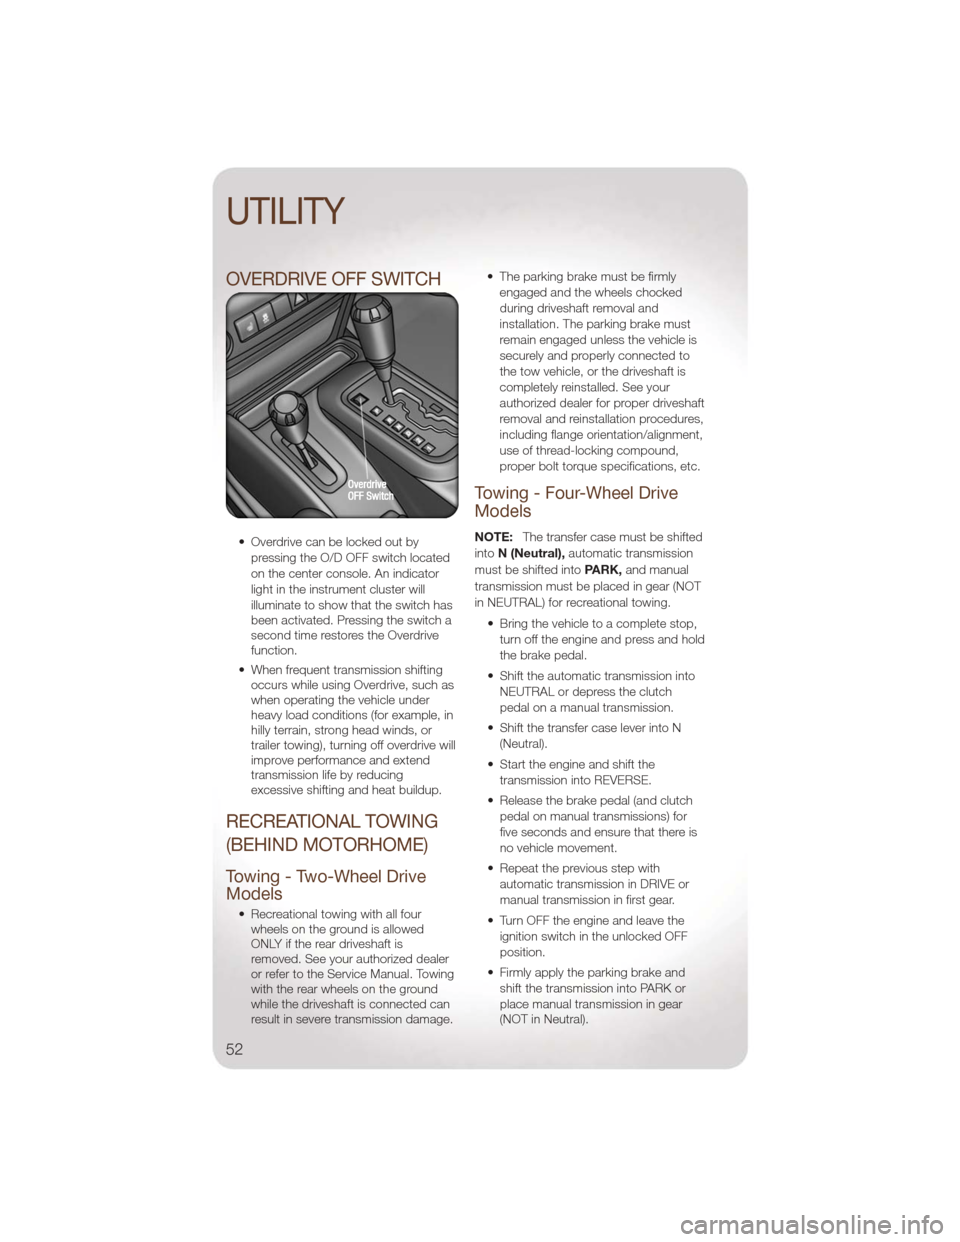
• Overdrive can be locked out bypressing the O/D OFF switch located
on the center console. An indicator
light in the instrument cluster will
illuminate to show that the switch has
been activated. Pressing the switch a
second time restores the Overdrive
function.
• When frequent transmission shifting occurs while using Overdrive, such as
when operating the vehicle under
heavy load conditions (for example, in
hilly terrain, strong head winds, or
trailer towing), turning off overdrive will
improve performance and extend
transmission life by reducing
excessive shifting and heat buildup.
RECREATIONAL TOWING
(BEHIND MOTORHOME)
Towing - Two-Wheel Drive
Models
• Recreational towing with all fourwheels on the ground is allowed
ONLY if the rear driveshaft is
removed. See your authorized dealer
or refer to the Service Manual. Towing
with the rear wheels on the ground
while the driveshaft is connected can
result in severe transmission damage. • The parking brake must be firmly
engaged and the wheels chocked
during driveshaft removal and
installation. The parking brake must
remain engaged unless the vehicle is
securely and properly connected to
the tow vehicle, or the driveshaft is
completely reinstalled. See your
authorized dealer for proper driveshaft
removal and reinstallation procedures,
including flange orientation/alignment,
use of thread-locking compound,
proper bolt torque specifications, etc.
Towing - Four-Wheel Drive
Models
NOTE: The transfer case must be shifted
into N (Neutral), automatic transmission
must be shifted into PARK,and manual
transmission must be placed in gear (NOT
in NEUTRAL) for recreational towing.
• Bring the vehicle to a complete stop,turn off the engine and press and hold
the brake pedal.
• Shift the automatic transmission into NEUTRAL or depress the clutch
pedal on a manual transmission.
• Shift the transfer case lever into N (Neutral).
• Start the engine and shift the transmission into REVERSE.
• Release the brake pedal (and clutch pedal on manual transmissions) for
five seconds and ensure that there is
no vehicle movement.
• Repeat the previous step with automatic transmission in DRIVE or
manual transmission in first gear.
• Turn OFF the engine and leave the ignition switch in the unlocked OFF
position.
• Firmly apply the parking brake and shift the transmission into PARK or
place manual transmission in gear
(NOT in Neutral).
UTILITY
52
Page 67 of 88
• Using a screwdriver or similar tool, press and hold the override tab through theaccess port on the center console.
• Move the shift lever into the NEUTRAL position.
• The vehicle may then be started in NEUTRAL.
• Reinstall the override cover.
TOWING A DISABLED VEHICLE
• The manufacturer requires towing your vehicle with all four wheels OFFthe ground
using a flatbed.
CAUTION!
Towing this vehicle using any other method could result in extensive damage to
the transfer case and/or transmission.
FREEING A STUCK VEHICLE
• If your vehicle becomes stuck in mud, sand or snow, it can often be moved by a rocking motion. Turn your steering wheel right and left to clear the area around the
front wheels. Then shift back and forth between DRIVE/1st gear and REVERSE.
Using minimal accelerator pedal pressure to maintain the rocking motion, without
spinning the wheels, is most effective.
NOTE: If your vehicle is equipped with Traction Control or Electronic Stability Control
(ESC), turn the system OFF before attempting to “rock” the vehicle.
CAUTION!
• Racing the engine or spinning the wheels may lead to transmission overheating and failure. Allow the engine to idle with the shift lever in NEUTRAL
for at least one minute after every five rocking-motion cycles. This will minimize
overheating and reduce the risk of transmission failure during prolonged efforts
to free a stuck vehicle.
• When “rocking” a stuck vehicle by moving between DRIVE/1st gear and REVERSE, do not spin the wheels faster than 15 mph (24 km/h), or drivetrain
damage may result.
• Revving the engine or spinning the wheels too fast may lead to transmission overheating and failure. It can also damage the tires. Do not spin the wheels
above 30 mph (48 km/h) while in gear (no transmission shifting occurring).
WHAT TO DO IN EMERGENCIES
65