spare wheel JEEP WRANGLER 2011 JK / 3.G User Guide
[x] Cancel search | Manufacturer: JEEP, Model Year: 2011, Model line: WRANGLER, Model: JEEP WRANGLER 2011 JK / 3.GPages: 88, PDF Size: 3.52 MB
Page 61 of 88
WARNING!
You or others can be badly burned by hot engine coolant (antifreeze) or steam
from your radiator. If you see or hear steam coming from under the hood, do not
open the hood until the radiator has had time to cool. Never try to open a cooling
system pressure cap when the radiator or coolant bottle is hot.
JACKING AND TIRE CHANGING
Jack Location
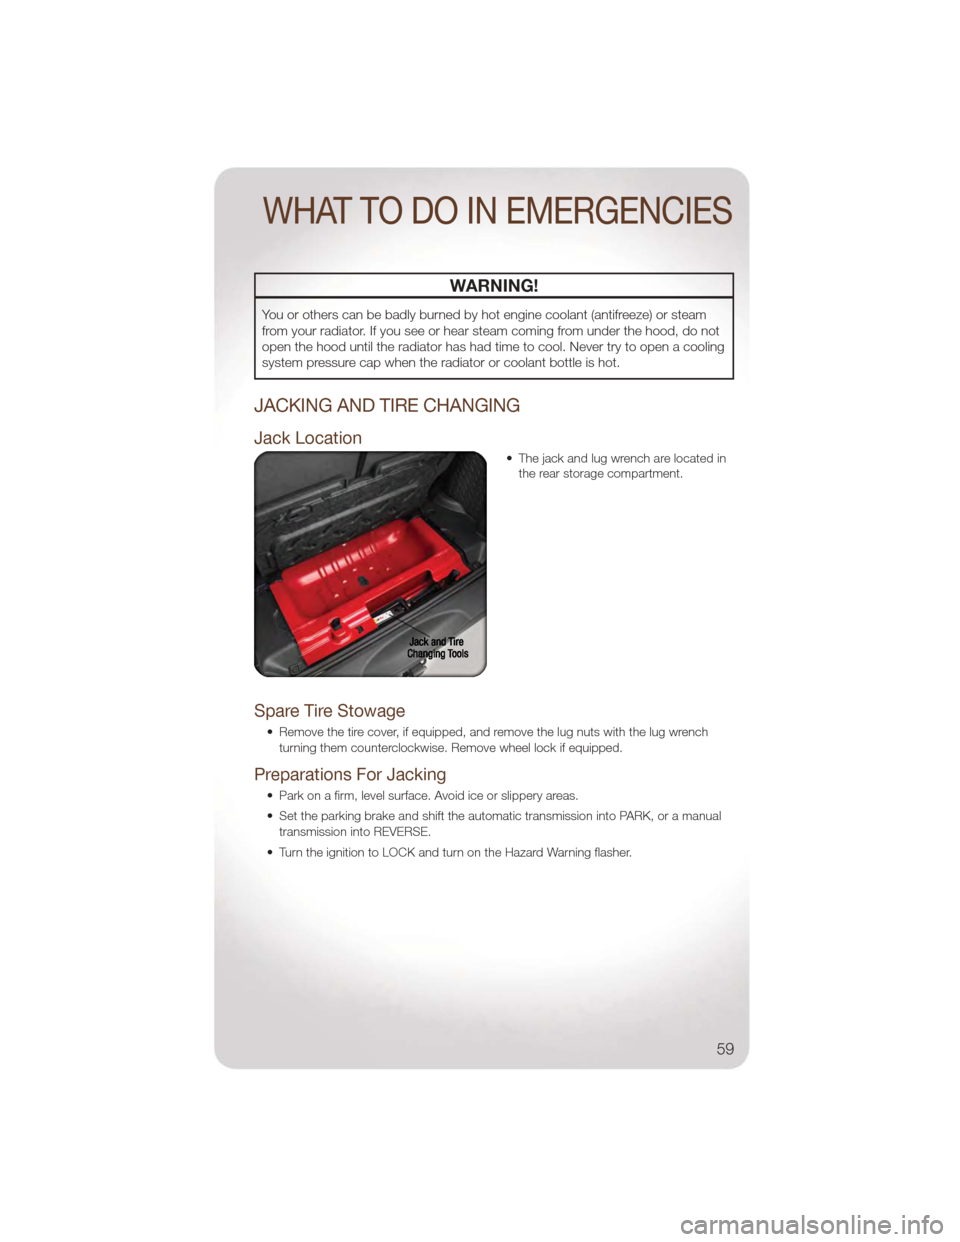
• The jack and lug wrench are located inthe rear storage compartment.
Spare Tire Stowage
• Remove the tire cover, if equipped, and remove the lug nuts with the lug wrench
turning them counterclockwise. Remove wheel lock if equipped.
Preparations For Jacking
• Park on a firm, level surface. Avoid ice or slippery areas.
• Set the parking brake and shift the automatic transmission into PARK, or a manualtransmission into REVERSE.
• Turn the ignition to LOCK and turn on the Hazard Warning flasher.
WHAT TO DO IN EMERGENCIES
59
Page 62 of 88
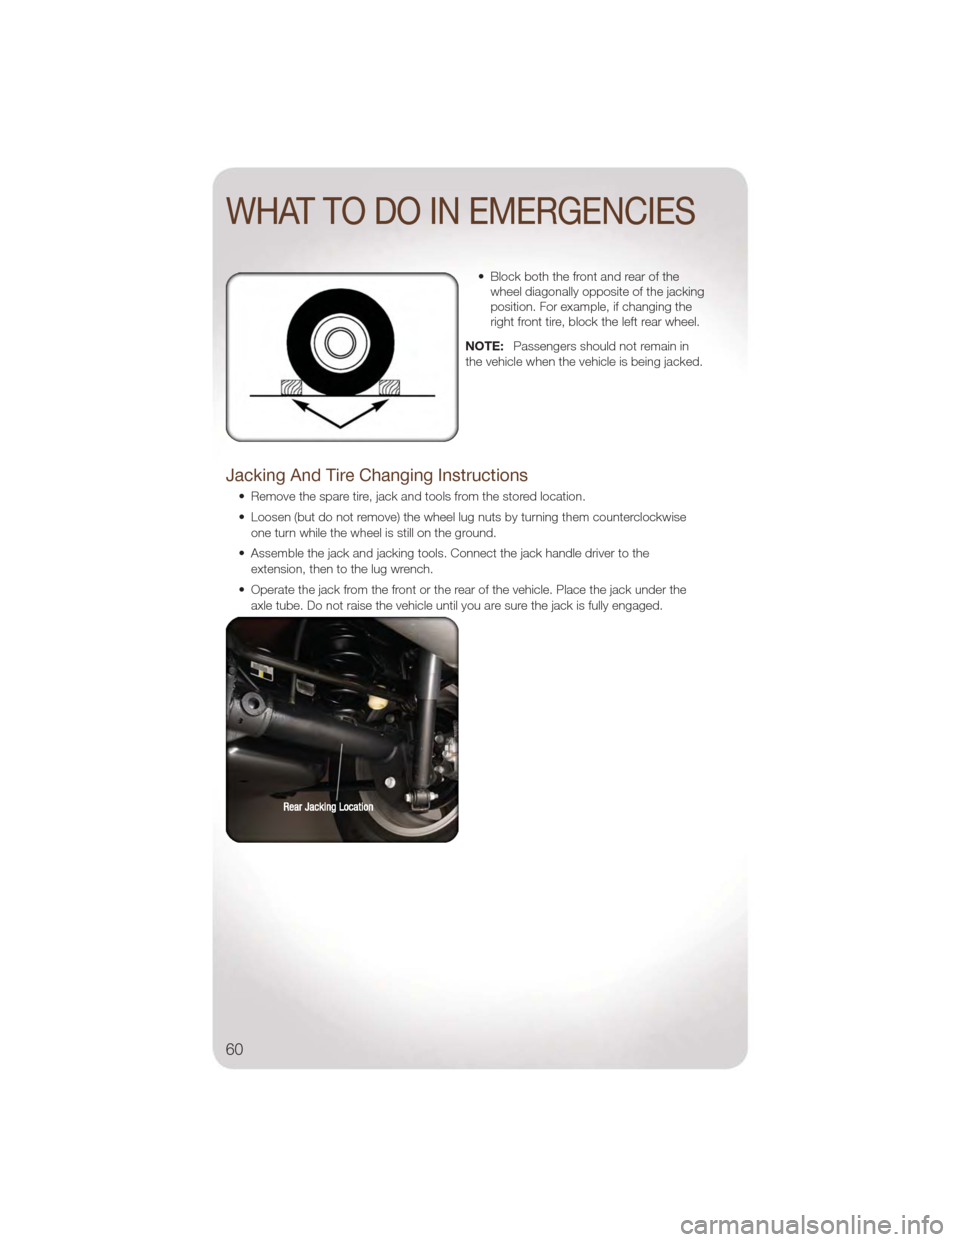
• Block both the front and rear of thewheel diagonally opposite of the jacking
position. For example, if changing the
right front tire, block the left rear wheel.
NOTE: Passengers should not remain in
the vehicle when the vehicle is being jacked.
Jacking And Tire Changing Instructions
• Remove the spare tire, jack and tools from the stored location.
• Loosen (but do not remove) the wheel lug nuts by turning them counterclockwise
one turn while the wheel is still on the ground.
• Assemble the jack and jacking tools. Connect the jack handle driver to the extension, then to the lug wrench.
• Operate the jack from the front or the rear of the vehicle. Place the jack under the axle tube. Do not raise the vehicle until you are sure the jack is fully engaged.
WHAT TO DO IN EMERGENCIES
60
Page 63 of 88
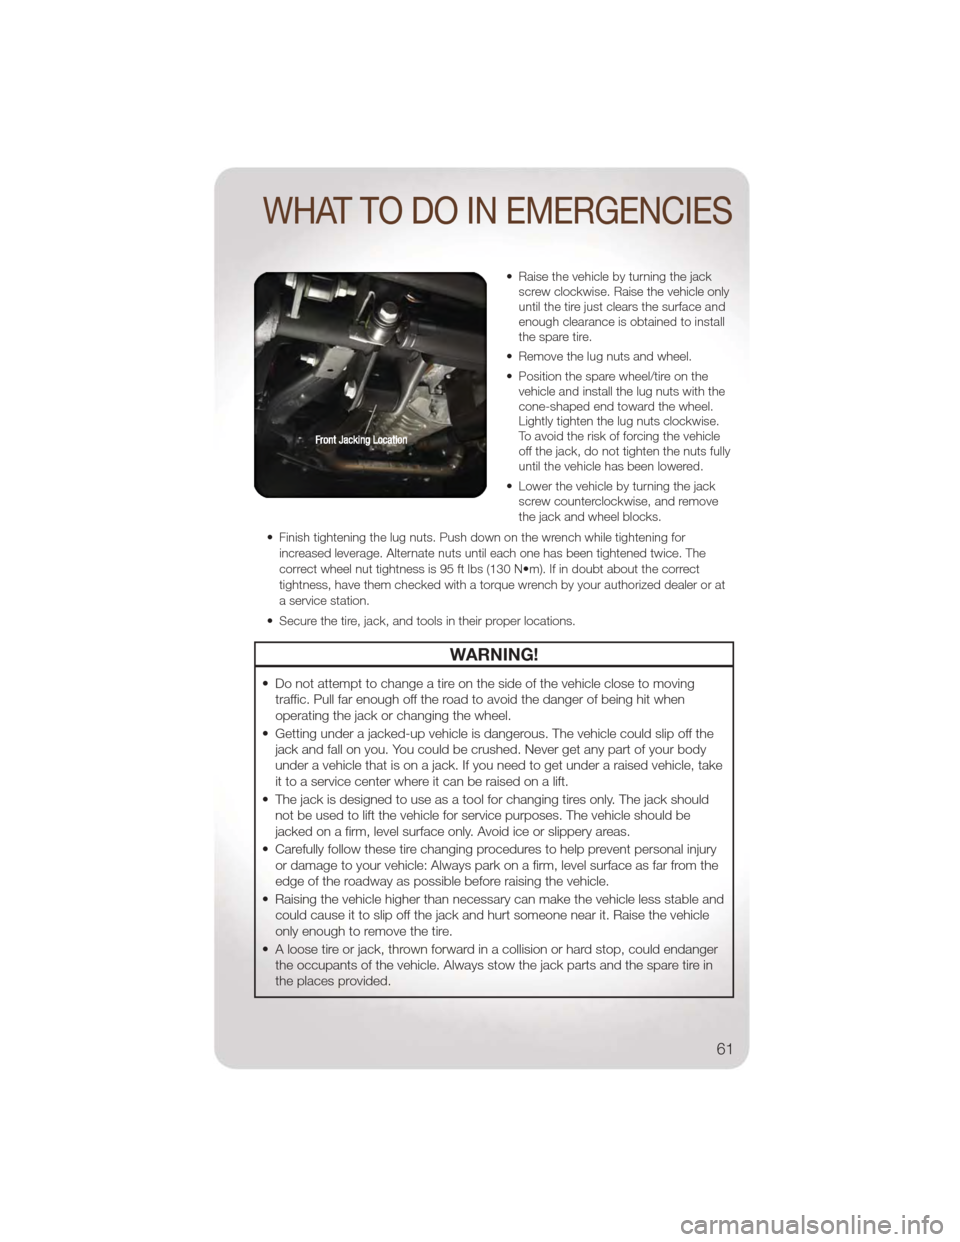
• Raise the vehicle by turning the jackscrew clockwise. Raise the vehicle only
until the tire just clears the surface and
enough clearance is obtained to install
the spare tire.
• Remove the lug nuts and wheel.
• Position the spare wheel/tire on the vehicle and install the lug nuts with the
cone-shaped end toward the wheel.
Lightly tighten the lug nuts clockwise.
To avoid the risk of forcing the vehicle
off the jack, do not tighten the nuts fully
until the vehicle has been lowered.
• Lower the vehicle by turning the jack screw counterclockwise, and remove
the jack and wheel blocks.
• Finish tightening the lug nuts. Push down on the wrench while tightening for increased leverage. Alternate nuts until each one has been tightened twice. The
correct wheel nut tightness is 95 ft lbs (130 N•m). If in doubt about the correct
tightness, have them checked with a torque wrench by your authorized dealer or at
a service station.
• Secure the tire, jack, and tools in their proper locations.
WARNING!
• Do not attempt to change a tire on the side of the vehicle close to moving traffic. Pull far enough off the road to avoid the danger of being hit when
operating the jack or changing the wheel.
• Getting under a jacked-up vehicle is dangerous. The vehicle could slip off the jack and fall on you. You could be crushed. Never get any part of your body
under a vehicle that is on a jack. If you need to get under a raised vehicle, take
it to a service center where it can be raised on a lift.
• The jack is designed to use as a tool for changing tires only. The jack should not be used to lift the vehicle for service purposes. The vehicle should be
jacked on a firm, level surface only. Avoid ice or slippery areas.
• Carefully follow these tire changing procedures to help prevent personal injury or damage to your vehicle: Always park on a firm, level surface as far from the
edge of the roadway as possible before raising the vehicle.
• Raising the vehicle higher than necessary can make the vehicle less stable and could cause it to slip off the jack and hurt someone near it. Raise the vehicle
only enough to remove the tire.
• A loose tire or jack, thrown forward in a collision or hard stop, could endanger the occupants of the vehicle. Always stow the jack parts and the spare tire in
the places provided.
WHAT TO DO IN EMERGENCIES
61
Page 82 of 88
AUTHENTIC ACCESSORIES BY MOPAR®
• The following highlights just some of the many Authentic Jeep Accessories byMopar featuring a fit, finish, and functionality specifically for your Jeep Wrangler.
• In choosing Authentic Accessories you gain far more than expressive style, premium protection, or extreme entertainment, you also benefit from enhancing your vehicle
with accessories that have been thoroughly tested and factory-approved.
• For the full line of Authentic Jeep Accessories by Mopar, visit your local Jeep dealership or online at mopar.com.
Chrome:
• Grille • Tubular Side Steps • Tubular Bumper
• Mirror Covers • Fuel Door • Tail Lamp Guards
Off Road:
• Off Road Bumpers • Rock Rails • Skid Plates
• Winches • Lift Kits • Off Road Lights
Exterior:
• Black Tubular Side Steps • Black Tubular Bumpers • Running Boards
• Front End Cover • Cab Covers • Spare Tire Covers
• Air Deflectors • Wheels • Hard Tops
• Soft Tops • Splash Guards • Fender Flares
Interior:
• Premium Carpet Floor Mats • Slush Floor Mats • Door Sill Guards
• Seat Covers
Electronics:
• Portable Navigation Systems • Uconnect™ Web (WiFi) • Sirius Satellite Radio
• Heated Seats • Ambient Footwell Lighting • iPod
®Adapter
• Fog Lights
Carriers:
• Hitch-mount Bike Carrier • Spare Tire-mount Ski and Freedom Top Carriers• Hitch Receivers and
Trailering Accessories
iPod
®is a registered trademark of Apple, Inc.
MOPAR ACCESSORIES
80
Page 84 of 88
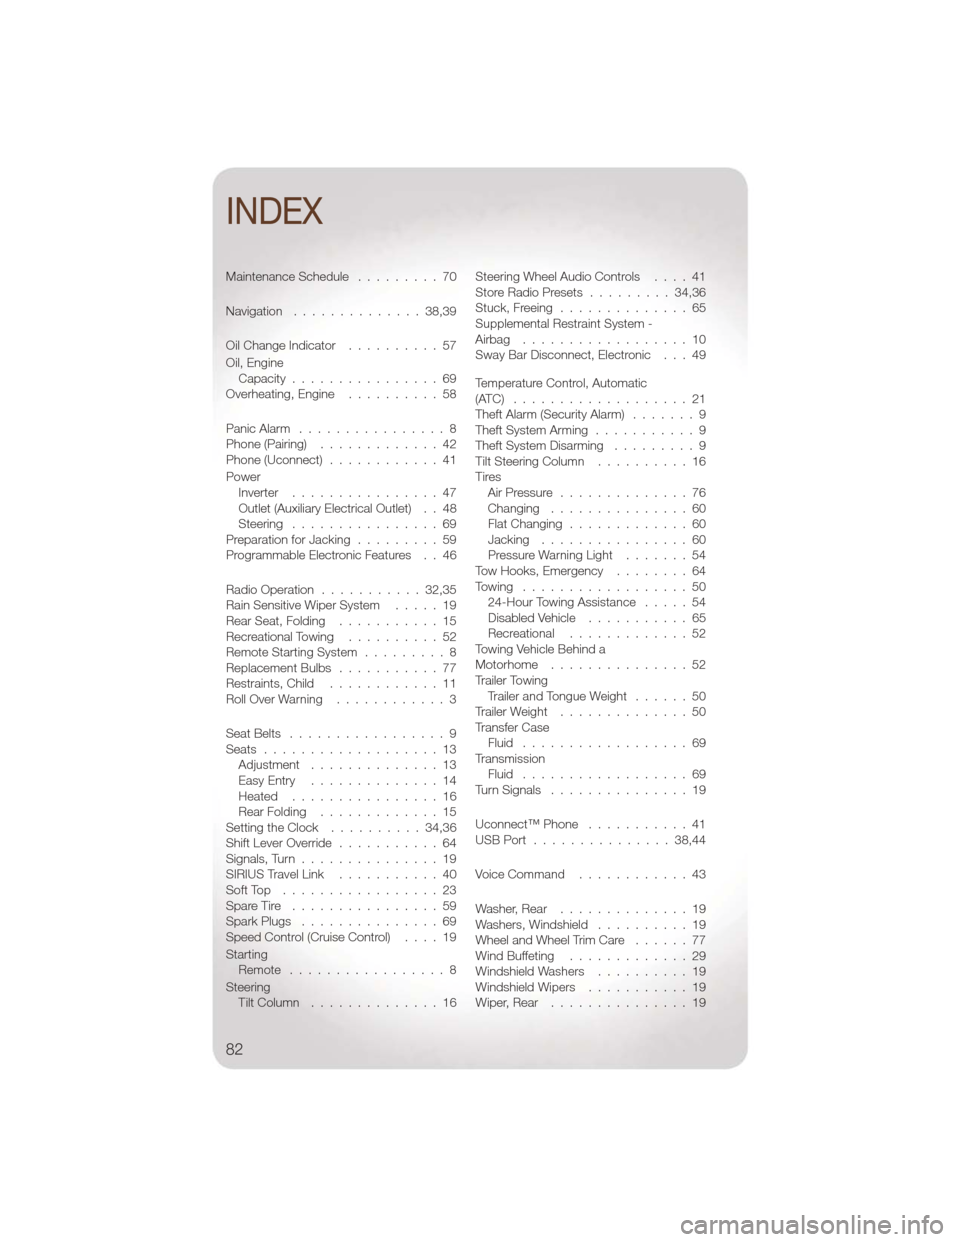
Maintenance Schedule.........70
Navigation ..............38,39
Oil Change Indicator ..........57
Oil, Engine Capacity ................69
Overheating, Engine ..........58
Panic Alarm ................8
Phone (Pairing) .............42
Phone (Uconnect) ............41
Power Inverter ................47
Outlet (Auxiliary Electrical Outlet) . . 48
Steering ................69
PreparationforJacking .........59
Programmable Electronic Features . . 46
Radio Operation ...........32,35
Rain Sensitive Wiper System .....19
Rear Seat, Folding ...........15
Recreational Towing ..........52
Remote Starting System .........8
Replacement Bulbs ...........77
Restraints, Child ............11
RollOverWarning ............3
SeatBelts .................9
Seats ...................13 Adjustment ..............13
EasyEntry ..............14
Heated ................16
RearFolding .............15
Setting the Clock ..........34,36
Shift Lever Override ...........64
Signals,Turn...............19
SIRIUSTravelLink ...........40
SoftTop .................23
Spare Tire ................59
Spark Plugs ...............69
Speed Control (Cruise Control) ....19
Starting Remote .................8
Steering TiltColumn ..............16 Steering Wheel Audio Controls
....41
Store Radio Presets .........34,36
Stuck,Freeing ..............65
Supplemental Restraint System -
Airbag ..................10
Sway Bar Disconnect, Electronic . . . 49
Temperature Control, Automatic
(ATC) ...................21
Theft Alarm (Security Alarm) .......9
Theft System Arming ...........9
Theft System Disarming .........9
Tilt Steering Column ..........16
Tires AirPressure ..............76
Changing ...............60
Flat Changing .............60
Jacking ................60
Pressure Warning Light .......54
Tow Hooks, Emergency ........64
Towing ..................50 24-Hour Towing Assistance .....54
DisabledVehicle ...........65
Recreational .............52
Towing Vehicle Behind a
Motorhome ...............52
Trailer Towing Trailer and Tongue Weight ......50
Trailer Weight ..............50
Transfer Case Fluid ..................69
Transmission Fluid ..................69
TurnSignals ...............19
Uconnect™ Phone ...........41
USBPort ...............38,44
Voice Command ............43
Washer, Rear ..............
19
Washers, Windshield ..........19
Wheel and Wheel Trim Care ......77
Wind Buffeting .............29
WindshieldWashers ..........19
WindshieldWipers ...........19
Wiper,Rear ...............19
INDEX
82