fuel JEEP WRANGLER 2014 JK / 3.G User Guide
[x] Cancel search | Manufacturer: JEEP, Model Year: 2014, Model line: WRANGLER, Model: JEEP WRANGLER 2014 JK / 3.GPages: 148, PDF Size: 12.93 MB
Page 10 of 148
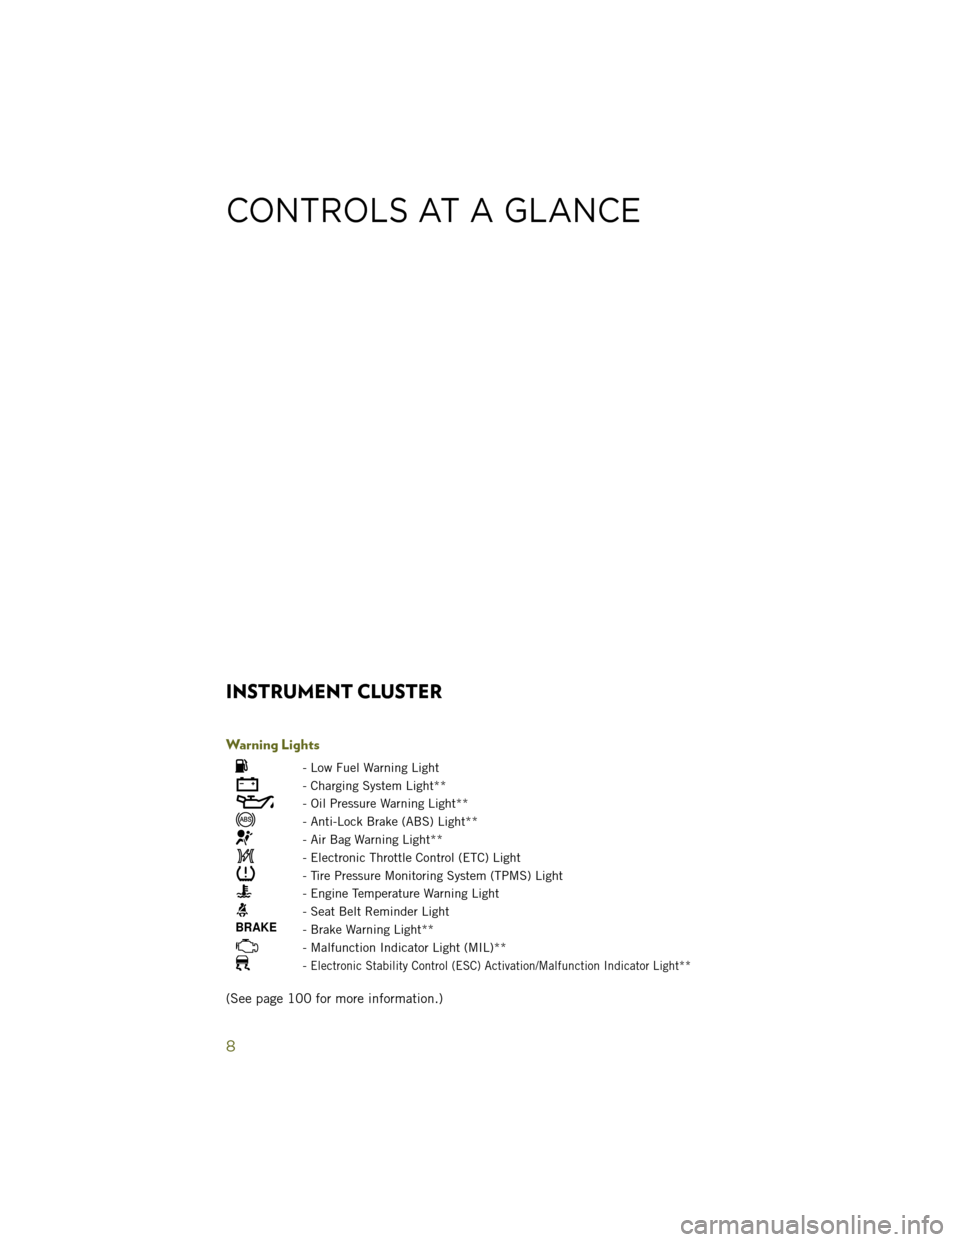
INSTRUMENT CLUSTER
Warning Lights
- Low Fuel Warning Light
- Charging System Light**
- Oil Pressure Warning Light**
- Anti-Lock Brake (ABS) Light**
- Air Bag Warning Light**
- Electronic Throttle Control (ETC) Light
- Tire Pressure Monitoring System (TPMS) Light
- Engine Temperature Warning Light
- Seat Belt Reminder Light
- Brake Warning Light**
- Malfunction Indicator Light (MIL)**
-Electronic Stability Control (ESC) Activation/Malfunction Indicator Light**
(See page 100 for more information.)
CONTROLS AT A GLANCE
8
Page 11 of 148
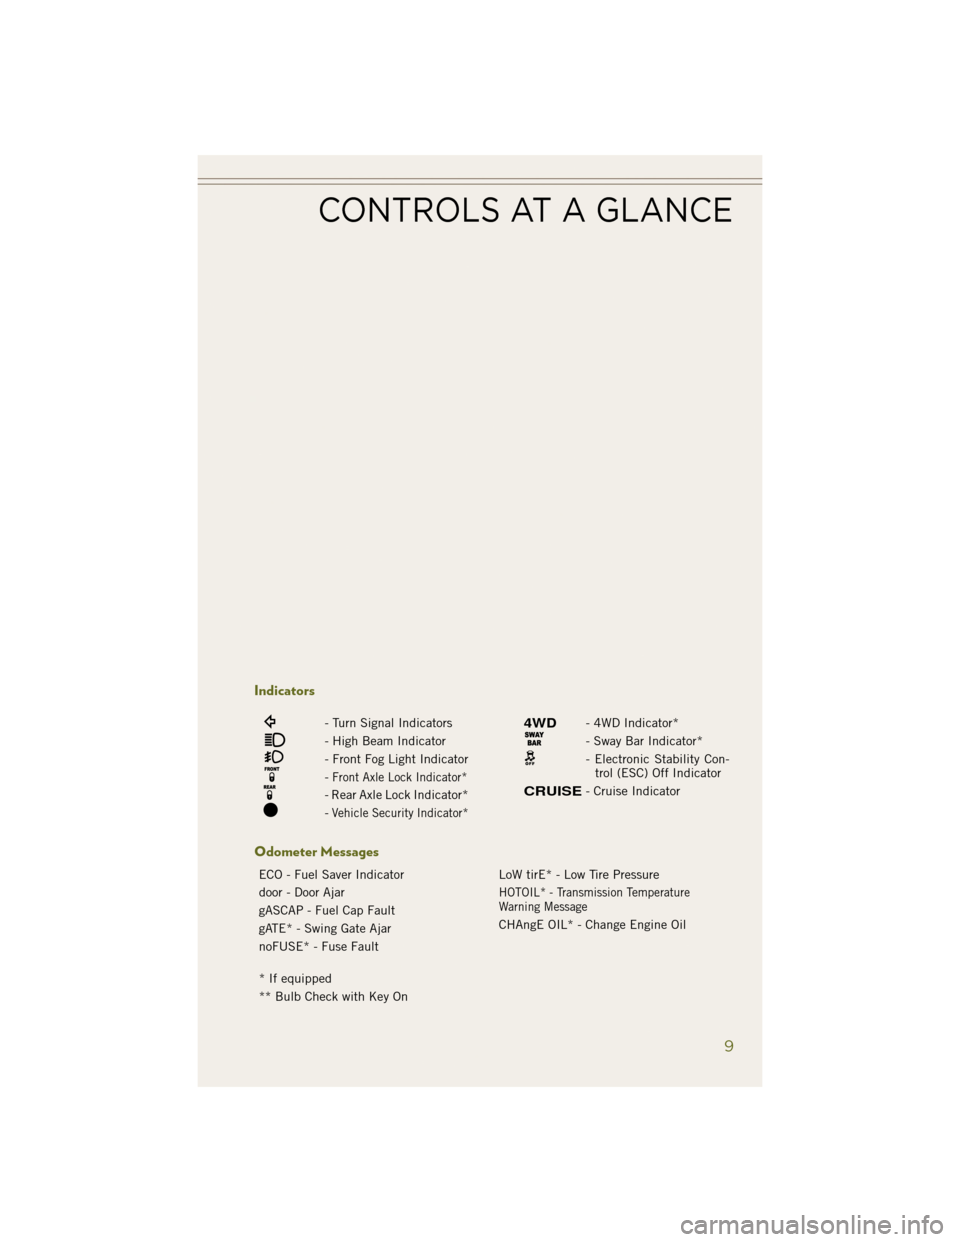
Indicators
- Turn Signal Indicators
- High Beam Indicator
- Front Fog Light Indicator
-Front Axle Lock Indicator*
- Rear Axle Lock Indicator*
-Vehicle Security Indicator*
- 4WD Indicator*
- Sway Bar Indicator*
- Electronic Stability Con-trol (ESC) Off Indicator
- Cruise Indicator
Odometer Messages
ECO - Fuel Saver Indicator LoW tirE* - Low Tire Pressure
door - Door Ajar
HOTOIL* - Transmission Temperature
Warning Message
gASCAP - Fuel Cap Fault CHAngE OIL* - Change Engine Oil
gATE* - Swing Gate Ajar
noFUSE* - Fuse Fault
* If equipped
** Bulb Check with Key On
CONTROLS AT A GLANCE
9
Page 82 of 148
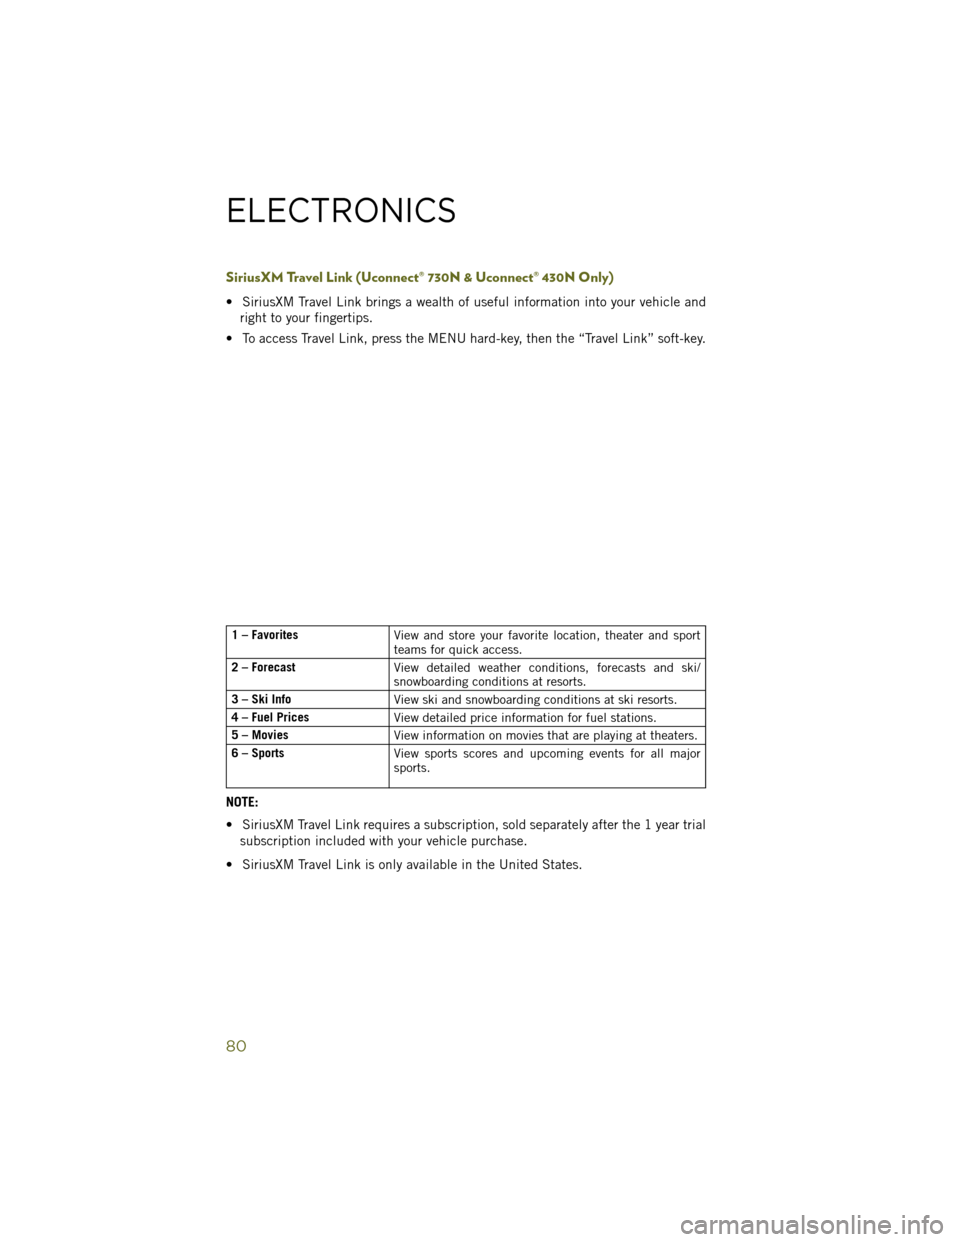
SiriusXM Travel Link (Uconnect® 730N & Uconnect® 430N Only)
• SiriusXM Travel Link brings a wealth of useful information into your vehicle andright to your fingertips.
• To access Travel Link, press the MENU hard-key, then the “Travel Link” soft-key.
1 – Favorites View and store your favorite location, theater and sport
teams for quick access.
2 – Forecast View detailed weather conditions, forecasts and ski/
snowboarding conditions at resorts.
3 – Ski Info View ski and snowboarding conditions at ski resorts.
4 – Fuel Prices View detailed price information for fuel stations.
5 – Movies View information on movies that are playing at theaters.
6 – Sports View sports scores and upcoming events for all major
sports.
NOTE:
• SiriusXM Travel Link requires a subscription, sold separately after the 1 year trial
subscription included with your vehicle purchase.
• SiriusXM Travel Link is only available in the United States.
ELECTRONICS
80
Page 90 of 148
Bluetooth® STREAMING AUDIO
•If equipped with Uconnect®Voice Com-
mand, your Bluetooth®-equipped iPod®
devices, cell phones or other media play-
ers, may also be able to stream music to
your vehicles speakers. Your connected
device must be Bluetooth
®-compatible,
and paired with your radio (see
www.UconnectPhone.com for pairing in-
structions).
• Non-Touchscreen Radios: Press the “AUX” button on the radio faceplate until "BT"
or “Audio Streaming” is displayed on the radio screen.
• Touchscreen-Radios: Press the “RADIO/MEDIA” or “MEDIA” hard-key and then
touch the “AUX” soft-key tab.
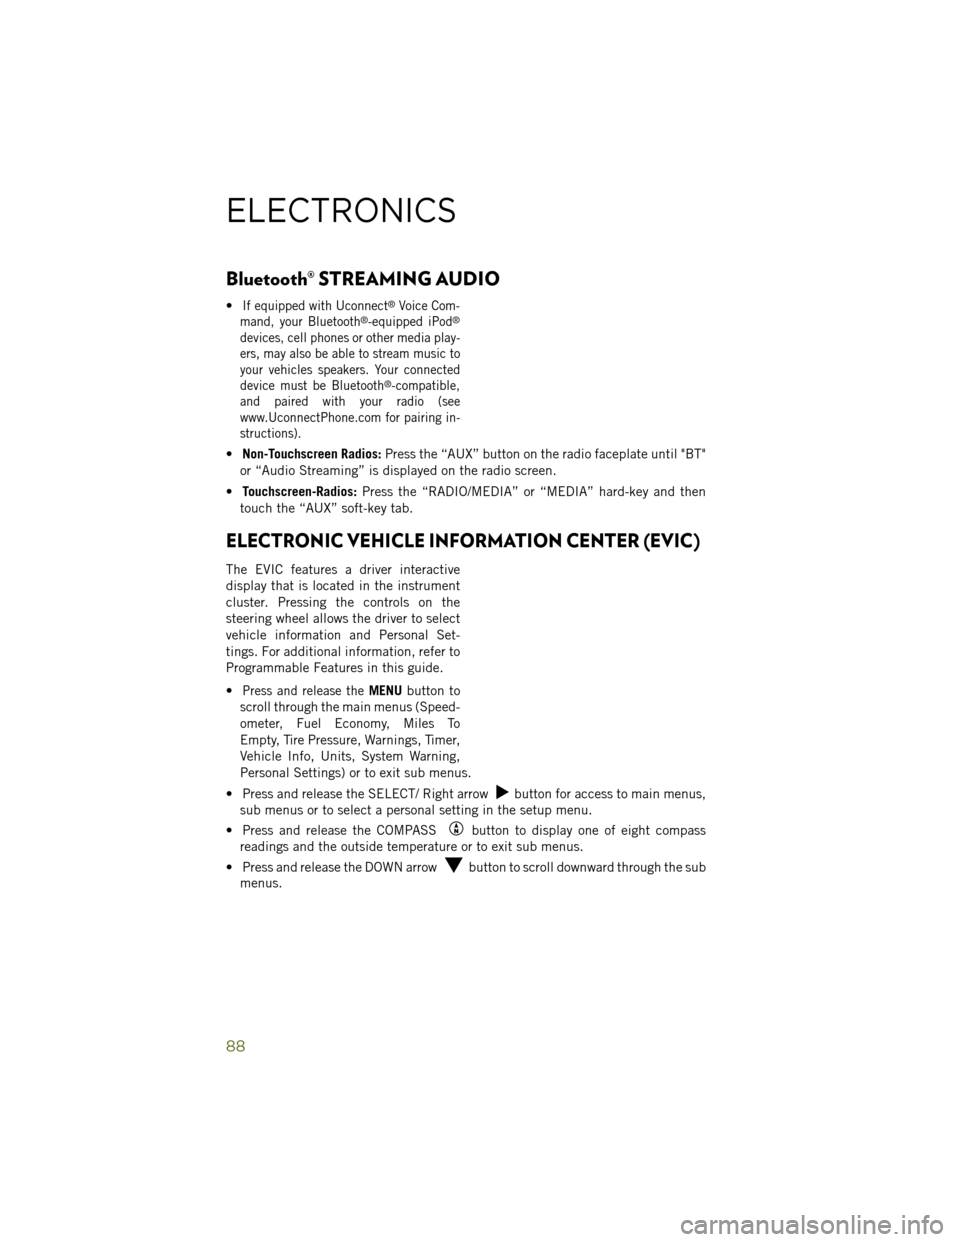
ELECTRONIC VEHICLE INFORMATION CENTER (EVIC)
The EVIC features a driver interactive
display that is located in the instrument
cluster. Pressing the controls on the
steering wheel allows the driver to select
vehicle information and Personal Set-
tings. For additional information, refer to
Programmable Features in this guide.
•
Press and release theMENU button to
scroll through the main menus (Speed-
ometer, Fuel Economy, Miles To
Empty, Tire Pressure, Warnings, Timer,
Vehicle Info, Units, System Warning,
Personal Settings) or to exit sub menus.
• Press and release the SELECT/ Right arrow
button for access to main menus,
sub menus or to select a personal setting in the setup menu.
• Press and release the COMPASS
button to display one of eight compass
readings and the outside temperature or to exit sub menus.
• Press and release the DOWN arrow
button to scroll downward through the sub
menus.
ELECTRONICS
88
Page 91 of 148
EVIC Main Menu
• To step to each main menu feature press and release the MENU button once foreach step. A step from the last item in the list will cause the first item in the
feature list to be displayed. The following features are in the Main menu:• Compass, Outside Temperature, and ECO display
• Digital Speedometer
• Average Fuel Economy
• Distance to Empty
• Elapsed Time
• Vehicle Information
• Coolant Temp
• Oil Pressure
• Transmission Temp
• Oil Life Remaining (Automatic Oil Change Indicator)
• EVIC Units Selection
• System Status
• Personal Settings
• Tire PSI
Compass Calibration
This compass is self-calibrating, which eliminates the need to set the compass
manually. When the vehicle is new, the compass may appear erratic and the EVIC will
display “CAL” until the compass is calibrated.
You may also calibrate the compass by completing one or more 360 degree turns (in
an area free from large metal or metallic objects) until the “CAL” message displayed
in the EVIC turns off. The compass will now function normally.
ECO
• The ECO message will appear in your EVIC display whenever you are driving in a fuel efficient manner.
• This feature allows you to monitor when you are driving in a fuel efficient manner, and it can be used to modify driving habits in order to increase fuel economy.
ELECTRONICS
89
Page 92 of 148
PROGRAMMABLE FEATURES
Electronic Vehicle Information Center (EVIC)
• The EVIC can be used to program the following Personal Settings. Press andrelease the MENU button until Personal Settings displays, then press the DOWN
button
to scroll through the settings. Press the SELECT buttonto change
the setting.
• Language • Illumin Approach
• Auto UNLK On Exit • Hill Start Assist (HSA)
• RKE Unlock • Display Units of Measure In
• Sound Horn With RKE Lock • Nav – Turn by Turn
• Flash Lamp With Lock • Display Fuel Saver
• Headlamp Off Delay • Compass Variance
• Headlamps With Wipers • Calibrate Compass
• Key-Off Power Delay
Key Fob Programmable Features
The following features may also be programmed by using the Key Fob transmitter or
the ignition switch and driver's door lock switch.
NOTE:
Pushing the LOCK button while you are inside the vehicle will activate the Vehicle
Security Alarm. Opening a door with the Vehicle Security Alarm activated will cause
the alarm to sound. Push the UNLOCK button to deactivate the Vehicle Security
Alarm.
Flashing Lamps With Lock
• The turn signal lights flashing, when the doors are locked or unlocked, feature can be turned on or off. To turn this feature on or off:• Press and hold the UNLOCK button for at least 4 seconds, but no longer than
10 seconds. Then, press and hold the LOCK button while still holding the
UNLOCK button.
• Release both buttons at the same time.
ELECTRONICS
90
Page 102 of 148
ROADSIDE ASSISTANCE
Dial toll-free 1-800-521-2779 for U.S. Residents or 1-800-363-4869 for Canadian
Residents.
• Provide your name, vehicle identification number, license plate number, and yourlocation, including the telephone number from which you are calling.
• Briefly describe the nature of the problem and answer a few simple questions.
• You will be given the name of the service provider and an estimated time of arrival. If you feel you are in an “unsafe situation”, please let us know. With your consent,
we will contact local police or safety authorities.
INSTRUMENT CLUSTER WARNING LIGHTS
- Electronic Stability Control (ESC) Activation/Malfunction Indicator Light
• If the “ESC Activation/Malfunction Indicator Light” comes on continuously withthe engine running, a malfunction has been detected in the ESC system. If this
light remains on after several ignition cycles, and the vehicle has been driven
several miles (kilometers) at speeds greater than 30 mph (48 km/h), we recom-
mend you drive to the nearest service center and have the vehicle serviced
immediately.
• The “ESC Activation/Malfunction Indicator Light” starts to flash as soon as the tires lose traction and the ESC system becomes active. If the light begins to flash
during acceleration, ease up on the accelerator and apply as little throttle as
possible. Be sure to adapt your speed and driving to the prevailing road conditions.
The light also flashes when TCS is active. To improve the vehicle's traction when
starting off in deep snow, sand or gravel, it may be desirable to switch the ESC
system to Partial Off mode by momentarily pressing the ESC Off
switch.
- Tire Pressure Monitoring System (TPMS) Light
Each tire, including the spare (if provided), should be checked monthly when cold
and inflated to the inflation pressure recommended by the vehicle manufacturer on
the vehicle placard or tire inflation pressure label. (If your vehicle has tires of a
different size than the size indicated on the vehicle placard or tire inflation pressure
label, you should determine the proper tire inflation pressure for those tires.)
As an added safety feature, your vehicle has been equipped with a tire pressure
monitoring system (TPMS) that illuminates a low tire pressure telltale when one or
more of your tires is significantly under-inflated. Accordingly, when the low tire
pressure telltale illuminates, you should stop and check your tires as soon as
possible, and inflate them to the proper pressure. Driving on a significantly under-
inflated tire causes the tire to overheat and can lead to tire failure. Under-inflation
also reduces fuel efficiency and tire tread life, and may affect the vehicle’s handling
and stopping ability.
WHAT TO DO IN EMERGENCIES
100
Page 104 of 148
- Engine Temperature Warning Light
This light warns of an overheated engine condition.
If the light turns on and a warning chime sounds while driving, safely pull over and
stop the vehicle. If the A/C system is on, turn it off. Also, shift the transmission into
NEUTRAL and idle the vehicle. If the temperature reading does not return to normal,
turn the engine off immediately.
We recommend that you do not operate the vehicle or engine damage will occur. Have
the vehicle serviced immediately.
WARNING!
A hot engine cooling system is dangerous. You or others could be badly burned by
steam or boiling coolant.
- Brake Warning Light
The Brake Warning light illuminates when there is either a system malfunction or the
parking brake is applied. If the light is on and the parking brake is not applied, it
indicates a possible brake hydraulic malfunction, brake booster problem or an
Anti-Lock Brake System problem.
Please have your vehicle serviced immediately.
WARNING!
Driving a vehicle with the red brake light on is dangerous. Part of the brake system
may have failed. It will take longer to stop the vehicle. You could have a collision.
Have the vehicle checked immediately.
- Malfunction Indicator Light (MIL)
Certain conditions, such as a loose or missing gas cap, poor fuel quality, etc., may
illuminate the MIL after engine start. The vehicle should be serviced if the light stays
on through several typical driving cycles. In most situations, the vehicle will drive
normally and not require towing.
If the MIL flashes when the engine is running, serious conditions may exist that could
lead to immediate loss of power or severe catalytic converter damage. We recommend
you do not operate the vehicle. Have the vehicle serviced immediately.
WHAT TO DO IN EMERGENCIES
102
Page 106 of 148
- Air Bag Warning Light
• If the light is not on during starting, stays on, or turns on while driving, have thevehicle serviced by an authorized service center immediately.
Fuel Cap/Loose Gas Cap Message
• If a “gas cap” message (shown as Check Fuel Cap) appears, tighten the gas capuntil a “clicking” sound is heard.
• Press the odometer reset button to turn the message off.
• If the message continues to appear for more than three days after tightening the gas cap, see your authorized service center.
Oil Change EVIC Indicator
Message
If an “oil change” message (shown as “Change Oil Soon” and “Oil Change Needed”)
appears and a single chime sounds, it is time for your next required oil change.
Resetting The Light After Servicing
1. Turn the ignition switch to the ON/RUN position (do not start engine).
2. Fully depress the accelerator pedal three times within 10 seconds.
3. Turn the ignition switch to the OFF/LOCK position.
HOTOIL – Transmission Temperature Warning Message
• The HOTOIL cluster message will appear in the odometer accompanied with achime to indicate that there is excessive transmission fluid temperature that might
occur with severe usage such as trailer towing.
• It may also occur when operating the vehicle in a high torque converter slip condition, such as 4-wheel-drive operation (e.g., snow plowing, off-road opera-
tion).
• If this HOTOIL message turns on, stop the vehicle and run the engine at idle or faster, with the transmission in NEUTRAL until the message turns off.
CAUTION!
Continuous driving with the Transmission Temperature HOTOIL Warning message
illuminated will eventually cause severe transmission damage and transmission
failure.
WARNING!
Continued operation with the Transmission Temperature HOTOIL Warning mes-
sage illuminated could cause the fluid to boil over, come into contact with the hot
engine or exhaust components causing a fire that may result in personal injury.
WHAT TO DO IN EMERGENCIES
104
Page 113 of 148
JUMP-STARTING
• If your vehicle has a discharged bat-tery it can be jump-started using a set
of jumper cables and a battery in an-
other vehicle or by using a portable
battery booster pack.
• Jump-starting can be dangerous if done improperly so please follow the
procedures in this section carefully.
NOTE:
When using a portable battery booster
pack follow the manufacturer’s operating
instructions and precautions.
Preparations For Jump-Start
• The battery in your vehicle is located in the right rear of the engine compartment.
1. Set the parking brake, shift the automatic transmission into PARK and turn the ignition to LOCK.
2. Turn off the heater, radio, and all unnecessary electrical accessories.
3. If using another vehicle to jump-start the battery, park the vehicle within the jumper cables reach, set the parking brake and make sure the ignition is OFF.
Jump-Starting Procedure
1. Connect the positive (+)end of the jumper cable to the positive (+)post of the
vehicle with the discharged battery.
2. Connect the opposite end of the positive (+)jumper cable to the positive (+)post
of the booster battery.
3. Connect the negative (-)end of the jumper cable to the negative (-)post of the
booster battery.
4. Connect the opposite end of the negative (-)jumper cable to a good engine ground
(exposed metal part of the discharged vehicle’s engine) away from the battery and
the fuel injection system.
5. Start the engine in the vehicle that has the booster battery, let the engine idle a few minutes, and then start the engine in the vehicle with the discharged battery.
WHAT TO DO IN EMERGENCIES
111