change wheel JEEP WRANGLER 2015 JK / 3.G Owners Manual
[x] Cancel search | Manufacturer: JEEP, Model Year: 2015, Model line: WRANGLER, Model: JEEP WRANGLER 2015 JK / 3.GPages: 695, PDF Size: 20.64 MB
Page 325 of 695
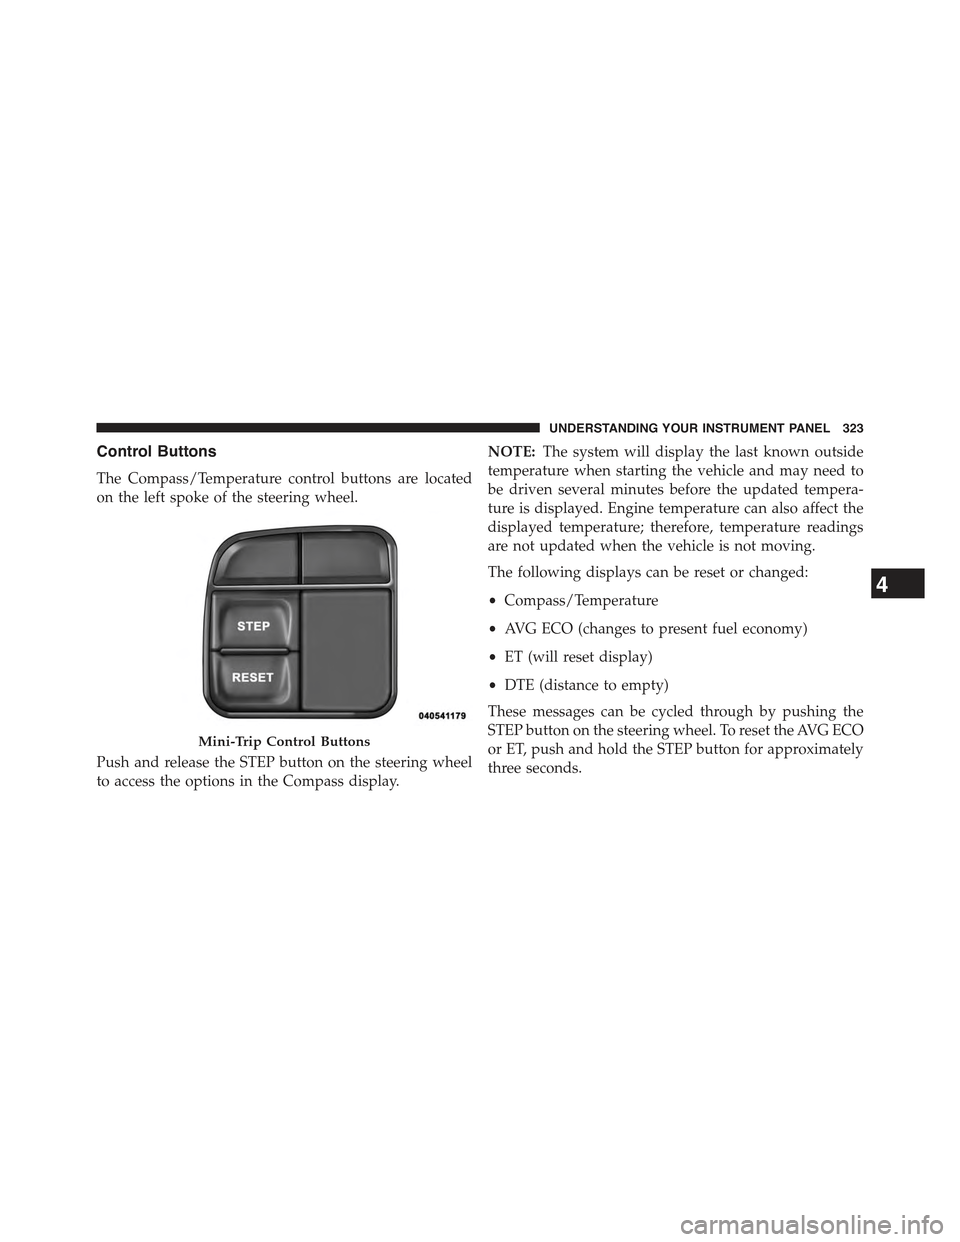
Control Buttons
The Compass/Temperature control buttons are located
on the left spoke of the steering wheel.
Push and release the STEP button on the steering wheel
to access the options in the Compass display.
NOTE:The system will display the last known outside
temperature when starting the vehicle and may need to
be driven several minutes before the updated tempera-
ture is displayed. Engine temperature can also affect the
displayed temperature; therefore, temperature readings
are not updated when the vehicle is not moving.
The following displays can be reset or changed:
•Compass/Temperature
•AVG ECO (changes to present fuel economy)
•ET (will reset display)
•DTE (distance to empty)
These messages can be cycled through by pushing the
STEP button on the steering wheel. To reset the AVG ECO
or ET, push and hold the STEP button for approximately
three seconds.
Mini-Trip Control Buttons
4
UNDERSTANDING YOUR INSTRUMENT PANEL 323
Page 327 of 695
To Set The Variance
Start the engine and leave the transmission gear selector
lever in the PARK position. Press and hold the RESET
button on the steering wheel (for approximately ten
seconds) until the current variance zone number is dis-
played. To change the zone, press and release the STEP
button to increase the variance one step. Repeat as
necessary until the desired variance is achieved.
NOTE:The factory default zone is 8. During program-
ming, the zone value will wrap around from zone 15 to
zone 1.
Manual Compass Calibration
If the compass appears erratic, inaccurate or abnormal,
you may wish to calibrate the compass. Prior to calibrat-
ing the compass, make sure the proper zone is selected.
1. Start the engine and leave the transmission in the
PARK position.
2. Press and hold the RESET button (for approximately
10 seconds) until the current variance zone number is
displayed.
3. Release the RESET button, then press and hold again
for approximately 10 seconds, until the direction is
displayed, with the CAL indicator on continuously in
the display.
4. To complete the compass calibration, drive the vehicle
in one or more complete 360–degree circles, under
5 mph (8 km/h) in an area free from power lines and
large metallic objects, until the CAL indicator turns
off. The compass will now function normally.
NOTE:
•A good calibration requires a level surface and an
environment free from large metallic objects such as
buildings, bridges, underground cables, railroad
tracks, etc.
4
UNDERSTANDING YOUR INSTRUMENT PANEL 325
Page 453 of 695
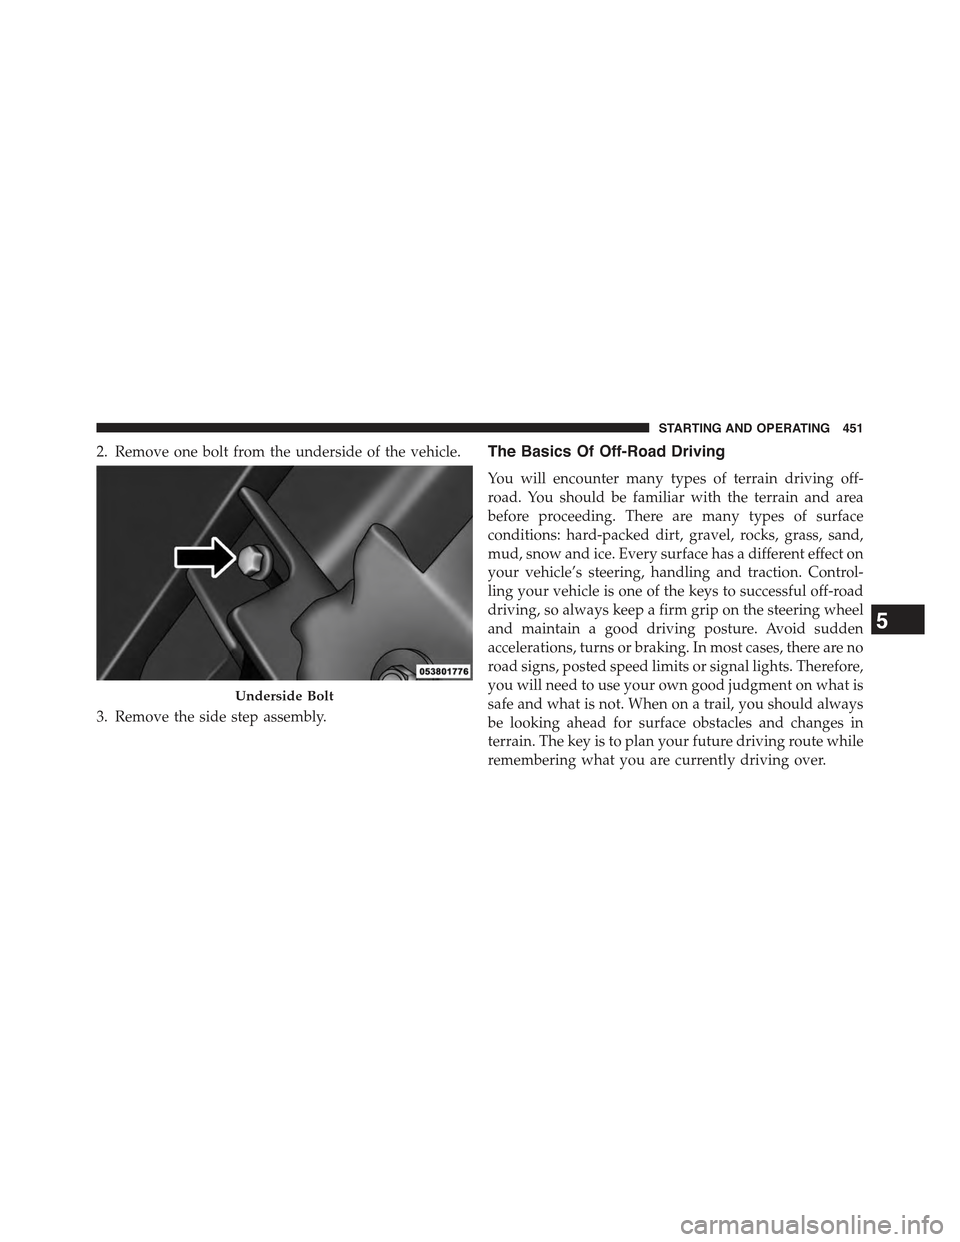
2. Remove one bolt from the underside of the vehicle.
3. Remove the side step assembly.
The Basics Of Off-Road Driving
You will encounter many types of terrain driving off-
road. You should be familiar with the terrain and area
before proceeding. There are many types of surface
conditions: hard-packed dirt, gravel, rocks, grass, sand,
mud, snow and ice. Every surface has a different effect on
your vehicle’s steering, handling and traction. Control-
ling your vehicle is one of the keys to successful off-road
driving, so always keep a firm grip on the steering wheel
and maintain a good driving posture. Avoid sudden
accelerations, turns or braking. In most cases, there are no
road signs, posted speed limits or signal lights. Therefore,
you will need to use your own good judgment on what is
safe and what is not. When on a trail, you should always
be looking ahead for surface obstacles and changes in
terrain. The key is to plan your future driving route while
remembering what you are currently driving over.
Underside Bolt
5
STARTING AND OPERATING 451
Page 459 of 695
CAUTION!
Winching or rocking the vehicle off hard objects
increases the risk of underbody damage.
Hill Climbing
Hill climbing requires good judgment and a good under-
standing of your abilities and your vehicle’s limitations.
Hills can cause serious problems. Some are just too steep
to climb and should not be attempted. You should always
feel confident with the vehicle and your abilities. You
should always climb hills straight up and down. Never
attempt to climb a hill on an angle.
Before Climbing A Steep Hill
As you approach a hill, consider its grade or steepness.
Determine if it is too steep. Look to see what the traction
is on the hill side trail. Is the trail straight up and down?
What is on top and the other side? Are there ruts, rocks,
branches or other obstacles on the path? Can you safely
recover the vehicle if something goes wrong? If every-
thing looks good and you feel confident, shift the trans-
mission into a lower gear with 4L (Low) engaged, and
proceed with caution, maintaining your momentum as
you climb the hill.
Driving Up Hill
Once you have determined your ability to proceed and
have shifted into the appropriate gear, line your vehicle
up for the straightest possible run. Accelerate with an
easy constant throttle and apply more power as you start
up the hill. Do not race forward into a steep grade; the
abrupt change of grade could cause you to lose control. If
the front end begins to bounce, ease off the throttle
slightly to bring all four tires back on the ground. As you
approach the crest of the hill, ease off the throttle and
slowly proceed over the top. If the wheels start to slip as
you approach the crest of a hill, ease off the accelerator
5
STARTING AND OPERATING 457
Page 478 of 695
7. If the sequence was completed properly, the “ESC
Activation/Malfunction Indicator Light” will blink
several times to confirm HSA is off.
Steps 1-7 must be completed within 90 seconds to turn off
HSA. Repeat steps 1-7 to re-enable HSA functionality.
Electronic Roll Mitigation (ERM)
This system anticipates the potential for wheel lift by
monitoring the driver ’s steering wheel input and the speed
of the vehicle. When ERM determines that the rate of change
of the steering wheel angle and vehicle’s speed are sufficient
to potentially cause wheel lift, it applies the appropriate
brake and may reduce engine power to lessen the chance
that wheel lift will occur. ERM will only intervene during
very severe or evasive driving maneuvers.
Electronic Roll Mitigation (ERM) can only reduce the
chance of wheel lift occurring during severe or evasive
driving maneuvers. It cannot prevent wheel lift due to
other factors such as road conditions, leaving the road-
way or striking objects or other vehicles.
NOTE:Anytime the ESC system is in the “Full Off”
mode, ERM is disabled. Refer to Electronic Stability
Control (ESC) for a complete explanation of the available
ESC modes.
WARNING!
Many factors, such as vehicle loading, road condi-
tions and driving conditions, influence the chance
that wheel lift or rollover may occur. Electronic Roll
Mitigation (ERM) cannot prevent all wheel lift or
rollovers, especially those that involve leaving the
roadway or striking objects or other vehicles. The
(Continued)
476 STARTING AND OPERATING
Page 512 of 695
WARNING!
•Do not use a tire, wheel size or rating other than
that specified for your vehicle. Some combinations
of unapproved tires and wheels may change sus-
pension dimensions and performance characteris-
tics, resulting in changes to steering, handling, and
braking of your vehicle. This can cause unpredict-
able handling and stress to steering and suspen-
sion components. You could lose control and have
a collision resulting in serious injury or death. Use
only the tire and wheel sizes with load ratings
approved for your vehicle.
•Never use a tire with a smaller load index or
capacity, other than what was originally equipped
on your vehicle. Using a tire with a smaller load
index could result in tire overloading and failure.
You could lose control and have a collision.
(Continued)
WARNING!(Continued)
•Failure to equip your vehicle with tires having
adequate speed capability can result in sudden tire
failure and loss of vehicle control.
CAUTION!
Replacing original tires with tires of a different size
may result in false speedometer and odometer read-
ings.
TIRE CHAINS (TRACTION DEVICES)
Use of traction devices require sufficient tire-to-body
clearance. Follow these recommendations to guard
against damage.
•Traction device must be of proper size for the tire, as
recommended by the traction device manufacturer.
510 STARTING AND OPERATING
Page 565 of 695
WARNING!
To avoid the risk of forcing the vehicle off the jack,
do not tighten the lug nuts fully until the vehicle has
been lowered. Failure to follow this warning may
result in personal injury.
JACKING AND TIRE CHANGING
WARNING!
•Do not attempt to change a tire on the side of the
vehicle close to moving traffic. Pull far enough off
the road to avoid the danger of being hit when
operating the jack or changing the wheel.
(Continued)
WARNING!(Continued)
•Being under a jacked-up vehicle is dangerous. The
vehicle could slip off the jack and fall on you. You
could be crushed. Never put any part of your body
under a vehicle that is on a jack. If you need to get
under a raised vehicle, take it to a service center
where it can be raised on a lift.
•Never start or run the engine while the vehicle is
on a jack.
•The jack is designed to be used as a tool for
changing tires only. The jack should not be used to
lift the vehicle for service purposes. The vehicle
should be jacked on a firm level surface only.
Avoid ice or slippery areas.
6
WHAT TO DO IN EMERGENCIES 563
Page 567 of 695
Spare Tire Removal
To remove the spare tire from the carrier, remove the tire
cover, if equipped, and remove the lug nuts with the lug
wrench turning them counterclockwise.
NOTE:If you have added aftermarket accessories to the
spare tire mounted carrier, it cannot exceed a gross
weight of 85 lbs (38.5 kg) including the weight of the
spare tire.
Preparations For Jacking
1.Park on a firm, level surface. Avoid ice or slippery areas.
WARNING!
Do not attempt to change a tire on the side of the
vehicle close to moving traffic, pull far enough off
the road to avoid being hit when operating the jack
or changing the wheel.
2. Turn on the Hazard Warning flasher.
3. Set the parking brake.
4. Shift the automatic transmission into PARK, or a
manual transmission into REVERSE.
5. Turn the ignition to LOCK.
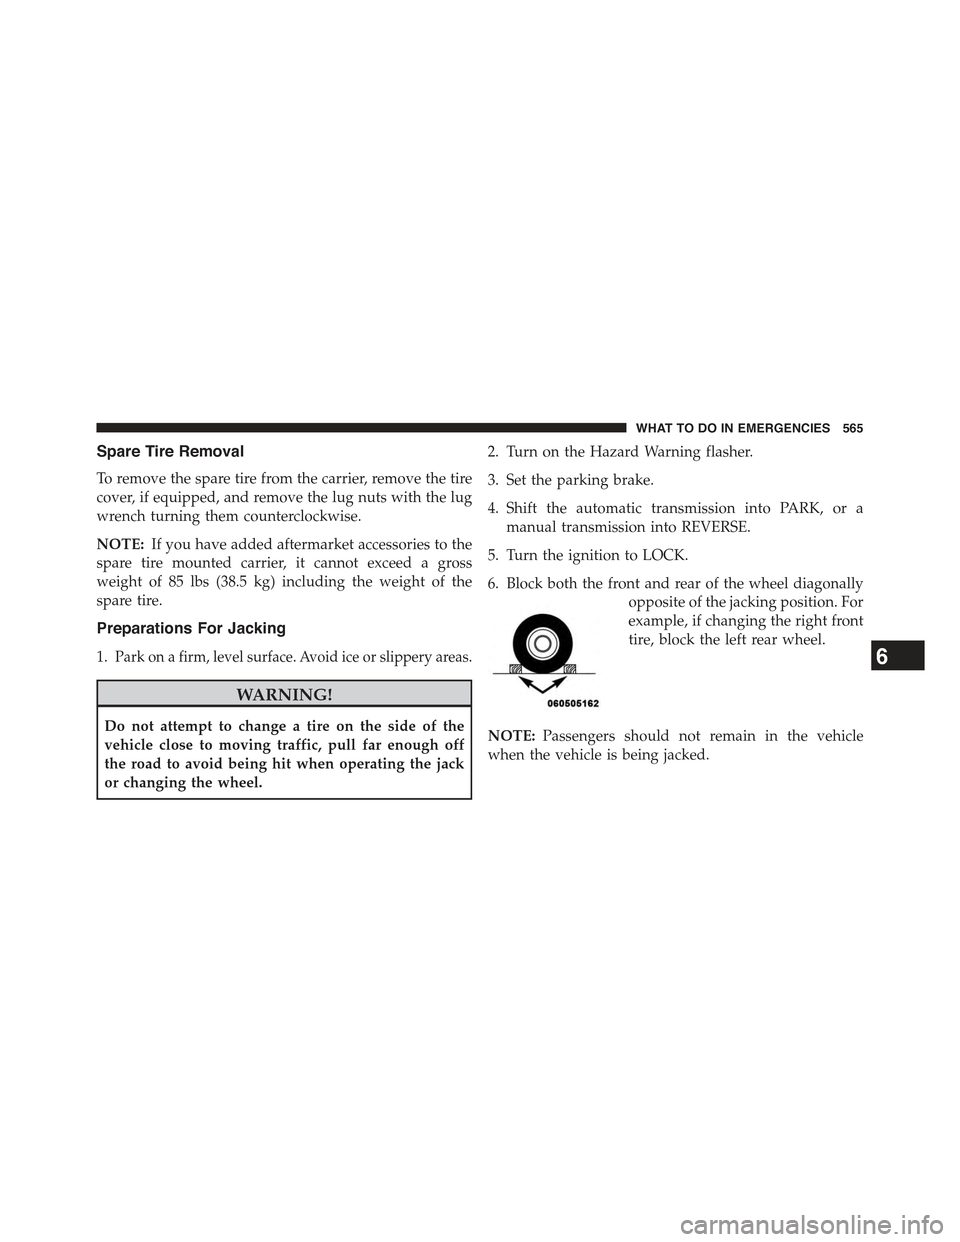
6. Block both the front and rear of the wheel diagonally
opposite of the jacking position. For
example, if changing the right front
tire, block the left rear wheel.
NOTE:Passengers should not remain in the vehicle
when the vehicle is being jacked.
6
WHAT TO DO IN EMERGENCIES 565
Page 568 of 695
Jacking Instructions
WARNING!
Carefully follow these tire changing warnings to
help prevent personal injury or damage to your
vehicle:
•Always park on a firm, level surface as far from the
edge of the roadway as possible before raising the
vehicle.
•Turn on the Hazard Warning flasher.
•Block the wheel diagonally opposite the wheel to
be raised.
•Set the parking brake firmly and set an automatic
transmission in PARK; a manual transmission in
REVERSE.
•Never start or run the engine with the vehicle on a
jack.
(Continued)
WARNING!(Continued)
•Do not let anyone sit in the vehicle when it is on a
jack.
•Do not get under the vehicle when it is on a jack. If
you need to get under a raised vehicle, take it to a
service center where it can be raised on a lift.
•Only use the jack in the positions indicated and for
lifting this vehicle during a tire change.
•If working on or near a roadway, be extremely
careful of motor traffic.
•To assure that spare tires, flat or inflated, are
securely stowed, spares must be stowed with the
valve stem facing the ground.
566 WHAT TO DO IN EMERGENCIES