instrument panel JEEP WRANGLER 2015 JK / 3.G Owners Manual
[x] Cancel search | Manufacturer: JEEP, Model Year: 2015, Model line: WRANGLER, Model: JEEP WRANGLER 2015 JK / 3.GPages: 695, PDF Size: 20.64 MB
Page 3 of 695
TABLE OF CONTENTSSECTIONPAGE
1INTRODUCTION.............................................................3
2THINGS TO KNOW BEFORE STARTING YOUR VEHICLE............................11
3UNDERSTANDING THE FEATURES OF YOUR VEHICLE. . . . . . . . . . . . . . . . . . . . . . . . . . . . 105
4UNDERSTANDING YOUR INSTRUMENT PANEL. . . . . . . . . . . . . . . . . . . . . . . . . . . . . . . . . . 301
5STARTING AND OPERATING. . . . . . . . . . . . . . . . . . . . . . . . . . . . . . . . . . . . . . . . . . . . . . . . . 415
6WHAT TO DO IN EMERGENCIES. . . . . . . . . . . . . . . . . . . . . . . . . . . . . . . . . . . . . . . . . . . . . . 559
7MAINTAINING YOUR VEHICLE. . . . . . . . . . . . . . . . . . . . . . . . . . . . . . . . . . . . . . . . . . . . . . . 581
8MAINTENANCE SCHEDULES. . . . . . . . . . . . . . . . . . . . . . . . . . . . . . . . . . . . . . . . . . . . . . . . . 651
9IF YOU NEED CONSUMER ASSISTANCE. . . . . . . . . . . . . . . . . . . . . . . . . . . . . . . . . . . . . . . . 661
10INDEX. . . . . . . . . . . . . . . . . . . . . . . . . . . . . . . . . . . . . . . . . . . . . . . . . . . . . . . . . . . . . . . . . . . . 671
1
2
3
4
5
6
7
8
9
10
Page 10 of 695
WARNINGS AND CAUTIONS
This Owners Manual containsWARNINGSagainst op-
erating procedures that could result in a collision or
bodily injury. It also containsCAUTIONSagainst proce-
dures that could result in damage to your vehicle. If you
do not read this entire Owners Manual, you may miss
important information. Observe all Warnings and Cau-
tions.
VEHICLE IDENTIFICATION NUMBER
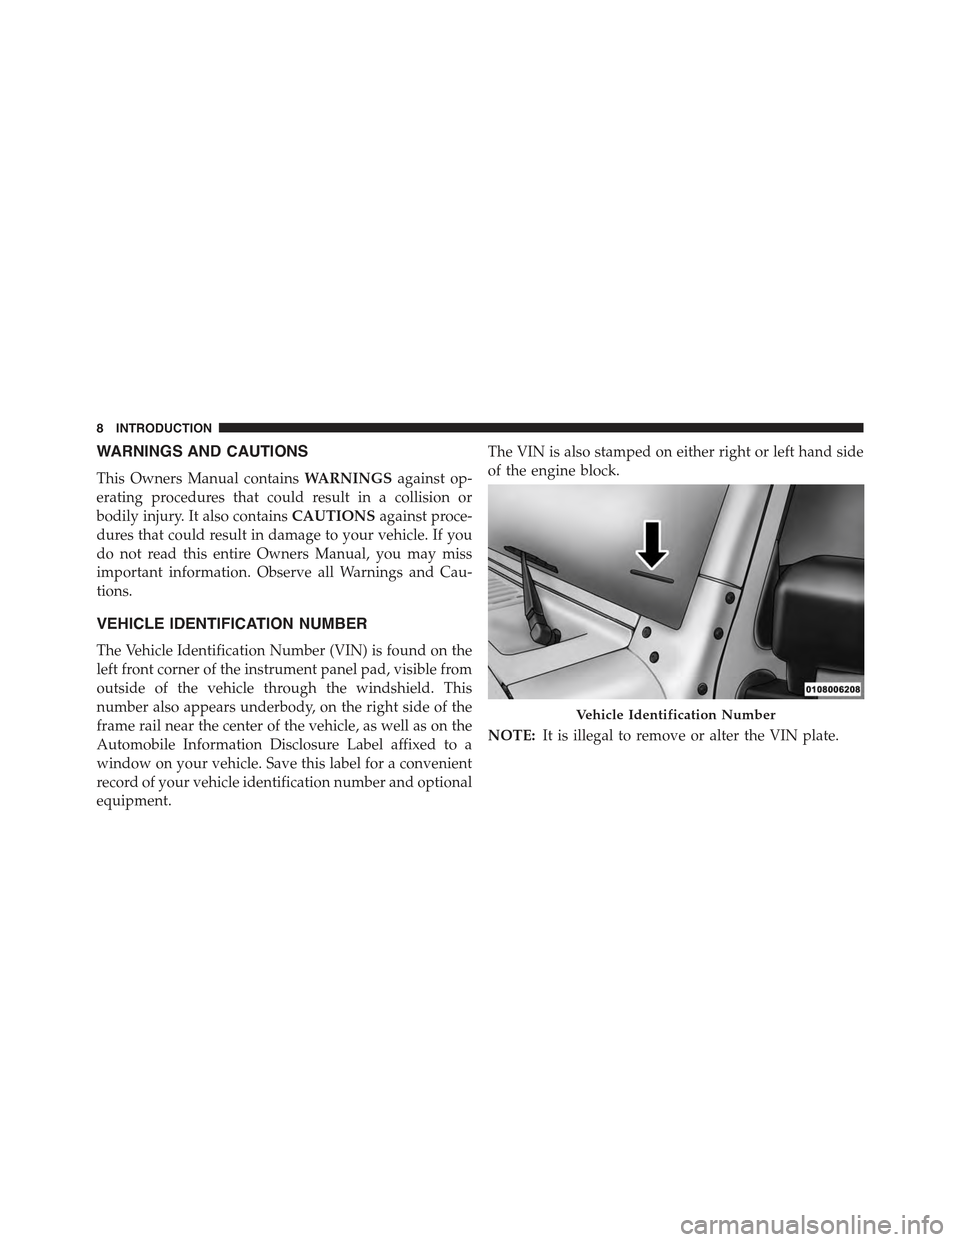
The Vehicle Identification Number (VIN) is found on the
left front corner of the instrument panel pad, visible from
outside of the vehicle through the windshield. This
number also appears underbody, on the right side of the
frame rail near the center of the vehicle, as well as on the
Automobile Information Disclosure Label affixed to a
window on your vehicle. Save this label for a convenient
record of your vehicle identification number and optional
equipment.
The VIN is also stamped on either right or left hand side
of the engine block.
NOTE:It is illegal to remove or alter the VIN plate.
Vehicle Identification Number
8INTRODUCTION
Page 26 of 695
To Unlock The Doors And Swing Gate
Push and release the RKE transmitter UNLOCK button
once to unlock the driver’s door only, or twice to unlock
all the doors and swing gate. When the RKE transmitter
UNLOCK button is pushed, the Illuminated Entry will
initiate and the turn signal lights will flash twice.
Remote Key Unlock On First Press
This feature lets you program the system to unlock either
the driver’s side, or all doors and swing gate on the first
push of the UNLOCK button on the RKE transmitter.
•For vehicles equipped with an Electronic Vehicle In-
formation Center (EVIC), refer to “Electronic Vehicle
Information Center (EVIC)/Personal Settings
(Customer-Programmable Features)” in “Understand-
ing Your Instrument Panel” for further information.
•For vehicles not equipped with the EVIC, the Remote
Unlock feature can be enabled or disabled by perform-
ing the following steps:
1. Push and hold the LOCK button on a programmed
RKE transmitter.
2. Continue to hold the RKE transmitter LOCK button
for at least four seconds, but not longer than 10
seconds, then push and hold the RKE transmitter
UNLOCK button.
3. Release both buttons at the same time.
4. Test this feature while outside of the vehicle by
pushing the LOCK/UNLOCK button on the RKE
transmitter.
24 THINGS TO KNOW BEFORE STARTING YOUR VEHICLE
Page 27 of 695
NOTE:Pushing the RKE transmitter LOCK button while
you are inside of the vehicle will activate the Vehicle
Security Alarm. Opening a door with the Vehicle Security
Alarm activated will cause the alarm to sound. Push the
RKE transmitter UNLOCK button to deactivate the Ve-
hicle Security Alarm.
5. If the desired programming was not achieved or to
reactivate this feature, repeat the above steps.
NOTE:Pushing the RKE transmitter LOCK button while
you are inside of the vehicle will activate the Vehicle
Security Alarm. Opening a door with the Vehicle Security
Alarm activated will cause the alarm to sound. Push the
RKE transmitter UNLOCK button to deactivate the Ve-
hicle Security Alarm.
To Lock The Doors And Swing Gate
Push and release the LOCK button on the RKE transmit-
ter to lock all doors. The turn signals will flash and the
horn will chirp once to acknowledge the lock signal.
Sound Horn On Lock
This feature will cause the horn to chirp when the doors
are locked with the RKE transmitter. This feature can be
turned on or turned off. To change the current setting,
proceed as follows:
•For vehicles equipped with the EVIC, refer to “Elec-
tronic Vehicle Information Center (EVIC)/Personal
Settings (Customer-Programmable Features)” in “Un-
derstanding Your Instrument Panel” for further infor-
mation.
2
THINGS TO KNOW BEFORE STARTING YOUR VEHICLE 25
Page 28 of 695
•For vehicles not equipped with the EVIC, perform the
following steps:
1. Push the RKE transmitter LOCK button for 4 to 10
seconds.
2. While the LOCK button is pushed (after four seconds),
push the RKE transmitter PANIC button. Release both
buttons.
The “Sound Horn On Lock” feature can be reactivated by
repeating this procedure.
Using The Panic Alarm
To turn the Panic Alarm feature on or off, push and hold
the PANIC button on the RKE transmitter for at least one
second and release. When the Panic Alarm is activated,
the headlights will turn on, the park lights will flash, the
horn will pulse on and off and the interior lights will turn
on.
The Panic Alarm will stay on for three minutes unless
you turn it off by pushing the PANIC button a second
time, or if the vehicle speed is 5 mph (8 km/h) or greater.
NOTE:When you turn off the Panic Alarm by pushing
the PANIC button a second time, you may have to move
closer to the vehicle due to the radio frequency noises of
the system.
To Turn Off Flash Lights With Lock
This feature will cause the turn signal lights to flash when
the doors are locked or unlocked with the RKE transmit-
ter. This feature can be turned on or turned off. To change
the current setting, proceed as follows:
•For vehicles equipped with the EVIC, refer to “Elec-
tronic Vehicle Information Center (EVIC)/Personal
Settings (Customer-Programmable Features)” in “Un-
derstanding Your Instrument Panel” for further infor-
mation.
26 THINGS TO KNOW BEFORE STARTING YOUR VEHICLE
Page 46 of 695
The top left switch controls the left front window and the
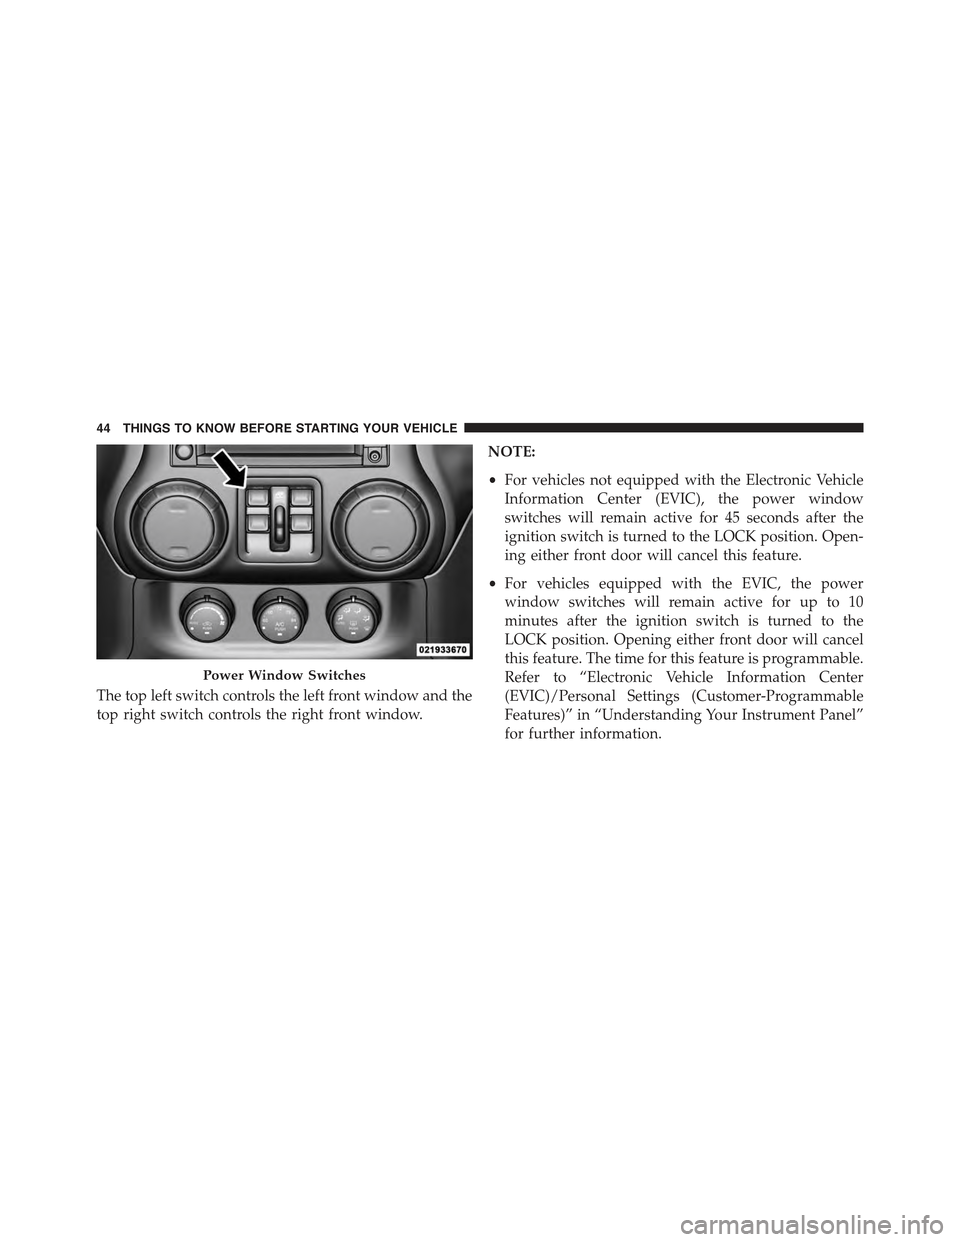
top right switch controls the right front window.
NOTE:
•For vehicles not equipped with the Electronic Vehicle
Information Center (EVIC), the power window
switches will remain active for 45 seconds after the
ignition switch is turned to the LOCK position. Open-
ing either front door will cancel this feature.
•For vehicles equipped with the EVIC, the power
window switches will remain active for up to 10
minutes after the ignition switch is turned to the
LOCK position. Opening either front door will cancel
this feature. The time for this feature is programmable.
Refer to “Electronic Vehicle Information Center
(EVIC)/Personal Settings (Customer-Programmable
Features)” in “Understanding Your Instrument Panel”
for further information.
Power Window Switches
44 THINGS TO KNOW BEFORE STARTING YOUR VEHICLE
Page 65 of 695
How To Disengage The Automatic Locking Mode
Unbuckle the combination lap/shoulder belt and allow it
to retract completely to disengage the Automatic Locking
Mode and activate the vehicle sensitive (emergency)
locking mode.
WARNING!
•The seat belt assembly must be replaced if the
switchable Automatic Locking Retractor (ALR) fea-
ture or any other seat belt function is not working
properly when checked according to the proce-
dures in the Service Manual.
•Failure to replace the seat belt assembly could
increase the risk of injury in collisions.
(Continued)
WARNING!(Continued)
•Do not use the Automatic Locking Mode to restrain
occupants who are wearing the seat belt or children
who are using booster seats. The locked mode is
only used to install rear-facing or forward-facing
child restraints that have a harness for restraining
the child.
Supplemental Restraint System (SRS)
Air Bag System Components
Your vehicle may be equipped with the following air bag
system components:
•Occupant Restraint Controller (ORC)
•Air Bag Warning Light
•Steering Wheel and Column
•Instrument Panel
2
THINGS TO KNOW BEFORE STARTING YOUR VEHICLE 63
Page 66 of 695
•Knee Impact Bolsters
•Advanced Front Air Bags
•Supplemental Side Air Bags
•Front and Side Impact Sensors
•Seat Belt Pretensioners
•Seat Belt Buckle Switch
•Seat Track Position Sensors
Advanced Front Air Bags
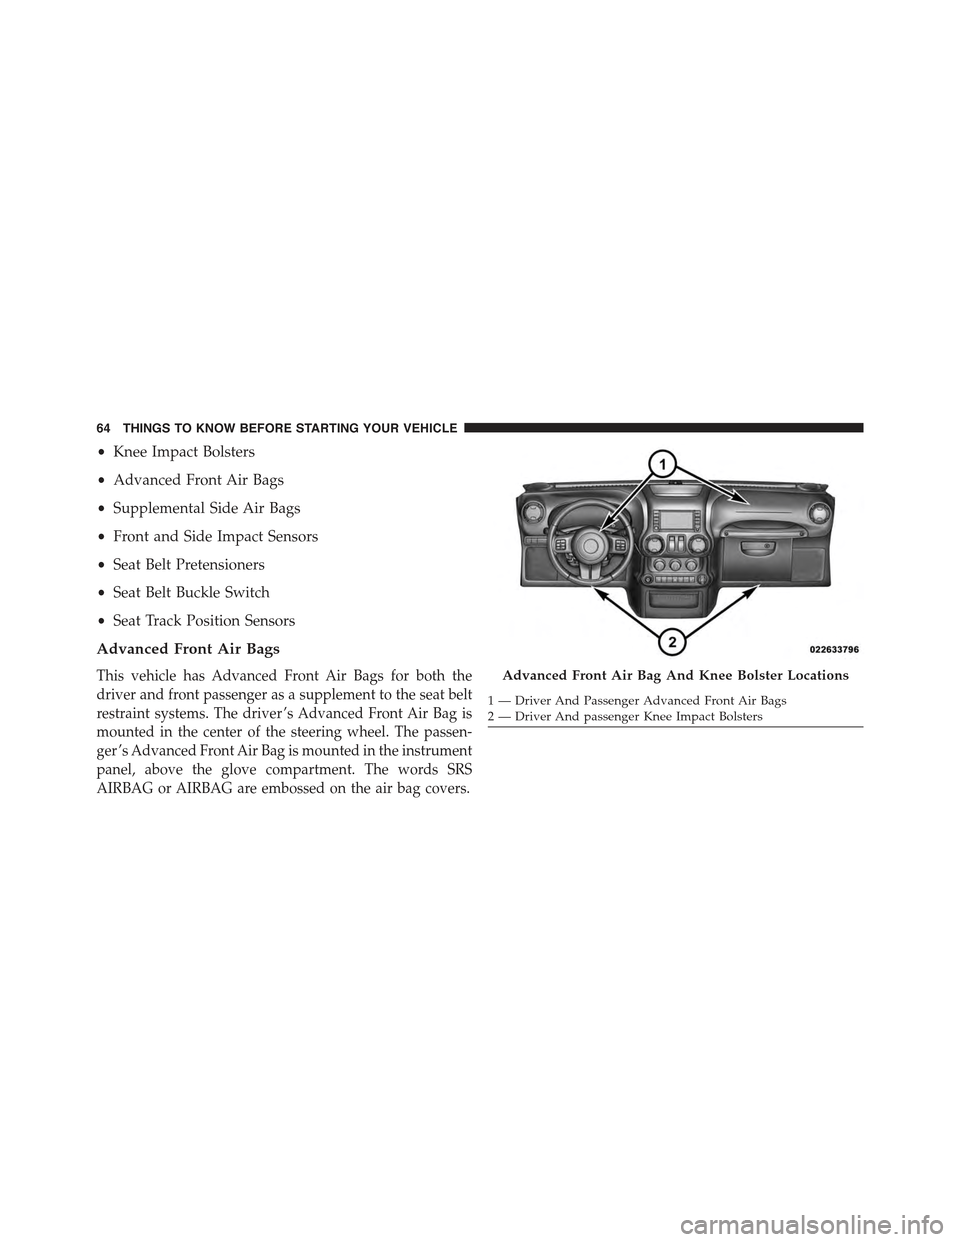
This vehicle has Advanced Front Air Bags for both the
driver and front passenger as a supplement to the seat belt
restraint systems. The driver ’s Advanced Front Air Bag is
mounted in the center of the steering wheel. The passen-
ger ’s Advanced Front Air Bag is mounted in the instrument
panel, above the glove compartment. The words SRS
AIRBAG or AIRBAG are embossed on the air bag covers.
Advanced Front Air Bag And Knee Bolster Locations
1—DriverAndPassengerAdvancedFrontAirBags2 — Driver And passenger Knee Impact Bolsters
64 THINGS TO KNOW BEFORE STARTING YOUR VEHICLE
Page 67 of 695
WARNING!
•Being too close to the steering wheel or instrument
panel during Advanced Front Air Bag deployment
could cause serious injury, including death. Air
bags need room to inflate. Sit back, comfortably
extending your arms to reach the steering wheel or
instrument panel.
•Never place a rear-facing child restraint in front of
an air bag. A deploying Passenger Advanced Front
Air Bag can cause death or serious injury to a child
12 years or younger, including a child in a rear-
facing child restraint.
•Only use a rear-facing child restraint in a vehicle
with a rear seat.
Advanced Front Air Bag Features
The Advanced Front Air Bag system has multistage
driver and front passenger air bags. This system provides
output appropriate to the severity and type of collision as
determined by the Occupant Restraint Controller (ORC),
which may receive information from the front impact
sensors or other system components.
The first stage inflator is triggered immediately during an
impact that requires air bag deployment. A low energy
output is used in less severe collisions. A higher energy
output is used for more severe collisions.
This vehicle may be equipped with driver and/or front
passenger seat track position sensors that may adjust the
inflation rate of the Advanced Front Air Bags based upon
seat position.
2
THINGS TO KNOW BEFORE STARTING YOUR VEHICLE 65
Page 68 of 695
This vehicle may be equipped with a driver and/or front
passenger seat belt buckle switch that detects whether
the driver or front passenger seat belt is buckled. The seat
belt buckle switch may adjust the inflation rate of the
Advanced Front Air Bags.
WARNING!
•No objects should be placed over or near the air
bag on the instrument panel or steering wheel,
because any such objects could cause harm if the
vehicle is in a collision severe enough to cause the
air bags to inflate.
(Continued)
WARNING!(Continued)
•Do not put anything on or around the air bag
covers or attempt to open them manually. You may
damage the air bags and you could be injured
because the air bags may no longer be functional.
The protective covers for the air bag cushions are
designed to open only when the air bags are
inflating.
•Relying on the air bags alone could lead to more
severe injuries in a collision. The air bags work
with your seat belt to restrain you properly. In
some collisions, air bags won’t deploy at all. Al-
ways wear your seat belts even though you have air
bags.
66 THINGS TO KNOW BEFORE STARTING YOUR VEHICLE