set JEEP WRANGLER 2016 JK / 3.G Owners Manual
[x] Cancel search | Manufacturer: JEEP, Model Year: 2016, Model line: WRANGLER, Model: JEEP WRANGLER 2016 JK / 3.GPages: 705, PDF Size: 5.5 MB
Page 22 of 705
VEHICLE SECURITY ALARM — IF EQUIPPED
The Vehicle Security Alarm monitors the vehicle doors,
swing gate, and ignition for unauthorized operation.
While the Vehicle Security Alarm is armed, interior
switches for door locks are disabled. The Vehicle Security
Alarm provides both audible and visible signals when
alarming. The horn will sound, the headlights will turn
on, the park lamps and/or turn signals will flash repeat-
edly for three minutes. If the disturbance is still present
(driver’s door, passenger door, other doors, ignition) after
three minutes, the headlights, park lamps and/or turn
signals will flash for an additional 15 minutes.
NOTE:The Panic Alarm and the Vehicle Security Alarm
are quite different. Please take a moment to activate the
Panic Alarm and the Vehicle Security Alarm to hear the
differences in the horn. In case one should go off in the
future, you will need to know which mode has been
activated in order to deactivate it.
Rearming The System
If something triggers the alarm, and no action is taken to
disarm it, the Vehicle Security Alarm will turn off the
horn after three minutes, turn off all of the visual signals
after 15 minutes, and then the Vehicle Security Alarm will
rearm itself.
To Arm The System
The Vehicle Security Alarm will set when you use the
Remote Keyless Entry (RKE) transmitter to lock the doors
and swing gate, or when you use the power door lock
switch while the door is open. After all the doors are
locked and closed, the Vehicle Security Light (located on
the instrument cluster) will flash rapidly for about 16
seconds to signal that the Vehicle Security Alarm is
arming. During this 16-second arming period, opening
any door or the swing gate will cancel the arming. If the
Vehicle Security Alarm is successfully set, the Vehicle
Security Light will flash at a slower rate to indicate the
Vehicle Security Alarm is armed.
20 THINGS TO KNOW BEFORE STARTING YOUR VEHICLE
Page 25 of 705
NOTE:The line of transmission must not be blocked
with metal objects.
To Unlock The Doors And Swing Gate
Push and release the RKE transmitter UNLOCK button
once to unlock the driver’s door only, or twice to unlock all the doors and swing gate. When the RKE transmitter
UNLOCK button is pushed, the Illuminated Entry will
initiate, and the turn signal lights will flash twice.
Remote Key Unlock On First Push
This feature lets you program the system to unlock either
the driver’s side, or all doors and swing gate on the first
push of the UNLOCK button on the RKE transmitter.
•
For vehicles equipped with an Electronic Vehicle In-
formation Center (EVIC), refer to “Electronic Vehicle
Information Center (EVIC)/Personal Settings
(Customer-Programmable Features)” in “Understand-
ing Your Instrument Panel” for further information.
• For vehicles not equipped with the EVIC, the Remote
Unlock feature can be enabled or disabled by perform-
ing the following steps:
1. Push and hold the LOCK button on a programmed RKE transmitter.
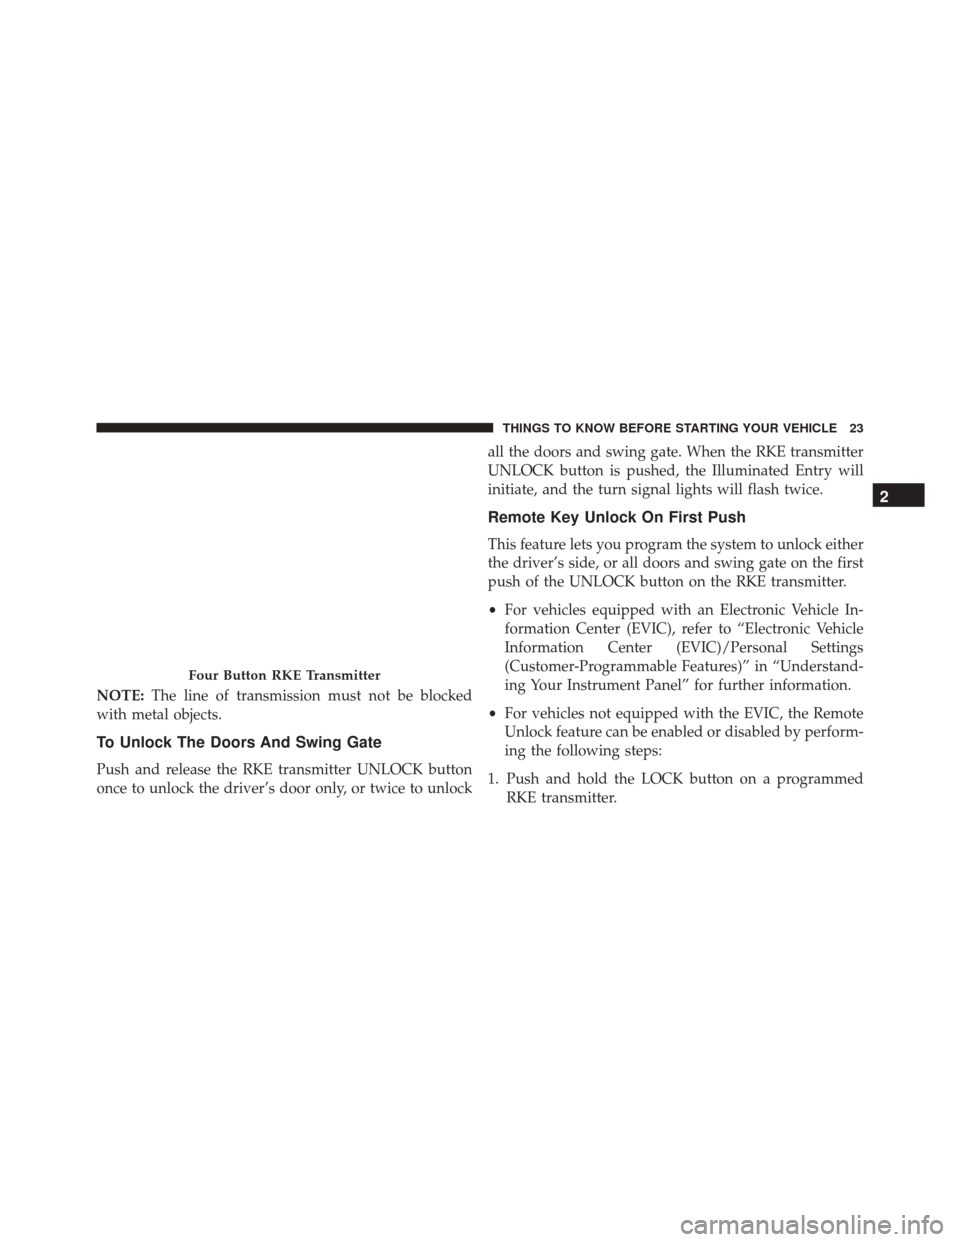
Four Button RKE Transmitter
2
THINGS TO KNOW BEFORE STARTING YOUR VEHICLE 23
Page 27 of 705
Sound Horn On Lock
This feature will cause the horn to chirp when the doors
are locked with the RKE transmitter. This feature can be
turned on or turned off. To change the current setting,
proceed as follows:
•For vehicles equipped with the EVIC, refer to “Elec-
tronic Vehicle Information Center (EVIC)/Personal
Settings (Customer-Programmable Features)” in “Un-
derstanding Your Instrument Panel” for further infor-
mation.
• For vehicles not equipped with the EVIC, perform the
following steps:
1. Push the RKE transmitter LOCK button for 4 to 10 seconds.
2. While the LOCK button is pushed (after four seconds), push the RKE transmitter PANIC button. Release both
buttons. The “Sound Horn On Lock” feature can be reactivated by
repeating this procedure.
Using The Panic Alarm
To turn the Panic Alarm feature on or off, push and hold
the PANIC button on the RKE transmitter for at least one
second and release. When the Panic Alarm is activated, the
headlights will turn on, the park lights will flash, the horn
will pulse on and off and the interior lights will turn on.
The Panic Alarm will stay on for three minutes unless
you turn it off by pushing the PANIC button a second
time, or if the vehicle speed is 5 mph (8 km/h) or greater.
NOTE:
When you turn off the Panic Alarm by pushing
the PANIC button a second time, you may have to move
closer to the vehicle due to the radio frequency noises of
the system.
2
THINGS TO KNOW BEFORE STARTING YOUR VEHICLE 25
Page 28 of 705
To Turn Off Flash Lights With Lock
This feature will cause the turn signal lights to flash when
the doors are locked or unlocked with the RKE transmit-
ter. This feature can be turned on or turned off. To change
the current setting, proceed as follows:
•For vehicles equipped with the EVIC, refer to “Elec-
tronic Vehicle Information Center (EVIC)/Personal
Settings (Customer-Programmable Features)” in “Un-
derstanding Your Instrument Panel” for further infor-
mation.
• For vehicles not equipped with the EVIC, perform the
following steps:
1. Push the RKE transmitter UNLOCK button for 4 to 10 seconds.
2. While the UNLOCK button is pushed, (after four seconds) push the RKE transmitter LOCK button.
Release both buttons. 3. Test the “Flash Lights With Lock” feature outside of
the vehicle by pushing the RKE transmitter LOCK
button with the ignition switch in the LOCK position
and the ignition key removed.
NOTE: Pushing the RKE transmitter LOCK button while
you are in the vehicle will activate the Vehicle Security
Alarm. Opening a door with the Vehicle Security Alarm
activated will cause the alarm to sound. Push the RKE
transmitter UNLOCK button to deactivate the Vehicle
Security Alarm.
The “Flash Lights With Lock” feature can be reactivated
by repeating this procedure.
Programming Additional Transmitters
Refer to “Sentry Key” in “Things To Know Before Start-
ing” for further information.
If you do not have a programmed RKE transmitter,
contact your authorized dealer for details.
26 THINGS TO KNOW BEFORE STARTING YOUR VEHICLE
Page 43 of 705
Automatic Door Locks — If Equipped
The auto door lock feature default condition is enabled.
When enabled, the door locks will lock automatically
when the vehicle’s speed exceeds 15 mph (24 km/h). The
auto door lock feature can be enabled or disabled by your
authorized dealer. The auto door lock feature is enabled/
disabled in the Uconnect Settings.
Automatic Unlock Doors On Exit — If Equipped
The doors will unlock automatically on vehicles with
power door locks if:
1. The “Automatic Unlock Doors On Exit” feature isenabled.
2. The vehicle speed returned to 0 mph (0 km/h) and the transmission shift lever is in NEUTRAL or PARK.
3. The driver door is opened.
4. The doors were not previously unlocked.
Automatic Unlock Doors On Exit Programming
The “Automatic Unlock Doors On Exit” feature can be
enabled or disabled as follows:
1. Close all doors and place the key in the ignition.
2. Cycle the ignition switch between LOCK and ON/ RUN and then back to LOCK four times ending up in
the LOCK position.
3. Push the power door unlock switch to unlock the doors.
4. A single chime will indicate the completion of the programming.
5. Repeat these steps if you want to return this feature to its previous setting.
NOTE: Use the “Automatic Unlock Doors On Exit”
feature in accordance with local laws.
2
THINGS TO KNOW BEFORE STARTING YOUR VEHICLE 41
Page 46 of 705
NOTE:
•For vehicles not equipped with the Electronic Vehicle
Information Center (EVIC), the power window
switches will remain active for 45 seconds after the
ignition switch is turned to the LOCK position. Open-
ing either front door will cancel this feature.
• For vehicles equipped with the EVIC, the power
window switches will remain active for up to 10
minutes after the ignition switch is turned to the
LOCK position. Opening either front door will cancel
this feature. The time for this feature is programmable.
Refer to “Electronic Vehicle Information Center
(EVIC)/Personal Settings (Customer-Programmable
Features)” in “Understanding Your Instrument Panel”
for further information. Four-Door Models
The lower left switch controls the left rear passenger
window, and the lower right switch controls the right
rear passenger window.
Auto-Down
Both the driver and front passenger window switches
have an “Auto-Down” feature. Push the window switch
past the first detent, release, and the window will go
down automatically. To cancel the Auto-Down move-
ment, operate the switch in either the up or down
direction and release the switch.
To stop the window from going all the way down during
the Auto-Down operation, pull up on the switch briefly.
To partially open the window, push halfway to the first
detent and release it when you want the window to stop.
44 THINGS TO KNOW BEFORE STARTING YOUR VEHICLE
Page 58 of 705
stowed position. If necessary, slide the latch plate
down the webbing to allow the seat belt to retract
fully.
Rear Center Lap/Shoulder Belt Retractor Lockout
This feature is designed to lock the retractor whenever
the rear seatback is not fully latched. This prevents
someone from wearing the rear center lap/shoulder belt
when the rear seatback is not fully latched.
NOTE:If the rear center lap/shoulder belt cannot be
pulled out, check that the rear seatback is fully latched.
If the rear seatback is properly latched and the rear center
lap/shoulder belt still cannot be pulled out, the
Automatic-Locking Retractor (ALR) system may be acti-
vated. To reset this feature you must let all of the seat belt
webbing return into the retractor. You will not be able to
pull out more webbing until all of the webbing has been
returned back into the retractor.
WARNING!
The rear center lap/shoulder belt is equipped with a
lockout feature to ensure that the rear seatback is in
the fully upright and locked position when occupied.
If the rear seatback is not fully upright and locked
and the rear center lap/shoulder belt can be pulled
out of the retractor, immediately take the vehicle to
your authorized dealer for service. Failure to follow
this warning could result in serious injury or death.
Lap/Shoulder Belt Untwisting Procedure
Use the following procedure to untwist a twisted lap/
shoulder belt.
1. Position the latch plate as close as possible to the anchor point.
56 THINGS TO KNOW BEFORE STARTING YOUR VEHICLE
Page 68 of 705
WARNING!(Continued)
some collisions, air bags won’t deploy at all. Al-
ways wear your seat belts even though you have air
bags.
Advanced Front Air Bag Operation
Advanced Front Air Bags are designed to provide addi-
tional protection by supplementing the seat belts. Ad-
vanced Front Air Bags are not expected to reduce the risk
of injury in rear, side, or rollover collisions. The Ad-
vanced Front Air Bags will not deploy in all frontal
collisions, including some that may produce substantial
vehicle damage — for example, some pole collisions,
truck underrides, and angle offset collisions.
On the other hand, depending on the type and location of
impact, Advanced Front Air Bags may deploy in crashes
with little vehicle front-end damage but that produce a
severe initial deceleration. Because air bag sensors measure vehicle deceleration
over time, vehicle speed and damage by themselves are
not good indicators of whether or not an air bag should
have deployed.
Seat belts are necessary for your protection in all colli-
sions, and also are needed to help keep you in position,
away from an inflating air bag.
When the ORC detects a collision requiring the Ad-
vanced Front Air Bags, it signals the inflator units. A large
quantity of non-toxic gas is generated to inflate the
Advanced Front Air Bags.
The steering wheel hub trim cover and the upper right
side of the instrument panel separate and fold out of the
way as the air bags inflate to their full size. The Advanced
Front Air Bags fully inflate in less time than it takes to
blink your eyes. The air bags then quickly deflate while
helping to restrain the driver and front passenger.
66 THINGS TO KNOW BEFORE STARTING YOUR VEHICLE
Page 72 of 705
If you do have a collision which deploys the air bags, any
or all of the following may occur:
•The air bag material may sometimes cause abrasions
and/or skin reddening to the occupants as the air bags
deploy and unfold. The abrasions are similar to fric-
tion rope burns or those you might get sliding along a
carpet or gymnasium floor. They are not caused by
contact with chemicals. They are not permanent and
normally heal quickly. However, if you haven’t healed
significantly within a few days, or if you have any
blistering, see your doctor immediately.
• As the air bags deflate, you may see some smoke-like
particles. The particles are a normal by-product of the
process that generates the non-toxic gas used for air
bag inflation. These airborne particles may irritate the
skin, eyes, nose, or throat. If you have skin or eye
irritation, rinse the area with cool water. For nose or
throat irritation, move to fresh air. If the irritation continues, see your doctor. If these particles settle on
your clothing, follow the garment manufacturer ’s in-
structions for cleaning.
Do not drive your vehicle after the air bags have de-
ployed. If you are involved in another collision, the air
bags will not be in place to protect you.
WARNING!
Deployed air bags and seat belt pretensioners cannot
protect you in another collision. Have the air bags,
seat belt pretensioners, and the seat belt retractor
assemblies replaced by an authorized dealer imme-
diately. Also, have the Occupant Restraint Controller
System serviced as well.
NOTE:
• Air bag covers may not be obvious in the interior trim,
but they will open during air bag deployment.
70 THINGS TO KNOW BEFORE STARTING YOUR VEHICLE
Page 73 of 705
•After any collision, the vehicle should be taken to an
authorized dealer immediately.
Enhanced Accident Response System
In the event of an impact, if the communication network
remains intact, and the power remains intact, depending
on the nature of the event, the ORC will determine
whether to have the Enhanced Accident Response Sys-
tem perform the following functions:
• Cut off fuel to the engine.
• Flash hazard lights as long as the battery has power or
until the hazard light button is pressed. The hazard
lights can be deactivated by pressing the hazard light
button.
• Turn on the interior lights, which remain on as long as
the battery has power.
• Unlock the power door locks.
Enhanced Accident Response System Reset
Procedure
In order to reset the Enhanced Accident Response System
functions after an event, the ignition switch must be
changed from ignition START or ON/RUN to ignition
OFF. Carefully check the vehicle for fuel leaks in the
engine compartment and on the ground near the engine
compartment and fuel tank before resetting the system
and starting the engine.
Air Bag Warning Light
The air bags must be ready to inflate for your
protection in a collision. The Occupant Re-
straint Controller (ORC) monitors the internal
circuits and interconnecting wiring associated
with air bag system electrical components.
The ORC monitors the readiness of the electronic parts of
the air bag system whenever the ignition switch is in the
START or ON/RUN position. If the ignition switch is in
2
THINGS TO KNOW BEFORE STARTING YOUR VEHICLE 71