turn signal JEEP WRANGLER 2016 JK / 3.G User Guide
[x] Cancel search | Manufacturer: JEEP, Model Year: 2016, Model line: WRANGLER, Model: JEEP WRANGLER 2016 JK / 3.GPages: 156, PDF Size: 8.82 MB
Page 3 of 156
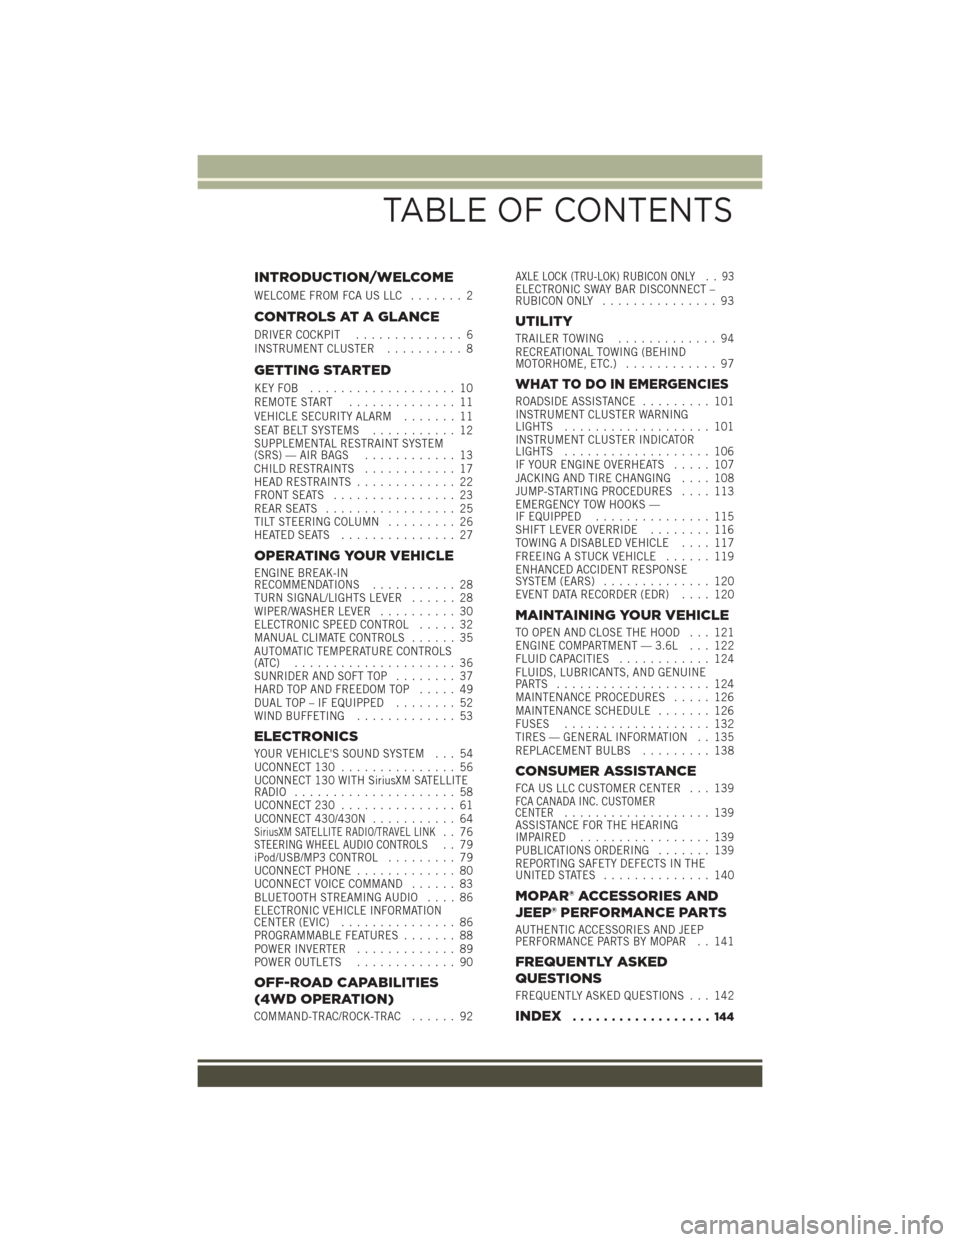
INTRODUCTION/WELCOME
WELCOME FROM FCA US LLC....... 2
CONTROLS AT A GLANCE
DRIVER COCKPIT.............. 6
INSTRUMENT CLUSTER .......... 8
GETTING STARTED
KEYFOB ................... 10
REMOTE START.............. 11
VEHICLE SECURITY ALARM ....... 11
SEAT BELT SYSTEMS ........... 12
SUPPLEMENTAL RESTRAINT SYSTEM
(SRS) — AIR BAGS ............ 13
CHILD RESTRAINTS ............ 17
HEAD RESTRAINTS ............. 22
FRONT SEATS ................ 23
REAR SEATS ................. 25
TILT STEERING COLUMN ......... 26
HEATEDSEATS ............... 27
OPERATING YOUR VEHICLE
ENGINE BREAK-IN
RECOMMENDATIONS ........... 28
TURN SIGNAL/LIGHTS LEVER ...... 28
WIPER/WASHER LEVER .......... 30
ELECTRONIC SPEED CONTROL ..... 32
MANUAL CLIMATE CONTROLS ...... 35
AUTOMATIC TEMPERATURE CONTROLS
(ATC) ..................... 36
SUNRIDER AND SOFT TOP ........ 37
HARD TOP AND FREEDOM TOP ..... 49
DUAL TOP – IF EQUIPPED ........ 52
WIND BUFFETING ............. 53
ELECTRONICS
YOUR VEHICLE'S SOUND SYSTEM . . . 54
UCONNECT 130............... 56
UCONNECT 130 WITH SiriusXM SATELLITE
RADIO ..................... 58
UCONNECT 230 ............... 61
UCONNECT 430/430N ........... 64
SiriusXM SATELLITE RADIO/TRAVEL LINK.. 76STEERING WHEEL AUDIO CONTROLS.. 79
iPod/USB/MP3 CONTROL ......... 79
UCONNECT PHONE ............. 80
UCONNECT VOICE COMMAND ...... 83
BLUETOOTH STREAMING AUDIO .... 86
ELECTRONIC VEHICLE INFORMATION
CENTER (EVIC) ............... 86
PROGRAMMABLE FEATURES ....... 88
POWER INVERTER ............. 89
POWER OUTLETS ............. 90
OFF-ROAD CAPABILITIES
(4WD OPERATION)
COMMAND-TRAC/ROCK-TRAC ...... 92
AXLE LOCK (TRU-LOK) RUBICON ONLY . . 93ELECTRONIC SWAY BAR DISCONNECT –
RUBICON ONLY............... 93
UTILITY
TRAILER TOWING ............. 94
RECREATIONAL TOWING (BEHIND
MOTORHOME, ETC.) ............ 97
WHAT TO DO IN EMERGENCIES
ROADSIDE ASSISTANCE ......... 101
INSTRUMENT CLUSTER WARNING
LIGHTS ................... 101
INSTRUMENT CLUSTER INDICATOR
LIGHTS ................... 106
IF YOUR ENGINE OVERHEATS ..... 107
JACKING AND TIRE CHANGING .... 108
JUMP-STARTING PROCEDURES .... 113
EMERGENCY TOW HOOKS —
IF EQUIPPED ............... 115
SHIFT LEVER OVERRIDE ........ 116
TOWING A DISABLED VEHICLE .... 117
FREEING A STUCK VEHICLE ...... 119
ENHANCED ACCIDENT RESPONSE
SYSTEM (EARS) .............. 120
EVENT DATA RECORDER (EDR) .... 120
MAINTAINING YOUR VEHICLE
TO OPEN AND CLOSE THE HOOD . . . 121
ENGINE COMPARTMENT — 3.6L . . . 122
FLUID CAPACITIES............ 124
FLUIDS, LUBRICANTS, AND GENUINE
PARTS .................... 124
MAINTENANCE PROCEDURES ..... 126
MAINTENANCE SCHEDULE ....... 126
FUSES ................... 132
TIRES — GENERAL INFORMATION . . 135
REPLACEMENT BULBS ......... 138
CONSUMER ASSISTANCE
FCA US LLC CUSTOMER CENTER . . . 139FCA CANADA INC. CUSTOMER
CENTER................... 139
ASSISTANCE FOR THE HEARING
IMPAIRED ................. 139
PUBLICATIONS ORDERING ....... 139
REPORTING SAFETY DEFECTS IN THE
UNITEDSTATES .............. 140
MOPAR® ACCESSORIES AND
JEEP® PERFORMANCE PARTS
AUTHENTIC ACCESSORIES AND JEEP
PERFORMANCE PARTS BY MOPAR . . 141
FREQUENTLY ASKED
QUESTIONS
FREQUENTLY ASKED QUESTIONS . . . 142
INDEX.................. 144
TABLE OF CONTENTS
Page 8 of 156
DRIVER COCKPIT
1. Turn Signal/Lights Lever (behind steering wheel) pg. 28
2. Instrument Cluster pg. 8
3. Wiper/Washer Lever (behind steering wheel) pg. 30
4. Audio System pg. 54
5. Power Windows
6. Glove Compartment
7. Climate Controls pg. 35
CONTROLS AT A GLANCE
6
Page 13 of 156
REMOTE START
• Push the REMOTE START buttonon the Key Fob twice within five seconds.
Pushing the REMOTE START button a third time shuts the engine off.
• To drive the vehicle, push the UNLOCK button, insert the key in the ignition and turn to the ON/RUN position.
• With Remote Start, the engine will only run for 15 minutes (timeout) unless the ignition key is placed in the ON/RUN position.
• The vehicle must be started with the key after two consecutive timeouts.
WARNING!
• Do not start or run an engine in a closed garage or confined area. Exhaust gas contains Carbon Monoxide (CO) which is odorless and colorless. Carbon
Monoxide is poisonous and can cause you or others to be severely injured or
killed when inhaled.
• Keep Key Fob transmitters away from children. Operation of the Remote Start
System, windows, door locks or other controls could cause you and others to be
severely injured or killed.
VEHICLE SECURITY ALARM
The Vehicle Security Alarm monitors the vehicle doors for unauthorized entry and the
ignition for unauthorized operation. While the Vehicle Security Alarm is armed,
interior switches for door locks and decklid release are disabled. If something triggers
the alarm, the Vehicle Security Alarm will provide the following audible and visible
signals: the horn will pulse, the park lamps and/or turn signals will flash, and the
Vehicle Security Light in the instrument cluster will flash.
To Arm The System:
Lock the door using either the power door lock switch (one door must be open) or the
LOCK button on the Remote Keyless Entry (RKE) transmitter (doors can be open or
closed), and close all doors.
The Vehicle Security Light in the instrument cluster will flash for 16 seconds. This
shows that the Vehicle Security Alarm is arming. During this period, if a door is
opened, the ignition is cycled to ON/RUN, or the power door locks are unlocked in any
manner, the Vehicle Security Alarm will automatically disarm.
NOTE:
• The Vehicle Security Alarm will not arm if you lock the doors with the manual door
lock plungers.
• Once armed, the Vehicle Security Alarm disables the unlock switch on the driver door trim panel and passenger door trim panel.
GETTING STARTED
11
Page 28 of 156
WARNING!
• It is extremely dangerous to ride in a cargo area, inside or outside of a vehicle.In a collision, people riding in these areas are more likely to be severely injured
or killed. Do not allow people to ride in any area of your vehicle that is not
equipped with seats and seat belts. Be sure everyone in your vehicle is in a seat
and using a seat belt properly.
• Be certain that the seatback is securely locked into position. If the seatback is
not securely locked into position, the seat will not provide the proper stability
for child seats and/or passengers. An improperly latched seat could cause you
or others to be severely injured or killed.
TILT STEERING COLUMN
This feature allows you to tilt the steering column upward or downward. The tilt lever
is located on the steering column, below the turn signal lever.
Push down on the lever to unlock the steering column. With one hand firmly on the
steering wheel, move the steering column up or down, as desired. Pull upwards on
the lever to lock the column firmly in place.
WARNING!
Do not adjust the steering column while driving. Adjusting the steering column
while driving or driving with the steering column unlocked, could cause the driver
to lose control of the vehicle. Failure to follow this warning may result in serious
injury or death.
Tilt Steering Column Lever
GETTING STARTED
26
Page 30 of 156
ENGINE BREAK-IN RECOMMENDATIONS
A long break-in period is not required for the engine and drivetrain (transmission and
axle) in your vehicle.
Drive moderately during the first 300 miles (500 km). After the initial 60 miles
(100 km), speeds up to 50 or 55 mph (80 or 90 km/h) are desirable.
While cruising, brief full-throttle acceleration within the limits of local traffic laws
contributes to a good break-in. Wide-open throttle acceleration in low gear can be
detrimental and should be avoided.
The engine oil installed in the engine at the factory is a high-quality energy
conserving type lubricant. Oil changes should be consistent with anticipated climate
conditions under which vehicle operations will occur. Refer to “Maintaining Your
Vehicle,” for the recommended viscosity and quality grades.
NOTE:
A new engine may consume some oil during its first few thousand miles (kilometers)
of operation. This should be considered a normal part of the break-in and not
interpreted as an indication of an engine problem or malfunction.
CAUTION!
Never use Non-Detergent Oil or Straight Mineral Oil in the engine or damage may
result.
TURN SIGNAL/LIGHTS LEVER
Headlights And Parking Lights
Turn the end of the multifunction lever to
the first detent for parking light opera-
tion. Turn to the second detent for head-
light operation.
Instrument Panel Dimmer
• Rotate the center portion of the leverto the extreme bottom position to fully
dim the instrument panel lights and
prevent the interior lights from illumi-
nating when a door is opened.
• Rotate the center portion of the lever up to increase the brightness of the
instrument panel lights when the park-
ing lights or headlights are on.
Multifunction Lever
OPERATING YOUR VEHICLE
28
Page 31 of 156
• Rotate the center portion of the lever upward to the next detent position tobrighten the odometer and radio controls when the parking lights or headlights are
on.
• Rotate the center portion of the lever upward to the last detent to turn on the interior lighting.
Flash-To-Pass
You can signal another vehicle with your headlights by lightly pulling the multifunc-
tion lever toward you. This will turn on the high beams headlights until the lever is
released.
High/Low Beam Switch
Push the multifunction lever away from you to switch the headlights to high beam.
Pull the lever toward you, to switch the headlights back to low beam.
Front Fog Lights
The front fog light switch is located on the multifunction lever. To activate the front
fog lights, turn on the parking or low beam headlights and pull out the end of the
lever.
NOTE:
The fog lights will only operate with the parking lights or the headlights on low beam.
Selecting high beam headlights will turn off the fog lights.
Turn Signals
Move the multifunction lever up or down and the arrows on each side of the
instrument cluster flash to show proper operation of the front and rear turn signal
lights.
NOTE:
• If either light remains on and does not flash, or there is a very fast flash rate, checkfor a defective outside light bulb. If an indicator fails to light when the lever is
moved, it would suggest that the indicator bulb is defective.
• A tone will chime if the turn signals are left on for more than 1 mile (2 km).
Lane Change Assist
Tap the lever up or down once, without moving beyond the detent, and the turn signal
(right or left) will flash three times then automatically turn off.
OPERATING YOUR VEHICLE
29
Page 78 of 156
Taking A Detour
To take a detour you must be navigating a route.
• Press the “back arrow” icon button on the touchscreen multiple times to return tothe Main Navigation menu.
• Press the “Detour” button on the touchscreen.
NOTE:
If the route you are currently taking is the only reasonable option, the device might
not calculate a detour.
Acquiring Satellites
The GPS Satellite strength bars indicate the strength of your satellite reception.
• Acquiring satellite signals can take a few minutes. When at least one of the bars is green, your device has acquired satellite signals.
• You may experience delays receiving satellite signals when in areas with an obstructed view to the sky, such as garages, tunnels, or large cities with tall
buildings.
SiriusXM SATELLITE RADIO/TRAVEL LINK
• SiriusXM Travel Link requires a subscription, sold separately after the five (5) yeartrial subscription included with your vehicle purchase.
• SiriusXM Travel Link is only available in the United States.
• The following describes features that are available when in SiriusXM Satellite Radio mode.
• To access SiriusXM Satellite Radio, push the RADIO/MEDIA or RADIO button on the faceplate, then press the “SAT” button on the touchscreen.
Info
• Press the “i” button on the touchscreen to view detailed information about the current Sirius XM Satellite channel.
SiriusXM Parental Controls
• SiriusXM offers the option to permanently block selected channels. Call 1-888-539-7474 and request the Family Package.
• Uconnect 430/430N: Push the “MENU” button on the faceplate while in SiriusXM
Satellite Radio Mode, then press the “Channel Lock” to enable and/or disable
desired channels. The SEEK and SCAN function will then only display channels
without Channel lock.
ELECTRONICS
76
Page 85 of 156
Transfer Ongoing Call Between Handset And Vehicle
• During a call, push the “Voice Command” button.
• After the BEEP, say “transfer call.”
Changing The Volume
• Start a dialogue by pushing the “Phone” button, then adjust the volume
during a normal call.
• Use the radio ON/OFF VOLUME rotary knob to adjust the volume to a comfortable level while the Uconnect system is speaking. Please note the volume setting for
Uconnect is different than the audio system.
WARNING!
• Any voice commanded system should be used only in safe driving conditions following applicable laws regarding phone use. Your attention should be
focused on safely operating the vehicle. Failure to do so may result in a
collision causing you and others to be severely injured or killed.
• In an emergency, to use Uconnect Phone, your mobile phone must be:
• turned on
• paired to Uconnect Phone
• have network coverage
UCONNECT VOICE COMMAND
Voice Command Operation
The Uconnect Voice Command system allows you to control your AM, FM radio,
satellite radio, disc player, HDD, Uconnect Phone, a memo recorder, and supported
portable media devices.
• When you push the “Voice Command” button
located on the radio faceplate
or steering wheel, you will hear a beep. The beep is your signal to give a command.
If you do not say a command within a few seconds, the system will present you with
a list of options. If you ever want to interrupt the system while it lists options, push
the “Voice Command” button
, listen for the BEEP, and say your command.
NOTE:
U.S. residents visit driveuconnect.com for more info on which voice command
features apply to your vehicle. Canadian residents visit driveuconnect.ca for more
info on which voice command features apply to your vehicle.
• Start a dialogue by pushing the “Voice Command” button
, you will hear a
beep. The beep is your signal to give a command. Below are a list of voice
commands for each of the different modes:
ELECTRONICS
83
Page 90 of 156
PROGRAMMABLE FEATURES
Electronic Vehicle Information Center (EVIC)
The EVIC can be used to program the following Personal Settings. Push theMENU
button until Personal Settings displays, then push the DOWNarrow button
to
scroll through the settings. Push the RIGHTarrow button
to change the setting.
• Language • Illumin Approach
• Auto UNLK On Exit • Hill Start Assist (HSA)
• RKE Unlock • Display Units of Measure In
• Sound Horn With RKE Lock • Nav – Turn by Turn
• Flash Lamp With Lock • Display Fuel Saver
• Headlamp Off Delay • Compass Variance
• Headlamps With Wipers • Calibrate Compass
• Key-Off Power Delay
Key Fob Programmable Features
The following features may also be programmed by using the Key Fob transmitter or
the ignition and driver's door lock switch. Refer to “Uconnect Settings” in “Under-
standing Your Instrument Panel” in the Owner’s Manual on the DVD for further
information.
NOTE:
Pushing the LOCK button while you are inside the vehicle will activate the Vehicle
Security Alarm. Opening a door with the Vehicle Security Alarm activated will cause
the alarm to sound. Push the UNLOCK button to deactivate the Vehicle Security
Alarm.
Flashing Lamps With Lock
The turn signal lights flashing, when the doors are locked or unlocked, feature can be
turned on or off. To turn this feature on or off:
• Push and hold the UNLOCK button for at least 4 seconds, but no longer than 10 seconds. Then, push and hold the LOCK button while still holding the UNLOCK
button.
• Release both buttons at the same time.
ELECTRONICS
88
Page 104 of 156
IF THE LIGHT STARTS FLASHING INDICATING A LOW TIRE PRESSURE, ADJUST
THE AIR PRESSURE IN THE LOW TIRE TO THE AIR PRESSURE SHOWN ON THE
VEHICLE PLACARD OR TIRE INFLATION PRESSURE LABEL LOCATED ON THE
DRIVER'S DOOR.
NOTE:
AFTER INFLATION, THE VEHICLE MAY NEED TO BE DRIVEN FOR 20 MINUTES
BEFORE THE FLASHING LIGHT WILL TURN OFF.
Please note that the TPMS is not a substitute for proper tire maintenance, and it is
the driver’s responsibility to maintain correct tire pressure, even if under-inflation has
not reached the level to trigger illumination of the TPMS low tire pressure telltale.
Your vehicle has also been equipped with a TPMS malfunction indicator to indicate
when the system is not operating properly. The TPMS malfunction indicator is
combined with the low tire pressure telltale.
When the system detects a malfunction, the telltale will flash for approximately one
minute and then remain continuously illuminated. This sequence will continue upon
subsequent vehicle start-ups as long as the malfunction exists. When the malfunc-
tion indicator is illuminated, the system may not be able to detect or signal low tire
pressure as intended. TPMS malfunctions may occur for a variety of reasons,
including the installation of replacement or alternate tires or wheels on the vehicle
that prevent the TPMS from functioning properly. Always check the TPMS malfunc-
tion telltale after replacing one or more tires or wheels on your vehicle to ensure that
the replacement or alternate tires and wheels allow the TPMS to continue to function
properly.
NOTE:
Tire pressures change by approximately 1 psi (7 kPa) per 12° F (7° C) of air
temperature change. Keep this in mind when checking tire pressure inside a garage,
especially in the Winter. Example: If garage temperature is 68°F (20°C), and the
outside temperature is 32°F (0°C), then the cold tire inflation pressure should be
increased by 3 psi (21 kPa), which equals 1 psi (7 kPa) for every 12°F (7°C) for this
outside temperature condition.
CAUTION!
The TPMS has been optimized for the original equipment tires and wheels. TPMS
pressures and warning have been established for the tire size equipped on your
vehicle. Undesirable system operation or sensor damage may result when using
replacement equipment that is not of the same size, type, and/or style. Aftermar-
ket wheels can cause sensor damage. Do not use tire sealant from a can, or
balance beads if your vehicle is equipped with a TPMS, as damage to the sensors
may result.
WHAT TO DO IN EMERGENCIES
102