warning JEEP WRANGLER 2016 Owner's Manual
[x] Cancel search | Manufacturer: JEEP, Model Year: 2016, Model line: WRANGLER, Model: JEEP WRANGLER 2016Pages: 721, PDF Size: 5.1 MB
Page 150 of 721

WARNING!
Any voice commanded system should be used only
in safe driving conditions following all applicable
laws, including laws regarding phone use. Your at-
tention should be focused on safely operating the
vehicle. Failure to do so may result in a collision
causing serious injury or death.
When you push the Voice Command
Page 156 of 721
WARNING!(Continued)
•Be sure everyone in your vehicle is in a seat and
using a seat belt properly.
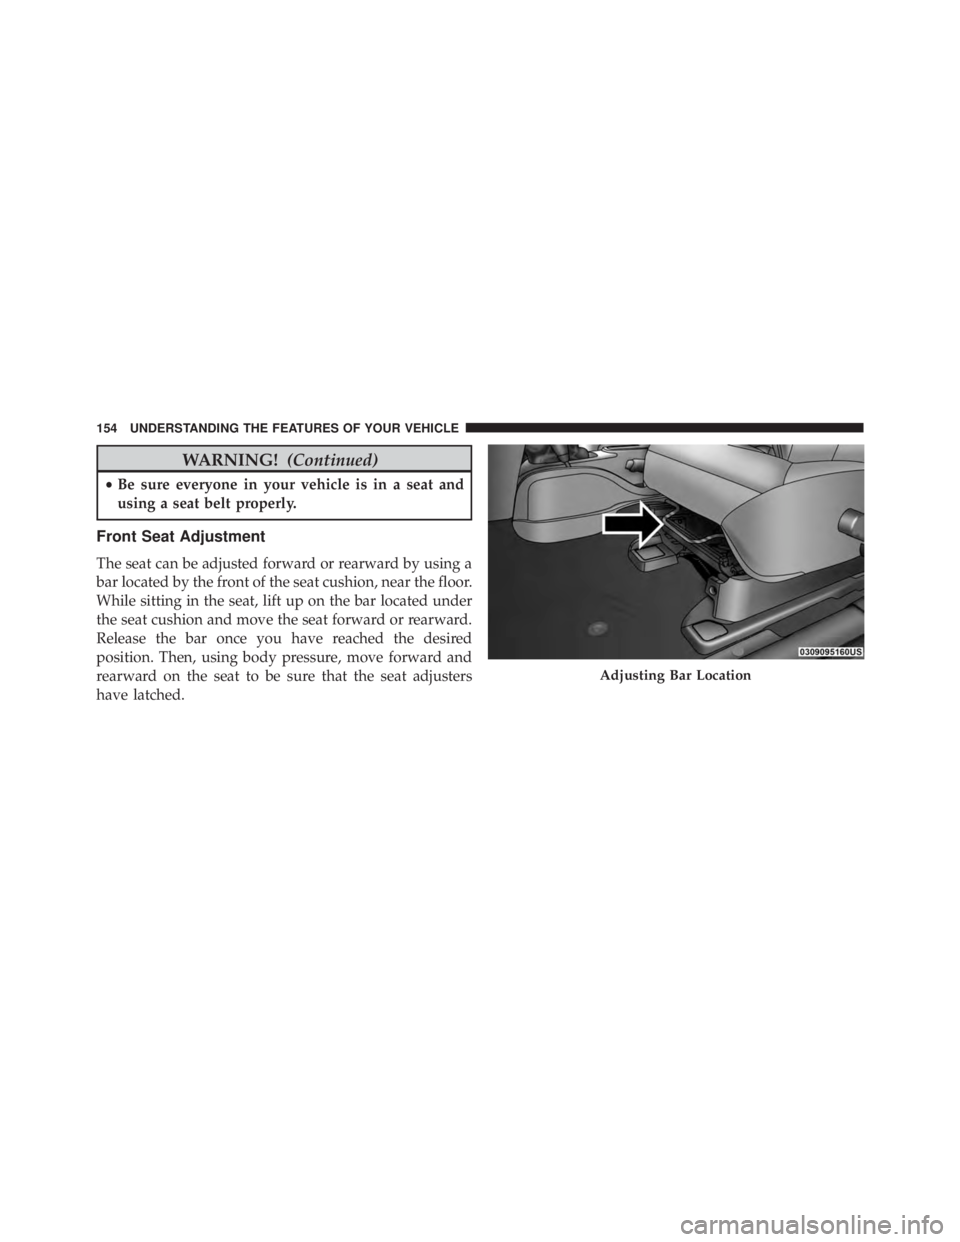
Front Seat Adjustment
The seat can be adjusted forward or rearward by using a
bar located by the front of the seat cushion, near the floor.
While sitting in the seat, lift up on the bar located under
the seat cushion and move the seat forward or rearward.
Release the bar once you have reached the desired
position. Then, using body pressure, move forward and
rearward on the seat to be sure that the seat adjusters
have latched.
Page 157 of 721
WARNING!
•Adjusting a seat while driving may be dangerous.
Moving a seat while driving could result in loss of
control which could cause a collision and serious
injury or death.
• Seats should be adjusted before fastening the seat
belts and while the vehicle is parked. Serious
injury or death could result from a poorly adjusted
seat belt.
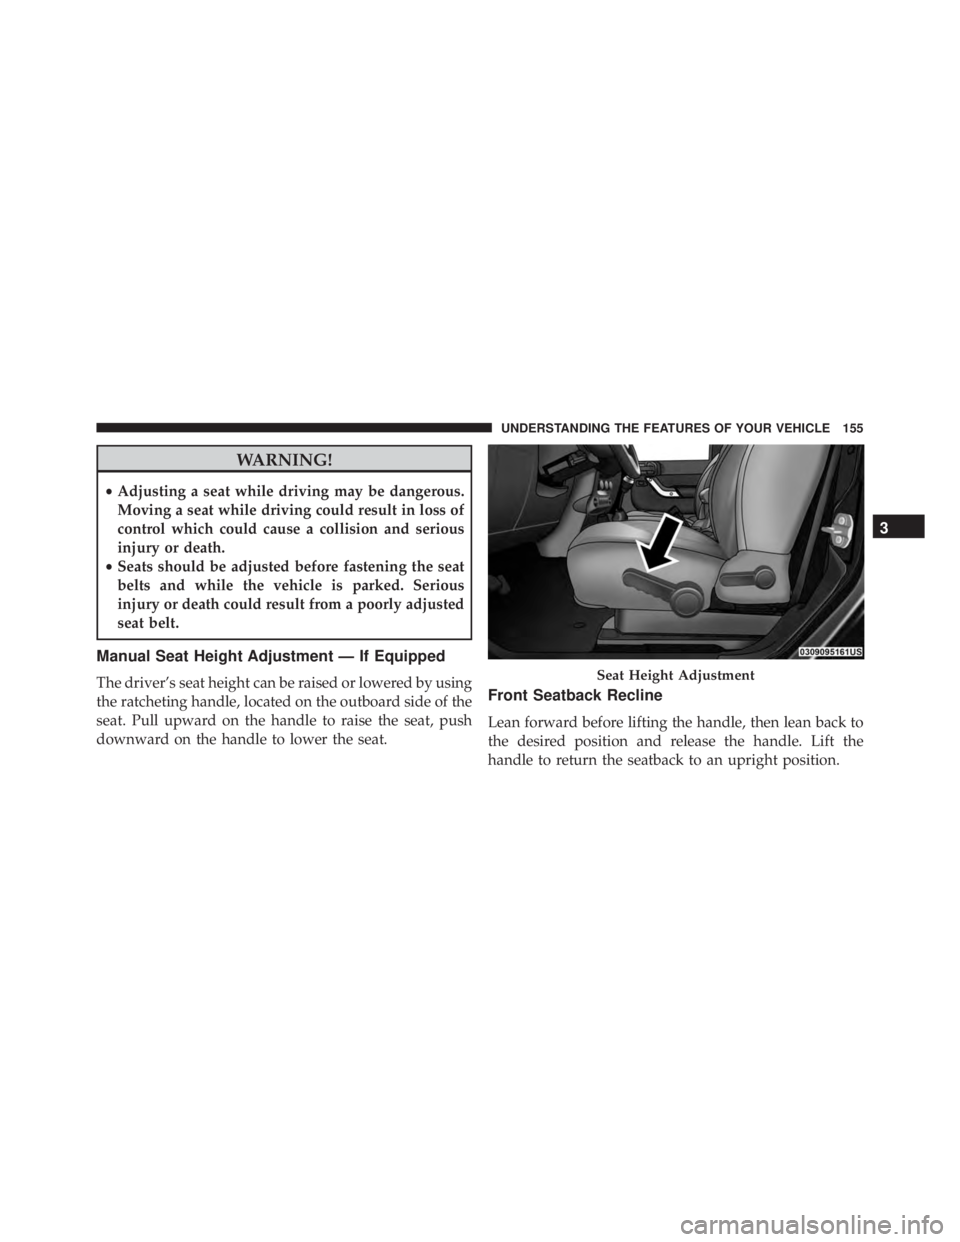
Manual Seat Height Adjustment — If Equipped
The driver’s seat height can be raised or lowered by using
the ratcheting handle, located on the outboard side of the
seat. Pull upward on the handle to raise the seat, push
downward on the handle to lower the seat.Front Seatback Recline
Lean forward before lifting the handle, then lean back to
the desired position and release the handle. Lift the
handle to return the seatback to an upright position.
Page 158 of 721
WARNING!
Do not ride with the seatback reclined so that the
shoulder belt is no longer resting against your chest.
In a collision you could slide under the seat belt,
which could result in serious injury or death.
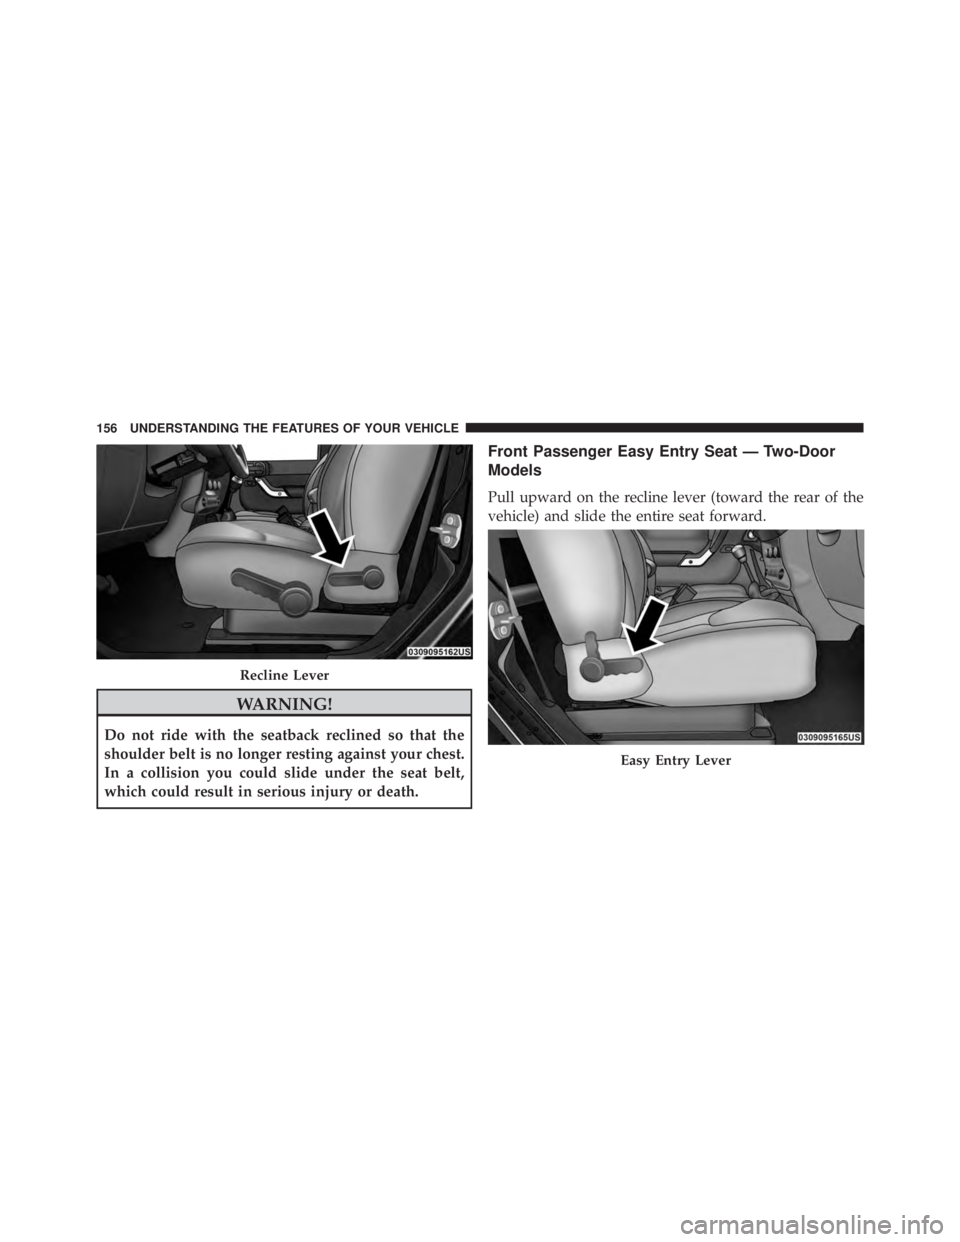
Front Passenger Easy Entry Seat — Two-Door
Models
Pull upward on the recline lever (toward the rear of the
vehicle) and slide the entire seat forward.
Page 163 of 721
WARNING!
•Persons who are unable to feel pain to the skin
because of advanced age, chronic illness, diabetes,
spinal cord injury, medication, alcohol use, exhaus-
tion or other physical condition must exercise care
when using the seat heater. It may cause burns
even at low temperatures, especially if used for
long periods of time.
• Do not place anything on the seat or seatback that
insulates against heat, such as a blanket or cushion.
This may cause the seat heater to overheat. Sitting
in a seat that has been overheated could cause
serious burns due to the increased surface tempera-
ture of the seat.
Head Restraints
Head restraints are designed to reduce the risk of injury
by restricting head movement in the event of a rear
impact. Head restraints should be adjusted so that the top
of the head restraint is located above the top of your ear.
Page 165 of 721
WARNING!
•A loose head restraint thrown forward in a colli-
sion or hard stop could cause serious injury or
death to occupants of the vehicle. Always securely
stow removed head restraints in a location outside
the occupant compartment.
• ALL the head restraints MUST be reinstalled in the
vehicle to properly protect the occupants. Follow
the re-installation instructions above prior to oper-
ating the vehicle or occupying a seat.
NOTE: Do not reposition the head restraint 180 degrees
to the incorrect position in an attempt to gain additional
clearance to the back of the head.
Rear Head Restraints — 2 Door Model
The rear seat head restraints are not adjustable. They can
be removed to make it easier to take out the rear seat. To
remove the head restraint, push the button on each of the
two head restraint guides and pull upward on the head
restraint. Replace the head restraint before driving the
vehicle with passengers in the rear seat. To replace the
head restraint, insert the head restraint rods into the
guides and push downward on the head restraint until
locked. Refer to “Occupant Restraints” in “Things to
Know Before Starting Your Vehicle” for information on
child seat tether routing.
Page 166 of 721
WARNING!(Continued)
area without the head restraints installed are more
likely to be seriously injured or killed.
• A loose head restraint thrown forward in a colli-
sion or hard stop could cause serious injury or
death to occupants of the vehicle. Always securely
stow removed head restraints in a location outside
the occupant compartment.
• ALL the head restraints MUST be reinstalled in the
vehicle to properly protect the occupants. Follow
the re-installation instructions above prior to oper-
ating the vehicle or occupying a seat.
NOTE: Do not reposition the head restraint 180 degrees
to the incorrect position in an attempt to gain additional
clearance to the back of the head.
Rear Head Restraints — 4 Door Model
The rear seat is equipped with nonadjustable head re-
straints. Refer to “Occupant Restraints” in “Things to
Know Before Starting Your Vehicle” for information on
child seat tether routing.
Removing the Rear Seat — Two-Door Models
NOTE:
• Prior to folding the rear seat, it may be necessary to
reposition the front seats.
• Be sure that the front seats are fully upright and
positioned forward. This will allow the rear seat to fold
down easily.
1. Lift the seatback release lever and fold the seatback forward.
164 UNDERSTANDING THE FEATURES OF YOUR VEHICLE
Page 171 of 721
WARNING!
Be certain that the seatback is securely locked into
position. If the seatback in not securely locked into
position the seat will not provide the proper stability
for child seats and/or passengers. An improperly
latched seat could cause serious injury.
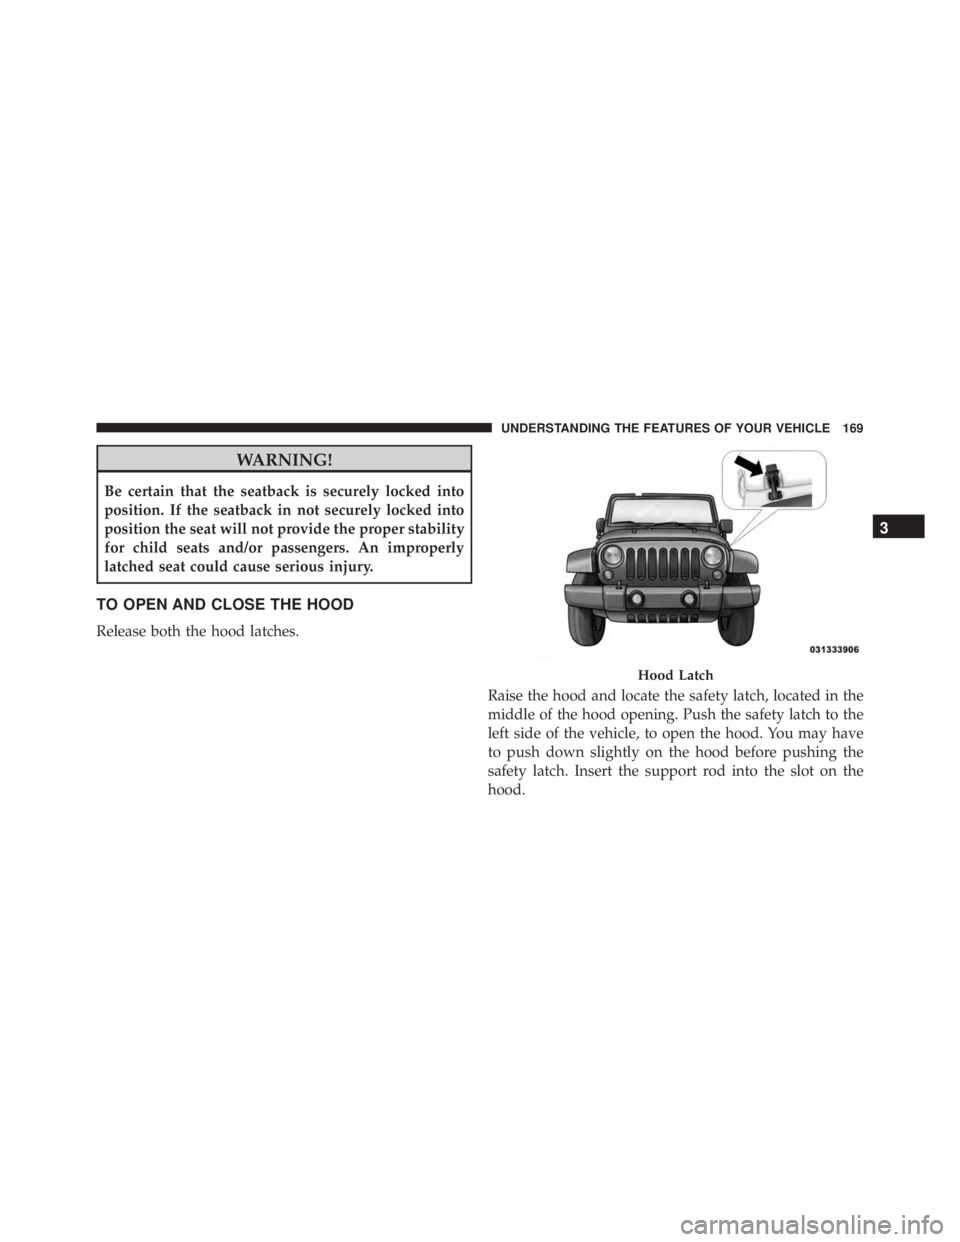
TO OPEN AND CLOSE THE HOOD
Release both the hood latches.Raise the hood and locate the safety latch, located in the
middle of the hood opening. Push the safety latch to the
left side of the vehicle, to open the hood. You may have
to push down slightly on the hood before pushing the
safety latch. Insert the support rod into the slot on the
hood.
Page 185 of 721
WARNING!(Continued)
the driver to lose control of the vehicle. Failure to
follow this warning may result in serious injury or
death.
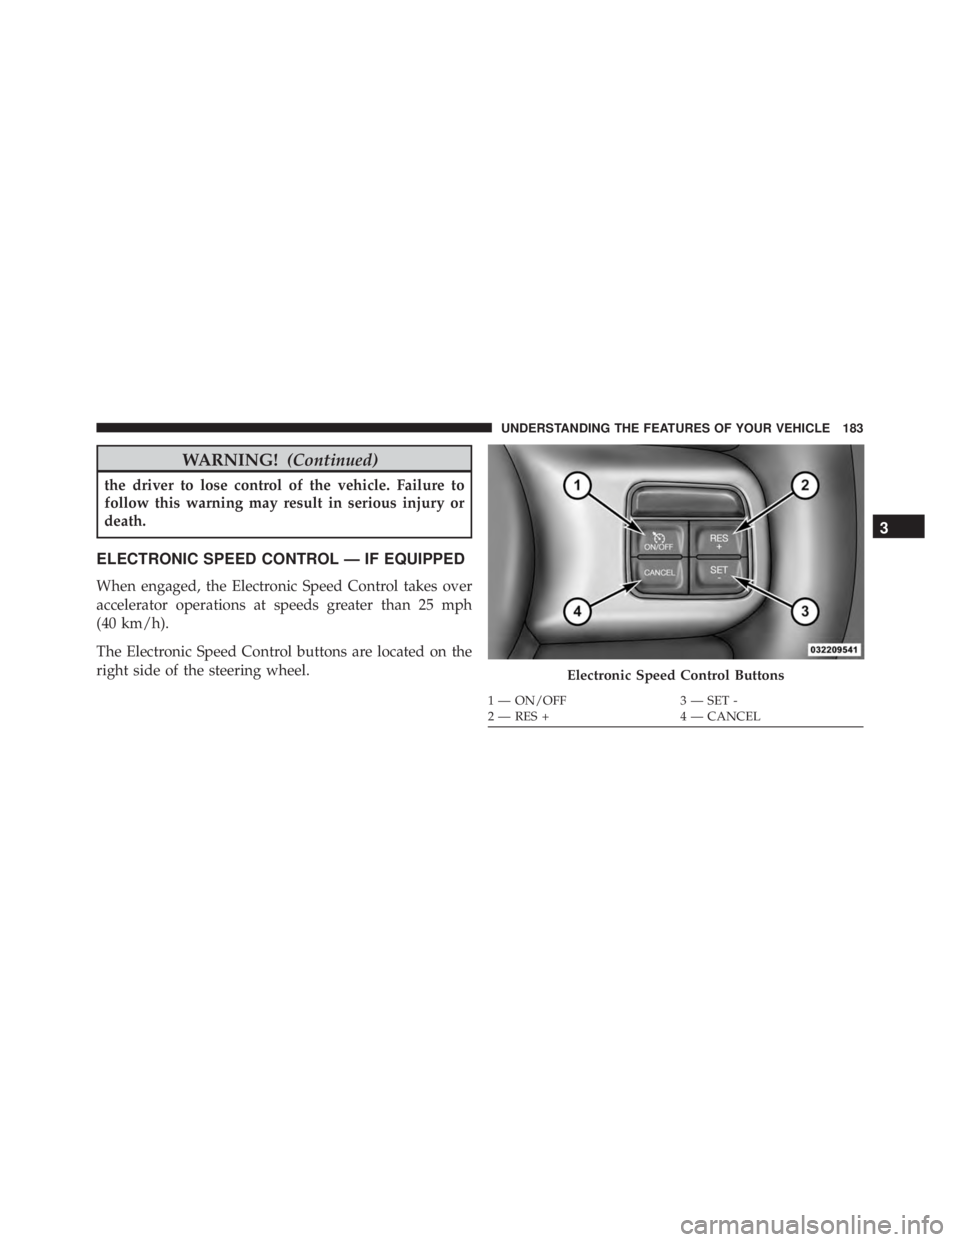
ELECTRONIC SPEED CONTROL — IF EQUIPPED
When engaged, the Electronic Speed Control takes over
accelerator operations at speeds greater than 25 mph
(40 km/h).
The Electronic Speed Control buttons are located on the
right side of the steering wheel.
Page 192 of 721
WARNING!
To avoid serious injury or death:
•Only devices designed for use in this type of outlet
should be inserted into any 12 Volt outlet.
• Do not touch with wet hands.
• Close the lid when not in use and while driving the
vehicle.
• If this outlet is mishandled, it may cause an electric
shock and failure.