CD player JEEP WRANGLER 2020 Owner handbook (in English)
[x] Cancel search | Manufacturer: JEEP, Model Year: 2020, Model line: WRANGLER, Model: JEEP WRANGLER 2020Pages: 276, PDF Size: 4.47 MB
Page 221 of 276
Audio Jack Operation
The AUX/Audio Jack provides a means to
connect a portable audio device, such as an
MP3 player or an iPod, to the vehicle’s sound
system. This requires the use of a 3.5 mm
stereo audio patch cable.
Pushing the AUX button will change the
mode to auxiliary device if the Audio Jack is
connected, allowing the music from your por-
table device to play through the vehicle's
speakers.
The functions of the portable device are con-
trolled using the device buttons, not the but-
tons on the radio. However, the volume may
be controlled using the radio or portable de-
vice.
219
Page 228 of 276
• Push the MEDIA button on the faceplate to
display the media source tabs at the top of
the screen. Select the source by pressing
the “HDD,” “DISC” or “AUX” media source
button on the touchscreen.
NOTE:
Your Touchscreen Radio will usually auto-
matically switch to the appropriate mode
when something is first connected or inserted
into the system.
Insert A CD/DVD Disc
• To insert a disc, push the LOAD button on
the faceplate.
• With the printed side upwards, insert the
disc into the disc slot of the radio. The radio
pulls the disc in automatically and closes
the flip screen. The radio selects the appro-
priate mode after the disc is recognized,
and starts playing the first track. The dis-
play shows “Reading...” during this
process.Seek Up/Seek Down
• Push the SEEK UP or SEEK DOWN buttons
on the faceplate to seek through tracks in
Disc Mode. Holding the SEEK UP button on
the touchscreen will fast forward through
the track until the beginning of the track is
reached; if still held it will fast-forward
through the next sequential track(s) (if ran-
dom play mode is not active) until released.
Holding the SEEK DOWN button on the
touchscreen will fast-reverse through the
track until the beginning of the track is
reached; if still held it will fast-reverse
through the next sequential track(s) (if ran-
dom play mode is not active) until released.
Audio Jack Operation
The AUX/Audio Jack provides a means to
connect a portable audio device, such as an
MP3 player or an iPod, to the vehicle’s sound
system. This requires the use of a 3.5 mm
stereo audio patch cable.• Push the MEDIA button on the faceplate
then the “AUX” button on the touchscreen
to change the mode to auxiliary device if
the Audio Jack is connected, allowing the
music from your portable device to play
through the vehicle's speakers.
NOTE:
The functions of the portable device are con-
trolled using the device itself, not the buttons
on the radio. However, the volume may be
controlled using the radio or portable device.
Hard Disk Drive (HDD) Operation
• The Hard Disk Drive (HDD) mode gives you
access to the audio files on the internal
hard disk drive. It functions similar to a CD
player, with the exception that the internal
HDD can hold more tracks.
• It is also possible to import display pictures
to the internal hard disk drive. The pictures
can be displayed on the right half of the
radio screen.
MULTIMEDIA
226
Page 234 of 276
TIPS CONTROLS AND
GENERAL INFORMATION
Steering Wheel Audio Controls
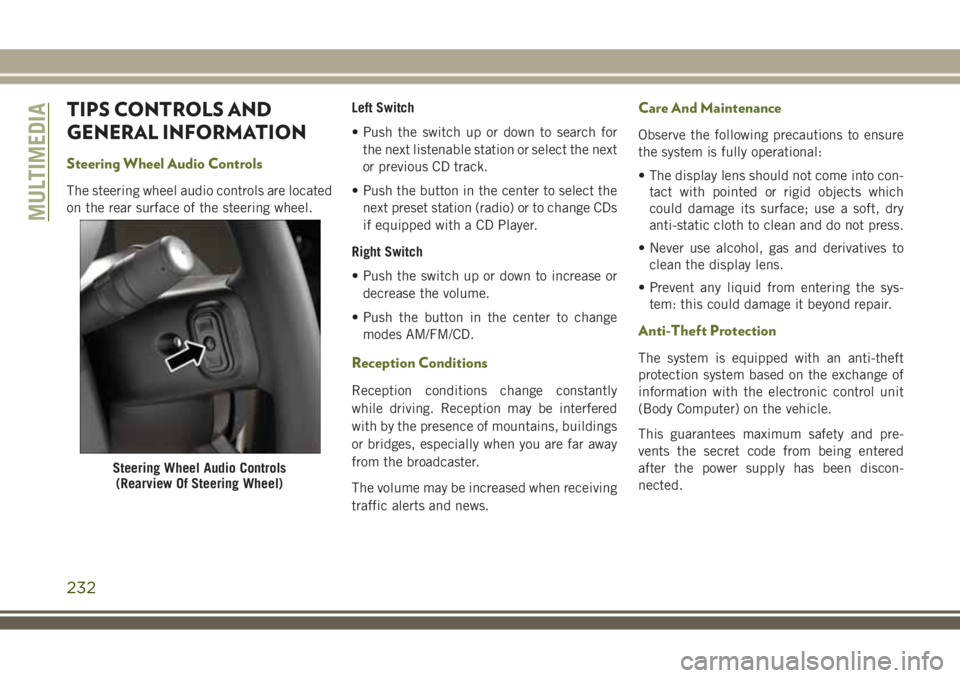
The steering wheel audio controls are located
on the rear surface of the steering wheel.Left Switch
• Push the switch up or down to search for
the next listenable station or select the next
or previous CD track.
• Push the button in the center to select the
next preset station (radio) or to change CDs
if equipped with a CD Player.
Right Switch
• Push the switch up or down to increase or
decrease the volume.
• Push the button in the center to change
modes AM/FM/CD.
Reception Conditions
Reception conditions change constantly
while driving. Reception may be interfered
with by the presence of mountains, buildings
or bridges, especially when you are far away
from the broadcaster.
The volume may be increased when receiving
traffic alerts and news.
Care And Maintenance
Observe the following precautions to ensure
the system is fully operational:
• The display lens should not come into con-
tact with pointed or rigid objects which
could damage its surface; use a soft, dry
anti-static cloth to clean and do not press.
• Never use alcohol, gas and derivatives to
clean the display lens.
• Prevent any liquid from entering the sys-
tem: this could damage it beyond repair.
Anti-Theft Protection
The system is equipped with an anti-theft
protection system based on the exchange of
information with the electronic control unit
(Body Computer) on the vehicle.
This guarantees maximum safety and pre-
vents the secret code from being entered
after the power supply has been discon-
nected.
Steering Wheel Audio Controls
(Rearview Of Steering Wheel)
MULTIMEDIA
232
Page 235 of 276
If the check has a positive outcome, the
system will start to operate, whereas if the
comparison codes are not the same or if the
electronic control unit (Body Computer) is
replaced, the system will ask the user to enter
the secret code. See an authorized dealer for
further information.
AUX/USB/MP3 CONTROL —
IF EQUIPPED
There are many ways to play music from
iPod/MP3 players or USB devices through
your vehicle's sound system.
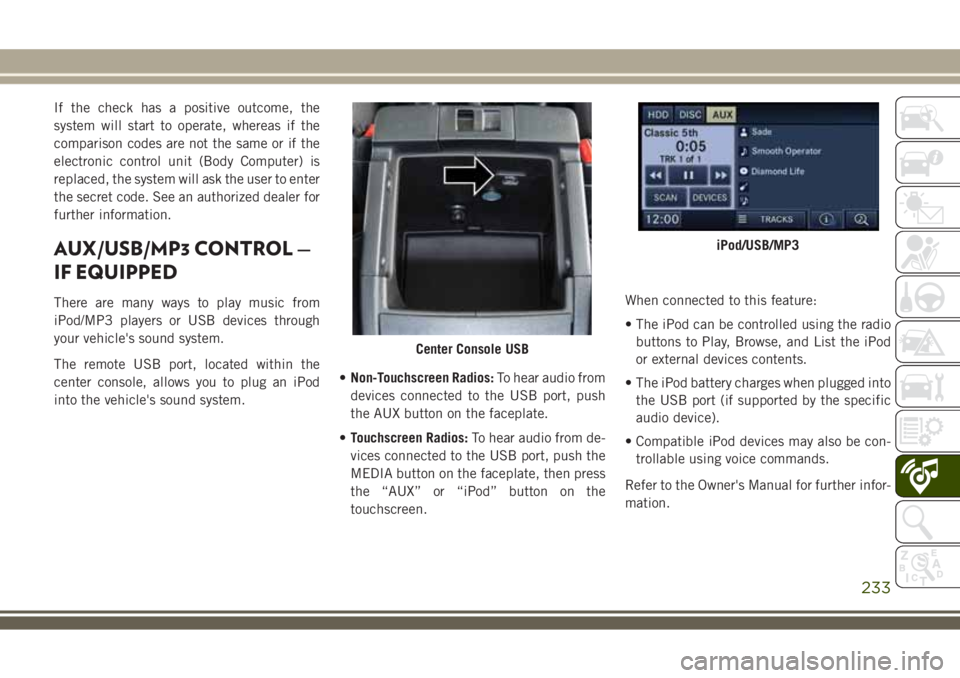
The remote USB port, located within the
center console, allows you to plug an iPod
into the vehicle's sound system.•Non-Touchscreen Radios:To hear audio from
devices connected to the USB port, push
the AUX button on the faceplate.
•Touchscreen Radios:To hear audio from de-
vices connected to the USB port, push the
MEDIA button on the faceplate, then press
the “AUX” or “iPod” button on the
touchscreen.When connected to this feature:
• The iPod can be controlled using the radio
buttons to Play, Browse, and List the iPod
or external devices contents.
• The iPod battery charges when plugged into
the USB port (if supported by the specific
audio device).
• Compatible iPod devices may also be con-
trollable using voice commands.
Refer to the Owner's Manual for further infor-
mation.
Center Console USB
iPod/USB/MP3
233
Page 238 of 276
Making A Phone Call
• Push the “Phone” button.
• After the BEEP, say “dial” (or “call” a
name).
• After the BEEP, say number (or name).
Receiving A Call — Accept (And End)
• When an incoming call rings/is announced
on Uconnect, push the “Phone” button
.
• To end a call, push the “Phone” button
.
Mute (Or Unmute) Microphone During
Call
• During a call, push the “Voice Command”
button
.
• After the BEEP, say “mute” (or “mute off”).
Transfer Ongoing Call Between Handset
And Vehicle
• During a call, push the “Voice Command”
button
.
• After the BEEP, say “transfer call.”
Changing The Volume
• Start a dialogue by pushing the “Phone”
button
, then adjust the volume during
a normal call.
• Use the radio ON/OFF VOLUME rotary knob
to adjust the volume to a comfortable level
while the Uconnect system is speaking.
Please note the volume setting for
Uconnect is different than the audio
system.
WARNING!
• Any voice commanded system should be
used only in safe driving conditions fol-
lowing applicable laws regarding phone
use. Your attention should be focused on
safely operating the vehicle. Failure to
do so may result in a collision causing
you and others to be severely injured or
killed.
• In an emergency, to use Uconnect
Phone, your mobile phone must be:
• turned on
• paired to Uconnect Phone
• have network coverage
UCONNECT VOICE
COMMAND
Voice Command Operation
The Uconnect Voice Command system allows
you to control your AM, FM radio, disc player,
HDD, Uconnect Phone, a memo recorder,
and supported portable media devices.
• When you push the “Voice Command”
button
located on the radio faceplate
or steering wheel, you will hear a beep. The
beep is your signal to give a command. If
you do not say a command within a few
seconds, the system presents you with a list
of options. If you ever want to interrupt the
system while it lists options, push the
“Voice Command” button
, listen for
the BEEP, and say your command.
MULTIMEDIA
236
Page 241 of 276
Voice Text Reply
If equipped with Uconnect Voice Command,
your radio may be able to play incoming Short
Message Service (SMS) messages (text mes-
sages) through the vehicle's sound system. It
also allows you to respond by selecting from
various predefined phrases.
NOTE:
Not all phones are compatible with this fea-
ture. Refer to the phone compatibility list at
UconnectPhone.com. Connected mobile
phones must be bluetooth-compatible and
paired with your radio.
• Push the “Voice Command” button
and after the BEEP, say “SMS” to get
started.
NOTE:
To access the tutorial, push the “Voice Com-
mand” button
. After the BEEP, say
“tutorial.” Push any button on the faceplate
or press any button on the touchscreen to
cancel the tutorial.
WARNING!
Any voice commanded system should be
used only in safe driving conditions follow-
ing applicable laws regarding phone use.
Your attention should be focused on safely
operating the vehicle. Failure to do so may
result in a collision causing you and others
to be severely injured or killed.
BLUETOOTH STREAMING
AUDIO
If equipped with Uconnect Voice Command,
your Bluetooth-equipped iPod devices, cell
phones or other media players, may also be
able to stream music to your vehicles speak-
ers. Your connected device must be
Bluetooth-compatible, and paired with your
radio (see UconnectPhone.com for pairing
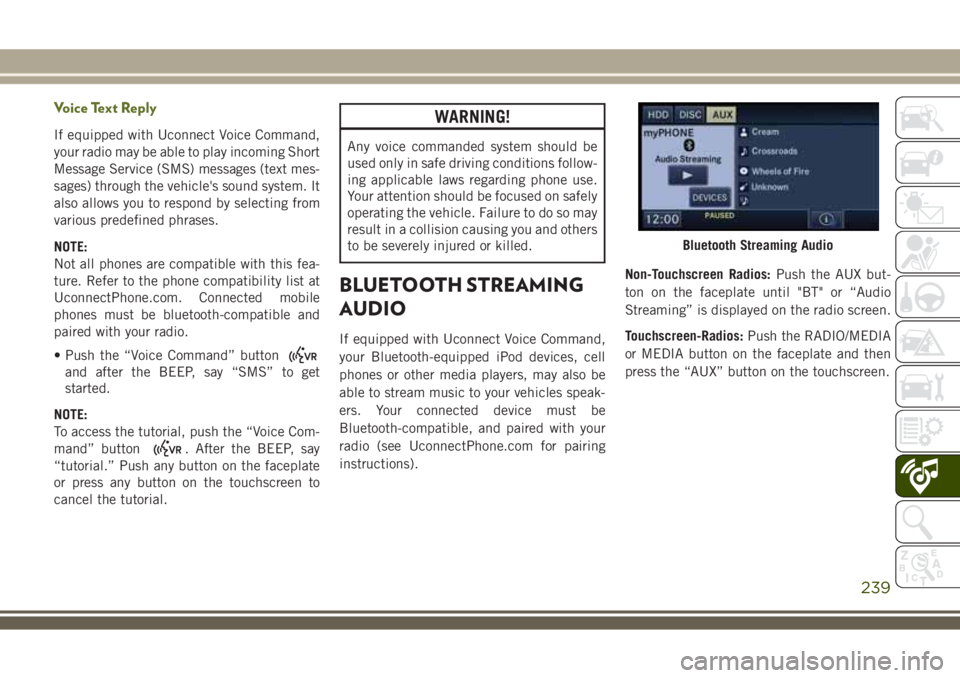
instructions).Non-Touchscreen Radios:Push the AUX but-
ton on the faceplate until "BT" or “Audio
Streaming” is displayed on the radio screen.
Touchscreen-Radios:Push the RADIO/MEDIA
or MEDIA button on the faceplate and then
press the “AUX” button on the touchscreen.
Bluetooth Streaming Audio
239
Page 261 of 276
Accessories..................212
Mopar...................212
Adding Fuel.................139
AirBag .....................93
Advance Front Air Bag.........93
Air Bag Operation.............94
Air Bag Warning Light..........92
Enhanced Accident Response . .98, 168
Event Data Recorder (EDR)......168
Front Air Bag...............93
If A Deployment Occurs.........97
Knee Impact Bolsters..........95
Maintaining Your Air Bag System . . .98
Transporting Pets............112
Air Bag Light............58, 92, 113
Air Bag Maintenance.............98
Air Conditioner Maintenance.......186
Air Conditioning Filter.........38, 187
Air Conditioning, Operating Tips......37
Air Conditioning Refrigerant. . . .186, 187
Air Conditioning System.......37, 186
Air Pressure, Tires..............193
Alarm (Security Alarm).........18, 61
Alterations/Modifications, Vehicle......4
Antifreeze (Engine Coolant)........210Anti-Lock Brake System (ABS).......68
Anti-Lock Warning Light...........61
Arming System (Security Alarm)......18
Assist, Hill Start................70
Audio Jack...............219, 226
Audio Settings................218
Automatic Headlights............29
Automatic Oil Change Indicator......58
Automatic Temperature Control (ATC) . . .37
Automatic Transmission..........127
Fluid Level Check...........184
Fluid Type................211
Autostick...................128
Axle Fluid...................211
Axle Lock...................132
Battery..................60, 186
Charging System Light.........60
Belts, Seat
.................
.113
Brake Assist System.............69
Brake Control System, Electronic.....69
Brake Fluid..............183, 211
Brake System................183
Fluid Check...............183
Master Cylinder.............183Parking..................121
Brake/Transmission Interlock.......127
Bulb Replacement..........146, 147
Bulbs, Light.................114
Capacities, Fluid..............210
Caps, Filler
Fuel....................139
Oil (Engine)...............180
Carbon Monoxide Warning.........112
Car Washes..................202
CD (Compact Disc) Player.........218
Center High Mounted Stop Light.....149
Chains, Tire..................200
Changing A Flat Tire.........154, 192
Checking Your Vehicle For Safety. . . .112
Checks, Safety................112
Child Restraints
How To Stow An Unused ALR Seat
Belt....................110
Cleaning
Wheels..................199
Climate Control................33
Manual...................33
Clock Setting.............218, 221
INDEX
259