fog light JEEP WRANGLER 2020 Owner handbook (in English)
[x] Cancel search | Manufacturer: JEEP, Model Year: 2020, Model line: WRANGLER, Model: JEEP WRANGLER 2020Pages: 276, PDF Size: 4.47 MB
Page 13 of 276
GETTING TO KNOW YOUR VEHICLE
KEYFOB...................13
KeyFob.....................13
IGNITION SWITCH............13
Ignition Key Removal............13
REMOTE STARTING SYSTEM — IF
EQUIPPED.................14
How To Use Remote Start..........14
Remote Start Abort Message........15
To Enter Remote Start............15
To Exit Remote Start Mode Without Driving
The Vehicle...................16
To Exit Remote Start Mode And Drive The
Vehicle.....................16
SENTRY KEY................16
Replacement Key Fobs...........17
Customer Key Programming........17
VEHICLE SECURITY ALARM — IF
EQUIPPED.................18
Rearming The System............18
To Arm The System.............18
To Disarm The System............18
DOORS....................19
Upper Half Door Window Removal — If
Equipped....................19
Front Door Removal..............19
Rear Door Removal (Four-Door Models) . .20
SEATS ....................21
Heated Seats — If Equipped........21
60/40 Split Folding Rear Seat —
Four Door Models..............22
Front Passenger Easy Entry Seat —
Two Door Models...............23
Tip ‘n Slide Seats — Two Door Models . .24
Removing The Rear Seat — Two Door
Models.....................24
HEAD RESTRAINTS...........25
Front Head Restraints............25
Rear Head Restraints — 2 Door Model . .26
Rear Head Restraints — 4 Door Model . .27
STEERING WHEEL............28
Tilt Steering Column.............28
MIRRORS..................28
Heated Mirrors — If Equipped.......28
EXTERIOR LIGHTS............28
Headlights And Parking Lights.......28
Daytime Running Lights — If Equipped .29
High/Low Beam Switch...........29
Flash-To-Pass.................29
Automatic Headlights — If Equipped . .29
Front Fog Lights...............29
Rear Fog Lights — If Equipped......29
Turn Signals..................29
Lane Change Assist — If Equipped....30
Lights-On Reminder.............30
Headlight Leveling System — If
Equipped...................30
WINDSHIELD WIPERS AND WASH-
ERS ......................30
Windshield Wiper Operation.........31
Rear Window Wiper/Washer — If
Equipped...................32
GETTING TO KNOW YOUR VEHICLE
11
Page 30 of 276
STEERING WHEEL
Tilt Steering Column
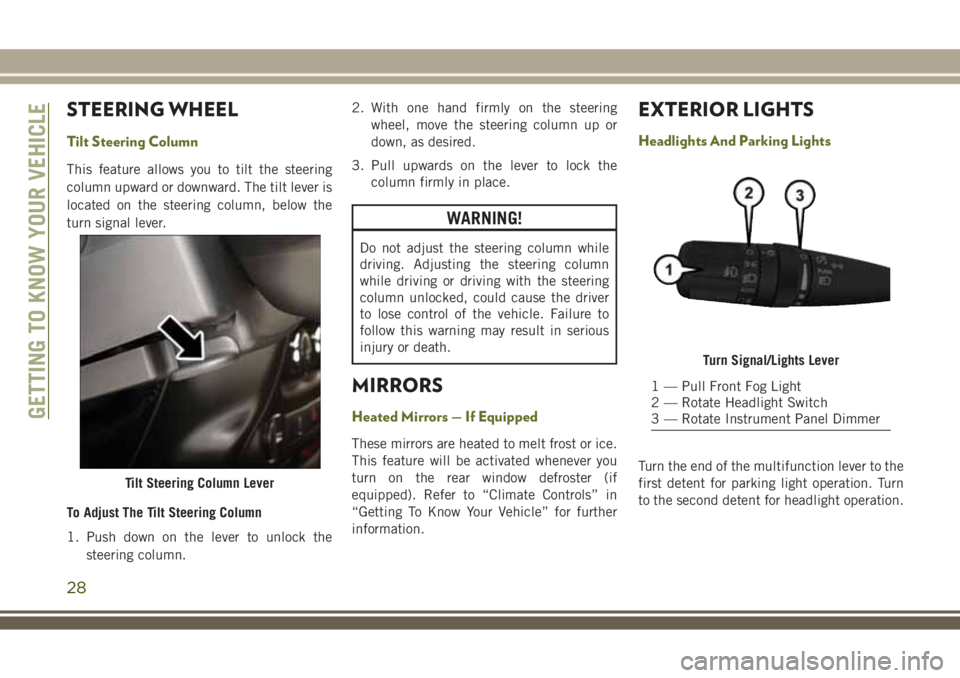
This feature allows you to tilt the steering
column upward or downward. The tilt lever is
located on the steering column, below the
turn signal lever.
To Adjust The Tilt Steering Column
1. Push down on the lever to unlock the
steering column.2. With one hand firmly on the steering
wheel, move the steering column up or
down, as desired.
3. Pull upwards on the lever to lock the
column firmly in place.
WARNING!
Do not adjust the steering column while
driving. Adjusting the steering column
while driving or driving with the steering
column unlocked, could cause the driver
to lose control of the vehicle. Failure to
follow this warning may result in serious
injury or death.
MIRRORS
Heated Mirrors — If Equipped
These mirrors are heated to melt frost or ice.
This feature will be activated whenever you
turn on the rear window defroster (if
equipped). Refer to “Climate Controls” in
“Getting To Know Your Vehicle” for further
information.
EXTERIOR LIGHTS
Headlights And Parking Lights
Turn the end of the multifunction lever to the
first detent for parking light operation. Turn
to the second detent for headlight operation.
Tilt Steering Column Lever
Turn Signal/Lights Lever
1 — Pull Front Fog Light
2 — Rotate Headlight Switch
3 — Rotate Instrument Panel Dimmer
GETTING TO KNOW YOUR VEHICLE
28
Page 31 of 276
Daytime Running Lights — If Equipped
The headlights come on at a low intensity level
when shifted into any position other than PARK
(auto transmission) or when the vehicle begins
to move (manual transmission).
NOTE:
The Daytime Running Light, on the same side
of the vehicle as the active turn signal, will
turn off automatically when a turn signal is in
operation and turn on again when the turn
signal is not operating.
High/Low Beam Switch
Push the multifunction lever toward the in-
strument panel to switch the headlights to
high beams. Pulling the multifunction lever
back toward the steering wheel will return the
lights to low beams.
Flash-To-Pass
You can signal another vehicle with your
headlights by lightly pulling the multifunc-
tion lever toward you. This will cause the high
beam headlights to turn on, and remain on,
until the lever is released.
Automatic Headlights — If Equipped
This system automatically turns the head-
lights on or off according to ambient light
levels. To turn the system on, turn the end of
the multifunction lever to the AUTO position
(third detent). When the system is on, the
Headlight Time Delay feature is also on. This
means the headlights will stay on for up to
90 seconds after you turn the ignition switch
to the LOCK position. To turn the Automatic
System off, turn the end of the multifunction
lever out of the AUTO position.
NOTE:
The engine must be running before the head-
lights will turn on in the Automatic mode.
Front Fog Lights
The front fog light switch is located on the
multifunction lever. To activate the front fog
lights, turn on the parking or low beam head-
lights and pull out the end of the lever.NOTE:
The fog lights will only operate with the park-
ing lights or the headlights on low beam.
Selecting high beam headlights will turn off
the fog lights.
Rear Fog Lights — If Equipped
The rear fog lights may be operated, as de-
sired, when visibility is poor due to fog. To
activate the rear fog lights, turn on the low
beam, high beam, or front fog lamps, pull out
the end of the multifunction lever and rotate
the lever to the last detent.
Turn Signals
Move the multifunction lever up or down and
the arrows on each side of the instrument
cluster flash to show proper operation of the
front and rear turn signal lights.
29
Page 38 of 276
Icon Description
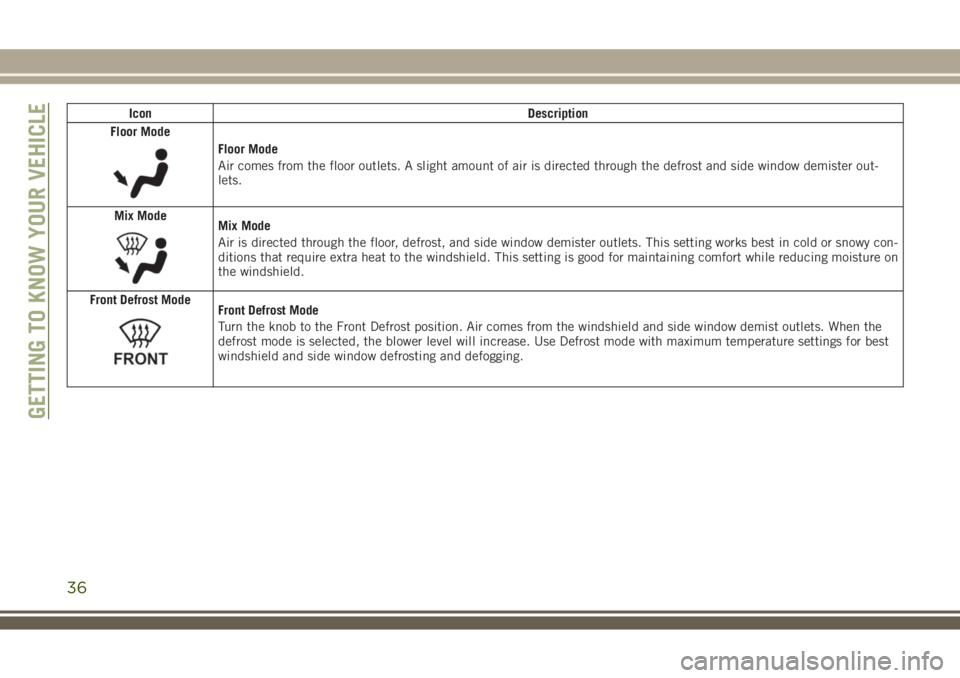
Floor Mode
Floor Mode
Air comes from the floor outlets. A slight amount of air is directed through the defrost and side window demister out-
lets.
Mix Mode
Mix Mode
Air is directed through the floor, defrost, and side window demister outlets. This setting works best in cold or snowy con-
ditions that require extra heat to the windshield. This setting is good for maintaining comfort while reducing moisture on
the windshield.
Front Defrost Mode
Front Defrost Mode
Turn the knob to the Front Defrost position. Air comes from the windshield and side window demist outlets. When the
defrost mode is selected, the blower level will increase. Use Defrost mode with maximum temperature settings for best
windshield and side window defrosting and defogging.
GETTING TO KNOW YOUR VEHICLE
36
Page 66 of 276
— 4WD Indicator Light — If Equipped
This light alerts the driver that the vehicle is
in the four-wheel drive mode, and the front
and rear driveshafts are mechanically locked
together forcing the front and rear wheels to
rotate at the same speed.
— Sway Bar Indicator Light — If
Equipped
This indicator will illuminate when the front
sway bar is disconnected.
Green Indicator Lights
— Front Fog Indicator Light — If
Equipped
This indicator will illuminate when the front
fog lights are on.
— Turn Signal Indicator Lights
When the left or right turn signal is activated,
the turn signal indicator will flash indepen-
dently and the corresponding exterior turn
signal lamps will flash. Turn signals can be
activated when the multifunction lever is
moved down (left) or up (right).NOTE:
• A continuous chime will sound if the ve-
hicle is driven more than 1 mile (1.6 km)
with either turn signal on.
• Check for an inoperative outside light bulb
if either indicator flashes at a rapid rate.
White Indicator Lights
CRUISE— Cruise Indicator
This indicator shows that the Speed Control
System is ON.
— Hill Descent Control (HDC) Indicator
Light — If Equipped
This indicator shows when the Hill Descent
Control (HDC) feature is turned on. The lamp
will be on solid when HDC is armed. HDC can
only be armed when the transfer case is in the
“4WD LOW” position and the vehicle speed
is less then 30 mph (48 km/h). If these
conditions are not met while attempting to
use the HDC feature, the HDC indicator light
will flash on/off.
Blue Indicator Lights
— High Beam Indicator Light
This indicator shows that the high beam
headlights are on. With the low beams acti-
vated, push the multifunction lever forward
(toward the front of the vehicle) to turn on the
high beams. Pull the multifunction lever rear-
ward (toward the rear of the vehicle) to turn
off the high beams. If the high beams are off,
pull the lever toward you for a temporary high
beam on, "flash to pass" scenario.
ONBOARD DIAGNOSTIC
SYSTEM — OBD II
Your vehicle is equipped with a sophisticated
Onboard Diagnostic system called OBD II.
This system monitors the performance of the
emissions, engine, and automatic transmis-
sion control systems. When these systems are
operating properly, your vehicle will provide
excellent performance and fuel economy, as
well as engine emissions well within current
government regulations.
GETTING TO KNOW YOUR INSTRUMENT PANEL
64
Page 148 of 276
HAZARD WARNING
FLASHERS
The Hazard Warning flasher switch is located
on the instrument panel below the climate
controls.
Push the switch to turn on the
Hazard Warning flasher. When the
switch is activated, all directionalturn signals will flash on and off to warn
oncoming traffic of an emergency. Push the
switch a second time to turn off the Hazard
Warning flashers.
This is an emergency warning system and it
should not be used when the vehicle is in
motion. Use it when your vehicle is disabled
and it is creating a safety hazard for other
motorists.When you must leave the vehicle to seek
assistance, the Hazard Warning flashers will
continue to operate even though the ignition
is placed in the OFF position.
NOTE:
With extended use the Hazard Warning flash-
ers may wear down your battery.
BULB REPLACEMENT
Replacement Bulbs
Interior Lights
Bulb Type
Bulb Number
Automatic Transmission Indicator Lamp 658
Courtesy Lights, Under Dash (1)906
Heater Control Lamps (2)194
Rocker Switch Indicator Lamp (Rear Window Defogger) **
Soundbar Dome Lamp912
** Bulbs only available from authorized dealer.
IN CASE OF EMERGENCY
146
Page 149 of 276
Exterior Lights
Bulb Type
Bulb Number
Backup Lamps (2)W16W
Center High-Mounted Stop Lamp (1) L.E.D. (Serviced At Authorized Dealer)
Front Fog Lamps (2)PSX24W
Rear Fog Lamps (2)P27/7W
Front Direction Lamps (2)PY27/7W
Front Side Repeaters/Side Marker Lamps (2) W5W
Headlamps (2)H4
Front Position Lamps (2)12V14W
Stop/Rear Position Lamps (2)P27/7W
Rear Direction Lamps (2)PY27/7W
License Lamp (2)W5W
NOTE:
Numbers refer to commercial bulb types that can be purchased from your local authorized dealer.
Bulb Replacement
NOTE:
Lens fogging can occur under certain atmo-
spheric conditions. This will usually clear as
atmospheric conditions change to allow the
condensation to change back into a vapor.
Turning the lamps on will usually accelerate
the clearing process.
Headlamp
1. Open hood and support using prop rod.
2. Remove the front grille. Turn the retainers
along the top 1/4 turn counterclockwise
and remove.
3. Pull the bottom of the grille away starting
at one side and working toward the other.4. Turn both park and turn signal socket
assemblies 1/4 turn counterclockwise and
remove.
5. Remove the four screws holding the metal
retaining ring.
6. Remove the lamp from the collar.
7. Grasp the bulb and turn 1/4 turn
counterclockwise.
147
Page 204 of 276
or more, run the air conditioning system at
idle for about five minutes in the fresh air
and high blower setting. This will ensure
adequate system lubrication to minimize
the possibility of compressor damage when
the system is started again.
BODYWORK
Body And Underbody Maintenance
Cleaning Headlights
Your vehicle is equipped with plastic head-
lights and fog lights that are lighter and less
susceptible to stone breakage than glass
headlights.
Plastic is not as scratch resistant as glass and
therefore different lens cleaning procedures
must be followed.
To minimize the possibility of scratching the
lenses and reducing light output, avoid wip-
ing with a dry cloth. To remove road dirt, wash
with a mild soap solution followed by rinsing.
Do not use abrasive cleaning components,
solvents, steel wool or other aggressive mate-
rial to clean the lenses.
Preserving The Bodywork
Washing
• Wash your vehicle regularly. Always wash
your vehicle in the shade using a mild car
wash soap, and rinse the panels completely
with clear water.
• Use a high quality cleaner wax remove road
film, stains and to protect your paint finish.
Take care never to scratch the paint.
• Avoid using abrasive compounds and power
buffing that may diminish the gloss or thin
out the paint finish.
CAUTION!
• Do not use abrasive or strong cleaning
materials such as steel wool or scouring
powder that will scratch metal and
painted surfaces.
• Use of power washers exceeding
1,200 psi (8,274 kPa) can result in
damage or removal of paint and decals.
Special Care
• If you drive on salted or dusty roads or if you
drive near the ocean, hose off the undercar-
riage at least once a month.
• It is important that the drain holes in the
lower edges of the doors, rocker panels, and
trunk be kept clear and open.
• If you detect any stone chips or scratches in
the paint, touch them up immediately. The
cost of such repairs is considered the re-
sponsibility of the owner.
• If your vehicle is damaged due to a collision
or similar cause that destroys the paint and
protective coating, have your vehicle re-
paired as soon as possible. The cost of such
repairs is considered the responsibility of
the owner.
• If you carry special cargo such as chemi-
cals, fertilizers, de-icer salt, etc., be sure
that such materials are well packaged and
sealed.
• If a lot of driving is done on gravel roads,
consider mud or stone shields behind each
wheel.
SERVICING AND MAINTENANCE
202
Page 263 of 276
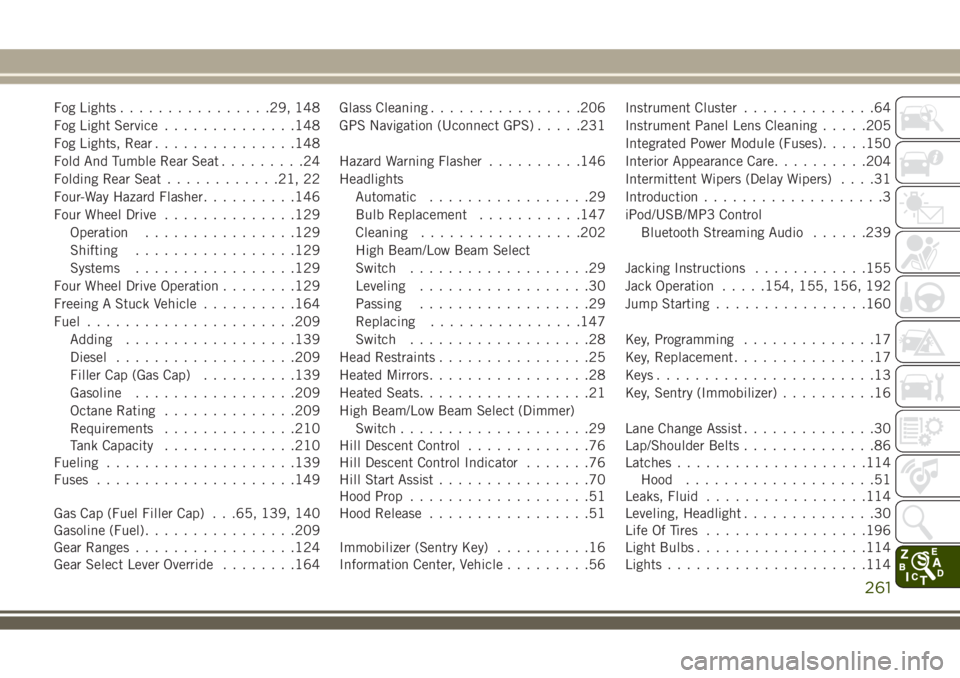
Fog Lights................29, 148
Fog Light Service..............148
Fog Lights, Rear...............148
Fold And Tumble Rear Seat.........24
Folding Rear Seat............21, 22
Four-Way Hazard Flasher..........146
Four Wheel Drive..............129
Operation................129
Shifting.................129
Systems.................129
Four Wheel Drive Operation........129
Freeing A Stuck Vehicle..........164
Fuel......................209
Adding..................139
Diesel...................209
Filler Cap (Gas Cap)..........139
Gasoline.................209
Octane Rating..............209
Requirements..............210
Tank Capacity..............210
Fueling....................139
Fuses.....................149
Gas Cap (Fuel Filler Cap) . . .65, 139, 140
Gasoline (Fuel)................209
Gear Ranges.................124
Gear Select Lever Override........164Glass Cleaning................206
GPS Navigation (Uconnect GPS).....231
Hazard Warning Flasher..........146
Headlights
Automatic.................29
Bulb Replacement...........147
Cleaning.................202
High Beam/Low Beam Select
Switch...................29
Leveling..................30
Passing..................29
Replacing
...............
.147
Switch...................28
Head Restraints................25
Heated Mirrors.................28
Heated Seats..................21
High Beam/Low Beam Select (Dimmer)
Switch....................29
Hill Descent Control.............76
Hill Descent Control Indicator.......76
Hill Start Assist................70
Hood Prop...................51
Hood Release.................51
Immobilizer (Sentry Key)..........16
Information Center, Vehicle.........56Instrument Cluster..............64
Instrument Panel Lens Cleaning.....205
Integrated Power Module (Fuses).....150
Interior Appearance Care..........204
Intermittent Wipers (Delay Wipers)....31
Introduction...................3
iPod/USB/MP3 Control
Bluetooth Streaming Audio......239
Jacking Instructions............155
Jack Operation.....154, 155, 156, 192
Jump Starting................160
Key, Programming..............17
Key, Replacement...............17
Keys.......................13
Key, Sentry (Immobilizer)..........16
Lane Change Assist..............30
Lap/Shoulder Belts..............86
Latches....................114
Hood....................51
Leaks, Fluid.................114
Leveling, Headlight..............30
Life Of Tires.................196
Light Bulbs..................114
Lights.....................114
261
Page 264 of 276
AirBag .............58, 92, 113
Automatic Headlights..........29
Back-Up.................149
Brake Assist Warning..........75
Bulb Replacement.......146, 147
Center Mounted Stop.........149
Cruise...................64
Daytime Running............29
Dimmer Switch, Headlight.......29
Exterior..................114
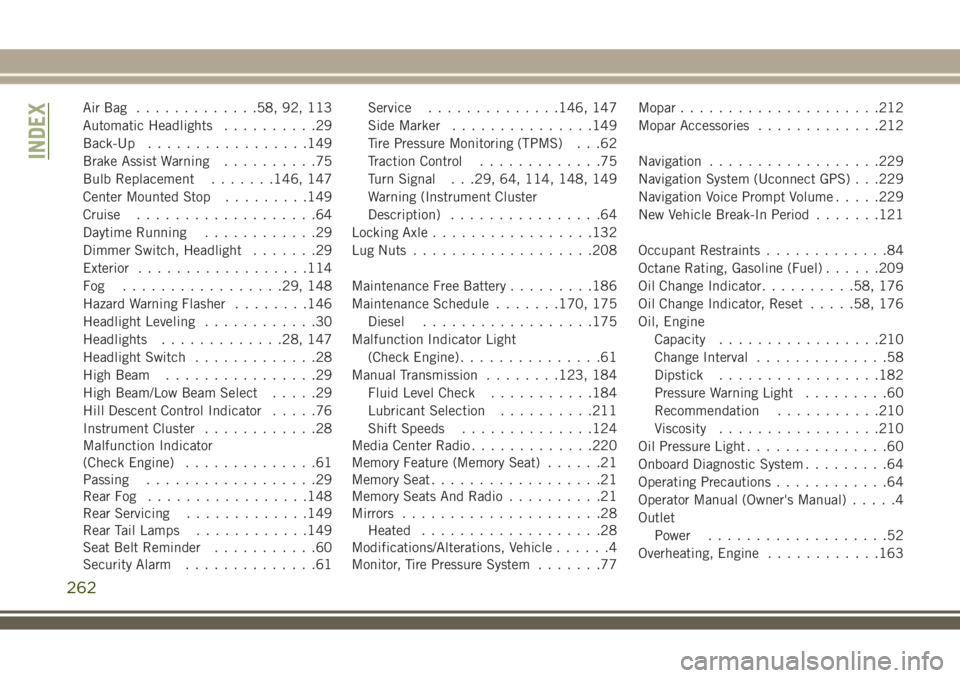
Fog .................29, 148
Hazard Warning Flasher........146
Headlight Leveling............30
Headlights.............28, 147
Headlight Switch.............28
High Beam................29
High Beam/Low Beam Select.....29
Hill Descent Control Indicator.....76
Instrument Cluster............28
Malfunction Indicator
(Check Engine)..............61
Passing..................29
Rear Fog.................148
Rear Servicing.............149
Rear Tail Lamps............149
Seat Belt Reminder...........60
Security Alarm..............61Service..............146, 147
Side Marker...............149
Tire Pressure Monitoring (TPMS) . . .62
Traction Control.............75
Turn Signal . . .29, 64, 114, 148, 149
Warning (Instrument Cluster
Description)................64
Locking Axle.................132
Lug Nuts...................208
Maintenance Free Battery.........186
Maintenance Schedule.......170, 175
Diesel..................175
Malfunction Indicator Light
(Check Engine)...............61
Manual Transmission........123, 184
Fluid Level Check...........184
Lubricant Selection..........211
Shift Speeds.............
.124
Media Center Radio.............220
Memory Feature (Memory Seat)......21
Memory Seat..................21
Memory Seats And Radio..........21
Mirrors.....................28
Heated...................28
Modifications/Alterations, Vehicle......4
Monitor, Tire Pressure System.......77Mopar.....................212
Mopar Accessories.............212
Navigation..................229
Navigation System (Uconnect GPS) . . .229
Navigation Voice Prompt Volume.....229
New Vehicle Break-In Period.......121
Occupant Restraints.............84
Octane Rating, Gasoline (Fuel)......209
Oil Change Indicator..........58, 176
Oil Change Indicator, Reset.....58, 176
Oil, Engine
Capacity.................210
Change Interval..............58
Dipstick.................182
Pressure Warning Light.........60
Recommendation...........210
Viscosity.................210
Oil Pressure Light...............60
Onboard Diagnostic System.........64
Operating Precautions............64
Operator Manual (Owner's Manual).....4
Outlet
Power...................52
Overheating, Engine............163
INDEX
262