seat adjustment JEEP WRANGLER 2020 Owner handbook (in English)
[x] Cancel search | Manufacturer: JEEP, Model Year: 2020, Model line: WRANGLER, Model: JEEP WRANGLER 2020Pages: 276, PDF Size: 4.47 MB
Page 27 of 276
3. Push down on the release bar on each
side, and pull the seat out and away from
the lower bracket.
4. Remove the seat from the vehicle.
WARNING!
• It is extremely dangerous to ride in a
cargo area, inside or outside of a vehicle.
In a collision, people riding in these
areas are more likely to be seriously
injured or killed.
• Do not allow people to ride in any area of
your vehicle that is not equipped with
seats and seat belts.
• Be sure everyone in your vehicle is in a
seat and using a seat belt properly.
• In a collision, you or others in your ve-
hicle could be injured if seats are not
properly latched to their floor attach-
ments. Always be sure that the seats are
fully latched.
Replacing The Rear Seat — Two-Door Mod-
els
Reverse the steps for removing the seat.
WARNING!
• To help protect against personal injury,
passengers should not be seated in the
rear cargo area with the rear seat folded
down or removed from the vehicle.
• The rear cargo space is intended for load
carrying purposes only, not for passen-
gers who should sit in seats and use seat
belts.
HEAD RESTRAINTS
Head restraints are designed to reduce the
risk of injury by restricting head movement in
the event of a rear impact. Head restraints
should be adjusted so that the top of the head
restraint is located above the top of your ear.
WARNING!
• All occupants, including the driver,
should not operate a vehicle or sit in a
vehicle’s seat until the head restraints
are placed in their proper positions in
order to minimize the risk of neck injury
in the event of a crash.
• Head restraints should never be ad-
justed while the vehicle is in motion.
Driving a vehicle with the head restraints
improperly adjusted or removed could
cause serious injury or death in the event
of a collision.
Front Head Restraints
To raise the head restraint, pull upward on the
head restraint. To lower the head restraint,
push the adjustment button located on the
base of the head restraint, and push down-
ward on the head restraint.
To remove the head restraint, raise it as far as
it can go then push the adjustment button
and the release button at the base of each
post while pulling the head restraint up. To
reinstall the head restraint, put the head
25
Page 28 of 276
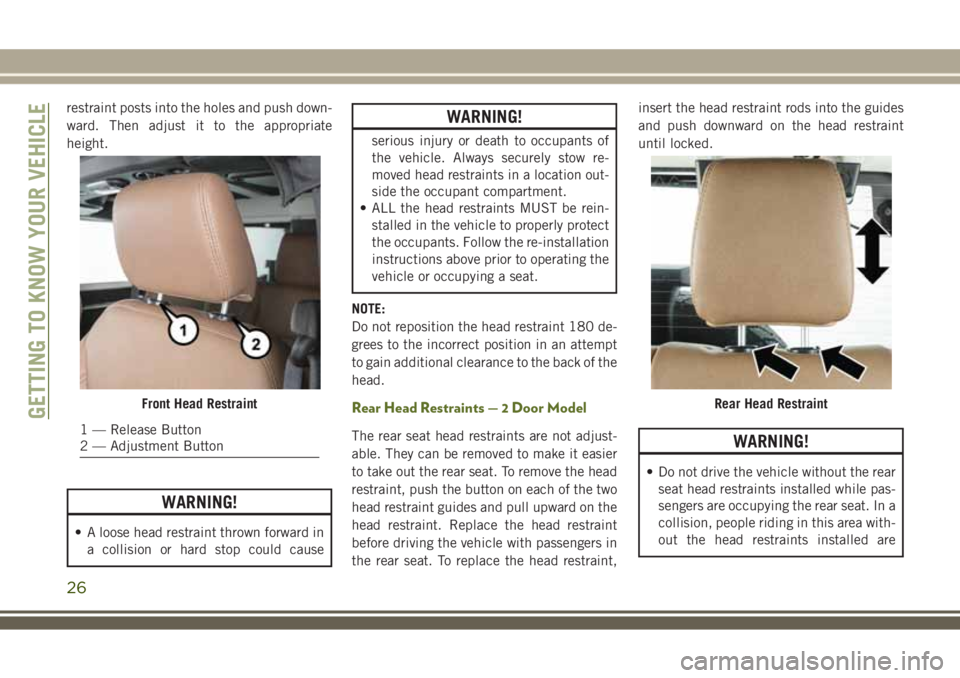
restraint posts into the holes and push down-
ward. Then adjust it to the appropriate
height.
WARNING!
• A loose head restraint thrown forward in
a collision or hard stop could cause
WARNING!
serious injury or death to occupants of
the vehicle. Always securely stow re-
moved head restraints in a location out-
side the occupant compartment.
• ALL the head restraints MUST be rein-
stalled in the vehicle to properly protect
the occupants. Follow the re-installation
instructions above prior to operating the
vehicle or occupying a seat.
NOTE:
Do not reposition the head restraint 180 de-
grees to the incorrect position in an attempt
to gain additional clearance to the back of the
head.
Rear Head Restraints — 2 Door Model
The rear seat head restraints are not adjust-
able. They can be removed to make it easier
to take out the rear seat. To remove the head
restraint, push the button on each of the two
head restraint guides and pull upward on the
head restraint. Replace the head restraint
before driving the vehicle with passengers in
the rear seat. To replace the head restraint,insert the head restraint rods into the guides
and push downward on the head restraint
until locked.WARNING!
• Do not drive the vehicle without the rear
seat head restraints installed while pas-
sengers are occupying the rear seat. In a
collision, people riding in this area with-
out the head restraints installed are
Front Head Restraint
1 — Release Button
2 — Adjustment Button
Rear Head RestraintGETTING TO KNOW YOUR VEHICLE
26
Page 92 of 276
WARNING!
resting on your neck. The retractor will
withdraw any slack in the shoulder belt.
• Misadjustment of the seat belt could
reduce the effectiveness of the safety
belt in a crash.
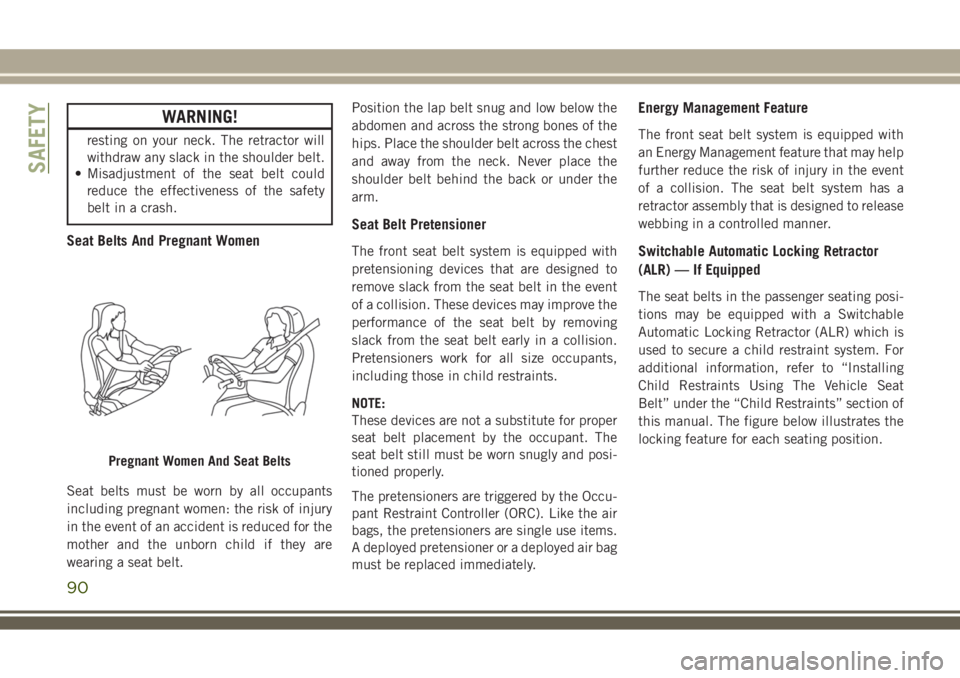
Seat Belts And Pregnant Women
Seat belts must be worn by all occupants
including pregnant women: the risk of injury
in the event of an accident is reduced for the
mother and the unborn child if they are
wearing a seat belt.Position the lap belt snug and low below the
abdomen and across the strong bones of the
hips. Place the shoulder belt across the chest
and away from the neck. Never place the
shoulder belt behind the back or under the
arm.
Seat Belt Pretensioner
The front seat belt system is equipped with
pretensioning devices that are designed to
remove slack from the seat belt in the event
of a collision. These devices may improve the
performance of the seat belt by removing
slack from the seat belt early in a collision.
Pretensioners work for all size occupants,
including those in child restraints.
NOTE:
These devices are not a substitute for proper
seat belt placement by the occupant. The
seat belt still must be worn snugly and posi-
tioned properly.
The pretensioners are triggered by the Occu-
pant Restraint Controller (ORC). Like the air
bags, the pretensioners are single use items.
A deployed pretensioner or a deployed air bag
must be replaced immediately.
Energy Management Feature
The front seat belt system is equipped with
an Energy Management feature that may help
further reduce the risk of injury in the event
of a collision. The seat belt system has a
retractor assembly that is designed to release
webbing in a controlled manner.
Switchable Automatic Locking Retractor
(ALR) — If Equipped
The seat belts in the passenger seating posi-
tions may be equipped with a Switchable
Automatic Locking Retractor (ALR) which is
used to secure a child restraint system. For
additional information, refer to “Installing
Child Restraints Using The Vehicle Seat
Belt” under the “Child Restraints” section of
this manual. The figure below illustrates the
locking feature for each seating position.
Pregnant Women And Seat Belts
SAFETY
90
Page 187 of 276
5. Place the gear selector momentarily into
each gear position (allowing time for the
transmission to fully engage in each posi-
tion), ending with the transmission in
PARK.
6. Remove the dipstick, wipe it clean and
reinsert it until seated.
7. Remove the dipstick again and note the
fluid level on both sides. The fluid level
reading is only valid if there is a solid
coating of oil on both sides of the dipstick.
Note that the holes in the dipstick will be
full of fluid if the actual level is at or above
the hole. The fluid level should be be-
tween the HOT (upper) reference holes on
the dipstick at normal operating tempera-
ture. If the fluid level is low, add fluid
through the dipstick tube to bring it to the
proper level.Do not overfill.Use ONLY the
specified fluid (refer to "Fluids And Lubri-
cants" under “Technical Specifications”
for fluid specifications). After adding any
quantity of oil through the dipstick tube,
wait a minimum of two minutes for the oil
to fully drain into the transmission before
rechecking the fluid level.NOTE:
• The holes in the dipstick will be full of
fluid if the actual level is at or above the
hole.
• If it is necessary to check the transmis-
sion below the operating temperature,
the fluid level should be between the
two COLD (lower) holes on the dipstick
with the fluid at approximately 80°F
(27°C). If the fluid level is correctly
established at 80° F (27°C), it should
be between the HOT (upper) reference
holes when the transmission reaches
180° F (82°C). Remember it is best to
check the level at the normal operating
temperature.
CAUTION!
If the fluid temperature is below 50°F
(10°C) it may not register on the dipstick.
Do not add fluid until the temperature is
elevated enough to produce an accurate
reading. Run the engine at idle, in PARK,
to warm the fluid.8. Reinstall the engine cover and snap it
down securely onto the four mounting
studs.
9. Check for leaks. Release the parking
brake.
NOTE:
To prevent dirt and water from entering the
transmission after checking or replenishing
fluid, make sure that the dipstick cap is
properly reseated. It is normal for the dipstick
cap to spring back slightly from its fully
seated position, as long as its seal remains
engaged in the dipstick tube.
Fluid Level Check — 2.8L Turbo Diesel
Engine
The fluid level is preset at the factory and
does not require adjustment under normal
operating conditions. Routine fluid level
checks are not required, therefore the trans-
mission filler tube is capped and no dipstick
is provided. An authorized dealer can check
your transmission fluid level using a special
service dipstick.
185
Page 265 of 276
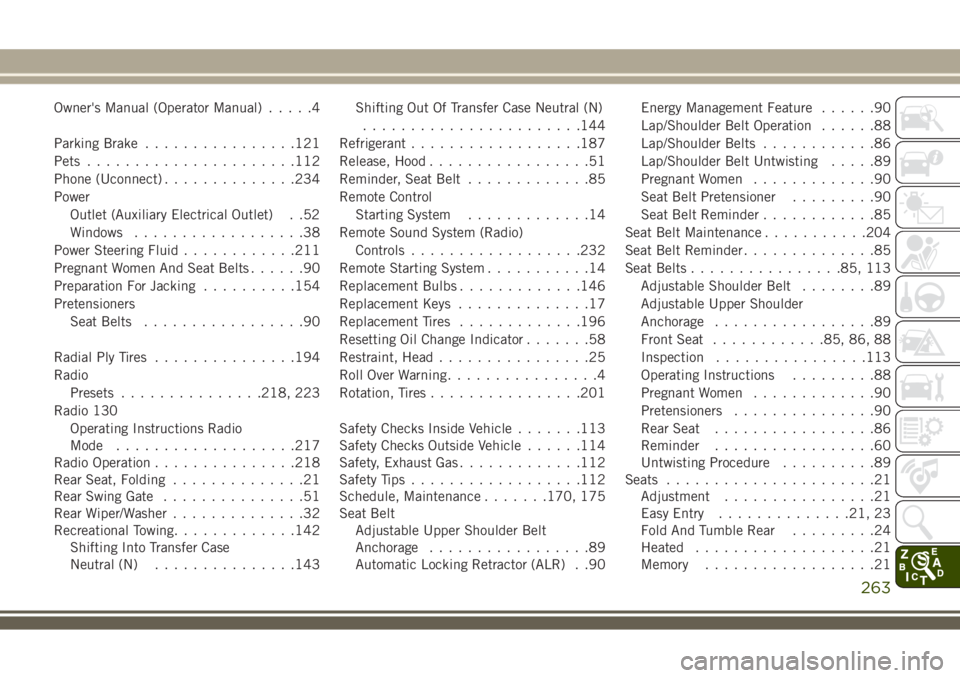
Owner's Manual (Operator Manual).....4
Parking Brake................121
Pets......................112
Phone (Uconnect)..............234
Power
Outlet (Auxiliary Electrical Outlet) . .52
Windows..................38
Power Steering Fluid............211
Pregnant Women And Seat Belts......90
Preparation For Jacking..........154
Pretensioners
Seat Belts.................90
Radial Ply Tires...............194
Radio
Presets...............218, 223
Radio 130
Operating Instructions Radio
Mode...................217
Radio Operation...............218
Rear Seat, Folding..............21
Rear Swing Gate...............51
Rear Wiper/Washer..............32
Recreational Towing.............142
Shifting Into Transfer Case
Neutral (N)...............143Shifting Out Of Transfer Case Neutral (N)
.......................144
Refrigerant..................187
Release, Hood.................51
Reminder, Seat Belt.............85
Remote Control
Starting System.............14
Remote Sound System (Radio)
Controls..................232
Remote Starting System...........14
Replacement Bulbs.............146
Replacement Keys..............17
Replacement Tires.............196
Resetting Oil Change Indicator.......58
Restraint, Head................25
Roll Over Warning................4
Rotation, Tires................201
Safety Checks Inside Vehicle.......113
Safety Checks Outside Vehicle......114
Safety, Exhaust Gas.............112
Safety Tips..................112
Schedule, Maintenance
.......170, 175
Seat Belt
Adjustable Upper Shoulder Belt
Anchorage.................89
Automatic Locking Retractor (ALR) . .90Energy Management Feature......90
Lap/Shoulder Belt Operation......88
Lap/Shoulder Belts............86
Lap/Shoulder Belt Untwisting.....89
Pregnant Women.............90
Seat Belt Pretensioner.........90
Seat Belt Reminder............85
Seat Belt Maintenance...........204
Seat Belt Reminder..............85
Seat Belts................85, 113
Adjustable Shoulder Belt........89
Adjustable Upper Shoulder
Anchorage.................89
Front Seat............85, 86, 88
Inspection................113
Operating Instructions.........88
Pregnant Women.............90
Pretensioners...............90
Rear Seat.................86
Reminder.................60
Untwisting Procedure..........89
Seats......................21
Adjustment................21
Easy Entry..............21, 23
Fold And Tumble Rear.........24
Heated...................21
Memory..................21
263