alarm JEEP WRANGLER 2021 Owner handbook (in English)
[x] Cancel search | Manufacturer: JEEP, Model Year: 2021, Model line: WRANGLER, Model: JEEP WRANGLER 2021Pages: 276, PDF Size: 4.47 MB
Page 13 of 276
GETTING TO KNOW YOUR VEHICLE
KEYFOB...................13
KeyFob.....................13
IGNITION SWITCH............13
Ignition Key Removal............13
REMOTE STARTING SYSTEM — IF
EQUIPPED.................14
How To Use Remote Start..........14
Remote Start Abort Message........15
To Enter Remote Start............15
To Exit Remote Start Mode Without Driving
The Vehicle...................16
To Exit Remote Start Mode And Drive The
Vehicle.....................16
SENTRY KEY................16
Replacement Key Fobs...........17
Customer Key Programming........17
VEHICLE SECURITY ALARM — IF
EQUIPPED.................18
Rearming The System............18
To Arm The System.............18
To Disarm The System............18
DOORS....................19
Upper Half Door Window Removal — If
Equipped....................19
Front Door Removal..............19
Rear Door Removal (Four-Door Models) . .20
SEATS ....................21
Heated Seats — If Equipped........21
60/40 Split Folding Rear Seat —
Four Door Models..............22
Front Passenger Easy Entry Seat —
Two Door Models...............23
Tip ‘n Slide Seats — Two Door Models . .24
Removing The Rear Seat — Two Door
Models.....................24
HEAD RESTRAINTS...........25
Front Head Restraints............25
Rear Head Restraints — 2 Door Model . .26
Rear Head Restraints — 4 Door Model . .27
STEERING WHEEL............28
Tilt Steering Column.............28
MIRRORS..................28
Heated Mirrors — If Equipped.......28
EXTERIOR LIGHTS............28
Headlights And Parking Lights.......28
Daytime Running Lights — If Equipped .29
High/Low Beam Switch...........29
Flash-To-Pass.................29
Automatic Headlights — If Equipped . .29
Front Fog Lights...............29
Rear Fog Lights — If Equipped......29
Turn Signals..................29
Lane Change Assist — If Equipped....30
Lights-On Reminder.............30
Headlight Leveling System — If
Equipped...................30
WINDSHIELD WIPERS AND WASH-
ERS ......................30
Windshield Wiper Operation.........31
Rear Window Wiper/Washer — If
Equipped...................32
GETTING TO KNOW YOUR VEHICLE
11
Page 17 of 276
• Ignition key removed from ignition
• Battery at an acceptable charge level
• System not disabled from previous remote
start event
• Vehicle security alarm not active
WARNING!
• Do not start or run an engine in a closed
garage or confined area. Exhaust gas
contains Carbon Monoxide (CO) which is
odorless and colorless. Carbon Monox-
ide is poisonous and can cause serious
injury or death when inhaled.
• Keep key fobs away from children. Op-
eration of the Remote Start System, win-
dows, door locks or other controls could
cause serious injury or death.
Remote Start Abort Message
The following messages will display in the
instrument cluster display if the vehicle fails to
remote start or exits remote start prematurely:
• Remote Start Aborted — Door Open
• Remote Start Aborted — Hood Open
• Remote Start Aborted — Fuel Low
• Remote Start Aborted — Swing Gate Open
• Remote Start Aborted — System Fault
The instrument cluster display message stays
active until the ignition is turned to the ON/
RUN position.
To Enter Remote Start
Push and release the remote start button on
the key fob twice within five seconds. The
vehicle doors will lock, the parking lights will
flash and the horn will chirp twice (if pro-
grammed). Then, the engine will start and the
vehicle will remain in the remote start mode
for a 15-minute cycle.NOTE:
• The park lamps will turn on and remain on
during remote start mode.
• For security, power window operation is
disabled when the vehicle is in the remote
start mode.
• The engine can be started two consecutive
times (two 15-minute cycles) with the key
fob. However, the ignition switch must be
cycled to the ON/RUN position before you
can repeat the start sequence for a third
cycle.
Remote start will also cancel if any of the
following occur:
• The engine stalls or RPM exceeds 2500.
• Any engine warning lamps come on.
• The hood is opened.
• The hazard switch is pushed.
• The transmission is moved out of PARK.
• The brake pedal is pushed.
15
Page 18 of 276
To Exit Remote Start Mode Without
Driving The Vehicle
Push and release the remote start button one
time or allow the engine to run for the entire
15-minute cycle.
NOTE:
To avoid unintentional shut downs, the sys-
tem will disable the one time push of the
remote start button for two seconds after
receiving a valid remote start request.
To Exit Remote Start Mode And Drive The
Vehicle
Before the end of the 15-minute cycle, push
and release the unlock button on the key fob
to unlock the doors and disarm the vehicle
security alarm (if equipped). Then, insert the
key into the ignition and place the ignition in
the ON/RUN position.
NOTE:
The ignition must be placed in the ON/RUN
position in order to drive the vehicle.
SENTRY KEY
The Sentry Key Immobilizer System prevents
unauthorized vehicle operation by disabling
the engine. The system does not need to be
armed or activated. Operation is automatic,
regardless of whether the vehicle is locked or
unlocked.
The system uses key fobs that have an em-
bedded electronic chip (transponder) to pre-
vent unauthorized vehicle operation. There-
fore, only key fobs that are programmed to
the vehicle can be used to start and operate
the vehicle. The system will shut the engine
off in two seconds if someone uses an invalid
key to try to start the engine.
NOTE:
A key fob that has not been programmed is
also considered an invalid key, even if it is cut
to fit the ignition or lock cylinder for that
vehicle.
During normal operation, after placing the
ignition in the on position, the vehicle secu-
rity light will turn on for three seconds for abulb check. If the light remains on after the
bulb check, it indicates that there is a prob-
lem with the electronics. In addition, if the
vehicle security light begins to flash after the
bulb check, it indicates that someone used
an invalid key to try to start the engine. Either
of these conditions will result in the engine
being shut off after two seconds.
If the vehicle security light turns on during
normal vehicle operation (vehicle running for
longer than ten seconds), it indicates that
there is a fault in the electronics. Should this
occur, have the vehicle serviced as soon as
possible by an authorized dealer.
CAUTION!
The Sentry Key Immobilizer system is not
compatible with some aftermarket remote
starting systems. Use of these systems
may result in vehicle starting problems
and loss of security protection.
All of the key fobs provided with your new
vehicle have been programmed to the vehicle
electronics.GETTING TO KNOW YOUR VEHICLE
16
Page 20 of 276
VEHICLE SECURITY ALARM
— IF EQUIPPED
The vehicle security alarm monitors the ve-
hicle doors, swing gate, and ignition for un-
authorized operation. While the vehicle secu-
rity alarm is armed, interior switches for door
locks are disabled. The vehicle security alarm
provides both audible and visible signals
when alarming. The horn will sound, the
headlights will turn on, the park lamps and/or
turn signals will flash repeatedly for three
minutes. If the disturbance is still present
(driver's door, passenger door, other doors,
ignition) after three minutes, the headlights,
park lamps and/or turn signals will flash for
an additional 15 minutes.
Rearming The System
If something triggers the alarm, and no action
is taken to disarm it, the vehicle security
alarm will turn off the horn after three min-
utes, turn off all of the visual signals after
15 minutes, and then the vehicle security
alarm will rearm itself.
To Arm The System
The vehicle security alarm will set when you
use the Remote Keyless Entry key fob to lock
the doors and swing gate, or when you use the
power door lock switch while the door is
open. After all the doors are locked and
closed, the vehicle security light (located on
the instrument cluster) will flash rapidly for
about 16 seconds to signal that the vehicle
security alarm is arming. During this 16-
second arming period, opening any door or
the swing gate will cancel the arming. If the
vehicle security alarm is successfully set, the
vehicle security light will flash at a slower
rate to indicate the vehicle security alarm is
armed.
To Disarm The System
To disarm the vehicle security alarm, you will
need to push the unlock button on the key
fob, or turn the ignition switch to the ON/
RUN position. If something has triggered the
vehicle security alarm in your absence, the
horn will sound three times, and the exterior
lights blink three times when you unlock the
doors. Check the vehicle for tampering.The vehicle security alarm is designed to
protect your vehicle; however, you can create
conditions where the vehicle security alarm
will arm unexpectedly. If you remain in the
vehicle and lock the doors with the key fob,
once the vehicle security alarm is armed
(after 16 seconds), when you pull the door
handle to exit, the alarm will sound. If this
occurs, push the unlock button on the key fob
to disarm the vehicle security alarm. You may
also accidentally disarm the vehicle security
alarm by unlocking the driver's door with the
key and then locking it. The door will be
locked but the vehicle security alarm will not
arm.
NOTE:
• Unlocking the doors with the manual door
lock plungers or the driver's door lock cyl-
inder will not disarm the vehicle security
alarm.
• When the vehicle security alarm is armed,
the interior power door lock switches will
not unlock the doors.
GETTING TO KNOW YOUR VEHICLE
18
Page 63 of 276
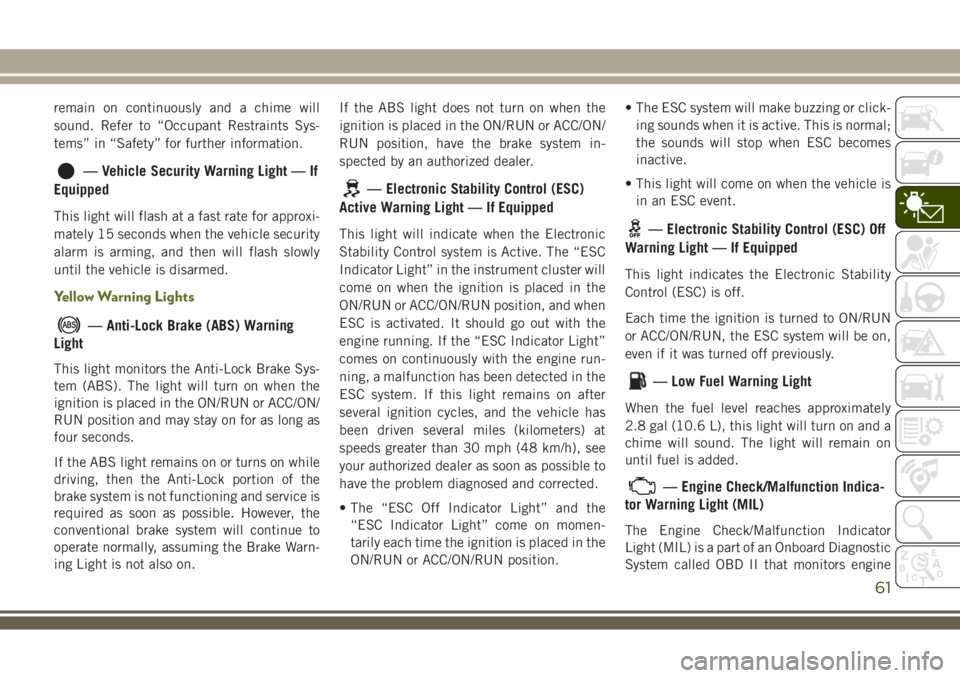
remain on continuously and a chime will
sound. Refer to “Occupant Restraints Sys-
tems” in “Safety” for further information.
— Vehicle Security Warning Light — If
Equipped
This light will flash at a fast rate for approxi-
mately 15 seconds when the vehicle security
alarm is arming, and then will flash slowly
until the vehicle is disarmed.
Yellow Warning Lights
— Anti-Lock Brake (ABS) Warning
Light
This light monitors the Anti-Lock Brake Sys-
tem (ABS). The light will turn on when the
ignition is placed in the ON/RUN or ACC/ON/
RUN position and may stay on for as long as
four seconds.
If the ABS light remains on or turns on while
driving, then the Anti-Lock portion of the
brake system is not functioning and service is
required as soon as possible. However, the
conventional brake system will continue to
operate normally, assuming the Brake Warn-
ing Light is not also on.If the ABS light does not turn on when the
ignition is placed in the ON/RUN or ACC/ON/
RUN position, have the brake system in-
spected by an authorized dealer.
— Electronic Stability Control (ESC)
Active Warning Light — If Equipped
This light will indicate when the Electronic
Stability Control system is Active. The “ESC
Indicator Light” in the instrument cluster will
come on when the ignition is placed in the
ON/RUN or ACC/ON/RUN position, and when
ESC is activated. It should go out with the
engine running. If the “ESC Indicator Light”
comes on continuously with the engine run-
ning, a malfunction has been detected in the
ESC system. If this light remains on after
several ignition cycles, and the vehicle has
been driven several miles (kilometers) at
speeds greater than 30 mph (48 km/h), see
your authorized dealer as soon as possible to
have the problem diagnosed and corrected.
• The “ESC Off Indicator Light” and the
“ESC Indicator Light” come on momen-
tarily each time the ignition is placed in the
ON/RUN or ACC/ON/RUN position.• The ESC system will make buzzing or click-
ing sounds when it is active. This is normal;
the sounds will stop when ESC becomes
inactive.
• This light will come on when the vehicle is
in an ESC event.— Electronic Stability Control (ESC) Off
Warning Light — If Equipped
This light indicates the Electronic Stability
Control (ESC) is off.
Each time the ignition is turned to ON/RUN
or ACC/ON/RUN, the ESC system will be on,
even if it was turned off previously.
— Low Fuel Warning Light
When the fuel level reaches approximately
2.8 gal (10.6 L), this light will turn on and a
chime will sound. The light will remain on
until fuel is added.
— Engine Check/Malfunction Indica-
tor Warning Light (MIL)
The Engine Check/Malfunction Indicator
Light (MIL) is a part of an Onboard Diagnostic
System called OBD II that monitors engine
61
Page 97 of 276
Seat belts are necessary for your protection in
all collisions, and also are needed to help
keep you in position, away from an inflating
air bag.
When the ORC detects a collision requiring
the front air bags, it signals the inflator units.
A large quantity of non-toxic gas is generated
to inflate the front air bags.
The steering wheel hub trim cover and the
upper passenger side of the instrument panel
separate and fold out of the way as the air
bags inflate to their full size. The front air
bags fully inflate in less time than it takes to
blink your eyes. The front air bags then
quickly deflate while helping to restrain the
driver and front passenger.
Knee Impact Bolsters
The Knee Impact Bolsters help protect the
knees of the driver and front passenger, and
position the front occupants for improved
interaction with the front air bags.
WARNING!
• Do not drill, cut, or tamper with the knee
impact bolsters in any way.
• Do not mount any accessories to the
knee impact bolsters such as alarm
lights, stereos, citizen band radios, etc.
Supplemental Side Air Bags
Supplemental Seat-Mounted Side Air Bags
(SABs) (if equipped)
Your vehicle may be equipped with Supple-
mental Seat-Mounted Side Air Bags (SABs).
If your vehicle is equipped with Supplemen-
tal Seat-Mounted Side Air Bags (SABs),
please refer to the information below.
Supplemental Seat-Mounted Side Air Bags
(SABs) are located in the outboard side of the
front seats. The SABs are marked with “SRS
AIRBAG” or “AIRBAG” on a label or on the
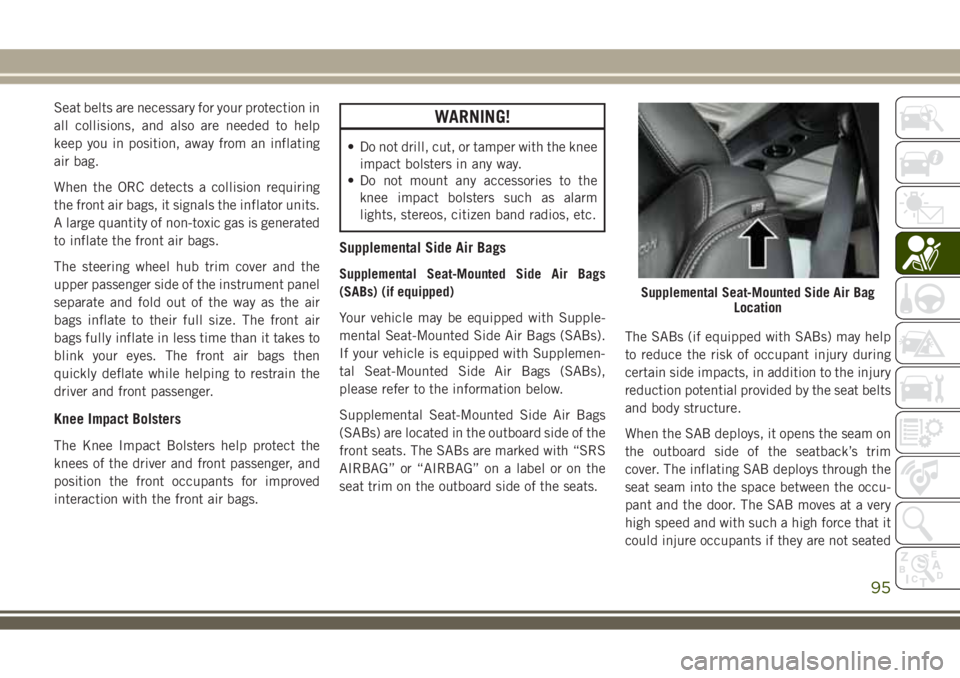
seat trim on the outboard side of the seats.The SABs (if equipped with SABs) may help
to reduce the risk of occupant injury during
certain side impacts, in addition to the injury
reduction potential provided by the seat belts
and body structure.
When the SAB deploys, it opens the seam on
the outboard side of the seatback’s trim
cover. The inflating SAB deploys through the
seat seam into the space between the occu-
pant and the door. The SAB moves at a very
high speed and with such a high force that it
could injure occupants if they are not seated
Supplemental Seat-Mounted Side Air Bag
Location
95
Page 261 of 276
Accessories..................212
Mopar...................212
Adding Fuel.................139
AirBag .....................93
Advance Front Air Bag.........93
Air Bag Operation.............94
Air Bag Warning Light..........92
Enhanced Accident Response . .98, 168
Event Data Recorder (EDR)......168
Front Air Bag...............93
If A Deployment Occurs.........97
Knee Impact Bolsters..........95
Maintaining Your Air Bag System . . .98
Transporting Pets............112
Air Bag Light............58, 92, 113
Air Bag Maintenance.............98
Air Conditioner Maintenance.......186
Air Conditioning Filter.........38, 187
Air Conditioning, Operating Tips......37
Air Conditioning Refrigerant. . . .186, 187
Air Conditioning System.......37, 186
Air Pressure, Tires..............193
Alarm (Security Alarm).........18, 61
Alterations/Modifications, Vehicle......4
Antifreeze (Engine Coolant)........210Anti-Lock Brake System (ABS).......68
Anti-Lock Warning Light...........61
Arming System (Security Alarm)......18
Assist, Hill Start................70
Audio Jack...............219, 226
Audio Settings................218
Automatic Headlights............29
Automatic Oil Change Indicator......58
Automatic Temperature Control (ATC) . . .37
Automatic Transmission..........127
Fluid Level Check...........184
Fluid Type................211
Autostick...................128
Axle Fluid...................211
Axle Lock...................132
Battery..................60, 186
Charging System Light.........60
Belts, Seat
.................
.113
Brake Assist System.............69
Brake Control System, Electronic.....69
Brake Fluid..............183, 211
Brake System................183
Fluid Check...............183
Master Cylinder.............183Parking..................121
Brake/Transmission Interlock.......127
Bulb Replacement..........146, 147
Bulbs, Light.................114
Capacities, Fluid..............210
Caps, Filler
Fuel....................139
Oil (Engine)...............180
Carbon Monoxide Warning.........112
Car Washes..................202
CD (Compact Disc) Player.........218
Center High Mounted Stop Light.....149
Chains, Tire..................200
Changing A Flat Tire.........154, 192
Checking Your Vehicle For Safety. . . .112
Checks, Safety................112
Child Restraints
How To Stow An Unused ALR Seat
Belt....................110
Cleaning
Wheels..................199
Climate Control................33
Manual...................33
Clock Setting.............218, 221
INDEX
259
Page 264 of 276
AirBag .............58, 92, 113
Automatic Headlights..........29
Back-Up.................149
Brake Assist Warning..........75
Bulb Replacement.......146, 147
Center Mounted Stop.........149
Cruise...................64
Daytime Running............29
Dimmer Switch, Headlight.......29
Exterior..................114
Fog .................29, 148
Hazard Warning Flasher........146
Headlight Leveling............30
Headlights.............28, 147
Headlight Switch.............28
High Beam................29
High Beam/Low Beam Select.....29
Hill Descent Control Indicator.....76
Instrument Cluster............28
Malfunction Indicator
(Check Engine)..............61
Passing..................29
Rear Fog.................148
Rear Servicing.............149
Rear Tail Lamps............149
Seat Belt Reminder...........60
Security Alarm..............61Service..............146, 147
Side Marker...............149
Tire Pressure Monitoring (TPMS) . . .62
Traction Control.............75
Turn Signal . . .29, 64, 114, 148, 149
Warning (Instrument Cluster
Description)................64
Locking Axle.................132
Lug Nuts...................208
Maintenance Free Battery.........186
Maintenance Schedule.......170, 175
Diesel..................175
Malfunction Indicator Light
(Check Engine)...............61
Manual Transmission........123, 184
Fluid Level Check...........184
Lubricant Selection..........211
Shift Speeds.............
.124
Media Center Radio.............220
Memory Feature (Memory Seat)......21
Memory Seat..................21
Memory Seats And Radio..........21
Mirrors.....................28
Heated...................28
Modifications/Alterations, Vehicle......4
Monitor, Tire Pressure System.......77Mopar.....................212
Mopar Accessories.............212
Navigation..................229
Navigation System (Uconnect GPS) . . .229
Navigation Voice Prompt Volume.....229
New Vehicle Break-In Period.......121
Occupant Restraints.............84
Octane Rating, Gasoline (Fuel)......209
Oil Change Indicator..........58, 176
Oil Change Indicator, Reset.....58, 176
Oil, Engine
Capacity.................210
Change Interval..............58
Dipstick.................182
Pressure Warning Light.........60
Recommendation...........210
Viscosity.................210
Oil Pressure Light...............60
Onboard Diagnostic System.........64
Operating Precautions............64
Operator Manual (Owner's Manual).....4
Outlet
Power...................52
Overheating, Engine............163
INDEX
262
Page 266 of 276
Rear Folding.............21, 22
Removal..................25
Seatback Release............21
Tilting...................21
Vented...................21
Ventilated.................21
Security Alarm..............18, 61
Security System................18
Sentry Key (Immobilizer)..........16
Sentry Key Programming..........17
Sentry Key Replacement..........17
Service Assistance.............242
Shifting....................126
Automatic Transmission........126
Manual Transmission.........123
Transfer Case, Shifting Into Transfer
Case Neutral (N)............143
Transfer Case, Shifting Out Of Transfer
Case Neutral (N)............144
Shift Lever Override.............164
Shoulder Belts.................86
Signals, Turn.....29, 64, 114, 148, 149
Snow Chains (Tire Chains).........200
Snow Tires..................197
Spare Tire............154, 198, 199
Speed Control
Accel/Decel...............138Cancel..................138
Resume.................138
Speed Control (Cruise Control)......136
Starting.................14, 117
Automatic Transmission........117
Cold Weather..............117
Engine Fails To Start.........118
Manual Transmission.........117
Remote..................14
Starting And Operating...........117
Starting Procedures.............117
Steering.....................28
Tilt Column................28
Wheel, Tilt
.................28
Steering Wheel Audio Controls......232
Steering Wheel Mounted Sound System
Controls..................232
Storage, Vehicle............37, 201
Storing Your Vehicle............201
Stuck, Freeing................164
Supplemental Restraint System -
AirBag ...................93
Sway Bar Disconnect, Electronic.....133
Sway Control, Trailer.............76
Swing Gate, Rear...............51
System, Remote Starting..........14Temperature Control, Automatic (ATC) . .37
Tilt Steering Column.............28
Tip Start....................119
Tires...............114, 193, 198
Aging (Life Of Tires)..........196
Air Pressure...............193
Chains..................200
Changing.............154, 192
Compact Spare.............198
General Information.......193, 198
High Speed...............194
Inflation Pressures...........193
Jacking...........154, 156, 192
Life Of Tires...............196
Pressure Monitor System (TPMS) . . .77
Pressure Warning Light.........62
Radial..................194
Replacement..............196
Rotation.................201
Safety..................193
Snow Tires................197
Spare Tire.........154, 198, 199
Spinning.................195
Tread Wear Indicators.........195
Wheel Nut Torque...........208
To Open Hood.................51
INDEX
264