check transmission fluid JEEP WRANGLER 2021 Owner handbook (in English)
[x] Cancel search | Manufacturer: JEEP, Model Year: 2021, Model line: WRANGLER, Model: JEEP WRANGLER 2021Pages: 276, PDF Size: 4.47 MB
Page 171 of 276
SERVICING AND MAINTENANCE
SCHEDULED SERVICING......170
Scheduled Servicing — Gasoline
Engine....................170
Scheduled Servicing — Diesel Engine. .175
ENGINE COMPARTMENT......180
3.6L Engine.................180
2.8L Diesel Engine.............181
Checking Oil Level — Gasoline Engine. .182
Checking Oil Level — Diesel Engine . . .182
Cooling System...............182
Adding Washer Fluid............183
Brake System................183
Manual Transmission...........184Automatic Transmission..........184
Maintenance-Free Battery........186
Air Conditioner Maintenance.......186
DEALER SERVICE...........189
Windshield Wiper Blades.........189
RAISING THE VEHICLE........192
TIRES....................193
Tires — General Information.......193
Tire Types...................197
Spare Tires — If Equipped........198
Wheel And Wheel Trim Care.......199Tire Chains (Traction Devices).......200
Tire Rotation Recommendations.....201
STORING THE VEHICLE.......201
BODYWORK...............202
Body And Underbody Maintenance . . .202
Preserving The Bodywork.........202
INTERIORS...............204
Seats And Fabric Parts...........204
Plastic And Coated Parts..........205
Leather Parts.................205
Glass Surfaces...............206
SERVICING AND MAINTENANCE
169
Page 172 of 276
SCHEDULED SERVICING
Scheduled Servicing — Gasoline Engine
The scheduled services listed in this manual
must be done at the times or mileages speci-
fied to protect your vehicle warranty and
ensure the best vehicle performance and re-
liability. More frequent maintenance may be
needed for vehicles in severe operating con-
ditions, such as dusty areas and very short
trip driving. Inspection and service should
also be done anytime a malfunction is sus-
pected.
The oil change indicator system will remind
you that it is time to take your vehicle in for
scheduled maintenance.
On non-instrument cluster display equipped
vehicles, “CHANgE OIL” will flash in the
instrument cluster odometer and a single
chime will sound, indicating that an oil
change is necessary.The oil change indicator message will illumi-
nate approximately 7,000 miles
(11,200 km) after the most recent oil change
was performed. Have your vehicle serviced as
soon as possible, within 500 miles (800 km).
However, an earlier oil change at 4,500 miles
(7,500 km) may be required if the vehicle is
operated under “Severe Duty Conditions”
later in this section.
NOTE:
• The oil change indicator message will not
monitor the time since the last oil change.
Change your vehicle's oil if it has been
6 months since your last oil change even if
the oil change indicator message is NOT
illuminated.
• Change your engine oil more often if you
drive your vehicle off-road for an extended
period of time.
• Under no circumstances should oil change
intervals exceed 7,500 miles (12,000 km)
or 6 months, whichever comes first.
Your authorized dealer will reset the oil
change indicator message after completing
the scheduled oil change.Once A Month Or Before A Long Trip
• Check the engine oil level about five min-
utes after a fully warmed engine is shut off.
Checking the oil level while the vehicle is
on level ground will improve the accuracy of
the oil level reading. Add oil only when the
level is at or below the ADD or MIN mark.
• Check the windshield washer solvent and
add if required.
• Check tire pressure and look for unusual
wear or damage. Rotate tires at the first
sign of irregular wear, even if it occurs
before the oil indicator system turns on.
• Inspect the battery and clean and tighten
the terminals as required.
• Check the fluid levels of coolant reservoir,
automatic transmission, brake master cyl-
inder and power steering and fill as needed.
• Check all lights and other electrical items
for correct operation.
SERVICING AND MAINTENANCE
170
Page 186 of 276
WARNING!
• Use only manufacturer's recommended
brake fluid. Refer to “Fluids And Lubri-
cants” in “Technical Specifications” for
further information. Using the wrong
type of brake fluid can severely damage
your brake system and/or impair its per-
formance. The proper type of brake fluid
for your vehicle is also identified on the
original factory installed hydraulic mas-
ter cylinder reservoir.
• To avoid contamination from foreign
matter or moisture, use only new brake
fluid or fluid that has been in a tightly
closed container. Keep the master cylin-
der reservoir cap secured at all times.
Brake fluid in a open container absorbs
moisture from the air resulting in a lower
boiling point. This may cause it to boil
unexpectedly during hard or prolonged
braking, resulting in sudden brake fail-
ure. This could result in a collision.
• Overfilling the brake fluid reservoir can
result in spilling brake fluid on hot en-
gine parts, causing the brake fluid to
WARNING!
catch fire. Brake fluid can also damage
painted and vinyl surfaces, care should
be taken to avoid its contact with these
surfaces.
• Do not allow petroleum based fluid to
contaminate the brake fluid. Brake seal
components could be damaged, causing
partial or complete brake failure. This
could result in a collision.
Manual Transmission
Fluid Level Check
Check the fluid level by removing the fill
plug. The fluid level should be between the
bottom of the fill hole and a point not more
than 3/16 of an inch (4.76 mm) below the
bottom of the hole.
Add fluid, if necessary, to maintain the
proper level.
Automatic Transmission
Fluid Level Check — Gasoline Engine
It is best to check the fluid level when the
transmission is at normal operating tempera-
ture (approximately 180°F/82°C). This oc-
curs after at least 15 miles (25 km) of driv-
ing. At normal operating temperature, the
fluid cannot be held comfortably between the
fingertips.
Use the following procedure to check the
transmission fluid level properly:
1. Park the vehicle on level ground.
2. Remove the engine cover by pulling it up
off the mounting studs (two in the front
and two in the rear).
3. Run the engine at normal idle speed for at
least 60 seconds, and leave the engine
running for the rest of this procedure.
4. Fully apply the parking brake, and press
the brake pedal.
SERVICING AND MAINTENANCE
184
Page 187 of 276
5. Place the gear selector momentarily into
each gear position (allowing time for the
transmission to fully engage in each posi-
tion), ending with the transmission in
PARK.
6. Remove the dipstick, wipe it clean and
reinsert it until seated.
7. Remove the dipstick again and note the
fluid level on both sides. The fluid level
reading is only valid if there is a solid
coating of oil on both sides of the dipstick.
Note that the holes in the dipstick will be
full of fluid if the actual level is at or above
the hole. The fluid level should be be-
tween the HOT (upper) reference holes on
the dipstick at normal operating tempera-
ture. If the fluid level is low, add fluid
through the dipstick tube to bring it to the
proper level.Do not overfill.Use ONLY the
specified fluid (refer to "Fluids And Lubri-
cants" under “Technical Specifications”
for fluid specifications). After adding any
quantity of oil through the dipstick tube,
wait a minimum of two minutes for the oil
to fully drain into the transmission before
rechecking the fluid level.NOTE:
• The holes in the dipstick will be full of
fluid if the actual level is at or above the
hole.
• If it is necessary to check the transmis-
sion below the operating temperature,
the fluid level should be between the
two COLD (lower) holes on the dipstick
with the fluid at approximately 80°F
(27°C). If the fluid level is correctly
established at 80° F (27°C), it should
be between the HOT (upper) reference
holes when the transmission reaches
180° F (82°C). Remember it is best to
check the level at the normal operating
temperature.
CAUTION!
If the fluid temperature is below 50°F
(10°C) it may not register on the dipstick.
Do not add fluid until the temperature is
elevated enough to produce an accurate
reading. Run the engine at idle, in PARK,
to warm the fluid.8. Reinstall the engine cover and snap it
down securely onto the four mounting
studs.
9. Check for leaks. Release the parking
brake.
NOTE:
To prevent dirt and water from entering the
transmission after checking or replenishing
fluid, make sure that the dipstick cap is
properly reseated. It is normal for the dipstick
cap to spring back slightly from its fully
seated position, as long as its seal remains
engaged in the dipstick tube.
Fluid Level Check — 2.8L Turbo Diesel
Engine
The fluid level is preset at the factory and
does not require adjustment under normal
operating conditions. Routine fluid level
checks are not required, therefore the trans-
mission filler tube is capped and no dipstick
is provided. An authorized dealer can check
your transmission fluid level using a special
service dipstick.
185
Page 188 of 276
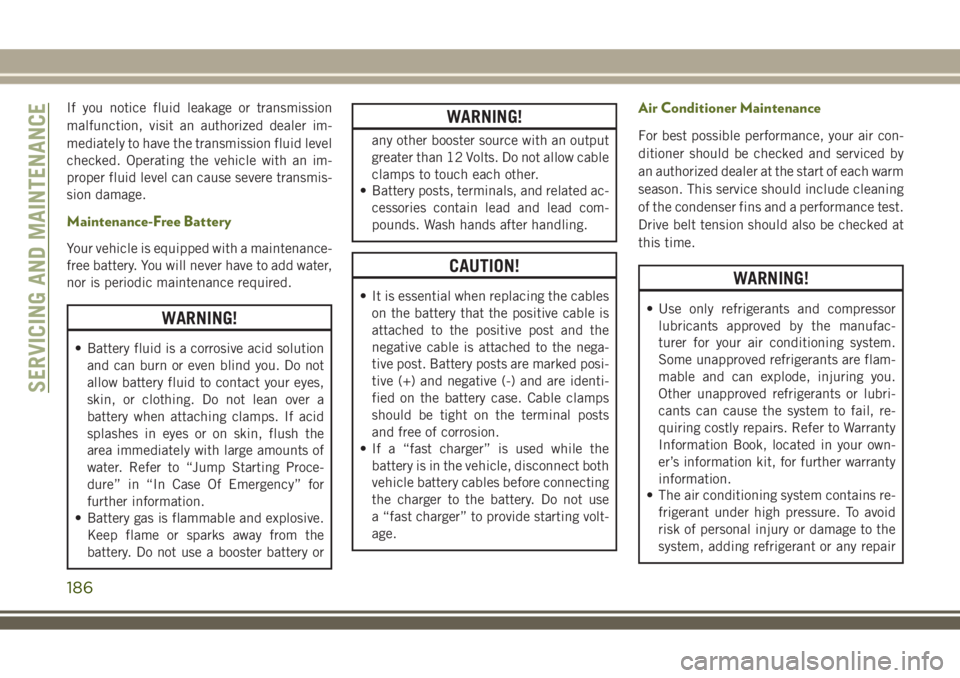
If you notice fluid leakage or transmission
malfunction, visit an authorized dealer im-
mediately to have the transmission fluid level
checked. Operating the vehicle with an im-
proper fluid level can cause severe transmis-
sion damage.
Maintenance-Free Battery
Your vehicle is equipped with a maintenance-
free battery. You will never have to add water,
nor is periodic maintenance required.
WARNING!
• Battery fluid is a corrosive acid solution
and can burn or even blind you. Do not
allow battery fluid to contact your eyes,
skin, or clothing. Do not lean over a
battery when attaching clamps. If acid
splashes in eyes or on skin, flush the
area immediately with large amounts of
water. Refer to “Jump Starting Proce-
dure” in “In Case Of Emergency” for
further information.
• Battery gas is flammable and explosive.
Keep flame or sparks away from the
battery. Do not use a booster battery or
WARNING!
any other booster source with an output
greater than 12 Volts. Do not allow cable
clamps to touch each other.
• Battery posts, terminals, and related ac-
cessories contain lead and lead com-
pounds. Wash hands after handling.
CAUTION!
• It is essential when replacing the cables
on the battery that the positive cable is
attached to the positive post and the
negative cable is attached to the nega-
tive post. Battery posts are marked posi-
tive (+) and negative (-) and are identi-
fied on the battery case. Cable clamps
should be tight on the terminal posts
and free of corrosion.
• If a “fast charger” is used while the
battery is in the vehicle, disconnect both
vehicle battery cables before connecting
the charger to the battery. Do not use
a “fast charger” to provide starting volt-
age.
Air Conditioner Maintenance
For best possible performance, your air con-
ditioner should be checked and serviced by
an authorized dealer at the start of each warm
season. This service should include cleaning
of the condenser fins and a performance test.
Drive belt tension should also be checked at
this time.
WARNING!
• Use only refrigerants and compressor
lubricants approved by the manufac-
turer for your air conditioning system.
Some unapproved refrigerants are flam-
mable and can explode, injuring you.
Other unapproved refrigerants or lubri-
cants can cause the system to fail, re-
quiring costly repairs. Refer to Warranty
Information Book, located in your own-
er’s information kit, for further warranty
information.
• The air conditioning system contains re-
frigerant under high pressure. To avoid
risk of personal injury or damage to the
system, adding refrigerant or any repair
SERVICING AND MAINTENANCE
186
Page 261 of 276
Accessories..................212
Mopar...................212
Adding Fuel.................139
AirBag .....................93
Advance Front Air Bag.........93
Air Bag Operation.............94
Air Bag Warning Light..........92
Enhanced Accident Response . .98, 168
Event Data Recorder (EDR)......168
Front Air Bag...............93
If A Deployment Occurs.........97
Knee Impact Bolsters..........95
Maintaining Your Air Bag System . . .98
Transporting Pets............112
Air Bag Light............58, 92, 113
Air Bag Maintenance.............98
Air Conditioner Maintenance.......186
Air Conditioning Filter.........38, 187
Air Conditioning, Operating Tips......37
Air Conditioning Refrigerant. . . .186, 187
Air Conditioning System.......37, 186
Air Pressure, Tires..............193
Alarm (Security Alarm).........18, 61
Alterations/Modifications, Vehicle......4
Antifreeze (Engine Coolant)........210Anti-Lock Brake System (ABS).......68
Anti-Lock Warning Light...........61
Arming System (Security Alarm)......18
Assist, Hill Start................70
Audio Jack...............219, 226
Audio Settings................218
Automatic Headlights............29
Automatic Oil Change Indicator......58
Automatic Temperature Control (ATC) . . .37
Automatic Transmission..........127
Fluid Level Check...........184
Fluid Type................211
Autostick...................128
Axle Fluid...................211
Axle Lock...................132
Battery..................60, 186
Charging System Light.........60
Belts, Seat
.................
.113
Brake Assist System.............69
Brake Control System, Electronic.....69
Brake Fluid..............183, 211
Brake System................183
Fluid Check...............183
Master Cylinder.............183Parking..................121
Brake/Transmission Interlock.......127
Bulb Replacement..........146, 147
Bulbs, Light.................114
Capacities, Fluid..............210
Caps, Filler
Fuel....................139
Oil (Engine)...............180
Carbon Monoxide Warning.........112
Car Washes..................202
CD (Compact Disc) Player.........218
Center High Mounted Stop Light.....149
Chains, Tire..................200
Changing A Flat Tire.........154, 192
Checking Your Vehicle For Safety. . . .112
Checks, Safety................112
Child Restraints
How To Stow An Unused ALR Seat
Belt....................110
Cleaning
Wheels..................199
Climate Control................33
Manual...................33
Clock Setting.............218, 221
INDEX
259
Page 262 of 276
Cold Weather Operation..........117
Compact Spare Tire.............198
Connector
UCI ....................233
Universal Consumer Interface
(UCI)...................233
Cooling System...............182
Coolant Capacity............210
Inspection................182
Selection Of Coolant (Antifreeze) . .210
Customer Assistance............242
Daytime Running Lights...........29
Dealer Service................189
Defroster, Windshield............113
Delay (Intermittent) Wipers.........31
Diagnostic System, Onboard........64
Diesel Engine Maintenance........175
Diesel Fuel..................209
Diesel Fuel Requirements.........209
Dimmer Switch, Headlight.........29
Dipsticks
Oil (Engine)...............182
Disabled Vehicle Towing..........165
Disarming, Security System.........18
Doors......................19Driver's Seat Back Tilt............21
Electronic Brake Control System......69
Anti-Lock Brake System........68
Electronic Roll Mitigation.......75
Traction Control System........71
Electronic Speed Control (Cruise
Control)..................136
Electronic Stability Control (ESC).....71
Electronic Throttle Control Warning
Light.....................60
Emergency Brake..............121
Emergency, In Case Of
Jacking..............154, 192
Jump Starting..............160
Engine.....................180
Break-In Recommendations.....121
Compartment...........180, 181
Compartment Identification . .180, 181
Cooling.................
.182
Exhaust Gas Caution..........112
Fails To Start...............118
Flooded, Starting............118
Fuel Requirements...........210
Jump Starting..............160
Oil .....................210
Oil Change Interval...........58Oil Filler Cap..............180
Oil Selection..............210
Overheating...............163
Starting.................117
Enhanced Accident Response
Feature................98, 168
Exhaust Gas Caution............112
Exhaust System...............112
Exterior Lights.............28, 114
Fabric Care..................203
Fabric Top..................203
Filters
Air Conditioning..........38, 187
Flashers
Hazard Warning.............146
Turn Signal......64, 114, 148, 149
Flash-To-Pass.................29
Flooded Engine Starting..........118
Fluid, Brake.................211
Fluid Capacities...............210
Fluid Leaks..................114
Fluid Level Checks
Brake...................183
Engine Oil................182
Manual Transmission.........184
Fluids And Lubricants...........210
INDEX
260
Page 264 of 276
AirBag .............58, 92, 113
Automatic Headlights..........29
Back-Up.................149
Brake Assist Warning..........75
Bulb Replacement.......146, 147
Center Mounted Stop.........149
Cruise...................64
Daytime Running............29
Dimmer Switch, Headlight.......29
Exterior..................114
Fog .................29, 148
Hazard Warning Flasher........146
Headlight Leveling............30
Headlights.............28, 147
Headlight Switch.............28
High Beam................29
High Beam/Low Beam Select.....29
Hill Descent Control Indicator.....76
Instrument Cluster............28
Malfunction Indicator
(Check Engine)..............61
Passing..................29
Rear Fog.................148
Rear Servicing.............149
Rear Tail Lamps............149
Seat Belt Reminder...........60
Security Alarm..............61Service..............146, 147
Side Marker...............149
Tire Pressure Monitoring (TPMS) . . .62
Traction Control.............75
Turn Signal . . .29, 64, 114, 148, 149
Warning (Instrument Cluster
Description)................64
Locking Axle.................132
Lug Nuts...................208
Maintenance Free Battery.........186
Maintenance Schedule.......170, 175
Diesel..................175
Malfunction Indicator Light
(Check Engine)...............61
Manual Transmission........123, 184
Fluid Level Check...........184
Lubricant Selection..........211
Shift Speeds.............
.124
Media Center Radio.............220
Memory Feature (Memory Seat)......21
Memory Seat..................21
Memory Seats And Radio..........21
Mirrors.....................28
Heated...................28
Modifications/Alterations, Vehicle......4
Monitor, Tire Pressure System.......77Mopar.....................212
Mopar Accessories.............212
Navigation..................229
Navigation System (Uconnect GPS) . . .229
Navigation Voice Prompt Volume.....229
New Vehicle Break-In Period.......121
Occupant Restraints.............84
Octane Rating, Gasoline (Fuel)......209
Oil Change Indicator..........58, 176
Oil Change Indicator, Reset.....58, 176
Oil, Engine
Capacity.................210
Change Interval..............58
Dipstick.................182
Pressure Warning Light.........60
Recommendation...........210
Viscosity.................210
Oil Pressure Light...............60
Onboard Diagnostic System.........64
Operating Precautions............64
Operator Manual (Owner's Manual).....4
Outlet
Power...................52
Overheating, Engine............163
INDEX
262