radio controls JEEP WRANGLER 2023 Owners Manual
[x] Cancel search | Manufacturer: JEEP, Model Year: 2023, Model line: WRANGLER, Model: JEEP WRANGLER 2023Pages: 396, PDF Size: 25.15 MB
Page 6 of 396
4
NORMAL OPERATION — DIESEL ENGINE ..................... 130
Cold Weather Precautions........................................ 131Engine Idling .............................................................. 131Stopping The Engine ................................................. 132
Cooling System Tips — Automatic Transmission..... 132
ENGINE BREAK-IN RECOMMENDATIONS —
GASOLINE ENGINE (IF EQUIPPED) ................................ 133
ENGINE BREAK-IN RECOMMENDATIONS — DIESEL
ENGINE (IF EQUIPPED) .................................................... 133
PARKING BRAKE ............................................................. 133
MANUAL TRANSMISSION — IF EQUIPPED .................... 134 Shifting....................................................................... 135
Downshifting.............................................................. 136
AUTOMATIC TRANSMISSION — IF EQUIPPED .............. 137 Ignition Park Interlock............................................... 137Brake/Transmission Shift Interlock (BTSI)
System ...................................................................... 138
8–Speed Automatic Transmission .......................... 138
FOUR–WHEEL DRIVE OPERATION ............................... 140 Four-Position Transfer Case — If Equipped ............ 141Five-Position Transfer Case — If Equipped .............. 142
Trac-Lok Rear Axle — If Equipped ............................ 144
Axle Lock (Tru-Lok) Front And Rear — If Equipped ... 144
Axle Lock (Tru-Lok) Rear Only — If Equipped .......... 144
Electronic Sway Bar Disconnect — If Equipped ...... 145
Off Road+ — If Equipped........................................... 146
ELECTRO-HYDRAULIC POWER STEERING .................... 146
STOP/START SYSTEM — AUTOMATIC TRANSMISSION
(IF EQUIPPED) .................................................................. 147 Autostop Mode .......................................................... 147
Possible Reasons The Engine Does Not Autostop.. 148
To Start The Engine While In Autostop Mode.......... 148
To Manually Turn Off The Stop/Start System ......... 148
To Manually Turn On The Stop/Start System.......... 149
System Malfunction .................................................. 149 STOP/START SYSTEM — MANUAL TRANSMISSION
(IF EQUIPPED) .................................................................. 149
Autostop Mode.......................................................... 149
Possible Reasons The Engine Does Not
Autostop .................................................................... 150
To Start The Engine While In Autostop Mode ......... 150
To Manually Turn Off The Stop/Start System ......... 150
To Manually Turn On The Stop/Start System ......... 151
System Malfunction.................................................. 151
CRUISE CONTROL SYSTEMS — IF EQUIPPED ............. 151 Cruise Control ........................................................... 151
Adaptive Cruise Control (ACC).................................. 152
PARKSENSE REAR PARK ASSIST — IF EQUIPPED ...... 160 ParkSense Sensors .................................................. 160ParkSense Warning Display ..................................... 160
ParkSense Display.................................................... 160
Enabling And Disabling ParkSense ......................... 162
Service The ParkSense Rear Park Assist System... 162
Cleaning The ParkSense System ............................. 163ParkSense System Usage Precautions ................... 163
PARKVIEW REAR BACK UP CAMERA ........................... 163
TRAILCAM SYSTEM — IF EQUIPPED .............................. 164
REFUELING THE VEHICLE — GASOLINE ENGINE
(IF EQUIPPED) .................................................................. 165 Fuel Filler Cap ........................................................... 165
Loose Fuel Filler Cap Message ............................... 166
REFUELING THE VEHICLE — DIESEL ENGINE
(IF EQUIPPED) .................................................................. 166 Avoid Using Contaminated Fuel............................... 167
Bulk Fuel Storage — Diesel Fuel .............................. 167
Diesel Exhaust Fluid ................................................. 167
VEHICLE LOADING ........................................................... 169 Certification Label..................................................... 169 TRAILER TOWING ............................................................170
Common Towing Definitions..................................... 170
Trailer Hitch Classification ........................................ 172Trailer Towing Weights (Maximum Trailer Weight
Ratings) ..................................................................... 172
Trailer And Tongue Weight........................................ 173Towing Requirements ............................................... 173Towing Tips ................................................................ 175
RECREATIONAL TOWING (BEHIND MOTORHOME) ...... 176 Towing This Vehicle Behind Another Vehicle ........... 176Recreational Towing — Four-Wheel Drive Models ... 176
DRIVING TIPS ....................................................................178 On-Road Driving Tips ................................................. 178
Off-Road Driving Tips................................................. 178
MULTIMEDIA
UCONNECT SYSTEMS ......................................................184
CYBERSECURITY ..............................................................184
UCONNECT SETTINGS ......................................................184 Customer Programmable Features ......................... 184
UCONNECT INTRODUCTION ............................................ 197 System Overview ...................................................... 197Drag & Drop Menu Bar ............................................. 200Safety And General Information ............................... 200
UCONNECT MODES .......................................................... 201 Steering Wheel Audio Controls ................................ 201Radio Mode .............................................................. 201
Media Mode .............................................................. 210
Phone Mode ............................................................. 212
23_JL_OM_EN_USC_t.book Page 4
Page 49 of 396
GETTING TO KNOW YOUR VEHICLE47
The power mirror controls consist of mirror select buttons
and a four-way mirror control switch. To adjust a mirror,
push either the L (left) or R (right) button to select the
mirror that you want to adjust.
Using the mirror control switch, push any of the four
arrows for the direction that you want the mirror to move.
UNIVERSAL GARAGE DOOR OPENER
(HOMELINK®) — IF EQUIPPED
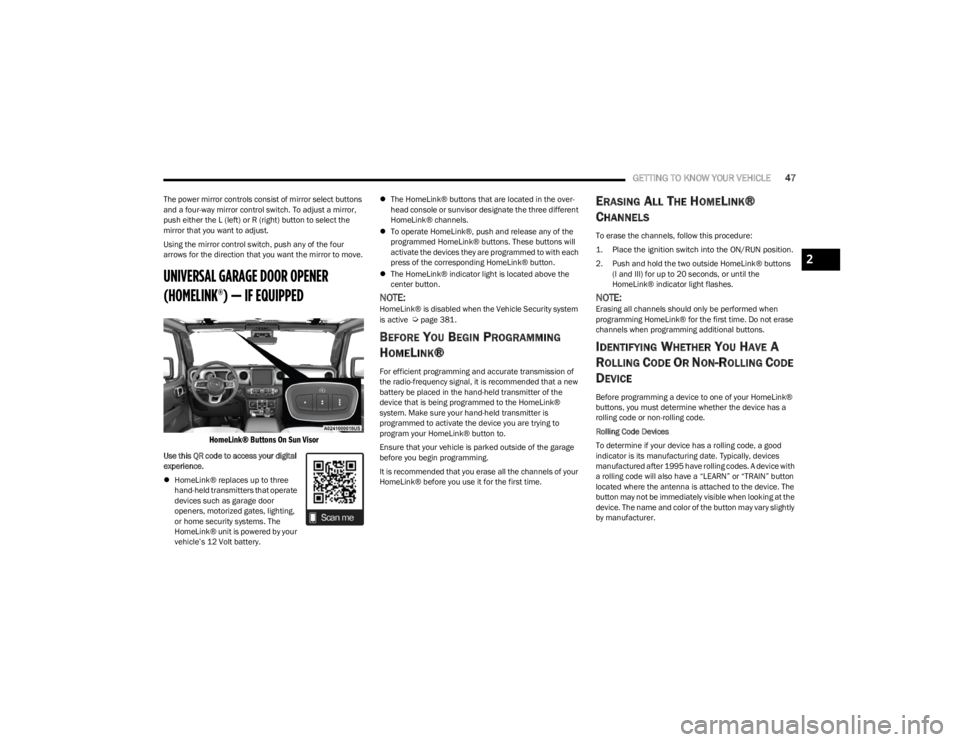
HomeLink® Buttons On Sun Visor
Use this QR code to access your digital
experience.
HomeLink® replaces up to three
hand-held transmitters that operate
devices such as garage door
openers, motorized gates, lighting,
or home security systems. The
HomeLink® unit is powered by your
vehicle’s 12 Volt battery.
The HomeLink® buttons that are located in the over -
head console or sunvisor designate the three different
HomeLink® channels.
To operate HomeLink®, push and release any of the
programmed HomeLink® buttons. These buttons will
activate the devices they are programmed to with each
press of the corresponding HomeLink® button.
The HomeLink® indicator light is located above the
center button.
NOTE:HomeLink® is disabled when the Vehicle Security system
is active Úpage 381.
BEFORE YOU BEGIN PROGRAMMING
H
OMELINK®
For efficient programming and accurate transmission of
the radio-frequency signal, it is recommended that a new
battery be placed in the hand-held transmitter of the
device that is being programmed to the HomeLink®
system. Make sure your hand-held transmitter is
programmed to activate the device you are trying to
program your HomeLink® button to.
Ensure that your vehicle is parked outside of the garage
before you begin programming.
It is recommended that you erase all the channels of your
HomeLink® before you use it for the first time.
ERASING ALL THE HOMELINK®
C
HANNELS
To erase the channels, follow this procedure:
1. Place the ignition switch into the ON/RUN position.
2. Push and hold the two outside HomeLink® buttons
(I and III) for up to 20 seconds, or until the
HomeLink® indicator light flashes.
NOTE:Erasing all channels should only be performed when
programming HomeLink® for the first time. Do not erase
channels when programming additional buttons.
IDENTIFYING WHETHER YOU HAVE A
R
OLLING CODE OR NON-ROLLING CODE
D
EVICE
Before programming a device to one of your HomeLink®
buttons, you must determine whether the device has a
rolling code or non-rolling code.
Rolling Code Devices
To determine if your device has a rolling code, a good
indicator is its manufacturing date. Typically, devices
manufactured after 1995 have rolling codes. A device with
a rolling code will also have a “LEARN” or “TRAIN” button
located where the antenna is attached to the device. The
button may not be immediately visible when looking at the
device. The name and color of the button may vary slightly
by manufacturer.
2
23_JL_OM_EN_USC_t.book Page 47
Page 56 of 396
54GETTING TO KNOW YOUR VEHICLE
If the lever is pulled while in the off position, the wipers will
operate for two or three wipe cycles. Then, the wipers will
turn off.
NOTE:As a protective measure, the washer will stop if the switch
is held for more than 20 seconds. Once the switch is
released the washer will resume normal operation.
Mist
Push upward on the wiper lever to activate a single wipe to
clear off-road mist or spray from a passing vehicle. As long
as the lever is held up, the wipers will continue to operate.
NOTE:The mist feature does not activate the washer pump;
therefore, no washer fluid will be sprayed on the wind -
shield. The washer function must be used in order to spray
the windshield with washer fluid.
For information on wiper care and replacement, see
Úpage 326.
REAR WINDOW WIPER/WASHER —
I
F EQUIPPED
A rotary switch on the center portion of the windshield
wiper/washer lever controls the operation of the rear
wiper/washer function.
Rotate the switch upward to the first detent
position for intermittent operation and to the
second detent for continuous rear wiper
operation.
Push the wiper lever toward the instrument
panel to activate the rear washer. The washer
pump and wiper will continue to operate as
long as the lever is held.
NOTE:As a protective measure, the washer will stop if the switch
is held for more than 20 seconds. Once the switch is
released the washer will resume normal operation.
If the rear wiper is operating when the ignition is placed in
the OFF position, the wiper will automatically return to the
parked position. When the vehicle is restarted, the wiper
will resume function at whichever position the switch is set
at.
CLIMATE CONTROLS
The Climate Control system allows you to regulate the
temperature, air flow, and direction of air circulating
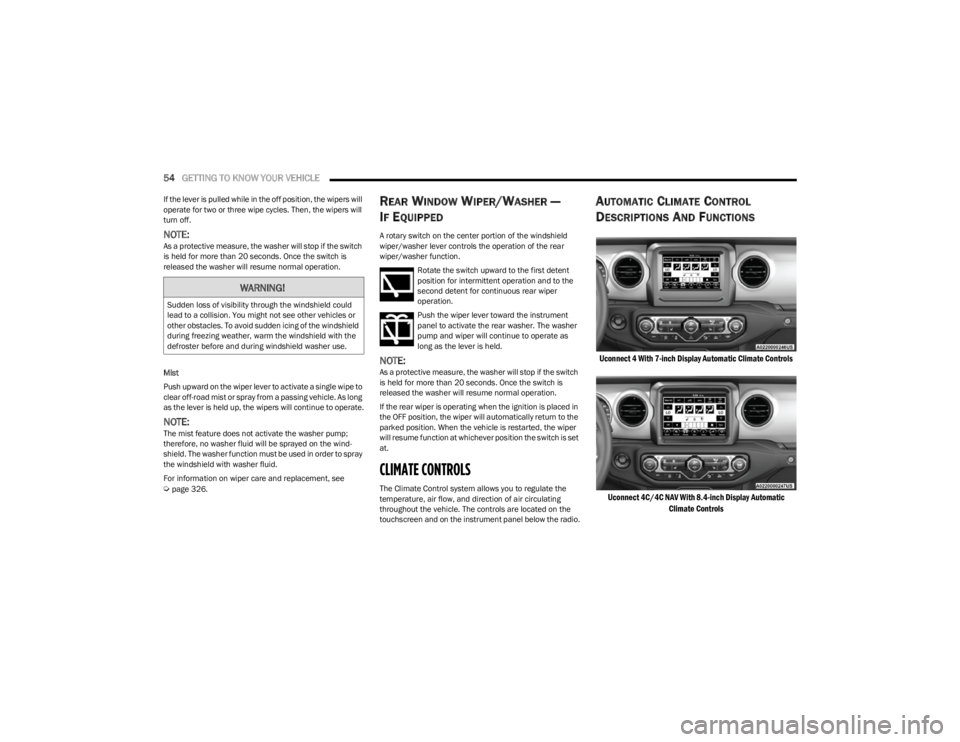
throughout the vehicle. The controls are located on the
touchscreen and on the instrument panel below the radio.
AUTOMATIC CLIMATE CONTROL
D
ESCRIPTIONS AND FUNCTIONS
Uconnect 4 With 7-inch Display Automatic Climate Controls
Uconnect 4C/4C NAV With 8.4-inch Display Automatic Climate Controls
WARNING!
Sudden loss of visibility through the windshield could
lead to a collision. You might not see other vehicles or
other obstacles. To avoid sudden icing of the windshield
during freezing weather, warm the windshield with the
defroster before and during windshield washer use.
23_JL_OM_EN_USC_t.book Page 54
Page 63 of 396
GETTING TO KNOW YOUR VEHICLE61
Rear Storage Compartment — If Equipped
The rear cargo area storage compartment is located
underneath the load floor.
To access the storage compartment, lift up on the cargo
strap/handle at the rear of the cargo area.
Rear Storage Cover (Four Door Models)
Rear Storage Cover (Two Door Models)
LIGHTED CUPHOLDERS — IF EQUIPPED
On some vehicles, the front cupholders are equipped with
a light ring that illuminates the cupholders for the front
passengers. The light ring is controlled by the Dimmer
Controls
Úpage 53.
USB/AUX CONTROL
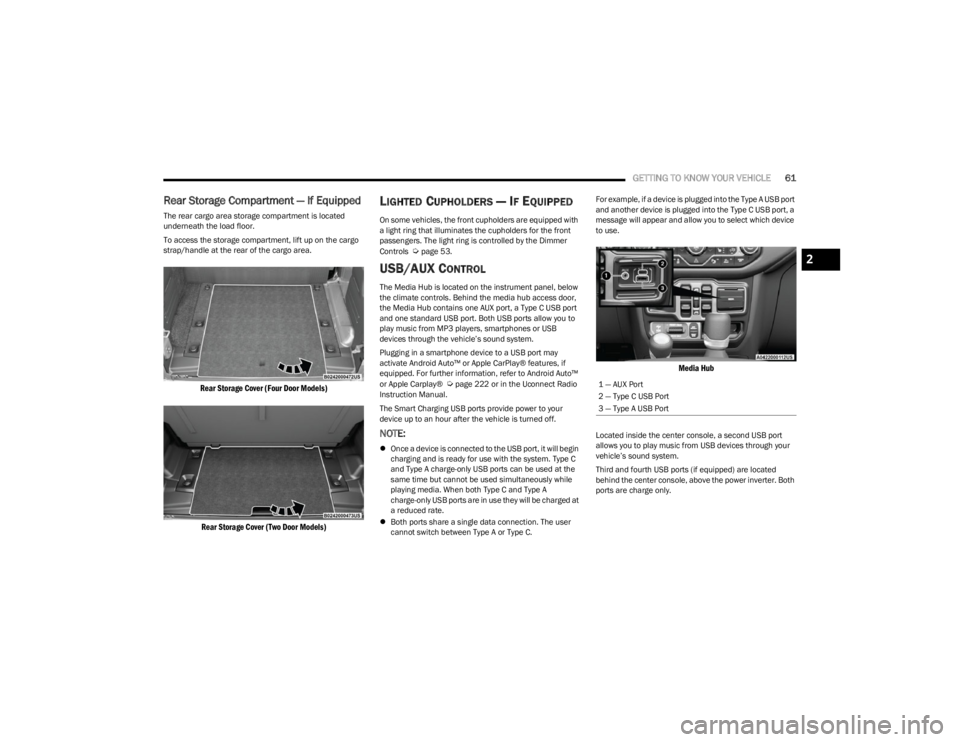
The Media Hub is located on the instrument panel, below
the climate controls. Behind the media hub access door,
the Media Hub contains one AUX port, a Type C USB port
and one standard USB port. Both USB ports allow you to
play music from MP3 players, smartphones or USB
devices through the vehicle’s sound system.
Plugging in a smartphone device to a USB port may
activate Android Auto™ or Apple CarPlay® features, if
equipped. For further information, refer to Android Auto™
or Apple Carplay®
Úpage 222 or in the Uconnect Radio
Instruction Manual.
The Smart Charging USB ports provide power to your
device up to an hour after the vehicle is turned off.
NOTE:
Once a device is connected to the USB port, it will begin
charging and is ready for use with the system. Type C
and Type A charge-only USB ports can be used at the
same time but cannot be used simultaneously while
playing media. When both Type C and Type A
charge-only USB ports are in use they will be charged at
a reduced rate.
Both ports share a single data connection. The user
cannot switch between Type A or Type C. For example, if a device is plugged into the Type A USB port
and another device is plugged into the Type C USB port, a
message will appear and allow you to select which device
to use.
Media Hub
Located inside the center console, a second USB port
allows you to play music from USB devices through your
vehicle’s sound system.
Third and fourth USB ports (if equipped) are located
behind the center console, above the power inverter. Both
ports are charge only.
1 — AUX Port
2 — Type C USB Port
3 — Type A USB Port
2
23_JL_OM_EN_USC_t.book Page 61
Page 165 of 396
STARTING AND OPERATING163
CLEANING THE PARKSENSE SYSTEM
Clean the Rear Park Assist sensors with water, car wash
soap and a soft cloth. Do not use rough or hard cloths. In
washing stations, clean sensors quickly keeping the vapor
jet/high pressure washing nozzles at least 4 inches (10
cm) from the sensors. Do not scratch or poke the sensors.
PARKSENSE SYSTEM USAGE
P
RECAUTIONS
NOTE:
Ensure that the rear fascia/bumper is free of snow, ice,
mud, dirt and debris to keep the ParkSense system
operating properly.
Jackhammers, large trucks, and other vibrations could
affect the performance of ParkSense.
When you turn ParkSense off, the instrument cluster
display will read “PARKSENSE OFF.” Furthermore, once
you turn ParkSense off, it remains off until you turn it
on again, even if you cycle the ignition.
ParkSense, when on, will reduce the volume of the
radio when it is sounding a tone.
Clean the ParkSense sensors regularly, taking care not
to scratch or damage them. The sensors must not be
covered with ice, snow, slush, mud, dirt or debris.
Failure to do so can result in the system not working
properly. The ParkSense system might not detect an
obstacle behind the fascia/bumper, or it could provide
a false indication that an obstacle is behind the fascia/
bumper.
Use the ParkSense switch to turn the ParkSense
system off if objects such as bicycle carriers, trailer
hitches, etc. are placed within 12 inches (30 cm) of the
rear fascia/bumper. Failure to do so can result in the
system misinterpreting a close object as a sensor
problem, causing the “PARKSENSE UNAVAILABLE
SERVICE REQUIRED” message to be displayed in the
instrument cluster display.
PARKVIEW REAR BACK UP CAMERA
The ParkView Rear Back Up Camera allows you to see an
on-screen image of the rear surroundings of your vehicle
whenever the gear selector is put into REVERSE. The
image will be displayed in the touchscreen display along
with a caution note to “Check Entire Surroundings” across
the top of the screen. After five seconds this note will
disappear. The ParkView camera is located on the rear of
the vehicle in the center of the spare tire.
Manual Activation Of The Rear View Camera
1. Press the Controls button located on the bottom of
the Uconnect display.
2. Press the Back Up Camera button to turn the Rear View Camera system on.
WARNING!
Drivers must be careful when backing up even when
using ParkSense. Always check carefully behind your
vehicle, look behind you, and be sure to check for
pedestrians, animals, other vehicles, obstructions,
and blind spots before backing up. You are respon -
sible for safety and must continue to pay attention to
your surroundings. Failure to do so can result in
serious injury or death.
Before using ParkSense, it is strongly recommended
that the ball mount and hitch ball assembly be
disconnected from the vehicle when the vehicle is
not used for towing. Failure to do so can result in
injury or damage to vehicles or obstacles because
the hitch ball will be much closer to the obstacle than
the rear fascia when the vehicle sounds the contin -
uous tone. Also, the sensors could detect the ball
mount and hitch ball assembly, depending on its size
and shape, giving a false indication that an obstacle
is behind the vehicle.
CAUTION!
ParkSense is only a parking aid and it is unable to
recognize every obstacle, including small obstacles.
Parking curbs might be temporarily detected or not
detected at all. Obstacles located above or below the
sensors will not be detected when they are in close
proximity.
The vehicle must be driven slowly when using Park -
Sense in order to be able to stop in time when an
obstacle is detected. It is recommended that the
driver looks over his/her shoulder when using Park -
Sense.
4
23_JL_OM_EN_USC_t.book Page 163
Page 200 of 396
198MULTIMEDIA
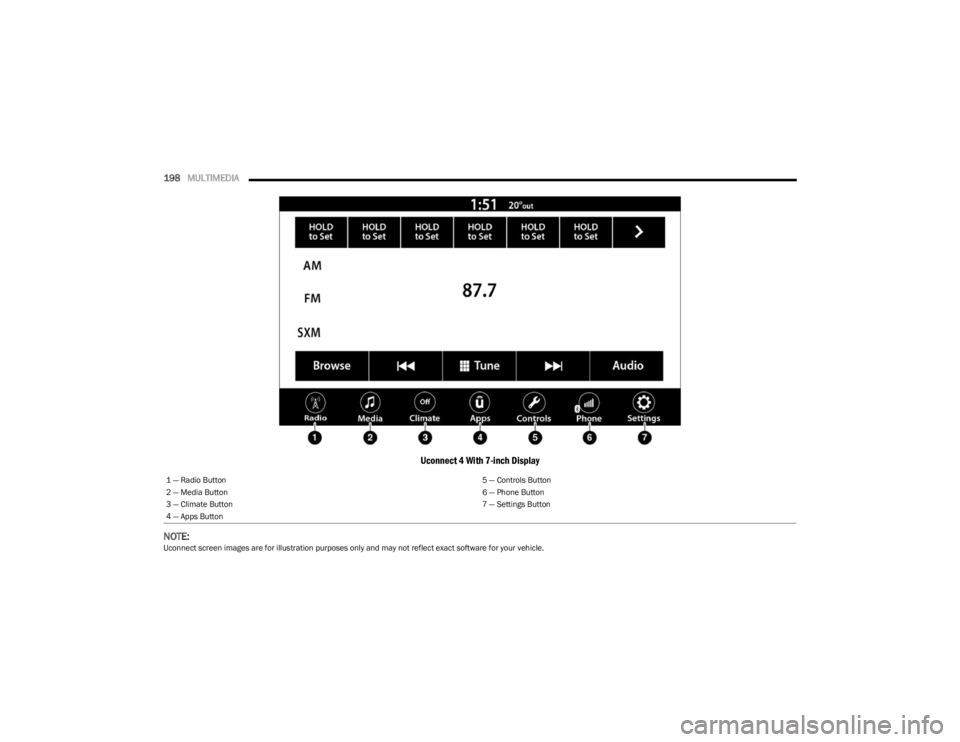
Uconnect 4 With 7-inch Display
NOTE:
Uconnect screen images are for illustration purposes only and may not reflect exact software for your vehicle. 1 — Radio Button
5 — Controls Button
2 — Media Button 6 — Phone Button
3 — Climate Button 7 — Settings Button
4 — Apps Button
23_JL_OM_EN_USC_t.book Page 198
Page 201 of 396
MULTIMEDIA199
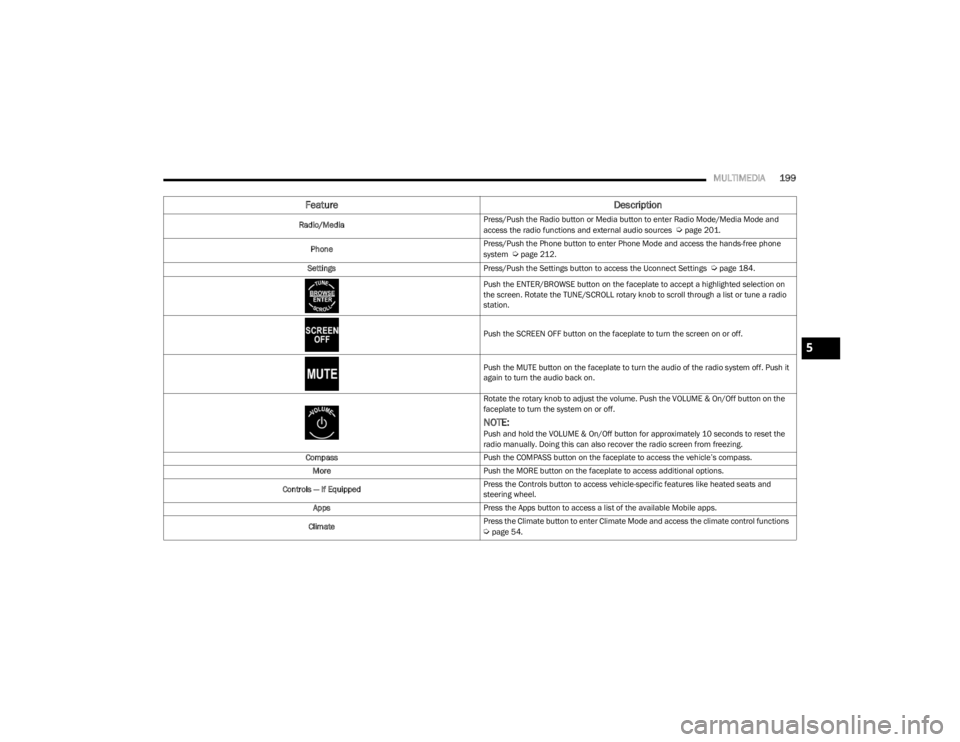
Feature Description
Radio/MediaPress/Push the Radio button or Media button to enter Radio Mode/Media Mode and
access the radio functions and external audio sources Úpage 201.
Phone Press/Push the Phone button to enter Phone Mode and access the hands-free phone
system
Úpage 212.
Settings Press/Push the Settings button to access the Uconnect Settings
Úpage 184.
Push the ENTER/BROWSE button on the faceplate to accept a highlighted selection on
the screen. Rotate the TUNE/SCROLL rotary knob to scroll through a list or tune a radio
station.
Push the SCREEN OFF button on the faceplate to turn the screen on or off.
Push the MUTE button on the faceplate to turn the audio of the radio system off. Push it
again to turn the audio back on.
Rotate the rotary knob to adjust the volume. Push the VOLUME & On/Off button on the
faceplate to turn the system on or off.
NOTE:Push and hold the VOLUME & On/Off button for approximately 10 seconds to reset the
radio manually. Doing this can also recover the radio screen from freezing.
Compass Push the COMPASS button on the faceplate to access the vehicle’s compass.
More Push the MORE button on the faceplate to access additional options.
Controls — If Equipped Press the Controls button to access vehicle-specific features like heated seats and
steering wheel.
Apps Press the Apps button to access a list of the available Mobile apps.
Climate Press the Climate button to enter Climate Mode and access the climate control functions
Úpage 54.
5
23_JL_OM_EN_USC_t.book Page 199
Page 203 of 396
MULTIMEDIA201
UCONNECT MODES
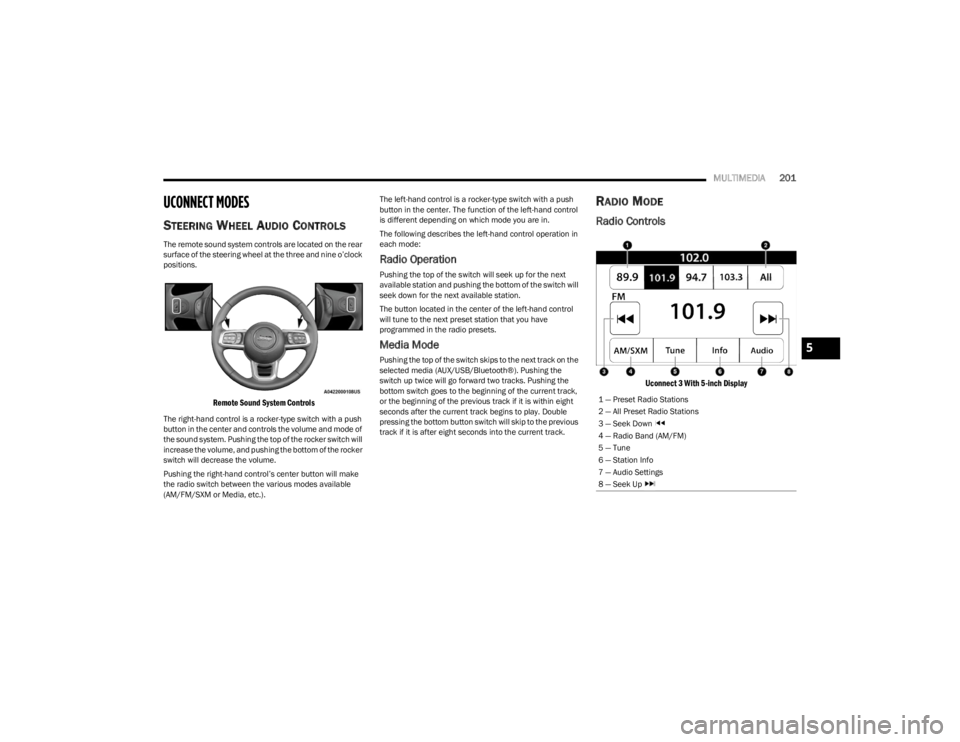
STEERING WHEEL AUDIO CONTROLS
The remote sound system controls are located on the rear
surface of the steering wheel at the three and nine o’clock
positions.
Remote Sound System Controls
The right-hand control is a rocker-type switch with a push
button in the center and controls the volume and mode of
the sound system. Pushing the top of the rocker switch will
increase the volume, and pushing the bottom of the rocker
switch will decrease the volume.
Pushing the right-hand control’s center button will make
the radio switch between the various modes available
(AM/FM/SXM or Media, etc.). The left-hand control is a rocker-type switch with a push
button in the center. The function of the left-hand control
is different depending on which mode you are in.
The following describes the left-hand control operation in
each mode:
Radio Operation
Pushing the top of the switch will seek up for the next
available station and pushing the bottom of the switch will
seek down for the next available station.
The button located in the center of the left-hand control
will tune to the next preset station that you have
programmed in the radio presets.
Media Mode
Pushing the top of the switch skips to the next track on the
selected media (AUX/USB/Bluetooth®). Pushing the
switch up twice will go forward two tracks. Pushing the
bottom switch goes to the beginning of the current track,
or the beginning of the previous track if it is within eight
seconds after the current track begins to play. Double
pressing the bottom button switch will skip to the previous
track if it is after eight seconds into the current track.
RADIO MODE
Radio Controls
Uconnect 3 With 5-inch Display
1 — Preset Radio Stations
2 — All Preset Radio Stations
3 — Seek Down
4 — Radio Band (AM/FM)
5 — Tune
6 — Station Info
7 — Audio Settings
8 — Seek Up
5
23_JL_OM_EN_USC_t.book Page 201
Page 213 of 396
MULTIMEDIA211
BLUETOOTH® MODE
Overview
Bluetooth® Streaming Audio or Bluetooth® Mode is
entered by pairing a Bluetooth® device, containing music,
to the Uconnect system.
Before proceeding, the Bluetooth® device must be paired
to the Uconnect Phone to communicate with the Uconnect
system.
On the Uconnect 3 With 5-inch Display, push the MEDIA
button located on the faceplate. Once in Media Mode,
press the Source button on the touchscreen and select
the Bluetooth® button
Úpage 212.
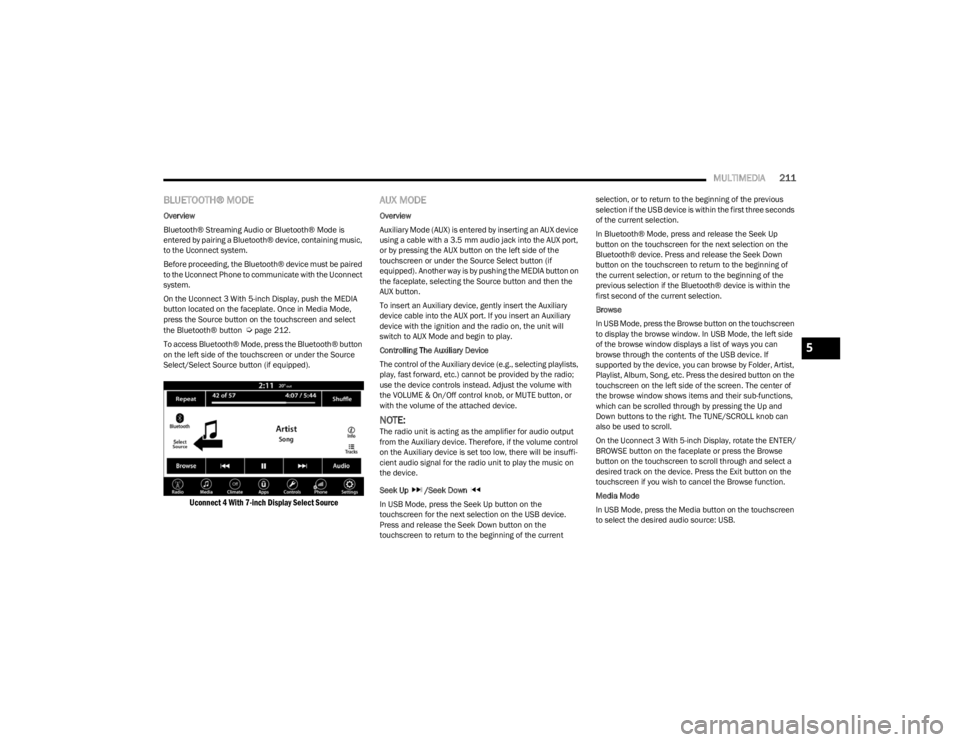
To access Bluetooth® Mode, press the Bluetooth® button
on the left side of the touchscreen or under the Source
Select/Select Source button (if equipped).
Uconnect 4 With 7-inch Display Select Source
AUX MODE
Overview
Auxiliary Mode (AUX) is entered by inserting an AUX device
using a cable with a 3.5 mm audio jack into the AUX port,
or by pressing the AUX button on the left side of the
touchscreen or under the Source Select button (if
equipped). Another way is by pushing the MEDIA button on
the faceplate, selecting the Source button and then the
AUX button.
To insert an Auxiliary device, gently insert the Auxiliary
device cable into the AUX port. If you insert an Auxiliary
device with the ignition and the radio on, the unit will
switch to AUX Mode and begin to play.
Controlling The Auxiliary Device
The control of the Auxiliary device (e.g., selecting playlists,
play, fast forward, etc.) cannot be provided by the radio;
use the device controls instead. Adjust the volume with
the VOLUME & On/Off control knob, or MUTE button, or
with the volume of the attached device.
NOTE:The radio unit is acting as the amplifier for audio output
from the Auxiliary device. Therefore, if the volume control
on the Auxiliary device is set too low, there will be insuffi -
cient audio signal for the radio unit to play the music on
the device.
Seek Up /Seek Down
In USB Mode, press the Seek Up button on the
touchscreen for the next selection on the USB device.
Press and release the Seek Down button on the
touchscreen to return to the beginning of the current selection, or to return to the beginning of the previous
selection if the USB device is within the first three seconds
of the current selection.
In Bluetooth® Mode, press and release the Seek Up
button on the touchscreen for the next selection on the
Bluetooth® device. Press and release the Seek Down
button on the touchscreen to return to the beginning of
the current selection, or return to the beginning of the
previous selection if the Bluetooth® device is within the
first second of the current selection.
Browse
In USB Mode, press the Browse button on the touchscreen
to display the browse window. In USB Mode, the left side
of the browse window displays a list of ways you can
browse through the contents of the USB device. If
supported by the device, you can browse by Folder, Artist,
Playlist, Album, Song, etc. Press the desired button on the
touchscreen on the left side of the screen. The center of
the browse window shows items and their sub-functions,
which can be scrolled through by pressing the Up and
Down buttons to the right. The TUNE/SCROLL knob can
also be used to scroll.
On the Uconnect 3 With 5-inch Display, rotate the ENTER/
BROWSE button on the faceplate or press the Browse
button on the touchscreen to scroll through and select a
desired track on the device. Press the Exit button on the
touchscreen if you wish to cancel the Browse function.
Media Mode
In USB Mode, press the Media button on the touchscreen
to select the desired audio source: USB.
5
23_JL_OM_EN_USC_t.book Page 211
Page 224 of 396
222MULTIMEDIA
Did You Know: Voice Text Reply is not compatible with
iPhone®, but if your vehicle is equipped with Siri® Eyes
Free, you can use your voice to send a text message.
SIRI® EYES FREE — IF EQUIPPED
When used with your Apple® iPhone® connected to your
vehicle via Bluetooth®, Siri lets you use your voice to send
text messages, select media, place phone calls and much
more. Siri uses your natural language to understand what
you mean and responds back to confirm your requests.
The system is designed to keep your eyes on the road and
your hands on the wheel by letting Siri help you perform
useful tasks.
To enable Siri, push and hold, then release the Uconnect
Voice Recognition (VR) button on the steering wheel. After
you hear a double beep, you can ask Siri to play podcasts
and music, get directions, read text messages, and many
other useful requests.
BLUETOOTH® COMMUNICATION LINK
Mobile phones may lose connection to the Uconnect
Phone. When this happens, the connection can generally
be re-established by restarting the mobile phone. Your
mobile phone is recommended to remain in Bluetooth®
ON Mode.
POWER-UP
After switching the ignition key from OFF to either the ON/
RUN or ACC position, or after a language change, you must
wait at least 15 seconds prior to using the system
Úpage 381.
ANDROID AUTO™ & APPLE CARPLAY® —
IF EQUIPPED
ANDROID AUTO™
Use this QR code to access your digital
experience.
Android Auto™ is a feature of your
Uconnect system, and your Android™
6.0 or higher powered smartphone
with a data plan, that allows you to
project your smartphone and a number
of its apps onto the touchscreen radio
display. Android Auto™ brings you useful information, and
organizes it into simple cards that appear just when they
are needed. Android Auto™ can be used with speech
technology, the steering wheel controls, the knobs and
buttons on your radio faceplate, and the radio display’s
touchscreen to control many of your apps. To use Android
Auto™, perform the following procedure:
NOTE:Feature availability depends on your carrier and mobile
phone manufacturer. Some Android Auto™ features may
or may not be available in every region and/or language.
1. Download the Android Auto™ app from the Google Play store on your Android™-powered smartphone.
2. Connect your Android™-powered smartphone to one of the media USB ports in your vehicle. If the Android
Auto™ app was not downloaded, the first time you plug your device in the app begins to download. Your
vehicle should be in PARK the first time you use the
app.
NOTE:Be sure to use the factory-provided USB cable that came
with your phone, as aftermarket cables may not work.
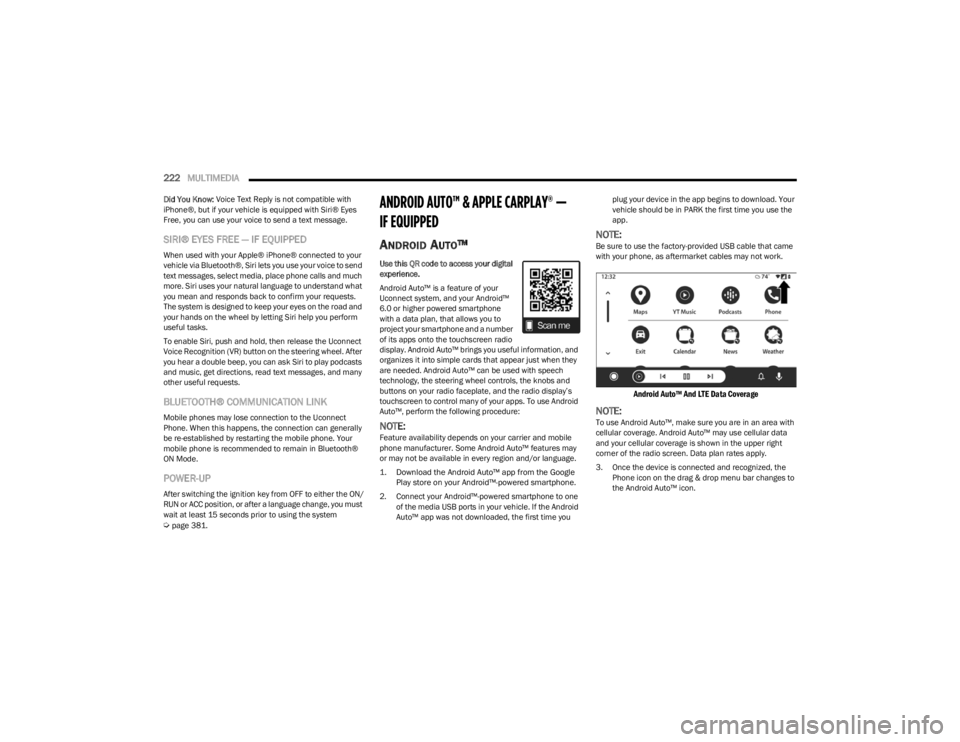
Android Auto™ And LTE Data Coverage
NOTE:To use Android Auto™, make sure you are in an area with
cellular coverage. Android Auto™ may use cellular data
and your cellular coverage is shown in the upper right
corner of the radio screen. Data plan rates apply.
3. Once the device is connected and recognized, the
Phone icon on the drag & drop menu bar changes to
the Android Auto™ icon.
23_JL_OM_EN_USC_t.book Page 222