steering program JEEP WRANGLER 2023 Owners Manual
[x] Cancel search | Manufacturer: JEEP, Model Year: 2023, Model line: WRANGLER, Model: JEEP WRANGLER 2023Pages: 396, PDF Size: 25.15 MB
Page 4 of 396
2
INTRODUCTION
SYMBOLS KEY ....................................................................... 8
ROLLOVER WARNING ......................................................... 8
VEHICLE MODIFICATIONS/ALTERATIONS ......................... 8
SYMBOL GLOSSARY ............................................................. 9
GETTING TO KNOW YOUR VEHICLE
KEYS ....................................................................................13
Key Fob ........................................................................ 13
SENTRY KEY ........................................................................15
IGNITION SWITCH ...............................................................15 Keyless Enter ‘n Go™ Ignition .................................... 15
REMOTE START — IF EQUIPPED (GASOLINE)..................17 How To Use Remote Start .......................................... 17
To Exit Remote Start Mode ........................................ 18
Remote Start Front Defrost Activation —
If Equipped .................................................................. 18
Remote Start Comfort Systems — If Equipped ......... 18
Remote Start Windshield Wiper De-Icer
Activation — If Equipped ............................................. 18
Remote Start Cancel Message .................................. 18
REMOTE START — IF EQUIPPED (DIESEL) ......................19 How To Use Remote Start .......................................... 19
VEHICLE SECURITY SYSTEM — IF EQUIPPED .................19 To Arm The System .................................................... 20
To Disarm The System ............................................... 20
Rearming Of The System ............................................ 20 DOORS ................................................................................ 20
Manual Door Locks......................................................20
Power Door Locks — If Equipped ............................... 21
Keyless Enter ‘n Go™ — Passive Entry
(If Equipped) ................................................................ 21
Automatic Door Locks — If Equipped ......................... 23
Child-Protection Door Lock System — Rear Doors.....23
Front Door Removal..................................................... 24
Rear Door Removal (Four-Door Models) ................... 27
Door Off Mirror Kit — If Equipped
S
........................ 29
Half-Door Installation — If Equipped
S
................... 31
STEERING WHEEL............................................................... 36 Tilt/Telescoping Steering Column ..............................36
Heated Steering Wheel — If Equipped........................ 37
SEATS .................................................................................. 37 Manual Adjustment Front Seats ................................. 37
60/40 Split Folding Rear Seat —
Four Door Models ........................................................ 39
Fold And Tumble Rear Seat — Two Door Models....... 39
Heated Seats — If Equipped........................................ 41
Rear Seat Armrest — If Equipped ............................... 41
Head Restraints ........................................................... 41
UCONNECT VOICE RECOGNITION ..................................... 44 Introducing Voice Recognition .................................... 44
Basic Voice Commands............................................... 44
Get Started ................................................................... 44
Additional Information................................................. 45
MIRRORS ............................................................................ 45 Inside Rearview Mirror ................................................ 45
Illuminated Vanity Mirrors .......................................... 46
Outside Mirrors ........................................................... 46
Outside Mirrors With Turn Signal — If Equipped ........ 46
Heated Mirrors — If Equipped ..................................... 46
Power Mirrors — If Equipped ....................................... 46 UNIVERSAL GARAGE DOOR OPENER
(HOMELINK®) — IF EQUIPPED
S
.................................. 47
Before You Begin Programming HomeLink® ............ 47
Erasing All The HomeLink® Channels ....................... 47
Identifying Whether You Have A Rolling Code Or
Non-Rolling Code Device............................................. 47
Programming HomeLink® To A Garage Door
Opener ......................................................................... 48
Programming HomeLink® To A Miscellaneous
Device .......................................................................... 48
Reprogramming A Single HomeLink® Button ........... 49
Canadian/Gate Operator Programming .................... 49
Security ........................................................................ 49
Troubleshooting Tips ................................................... 50
EXTERIOR LIGHTS .............................................................. 50 Headlight Switch.......................................................... 50
Daytime Running Lights (DRLs) — If Equipped ......... 51
High/Low Beam Switch............................................... 51
Automatic High Beam Headlamp Control —
If Equipped .................................................................. 51
Flash-To-Pass............................................................... 51
Automatic Headlights — If Equipped ......................... 51
Lights-On Reminder..................................................... 51
Front Fog Lights — If Equipped ................................... 52
Turn Signals ................................................................. 52
Lane Change Assist — If Equipped ............................. 52
INTERIOR LIGHTS .............................................................. 52 Interior Courtesy Lights ............................................... 52
Dimmer Control ........................................................... 53
WINDSHIELD WIPERS AND WASHERS ........................... 53 Windshield Wiper Operation ...................................... 53
Rear Window Wiper/Washer — If Equipped .............. 54
23_JL_OM_EN_USC_t.book Page 2
Page 6 of 396
4
NORMAL OPERATION — DIESEL ENGINE ..................... 130
Cold Weather Precautions........................................ 131Engine Idling .............................................................. 131Stopping The Engine ................................................. 132
Cooling System Tips — Automatic Transmission..... 132
ENGINE BREAK-IN RECOMMENDATIONS —
GASOLINE ENGINE (IF EQUIPPED) ................................ 133
ENGINE BREAK-IN RECOMMENDATIONS — DIESEL
ENGINE (IF EQUIPPED) .................................................... 133
PARKING BRAKE ............................................................. 133
MANUAL TRANSMISSION — IF EQUIPPED .................... 134 Shifting....................................................................... 135
Downshifting.............................................................. 136
AUTOMATIC TRANSMISSION — IF EQUIPPED .............. 137 Ignition Park Interlock............................................... 137Brake/Transmission Shift Interlock (BTSI)
System ...................................................................... 138
8–Speed Automatic Transmission .......................... 138
FOUR–WHEEL DRIVE OPERATION ............................... 140 Four-Position Transfer Case — If Equipped ............ 141Five-Position Transfer Case — If Equipped .............. 142
Trac-Lok Rear Axle — If Equipped ............................ 144
Axle Lock (Tru-Lok) Front And Rear — If Equipped ... 144
Axle Lock (Tru-Lok) Rear Only — If Equipped .......... 144
Electronic Sway Bar Disconnect — If Equipped ...... 145
Off Road+ — If Equipped........................................... 146
ELECTRO-HYDRAULIC POWER STEERING .................... 146
STOP/START SYSTEM — AUTOMATIC TRANSMISSION
(IF EQUIPPED) .................................................................. 147 Autostop Mode .......................................................... 147
Possible Reasons The Engine Does Not Autostop.. 148
To Start The Engine While In Autostop Mode.......... 148
To Manually Turn Off The Stop/Start System ......... 148
To Manually Turn On The Stop/Start System.......... 149
System Malfunction .................................................. 149 STOP/START SYSTEM — MANUAL TRANSMISSION
(IF EQUIPPED) .................................................................. 149
Autostop Mode.......................................................... 149
Possible Reasons The Engine Does Not
Autostop .................................................................... 150
To Start The Engine While In Autostop Mode ......... 150
To Manually Turn Off The Stop/Start System ......... 150
To Manually Turn On The Stop/Start System ......... 151
System Malfunction.................................................. 151
CRUISE CONTROL SYSTEMS — IF EQUIPPED ............. 151 Cruise Control ........................................................... 151
Adaptive Cruise Control (ACC).................................. 152
PARKSENSE REAR PARK ASSIST — IF EQUIPPED ...... 160 ParkSense Sensors .................................................. 160ParkSense Warning Display ..................................... 160
ParkSense Display.................................................... 160
Enabling And Disabling ParkSense ......................... 162
Service The ParkSense Rear Park Assist System... 162
Cleaning The ParkSense System ............................. 163ParkSense System Usage Precautions ................... 163
PARKVIEW REAR BACK UP CAMERA ........................... 163
TRAILCAM SYSTEM — IF EQUIPPED .............................. 164
REFUELING THE VEHICLE — GASOLINE ENGINE
(IF EQUIPPED) .................................................................. 165 Fuel Filler Cap ........................................................... 165
Loose Fuel Filler Cap Message ............................... 166
REFUELING THE VEHICLE — DIESEL ENGINE
(IF EQUIPPED) .................................................................. 166 Avoid Using Contaminated Fuel............................... 167
Bulk Fuel Storage — Diesel Fuel .............................. 167
Diesel Exhaust Fluid ................................................. 167
VEHICLE LOADING ........................................................... 169 Certification Label..................................................... 169 TRAILER TOWING ............................................................170
Common Towing Definitions..................................... 170
Trailer Hitch Classification ........................................ 172Trailer Towing Weights (Maximum Trailer Weight
Ratings) ..................................................................... 172
Trailer And Tongue Weight........................................ 173Towing Requirements ............................................... 173Towing Tips ................................................................ 175
RECREATIONAL TOWING (BEHIND MOTORHOME) ...... 176 Towing This Vehicle Behind Another Vehicle ........... 176Recreational Towing — Four-Wheel Drive Models ... 176
DRIVING TIPS ....................................................................178 On-Road Driving Tips ................................................. 178
Off-Road Driving Tips................................................. 178
MULTIMEDIA
UCONNECT SYSTEMS ......................................................184
CYBERSECURITY ..............................................................184
UCONNECT SETTINGS ......................................................184 Customer Programmable Features ......................... 184
UCONNECT INTRODUCTION ............................................ 197 System Overview ...................................................... 197Drag & Drop Menu Bar ............................................. 200Safety And General Information ............................... 200
UCONNECT MODES .......................................................... 201 Steering Wheel Audio Controls ................................ 201Radio Mode .............................................................. 201
Media Mode .............................................................. 210
Phone Mode ............................................................. 212
23_JL_OM_EN_USC_t.book Page 4
Page 20 of 396
18GETTING TO KNOW YOUR VEHICLE
TO EXIT REMOTE START MODE
To drive the vehicle after starting the Remote Start
system, either push and release the unlock button on the
key fob to unlock the doors, or unlock the vehicle using
Keyless Enter ‘n Go™ — Passive Entry via the door
handles, and disarm the Vehicle Security system (if
equipped). Then, prior to the end of the 15 minute cycle,
push and release the START/STOP ignition button.
The Remote Start system will turn the engine off if the
Remote Start button on the key fob is pushed again, or if
the engine is allowed to run for the entire 15 minute cycle.
Once the ignition is placed in the ON/RUN position, the
climate controls will resume previously set operations
(temperature, blower control, etc.).
NOTE:
To avoid unintentional shutdowns, the system will
disable for two seconds after receiving a valid Remote
Start request.
For vehicles equipped with the Keyless Enter ‘n Go™ —
Passive Entry feature, the message “Remote Start
Active — Push Start Button” will display in the instru -
ment cluster display until you push the START/STOP
ignition button.
REMOTE START FRONT DEFROST
A
CTIVATION — IF EQUIPPED
When Remote Start is active, and the outside ambient
temperature is 40°F (4.5°C) or below, the system will
automatically activate front defrost for 15 minutes or less.
The time is dependent on the ambient temperature. Once
the timer expires, the system will automatically adjust the settings depending on ambient conditions. See “Remote
Start Comfort Systems — If Equipped” in the next section
for detailed operation.
REMOTE START COMFORT SYSTEMS —
I
F EQUIPPED
When Remote Start is activated, the front and rear defrost
will automatically turn on in cold weather. The heated
steering wheel and driver heated seat feature will turn on if
programmed in the Comfort menu screen within Uconnect
Settings
Ú
page 184. In warm weather, the driver vented
seat feature will automatically turn on when the Remote
Start is activated, if programmed in the Comfort menu
screen. The vehicle will adjust the climate control settings
depending on the outside ambient temperature.
Automatic Temperature Control (ATC) — If Equipped
The climate controls automatically adjust to an optimal
temperature and mode, dependent on the outside
ambient temperature. When the ignition is placed in the
ON/RUN position, the climate controls will resume their
previous settings.
Manual Temperature Control (MTC) — If Equipped
In ambient temperatures of 40°F (4.5°C) or below, the
climate settings will default to maximum heat, with
fresh air entering the cabin. If the front defrost timer
expires, the vehicle will enter Mix mode.
In ambient temperatures from 40°F (4.5°C) to 78°F
(26°C), the climate settings will be based on the last
settings selected by the driver.
In ambient temperatures of 78°F (26°C) or above, the
climate settings will default to MAX A/C, Bi-Level mode,
with Recirculation on. For more information on ATC, MTC, and climate control
settings, see
Úpage 54.
NOTE:These features will stay on through the duration of Remote
Start, or until the ignition is placed in the ON/RUN
position. The climate control settings will change, and exit
the automatic defaults, if manually adjusted by the driver
while the vehicle is in Remote Start mode. This includes
turning the climate controls off using the OFF button.
REMOTE START WINDSHIELD WIPER
D
E-ICER ACTIVATION — IF EQUIPPED
When Remote Start is active and the outside ambient
temperature is less than 33°F (0.6°C), the Windshield
Wiper De-Icer will activate. Exiting Remote Start will
resume its previous operation. If the Windshield Wiper
De-Icer was active, the timer and operation will continue.
REMOTE START CANCEL MESSAGE
One of the following messages will display in the
instrument cluster if the vehicle fails to remote start or
exits Remote Start prematurely:
Remote Start Canceled — Door Open
Remote Start Canceled — Hood Open
Remote Start Canceled — Fuel Low
Remote Start Canceled — Swing Gate Open
Remote Start Canceled — Time Expired
Remote Start Disabled — Start Vehicle To Reset
The message will stay active until the ignition is placed in
the ON/RUN position.
23_JL_OM_EN_USC_t.book Page 18
Page 61 of 396
GETTING TO KNOW YOUR VEHICLE59
AUTOMATIC TEMPERATURE CONTROL
(ATC) — I
F EQUIPPED
Automatic Operation
1. Push the AUTO button on the faceplate, or the AUTO
button on the touchscreen on the Automatic
Temperature Control (ATC) Panel.
2. Next, adjust the temperature that you would like the system to maintain by adjusting the driver and
passenger temperature control buttons. Once the
desired temperature is displayed, the system will
achieve and automatically maintain that comfort
level.
3. When the system is set up for your comfort level, it is not necessary to change the settings. You will
experience the greatest efficiency by simply allowing
the system to function automatically.
NOTE:
It is not necessary to move the temperature settings for
cold or hot vehicles. The system automatically adjusts
the temperature, mode, and blower speed to provide
comfort as quickly as possible.
The temperature can be displayed in US or Metric units
by selecting the US/Metric customer-programmable
feature within Uconnect Settings
Úpage 184.
To provide you with maximum comfort in the Automatic
mode during cold start-ups, the blower fan will remain on
low until the engine warms up. The blower will increase in
speed and transition into Auto mode.
Manual Operation Override
This system offers a full complement of manual override
features. The AUTO symbol in the front ATC display will be
turned off when the system is being used in the manual
mode.
CLIMATE VOICE COMMANDS
Adjust vehicle temperatures hands-free and keep
everyone comfortable while you keep moving ahead.
Push the VR button on the steering wheel. After the beep,
say one of the following commands:
“Set the driver temperature to 70 degrees ”
“Set the passenger temperature to 70 degrees ”
Did You Know: Voice Command for Climate may only be
used to adjust the interior temperature of your vehicle.
Voice Command will not work to adjust the heated seats
or steering wheel if equipped.
OPERATING TIPS
Refer to the chart at the end of this section for suggested
control settings for various weather conditions.
Summer Operation
The engine cooling system must be protected with a
high-quality antifreeze coolant to provide proper corrosion
protection and to protect against engine overheating. OAT
coolant (conforming to MS.90032) is recommended.
Winter Operation
To ensure the best possible heater and defroster
performance, make sure the engine cooling system is
functioning properly and the proper amount, type, and concentration of coolant is used. Use of the Air
Recirculation mode during Winter months is not
recommended, because it may cause window fogging.
Vacation/Storage
For information on maintaining the Climate Control system
when the vehicle is being stored for an extended period of
time, see
Úpage 359.
Window Fogging
Vehicle windows tend to fog on the inside in mild, rainy,
and/or humid weather. To clear the windows, select
Defrost or Mix mode and increase the front blower speed.
Do not use the Recirculation mode without A/C for long
periods, as fogging may occur.
Outside Air Intake
Make sure the air intake, located directly in front of the
windshield, is free of obstructions, such as leaves. Leaves
collected in the air intake may reduce airflow, and if they
enter the plenum, they could plug the water drains. In
Winter months, make sure the air intake is clear of ice,
slush, and snow.
Cabin Air Filter
The Climate Control system filters out dust and pollen
from the air. Contact an authorized dealer to service your
cabin air filter, and to have it replaced when needed.
Stop/Start System — If Equipped
While in an Autostop, the Climate Control system may
automatically adjust airflow to maintain cabin comfort.
Customer settings will be maintained upon return to an
engine running condition.
2
23_JL_OM_EN_USC_t.book Page 59
Page 167 of 396
STARTING AND OPERATING165
NOTE:The system will stay active while in 4WD Low.
The TrailCam system has programmable settings that may
be selected through the Uconnect system
Úpage 184.
Manual Activation Of The TrailCam
TrailCam view can be activated via the below methods:
Press the FWD Camera button on the controls screen.
Press the Forward Facing Camera button on the apps
menu.
Press the TrailCam button on the Off Road Pages.
Press the Off Road+ button when “Auto Launch Off
Road+” (if equipped) has been selected under camera
settings.
The TrailCam view can also be activated by pressing the icon on the Back Up Camera view. The Back Up
Camera view can also be activated by pressing the
icon on the TrailCam view.
When the vehicle is shifted out of REVERSE with Camera
Delay turned off and TrailCam view is active, the TrailCam
mode is exited and the previous screen appears again.
When the vehicle is shifted out of REVERSE with Camera
Delay turned on and the TrailCam view is active, the
TrailCam image will be displayed for up to 10 seconds
unless the vehicle speed exceeds 8 mph (13 km/h), the
transmission is shifted into PARK, the ignition is placed in
the OFF position, or the touchscreen X button to disable
display of the TrailCam view is pressed.
Whenever the TrailCam image is activated through the
Manual Activation Methods, and the vehicle speed is
greater than or equal to 8 mph (13 km/h), a display timer for the image is initiated. The image will continue to be
displayed until the display timer exceeds 10 seconds.
NOTE:
If the vehicle speed remains below 8 mph (13 km/h)
while in 2WD or 4WD High, the TrailCam image will be
displayed continuously until deactivated via the touch -
screen X button, the transmission is shifted into PARK,
or the ignition is placed in the OFF position.
The touchscreen X button to disable the display of the
camera image is made available ONLY when the
vehicle is not in REVERSE.
The TrailCam view will stay active regardless of the
vehicle speed and time while in 4WD Low.
Cleaning The TrailCam
Press and hold the Clean Camera button located on the
TrailCam view to wash the TrailCam. Washer fluid will stop
when the button is released.
The camera can be washed up to 20 seconds at a time
while holding the button.
The Clean Camera system is not available when wind -
shield washing is in process.
When enabled, active dynamic tire lines are projected on
the ground plane of the TrailCam view based on the
steering wheel position.
REFUELING THE VEHICLE — GASOLINE
ENGINE (IF EQUIPPED)
FUEL FILLER CAP
The fuel filler cap is located on the driver's side of the
vehicle. If the fuel filler cap is lost or damaged, be sure the
replacement cap is the correct one for this vehicle.
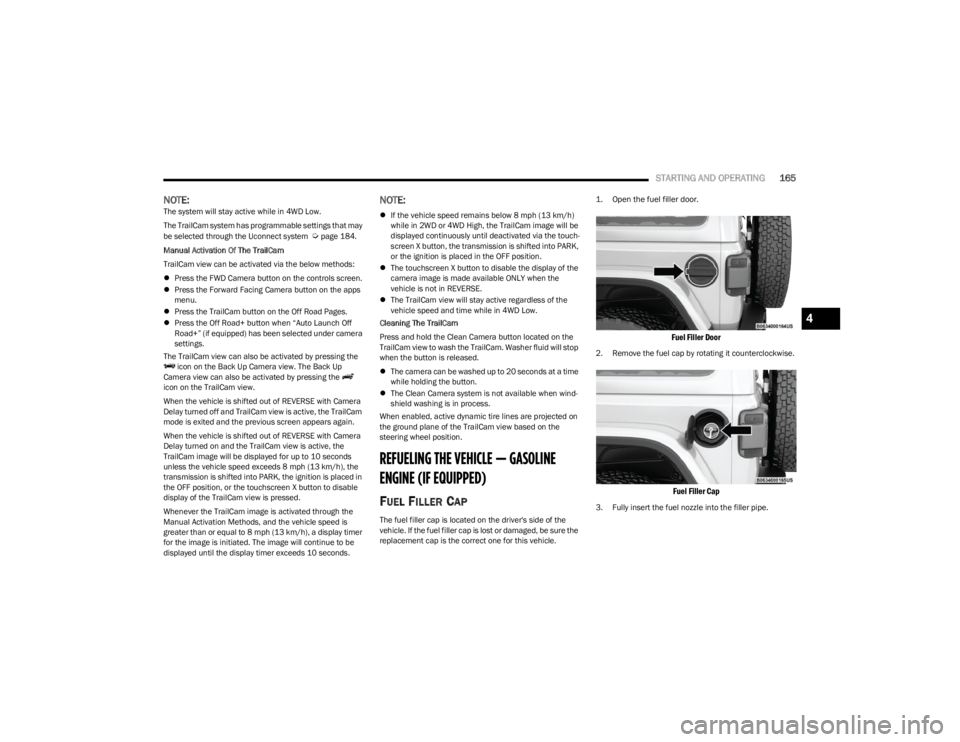
1. Open the fuel filler door.
Fuel Filler Door
2. Remove the fuel cap by rotating it counterclockwise.
Fuel Filler Cap
3. Fully insert the fuel nozzle into the filler pipe.
4
23_JL_OM_EN_USC_t.book Page 165
Page 203 of 396
MULTIMEDIA201
UCONNECT MODES
STEERING WHEEL AUDIO CONTROLS
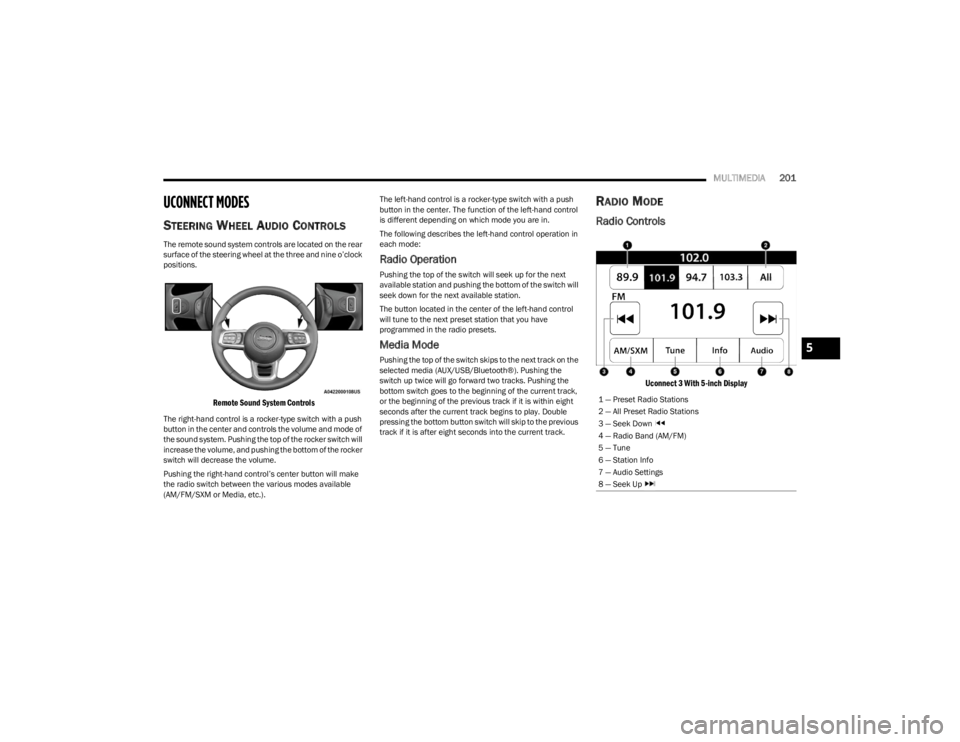
The remote sound system controls are located on the rear
surface of the steering wheel at the three and nine o’clock
positions.
Remote Sound System Controls
The right-hand control is a rocker-type switch with a push
button in the center and controls the volume and mode of
the sound system. Pushing the top of the rocker switch will
increase the volume, and pushing the bottom of the rocker
switch will decrease the volume.
Pushing the right-hand control’s center button will make
the radio switch between the various modes available
(AM/FM/SXM or Media, etc.). The left-hand control is a rocker-type switch with a push
button in the center. The function of the left-hand control
is different depending on which mode you are in.
The following describes the left-hand control operation in
each mode:
Radio Operation
Pushing the top of the switch will seek up for the next
available station and pushing the bottom of the switch will
seek down for the next available station.
The button located in the center of the left-hand control
will tune to the next preset station that you have
programmed in the radio presets.
Media Mode
Pushing the top of the switch skips to the next track on the
selected media (AUX/USB/Bluetooth®). Pushing the
switch up twice will go forward two tracks. Pushing the
bottom switch goes to the beginning of the current track,
or the beginning of the previous track if it is within eight
seconds after the current track begins to play. Double
pressing the bottom button switch will skip to the previous
track if it is after eight seconds into the current track.
RADIO MODE
Radio Controls
Uconnect 3 With 5-inch Display
1 — Preset Radio Stations
2 — All Preset Radio Stations
3 — Seek Down
4 — Radio Band (AM/FM)
5 — Tune
6 — Station Info
7 — Audio Settings
8 — Seek Up
5
23_JL_OM_EN_USC_t.book Page 201
Page 205 of 396
MULTIMEDIA203
RADIO VOICE COMMANDS
Use your voice to quickly get to the AM, FM, or SiriusXM®
Satellite Radio stations you would like to hear.
(Subscription or included SiriusXM® Satellite Radio trial
required.)
Push the VR button on the steering wheel and wait for
the beep to say a command. See an example:
“Tune to ninety-five-point-five FM”
“Tune to Satellite Channel Hits 1”
Did You Know: At any time, if you are not sure of what to
say or want to learn a Voice Command, push the VR button and say “ Help”. The system provides you with a list of
commands.
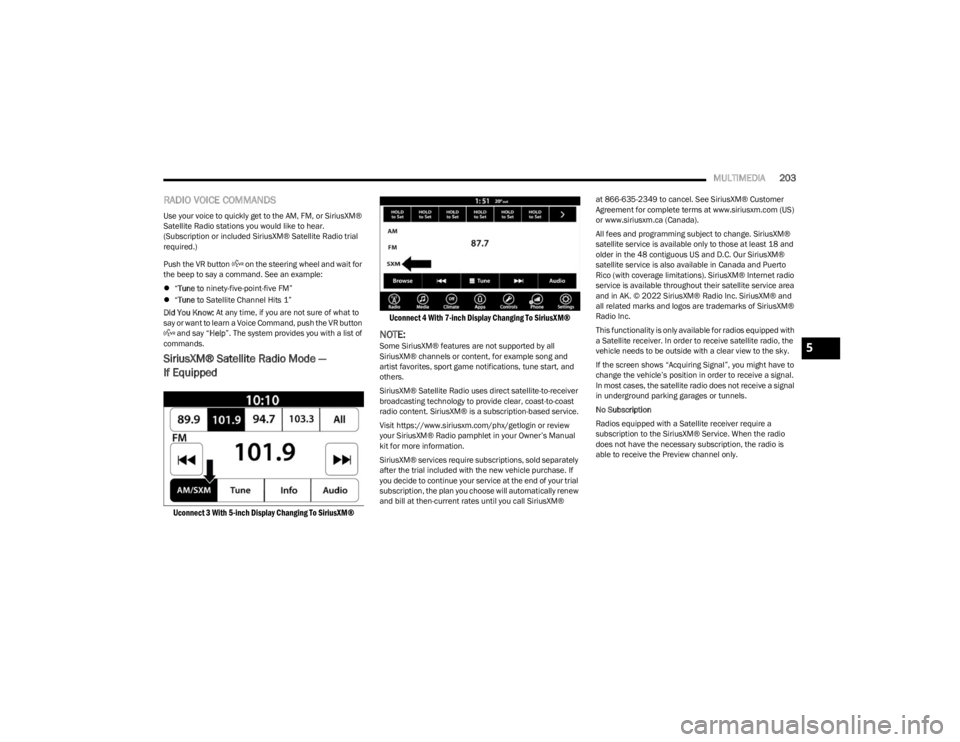
SiriusXM® Satellite Radio Mode —
If Equipped
Uconnect 3 With 5-inch Display Changing To SiriusXM® Uconnect 4 With 7-inch Display Changing To SiriusXM®
NOTE:Some SiriusXM® features are not supported by all
SiriusXM® channels or content, for example song and
artist favorites, sport game notifications, tune start, and
others.
SiriusXM® Satellite Radio uses direct satellite-to-receiver
broadcasting technology to provide clear, coast-to-coast
radio content. SiriusXM® is a subscription-based service.
Visit https://www.siriusxm.com/phx/getlogin or review
your SiriusXM® Radio pamphlet in your Owner’s Manual
kit for more information.
SiriusXM® services require subscriptions, sold separately
after the trial included with the new vehicle purchase. If
you decide to continue your service at the end of your trial
subscription, the plan you choose will automatically renew
and bill at then-current rates until you call SiriusXM® at 866-635-2349 to cancel. See SiriusXM® Customer
Agreement for complete terms at www.siriusxm.com (US)
or www.siriusxm.ca (Canada).
All fees and programming subject to change. SiriusXM®
satellite service is available only to those at least 18 and
older in the 48 contiguous US and D.C. Our SiriusXM®
satellite service is also available in Canada and Puerto
Rico (with coverage limitations). SiriusXM® Internet radio
service is available throughout their satellite service area
and in AK. © 2022 SiriusXM® Radio Inc. SiriusXM® and
all related marks and logos are trademarks of SiriusXM®
Radio Inc.
This functionality is only available for radios equipped with
a Satellite receiver. In order to receive satellite radio, the
vehicle needs to be outside with a clear view to the sky.
If the screen shows “Acquiring Signal”, you might have to
change the vehicle’s position in order to receive a signal.
In most cases, the satellite radio does not receive a signal
in underground parking garages or tunnels.
No Subscription
Radios equipped with a Satellite receiver require a
subscription to the SiriusXM® Service. When the radio
does not have the necessary subscription, the radio is
able to receive the Preview channel only.5
23_JL_OM_EN_USC_t.book Page 203
Page 258 of 396
256SAFETY
The FCW system is intended for on-road use only. If the
vehicle is taken off-road, the FCW system should be
deactivated to prevent unnecessary warnings to the
surroundings.
FCW may not react to irrelevant objects such as over -
head objects, ground reflections, objects not in the
path of the vehicle, stationary objects that are far away,
oncoming traffic, or leading vehicles with the same or
higher rate of speed.
FCW will be disabled like ACC, with the unavailable
screens.
Turning FCW On Or Off
The FCW setting menu can be adjusted through the
Uconnect Settings Úpage 184.
To turn the FCW system on, select between “Only
Warning” and “Warning and Braking” in the FCW menu.
Select “OFF” in the FCW menu to turn the FCW system
off.
NOTE:
When the FCW is “on”, this allows the system to warn
the driver of a possible collision with the vehicle in
front.
When the FCW is “off”, this prevents the system from
warning the driver of a possible collision with the
vehicle in front. If the FCW is set to “off”, “FCW OFF” will
be displayed in the instrument cluster display.
When FCW status is set to “Only Warning”, this
prevents the system from providing limited active
braking, or additional brake support if the driver is not
braking adequately in the event of a potential frontal
collision.
When FCW status is set to “Warning and Braking”, this
allows the system to warn the driver of a possible colli -
sion with the vehicle in front using audible/visual warn -
ings and it applies autonomous braking.
The system will retain the last setting selected by the
driver after ignition shutdown.
FCW Braking Status And Sensitivity
The FCW Sensitivity and Active Braking status are
programmable through the Uconnect system
Úpage 184.
Far
When the sensitivity of FCW is set to the “Far”
setting, this allows the system to warn the driver of
a possible more distant collision with the vehicle
in front using audible/visual warnings.
More cautious drivers that do not mind frequent
warnings may prefer this setting.
NOTE:The “Far” setting may result in a greater number of FCW
possible collision warnings experienced.
Medium
When the sensitivity of FCW is set to the “Medium”
setting, this allows the system to warn the driver of
a possible collision with the vehicle in front using
audible/visual warnings.
Near
When the sensitivity of FCW is set to the “Near”
setting, this allows the system to warn the driver of
a possible closer collision with the vehicle in front
using audible/visual warnings.
This setting provides less reaction time than the
“Far” and “Medium” settings, which allows for a
more dynamic driving experience.
More dynamic or aggressive drivers that want to
avoid frequent warnings may prefer this setting.
NOTE:The “Near” setting may result in a lesser number of FCW
possible collision warnings experienced.
FCW Limited Warning
If the instrument cluster displays “ACC/FCW Limited
Functionality” or “ACC/FCW Limited Functionality Clean
Front Windshield” momentarily, there may be a condition
that limits FCW functionality. Although the vehicle is still
drivable under normal conditions, the active braking may
not be fully available. Once the condition that limited the
system performance is no longer present, the system will
return to its full performance state. If the problem persists,
see an authorized dealer.
WARNING!
Forward Collision Warning (FCW) is not intended to
avoid a collision on its own, nor can FCW detect every
type of potential collision. In rare situations, the system
may react to surrounding objects such as tunnels,
bridges, guardrails, etc. The driver has the responsibility
to avoid a collision by controlling the vehicle via braking,
steering, and acceleration. Unintended braking
reactions can always be overridden by pressing down
hard on the accelerator. Failure to follow this warning
could lead to serious injury or death.
23_JL_OM_EN_USC_t.book Page 256
Page 388 of 396
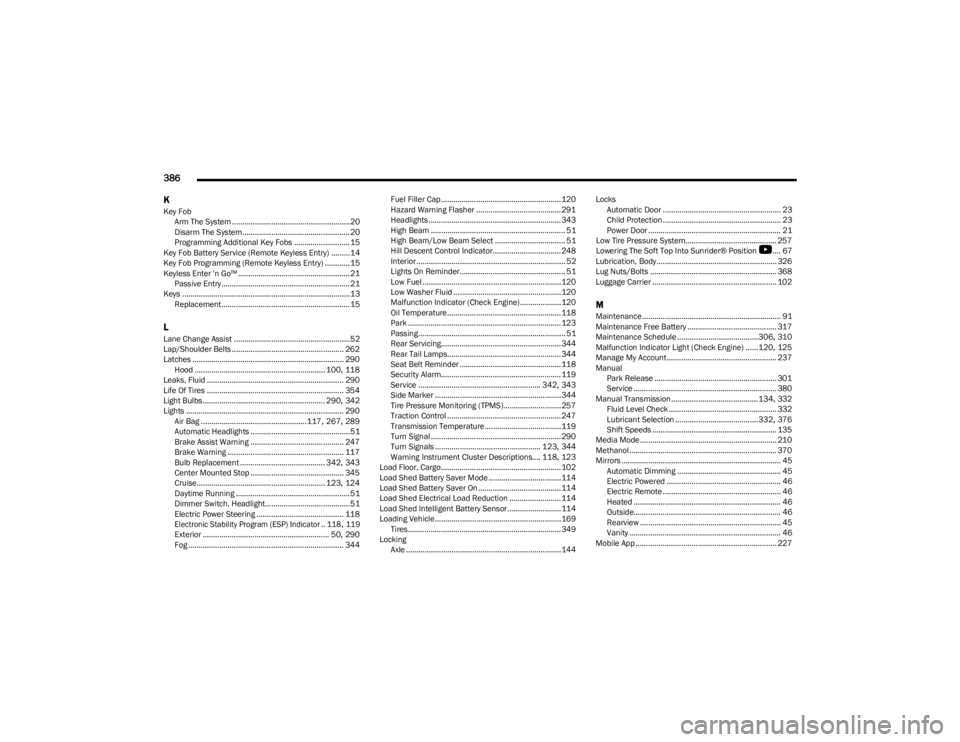
386
K
Key Fob Arm The System .........................................................20
Disarm The System....................................................20
Programming Additional Key Fobs ...........................15
Key Fob Battery Service (Remote Keyless Entry) .........14
Key Fob Programming (Remote Keyless Entry) ............ 15
Keyless Enter 'n Go™ ...................................................... 21 Passive Entry .............................................................. 21
Keys .................................................................................13 Replacement .............................................................. 15
LLane Change Assist ........................................................52
Lap/Shoulder Belts ...................................................... 262
Latches ......................................................................... 290 Hood ............................................................... 100
, 118
Leaks, Fluid .................................................................. 290
Life Of Tires .................................................................. 354
Light Bulbs ........................................................... 290
, 342
Lights ............................................................................ 290 Air Bag ...................................................117
, 267, 289
Automatic Headlights ................................................51
Brake Assist Warning ............................................. 247
Brake Warning ........................................................ 117 Bulb Replacement ......................................... 342
, 343
Center Mounted Stop ............................................. 345
Cruise.............................................................. 123
, 124
Daytime Running ....................................................... 51
Dimmer Switch, Headlight.........................................51
Electric Power Steering .......................................... 118
Electronic Stability Program (ESP) Indicator .. 118
, 119
Exterior ............................................................. 50, 290
Fog ........................................................................... 344 Fuel Filler Cap .......................................................... 120
Hazard Warning Flasher ......................................... 291
Headlights ................................................................ 343
High Beam ................................................................. 51
High Beam/Low Beam Select .................................. 51
Hill Descent Control Indicator................................. 248
Interior........................................................................ 52
Lights On Reminder................................................... 51
Low Fuel ...................................................................120 Low Washer Fluid ....................................................120Malfunction Indicator (Check Engine).................... 120
Oil Temperature ....................................................... 118
Park .......................................................................... 123Passing....................................................................... 51
Rear Servicing.......................................................... 344
Rear Tail Lamps....................................................... 344
Seat Belt Reminder ................................................. 118
Security Alarm.......................................................... 119
Service ........................................................... 342
, 343
Side Marker ............................................................. 344
Tire Pressure Monitoring (TPMS)............................ 257
Traction Control ....................................................... 247
Transmission Temperature..................................... 119
Turn Signal ............................................................... 290
Turn Signals ................................................... 123
, 344
Warning Instrument Cluster Descriptions.... 118, 123
Load Floor, Cargo.......................................................... 102
Load Shed Battery Saver Mode ...................................114
Load Shed Battery Saver On ........................................ 114
Load Shed Electrical Load Reduction ......................... 114
Load Shed Intelligent Battery Sensor..........................114
Loading Vehicle............................................................. 169 Tires.......................................................................... 349
Locking Axle ...........................................................................144 Locks
Automatic Door ......................................................... 23
Child Protection ......................................................... 23
Power Door ................................................................ 21
Low Tire Pressure System............................................ 257
Lowering The Soft Top Into Sunrider® Position
S
.... 67
Lubrication, Body.......................................................... 326
Lug Nuts/Bolts ............................................................. 368
Luggage Carrier ............................................................ 102
MMaintenance................................................................... 91
Maintenance Free Battery ........................................... 317
Maintenance Schedule .......................................306
, 310
Malfunction Indicator Light (Check Engine) ......120, 125
Manage My Account..................................................... 237
Manual Park Release ........................................................... 301
Service ..................................................................... 380
Manual Transmission..........................................134
, 332
Fluid Level Check .................................................... 332
Lubricant Selection ........................................332
, 376
Shift Speeds ............................................................ 135
Media Mode .................................................................. 210
Methanol ....................................................................... 370
Mirrors ............................................................................. 45 Automatic Dimming .................................................. 45
Electric Powered ....................................................... 46
Electric Remote ......................................................... 46
Heated ....................................................................... 46
Outside....................................................................... 46
Rearview .................................................................... 45
Vanity ......................................................................... 46
Mobile App .................................................................... 227
23_JL_OM_EN_USC_t.book Page 386