audio JEEP WRANGLER 2DOORS 2019 Owner handbook (in English)
[x] Cancel search | Manufacturer: JEEP, Model Year: 2019, Model line: WRANGLER 2DOORS, Model: JEEP WRANGLER 2DOORS 2019Pages: 348, PDF Size: 6.5 MB
Page 288 of 348
NOTE:
Requires compatible iPhone. See dealer for
phone compatibility. Data plan rates apply.
Vehicle user interface is a product of Apple.
Apple CarPlay is a trademark of Apple Inc.
iPhone is a trademark of Apple Inc., regis-
tered in the US and other countries. Apple
terms of use and privacy statements apply.
Phone
With CarPlay, press and hold the VR button
on the steering wheel to activate a Siri voice
recognition session. You can also press and
hold the Home button within CarPlay to start
talking to Siri. This allows you to make calls
or listen to voice mail as you normally would
using Siri on your iPhone.
NOTE:
Only temporarily pushing the VR button on
the steering wheel launches a built-in VR
session, not a Siri session, and it will not
function with CarPlay.
Music
CarPlay allows you to access all your artists,
playlists, and music from iTunes. Using your
iPhone’s data plan, you can also use select
third party audio apps including music,
news, sports, podcasts and more.
Messages
Just like your iPhone, CarPlay allows you to
use Siri to send or reply to text messages.
Since everything is done by voice, Siri can
also read incoming text messages so you
don’t have to.
Maps
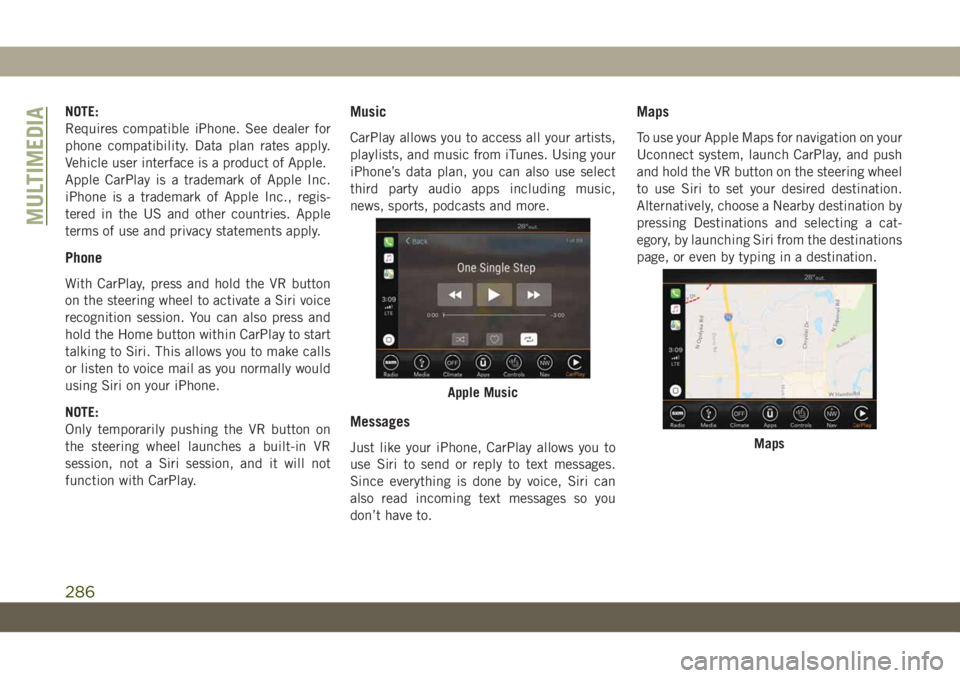
To use your Apple Maps for navigation on your
Uconnect system, launch CarPlay, and push
and hold the VR button on the steering wheel
to use Siri to set your desired destination.
Alternatively, choose a Nearby destination by
pressing Destinations and selecting a cat-
egory, by launching Siri from the destinations
page, or even by typing in a destination.
Apple Music
Maps
MULTIMEDIA
286
Page 290 of 348
UCONNECT SETTINGS
The Uconnect system allows you to access
Customer Programmable feature settings
such as Language, Display, Units, Voice,
Clock, Camera, Safety & Driving Assistance,
Mirrors & Wipers, Lights, Doors & Locks,
Auto-On Comfort, AUX Switches, Engine Off
Options, Compass Settings, Audio, Phone/
Bluetooth, Radio Setup, Restore Settings,
and System Information through buttons on
the touchscreen.
Push the SETTINGS button (Uconnect 3), or
press the “Apps” button (Uconnect 4 or
4C/4C NAV) located near the bottom of the
touchscreen, then press the “Settings” but-
ton on the touchscreen to access the Settings
screen. When making a selection, scroll up or
down until the preferred setting is high-
lighted, then press the preferred setting until
a check-mark appears next to the setting,
showing that setting has been selected. The
following feature settings are available:
• Language • Auto-On Comfort
• Display • AUX Switches
• Units • Engine Off Options• Voice • Compass — If
Equipped
• Clock • Audio
• Camera — If
Equipped• Phone/Bluetooth
• Safety & Driving As-
sistance• Radio Setup
• Mirrors & Wipers —
If Equipped• Restore Settings
• Lights • Clear Personal Data
• Doors & Locks • System Information
NOTE:
Depending on the vehicles options, feature
settings may vary.
Refer to “Uconnect Settings” in “Multime-
dia” in your Owner’s Manual for further infor-
mation.
TIPS CONTROLS AND
GENERAL INFORMATION
Steering Wheel Audio Controls
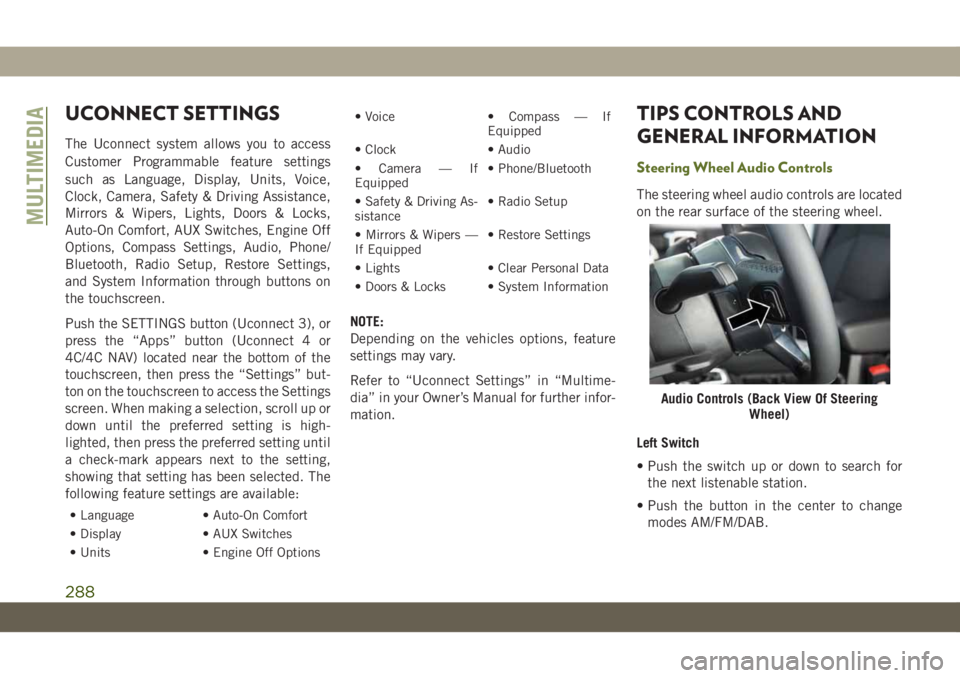
The steering wheel audio controls are located
on the rear surface of the steering wheel.
Left Switch
• Push the switch up or down to search for
the next listenable station.
• Push the button in the center to change
modes AM/FM/DAB.
Audio Controls (Back View Of Steering
Wheel)
MULTIMEDIA
288
Page 303 of 348
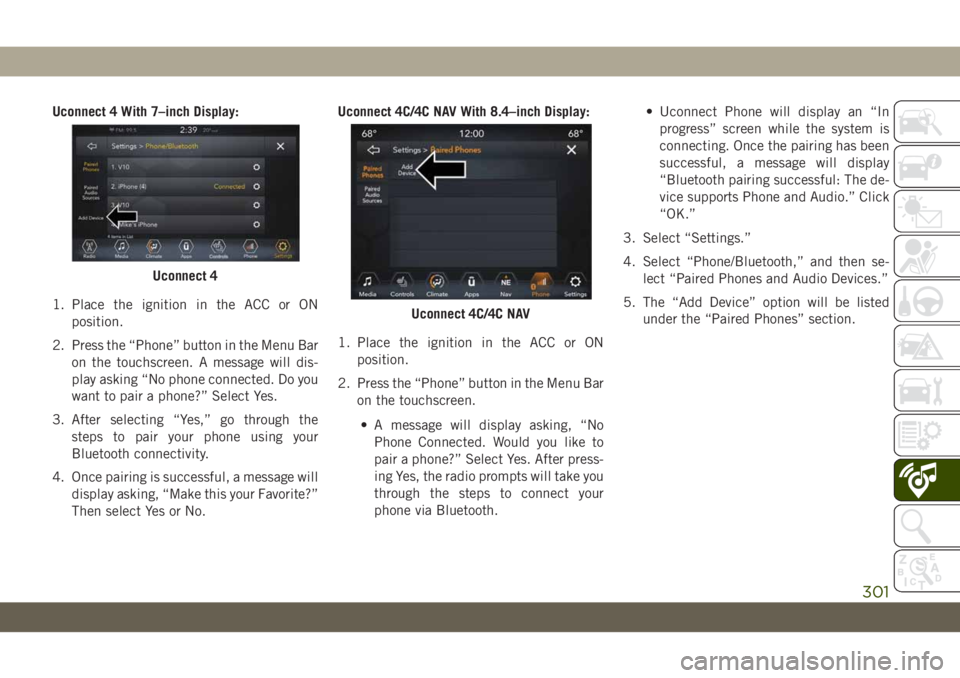
Uconnect 4 With 7–inch Display:
1. Place the ignition in the ACC or ON
position.
2. Press the “Phone” button in the Menu Bar
on the touchscreen. A message will dis-
play asking “No phone connected. Do you
want to pair a phone?” Select Yes.
3. After selecting “Yes,” go through the
steps to pair your phone using your
Bluetooth connectivity.
4. Once pairing is successful, a message will
display asking, “Make this your Favorite?”
Then select Yes or No.Uconnect 4C/4C NAV With 8.4–inch Display:
1. Place the ignition in the ACC or ON
position.
2. Press the “Phone” button in the Menu Bar
on the touchscreen.
• A message will display asking, “No
Phone Connected. Would you like to
pair a phone?” Select Yes. After press-
ing Yes, the radio prompts will take you
through the steps to connect your
phone via Bluetooth.• Uconnect Phone will display an “In
progress” screen while the system is
connecting. Once the pairing has been
successful, a message will display
“Bluetooth pairing successful: The de-
vice supports Phone and Audio.” Click
“OK.”
3. Select “Settings.”
4. Select “Phone/Bluetooth,” and then se-
lect “Paired Phones and Audio Devices.”
5. The “Add Device” option will be listed
under the “Paired Phones” section.
Uconnect 4
Uconnect 4C/4C NAV
301
Page 304 of 348
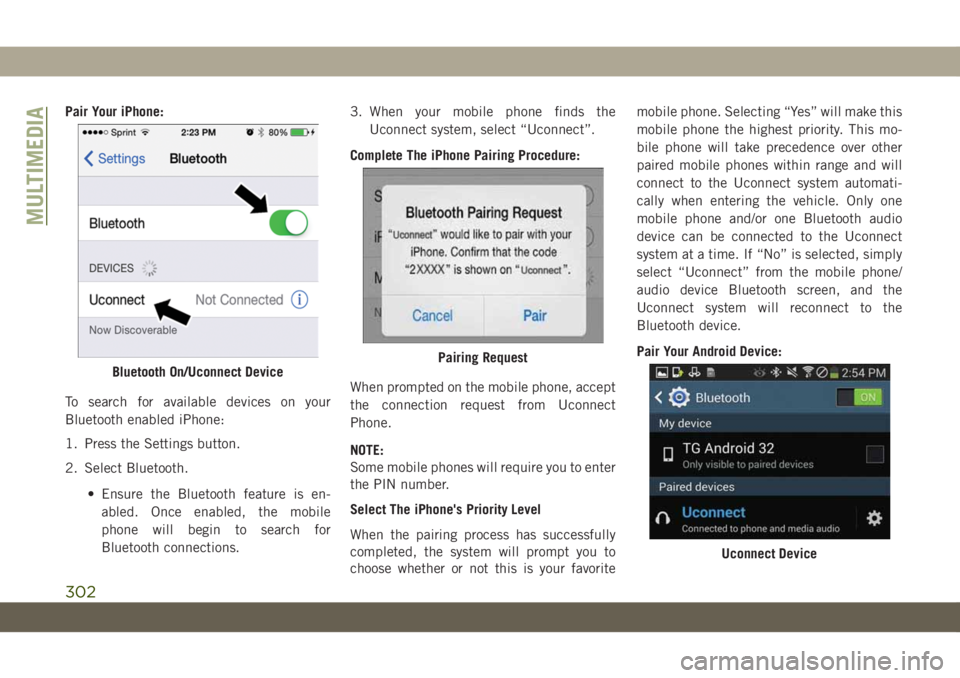
Pair Your iPhone:
To search for available devices on your
Bluetooth enabled iPhone:
1. Press the Settings button.
2. Select Bluetooth.
• Ensure the Bluetooth feature is en-
abled. Once enabled, the mobile
phone will begin to search for
Bluetooth connections.3. When your mobile phone finds the
Uconnect system, select “Uconnect”.
Complete The iPhone Pairing Procedure:
When prompted on the mobile phone, accept
the connection request from Uconnect
Phone.
NOTE:
Some mobile phones will require you to enter
the PIN number.
Select The iPhone's Priority Level
When the pairing process has successfully
completed, the system will prompt you to
choose whether or not this is your favoritemobile phone. Selecting “Yes” will make this
mobile phone the highest priority. This mo-
bile phone will take precedence over other
paired mobile phones within range and will
connect to the Uconnect system automati-
cally when entering the vehicle. Only one
mobile phone and/or one Bluetooth audio
device can be connected to the Uconnect
system at a time. If “No” is selected, simply
select “Uconnect” from the mobile phone/
audio device Bluetooth screen, and the
Uconnect system will reconnect to the
Bluetooth device.
Pair Your Android Device:
Bluetooth On/Uconnect DevicePairing Request
Uconnect Device
MULTIMEDIA
302
Page 305 of 348
To search for available devices on your
Bluetooth enabled Android Device:
1. Push the Menu button.
2. Select Settings.
3. Select Connections.
4. Turn Bluetooth setting to “On.”
• Ensure the Bluetooth feature is en-
abled. Once enabled, the mobile phone
will begin to search for Bluetooth
connections.
5. Once your mobile phone finds the
Uconnect system, select “Uconnect”.
• You may be prompted by your mobile
phone to download the phonebook,
check “Do Not Ask Again” to automati-
cally download the phonebook. This is
so you can make calls by saying the
name of your contact.Complete The Android Pairing Procedure:
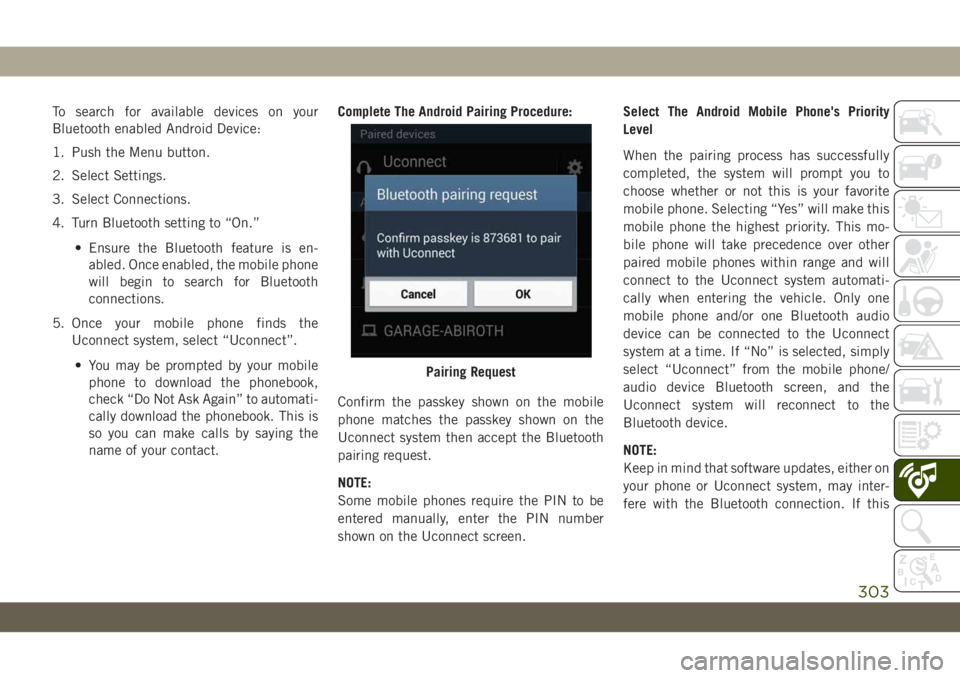
Confirm the passkey shown on the mobile
phone matches the passkey shown on the
Uconnect system then accept the Bluetooth
pairing request.
NOTE:
Some mobile phones require the PIN to be
entered manually, enter the PIN number
shown on the Uconnect screen.Select The Android Mobile Phone's Priority
Level
When the pairing process has successfully
completed, the system will prompt you to
choose whether or not this is your favorite
mobile phone. Selecting “Yes” will make this
mobile phone the highest priority. This mo-
bile phone will take precedence over other
paired mobile phones within range and will
connect to the Uconnect system automati-
cally when entering the vehicle. Only one
mobile phone and/or one Bluetooth audio
device can be connected to the Uconnect
system at a time. If “No” is selected, simply
select “Uconnect” from the mobile phone/
audio device Bluetooth screen, and the
Uconnect system will reconnect to the
Bluetooth device.
NOTE:
Keep in mind that software updates, either on
your phone or Uconnect system, may inter-
fere with the Bluetooth connection. If this
Pairing Request
303
Page 307 of 348
Changing The Volume
• Start a dialogue by pushing the VR button
, then say a command. For example,
"Help".
• Use the radio VOLUME/MUTE rotary knob
to adjust the volume to a comfortable level
while the Uconnect system is speaking.
NOTE:
The volume setting for Uconnect is different
than the audio system.
NOTE:
To access help, push the VR button
on the
steering wheel and say "help." Push the VR
button
and say "cancel" to cancel the help
session.
Using Do Not Disturb
With Do Not Disturb, you can disable notifi-
cations from incoming calls and texts, allow-
ing you to keep your eyes on the road and
hands on the wheel. For your convenience,
there is a counter display to keep track of your
missed calls and text messages while you
were using Do Not Disturb.To activate Do Not Disturb, select “Pairing”
on the phone menu bar, and select “Do Not
Disturb” from the Settings menu. You can
also activate it using the “Do Not Disturb”
button at the top of every Phone screen.
Do Not Disturb can automatically reply with a
text message, a call or both, when declining
an incoming call and send it to voicemail.
Automatic reply messages can be:
• “I am driving right now, I will get back to
you shortly.”
• Create a custom auto reply message up to
160 characters.
While in Do Not Disturb, Conference Call can
be selected so you can still place a second
call without being interrupted by incoming
calls.
NOTE:
• Only the beginning of your custom message
will be seen on the touchscreen.
• Reply with text message is not compatible
with iPhones.• Auto reply with text message is only avail-
able on phones that supporting Bluetooth
MAP.
Incoming Text Messages
After pairing your Uconnect system with a
Bluetooth enabled mobile device with the
Message Access Profile (MAP), the Uconnect
system can announce a new incoming text
message and read it to you over the vehicle’s
audio system.
To listen to incoming text messages, or any
messages currently on the mobile phone,
select the “Messages” menu and press the
“Listen” button next to the message you want
to listen to.
NOTE:
Only incoming text messages received during
the current ignition cycle can be viewed/read.
To Enable Incoming Text Messaging:
iPhone
1. Press the settings button on the mobile
phone.
305
Page 337 of 348
Accessories..................262
Mopar...................262
Adding Fuel.................166
Additives, Fuel................253
Air Bag
Air Bag Operation............111
Air Bag Warning Light.........108
Disable, Passenger Air Bag......111
Enhanced Accident Response .119, 205
Event Data Recorder (EDR)......205
Front Air Bag...............110
If Deployment Occurs.........118
Knee Impact Bolsters.........116
Maintaining Your Air Bag System . .120
Maintenance...............120
Redundant Air Bag Warning Light . .109
Transporting Pets............136
Air Bag Light...........66, 108, 137
Air Conditioning Filter............45
Air Conditioning, Operating Tips......45
Air Conditioning System...........44
Air Pressure
Tires....................231
Alarm
Arm The System.............17Disarm The System............18
Security Alarm............17, 70
Alterations/Modifications
Vehicle....................3
Android Auto..........275, 281, 314
Apps....................284
Communication.............284
Maps...................283
Music...................284
Antifreeze (Engine Coolant)........257
Anti-Lock Brake System (ABS).......82
Anti-Lock Warning Light...........70
Apple CarPlay.........276, 285, 314
Apps....................287
Maps...................286
Messages.................286
Music
...................286
Phone...................286
Assist, Hill Start................84
Audio Systems (Radio)...........270
Auto Down Power Windows.........46
Automatic Headlights............36
Automatic Temperature Control (ATC) . . .44
Automatic Transmission..........148
Fluid Level Check............225Fluid Type................261
Auxiliary Electrical Outlet (Power Outlet). .57
Auxiliary Power Outlet............57
Auxiliary Switches..............60
Axle Fluid...................261
Axle Lock...................156
Battery..................68, 221
Charging System Light..........68
Belts, Seat..................137
Blind Spot Monitoring............91
B-Pillar Location..............226
Brake Assist System.............83
Brake Control System............83
Brake Fluid..............224, 261
Brake System................224
Fluid Check...............224
Master Cylinder.............224
Warning Light...............67
Brake/Transmission Interlock.......148
Bulb Replacement..........176, 178
Bulbs, Light..............139, 176
Camera, Rear................165
Capacities, Fluid..............257
INDEX
335