door lock JEEP WRANGLER 2DOORS 2019 Owner handbook (in English)
[x] Cancel search | Manufacturer: JEEP, Model Year: 2019, Model line: WRANGLER 2DOORS, Model: JEEP WRANGLER 2DOORS 2019Pages: 348, PDF Size: 6.5 MB
Page 136 of 348
two posts. If not possible, lower the head
restraint and pass the tether strap around
the outboard side of the head restraint.
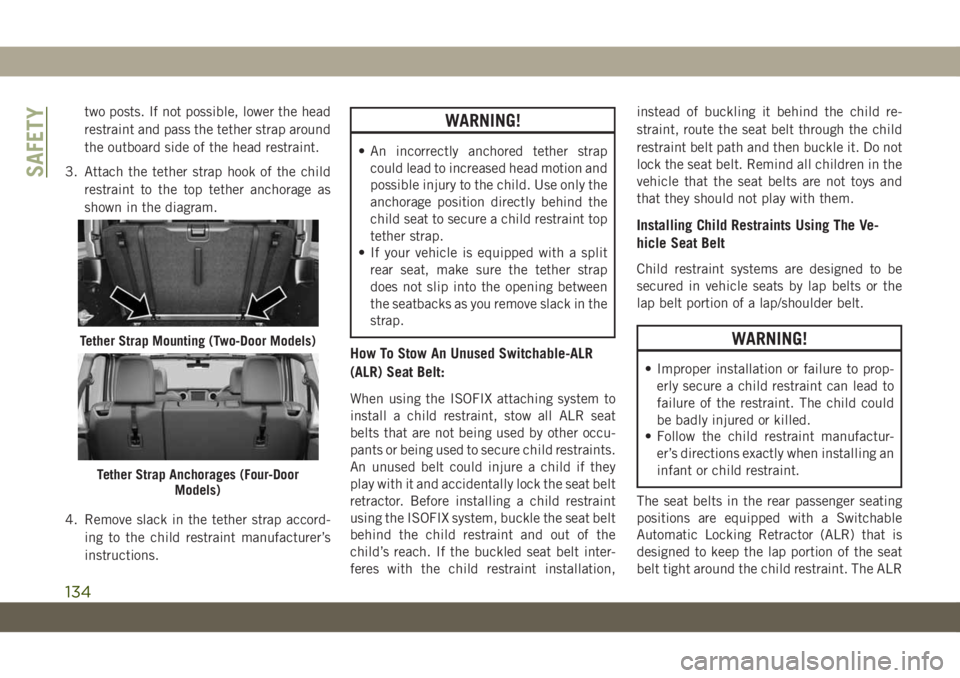
3. Attach the tether strap hook of the child
restraint to the top tether anchorage as
shown in the diagram.
4. Remove slack in the tether strap accord-
ing to the child restraint manufacturer’s
instructions.WARNING!
• An incorrectly anchored tether strap
could lead to increased head motion and
possible injury to the child. Use only the
anchorage position directly behind the
child seat to secure a child restraint top
tether strap.
• If your vehicle is equipped with a split
rear seat, make sure the tether strap
does not slip into the opening between
the seatbacks as you remove slack in the
strap.
How To Stow An Unused Switchable-ALR
(ALR) Seat Belt:
When using the ISOFIX attaching system to
install a child restraint, stow all ALR seat
belts that are not being used by other occu-
pants or being used to secure child restraints.
An unused belt could injure a child if they
play with it and accidentally lock the seat belt
retractor. Before installing a child restraint
using the ISOFIX system, buckle the seat belt
behind the child restraint and out of the
child’s reach. If the buckled seat belt inter-
feres with the child restraint installation,instead of buckling it behind the child re-
straint, route the seat belt through the child
restraint belt path and then buckle it. Do not
lock the seat belt. Remind all children in the
vehicle that the seat belts are not toys and
that they should not play with them.
Installing Child Restraints Using The Ve-
hicle Seat Belt
Child restraint systems are designed to be
secured in vehicle seats by lap belts or the
lap belt portion of a lap/shoulder belt.
WARNING!
• Improper installation or failure to prop-
erly secure a child restraint can lead to
failure of the restraint. The child could
be badly injured or killed.
• Follow the child restraint manufactur-
er’s directions exactly when installing an
infant or child restraint.
The seat belts in the rear passenger seating
positions are equipped with a Switchable
Automatic Locking Retractor (ALR) that is
designed to keep the lap portion of the seat
belt tight around the child restraint. The ALR
Tether Strap Mounting (Two-Door Models)
Tether Strap Anchorages (Four-Door
Models)
SAFETY
134
Page 141 of 348
WARNING!
• NEVER place any objects under the floor
mat (e.g., towels, keys, etc.). These ob-
jects could change the position of the
floor mat and may cause interference
with the accelerator, brake, or clutch
pedals.
• If the vehicle carpet has been removed
and re-installed, always properly attach
carpet to the floor and check the floor
mat fasteners are secure to the vehicle
carpet. Fully depress each pedal to
check for interference with the accelera-
tor, brake, or clutch pedals then re-
install the floor mats.
• It is recommended to only use mild soap
and water to clean your floor mats. After
cleaning, always check your floor mat
WARNING!
has been properly installed and is se-
cured to your vehicle using the floor mat
fasteners by lightly pulling mat.
Periodic Safety Checks You Should Make
Outside The Vehicle
Tires
Examine tires for excessive tread wear and
uneven wear patterns. Check for stones,
nails, glass, or other objects lodged in the
tread or sidewall. Inspect the tread for cuts
and cracks. Inspect sidewalls for cuts,
cracks, and bulges. Check the wheel nuts for
tightness. Check the tires (including spare)
for proper cold inflation pressure.
Lights
Have someone observe the operation of brake
lights and exterior lights while you work the
controls. Check turn signal and high beam
indicator lights on the instrument panel.
Door Latches
Check for proper closing, latching, and lock-
ing.
Fluid Leaks
Check area under the vehicle after overnight
parking for fuel, coolant, oil, or other fluid
leaks. Also, if gasoline fumes are detected or
if fuel, or brake fluid leaks are suspected. The
cause should be located and corrected imme-
diately.
139
Page 265 of 348
Off Road & Performance:
• Bumpers • Performance Brakes • Rock Rails
• Winches • Axle Locker Kit • Grille Guard
• Performance Axles • Differential Covers • Spare Tire Carrier
• Performance Hoods • LED Off Road Lights • Fender Flares
• Lift Kits • Skid Plates • Tailgate Reinforcement
Exterior:
• Wheels • Hood Lock • Front End Cover
• Spare Tire Covers • Wheel Locks • Parking Cover
• Fuel Doors • Trailer Hitches • LED Lights
• Air Deflectors • Body Graphics • Valve Stem Caps
• Locking Gas Cap • Hood Graphics • Ski And Snowboard Carriers
• Tubular Steps • Satin Black Grille • Roof Basket
• Molded Side Steps • Camping Tent • Roof Basket Net
• Windshield Tie Down Strap • Hood Cover • Towing Kit
• Splash Guards
Interior:
• Hard Top Headliner • Door Sill Guards • Trailrail Cargo Rail
• Premium Carpet Floor Mats • Storage Bags • Trailrail Vertical Cargo Divider
• All Weather Floor Mats • Cargo Tub • Tailgate Table
• Radio Screen Protector • Cargo Tray • Dog Kennel
• Grab Handles • Cargo Net • Dog Partition
Electronics:
• Electronic Vehicle Tracking System
263
Page 274 of 348
UCONNECT 4 WITH 7-INCH
DISPLAY
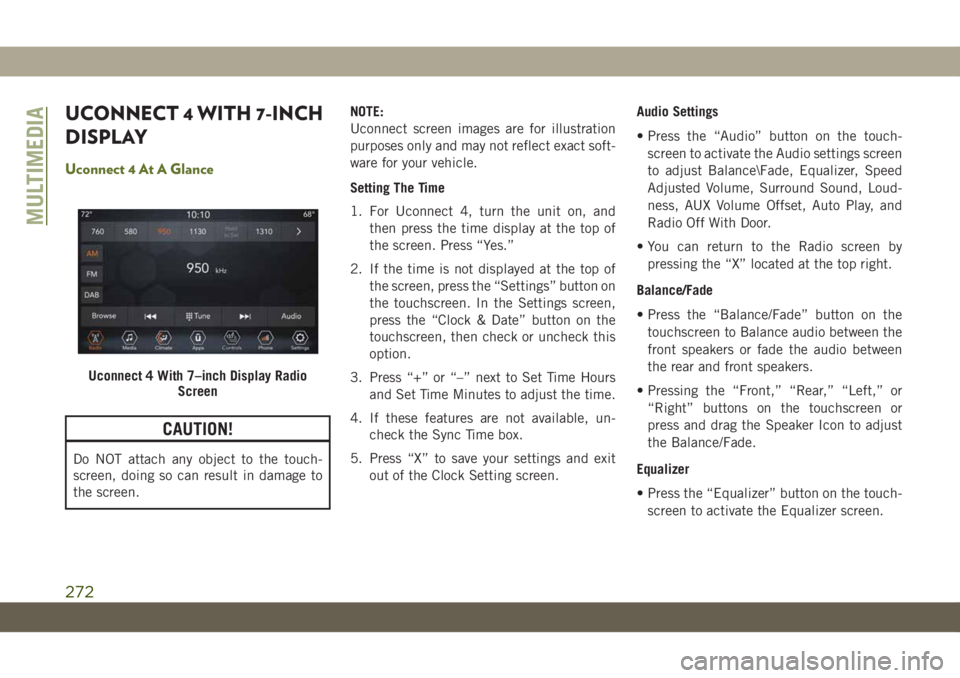
Uconnect 4 At A Glance
CAUTION!
Do NOT attach any object to the touch-
screen, doing so can result in damage to
the screen.NOTE:
Uconnect screen images are for illustration
purposes only and may not reflect exact soft-
ware for your vehicle.
Setting The Time
1. For Uconnect 4, turn the unit on, and
then press the time display at the top of
the screen. Press “Yes.”
2. If the time is not displayed at the top of
the screen, press the “Settings” button on
the touchscreen. In the Settings screen,
press the “Clock & Date” button on the
touchscreen, then check or uncheck this
option.
3. Press “+” or “–” next to Set Time Hours
and Set Time Minutes to adjust the time.
4. If these features are not available, un-
check the Sync Time box.
5. Press “X” to save your settings and exit
out of the Clock Setting screen.Audio Settings
• Press the “Audio” button on the touch-
screen to activate the Audio settings screen
to adjust Balance\Fade, Equalizer, Speed
Adjusted Volume, Surround Sound, Loud-
ness, AUX Volume Offset, Auto Play, and
Radio Off With Door.
• You can return to the Radio screen by
pressing the “X” located at the top right.
Balance/Fade
• Press the “Balance/Fade” button on the
touchscreen to Balance audio between the
front speakers or fade the audio between
the rear and front speakers.
• Pressing the “Front,” “Rear,” “Left,” or
“Right” buttons on the touchscreen or
press and drag the Speaker Icon to adjust
the Balance/Fade.
Equalizer
• Press the “Equalizer” button on the touch-
screen to activate the Equalizer screen.
Uconnect 4 With 7–inch Display Radio
Screen
MULTIMEDIA
272
Page 290 of 348
UCONNECT SETTINGS
The Uconnect system allows you to access
Customer Programmable feature settings
such as Language, Display, Units, Voice,
Clock, Camera, Safety & Driving Assistance,
Mirrors & Wipers, Lights, Doors & Locks,
Auto-On Comfort, AUX Switches, Engine Off
Options, Compass Settings, Audio, Phone/
Bluetooth, Radio Setup, Restore Settings,
and System Information through buttons on
the touchscreen.
Push the SETTINGS button (Uconnect 3), or
press the “Apps” button (Uconnect 4 or
4C/4C NAV) located near the bottom of the
touchscreen, then press the “Settings” but-
ton on the touchscreen to access the Settings
screen. When making a selection, scroll up or
down until the preferred setting is high-
lighted, then press the preferred setting until
a check-mark appears next to the setting,
showing that setting has been selected. The
following feature settings are available:
• Language • Auto-On Comfort
• Display • AUX Switches
• Units • Engine Off Options• Voice • Compass — If
Equipped
• Clock • Audio
• Camera — If
Equipped• Phone/Bluetooth
• Safety & Driving As-
sistance• Radio Setup
• Mirrors & Wipers —
If Equipped• Restore Settings
• Lights • Clear Personal Data
• Doors & Locks • System Information
NOTE:
Depending on the vehicles options, feature
settings may vary.
Refer to “Uconnect Settings” in “Multime-
dia” in your Owner’s Manual for further infor-
mation.
TIPS CONTROLS AND
GENERAL INFORMATION
Steering Wheel Audio Controls
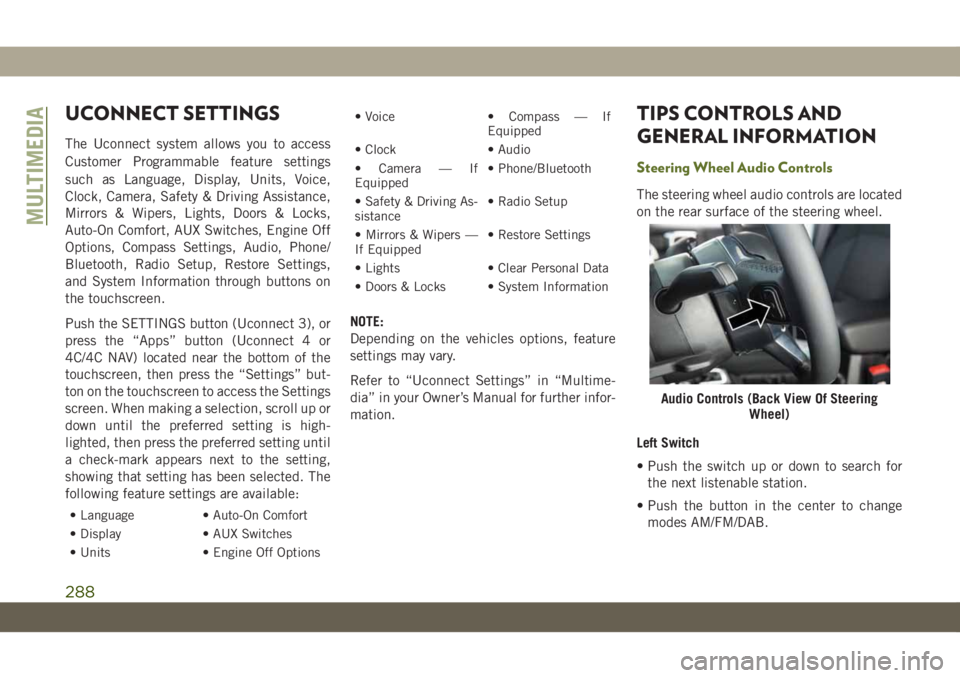
The steering wheel audio controls are located
on the rear surface of the steering wheel.
Left Switch
• Push the switch up or down to search for
the next listenable station.
• Push the button in the center to change
modes AM/FM/DAB.
Audio Controls (Back View Of Steering
Wheel)
MULTIMEDIA
288
Page 338 of 348
Caps, Filler
Fuel.................166, 167
Oil (Engine)...............217
Carbon Monoxide Warning.........137
Car Washes..................239
Center High Mounted Stop Light.....180
Chains, Tire..................237
Change Oil Indicator.............63
Changing A Flat Tire............226
Check Engine Light (Malfunction Indicator
Light)....................79
Checking Your Vehicle For Safety. . . .136
Checks, Safety................136
Child Restraints
Child Seat Installation.........134
How To Stow An unused ALR Seat
Belt....................134
Cleaning
Wheels..................236
Climate Control
Automatic.................39
Clock Settings................269
Compact Spare Tire.............235
Connector
UCI ....................289
Universal Consumer Interface (UCI) .289
Cooling System...............224Coolant Capacity............257
Inspection................224
Selection Of Coolant
(Antifreeze)............257, 259
Cruise Light.............75, 77, 78
Customer Assistance............318
Cybersecurity.................267
Daytime Running Lights...........35
Dealer Service................221
Defroster, Windshield............138
Delay (Intermittent) Wipers.........38
Diagnostic System, Onboard........78
Dimmer Switch, Headlight.........35
Dipsticks
Oil (Engine)...............220
Disabled Vehicle Towing..........202
Disturb................
.305, 313
Door Ajar.................68, 69
Door Ajar Light..............68, 69
Doors......................18
Removal................22, 24
Removal, Front..............22
Removal, Rear...............24
Drag And Drop Menu........273, 279
Driver’s Seat Back Tilt............26Dual Top....................54
Electrical Outlet, Auxiliary (Power
Outlet)....................57
Electrical Power Outlets...........57
Electric Brake Control System.......83
Anti-Lock Brake System.........82
Electronic Roll Mitigation.....85, 88
Electronic Speed Control (Cruise
Control)..................160
Electronic Stability Control (ESC).....85
Electronic Throttle Control Warning
Light.....................68
Emergency, In Case Of
Jacking...............189, 226
Jump Starting..............196
Emission Control System Maintenance . .79
Emissions...................262
Engine.....................217
Break-In Recommendations......146
Compartment.......217, 218, 219
Compartment
Identification........217, 218, 219
Coolant (Antifreeze)..........259
Cooling..................224
Exhaust Gas Caution..........137
Fuel Requirements........252, 257
INDEX
336
Page 342 of 348
Remote Keyless Entry
Arm The Alarm..............17
Disarm The Alarm............18
Remote Starting System...........16
Removable Doors............22, 24
Front....................22
Rear.....................24
Removable Top...........47, 51, 54
Dual Top Operation............47
Removal....................51
Removing....................54
Replacement Bulbs.............176
Replacement Keys..............14
Replacement Tires.............233
Restraints, Head...............30
Roll Over Warning...............2
Rotation, Tires................238
Safety Checks Inside Vehicle.......137
Safety Checks Outside Vehicle......139
Safety, Exhaust Gas.............137
Safety Information, Tire..........226
Safety Tips..................136
Schedule, Maintenance.......208, 213
Seat Belt Maintenance...........242
Seat Belt Reminder..............69
Seat Belts...............100, 137Adjustable Shoulder Belt.......105
Adjustable Upper Shoulder
Anchorage................105
Adjustable Upper Shoulder Belt
Anchorage................105
Automatic Locking Retractor (ALR) .106
Energy Management Feature.....106
Front Seat.........100, 102, 103
Inspection................137
Lap/Shoulder Belt Operation.....103
Lap/Shoulder Belts...........102
Lap/Shoulder Belt Untwisting.....105
Operating Instructions.........103
Pregnant Women............106
Pretensioners..............106
Rear Seat
.................102
Reminder.................100
Seat Belt Pretensioner.........106
Seat Belt Reminder . . .69, 76, 77, 100
Untwisting Procedure.........105
Seats......................26
Adjustment................26
Fold And Tumble Rear..........29
Rear Folding................26
Tilting....................26
Security Alarm..............17, 70
Arm The System.............17Disarm The System............18
Selection Of Coolant (Antifreeze).....259
Sentry Key Replacement..........14
Service Assistance.............318
Shifting....................147
Automatic Transmission.....147, 148
Transfer Case, Shifting Into Transfer Case
Neutral (N)................172
Transfer Case, Shifting Out Of Transfer
Case Neutral (N)............173
Shoulder Belts................102
Signals, Turn.......76, 139, 178, 179
Siri.......................313
Snow Chains (Tire Chains).........237
Snow Tires..................235
Soft Top..................47, 54
Spare Tire...................190
Spare Tires...............235, 236
Spark Plugs.................259
Specifications
Fuel (Gasoline).............259
Oil .....................259
Speed Control
Accel/Decel...............162
Cancel...................162
Resume..................162
Speed Control (Cruise Control)......160
INDEX
340