door lock JEEP WRANGLER 2DOORS 2020 Owner handbook (in English)
[x] Cancel search | Manufacturer: JEEP, Model Year: 2020, Model line: WRANGLER 2DOORS, Model: JEEP WRANGLER 2DOORS 2020Pages: 330, PDF Size: 9.16 MB
Page 53 of 330
51
Freedom Top And Hard Top
To Remove Freedom Top Panels
NOTE:
The left side panel must be removed before
removing the right side panel.
1. Fold down the sun visor against the wind-
shield.
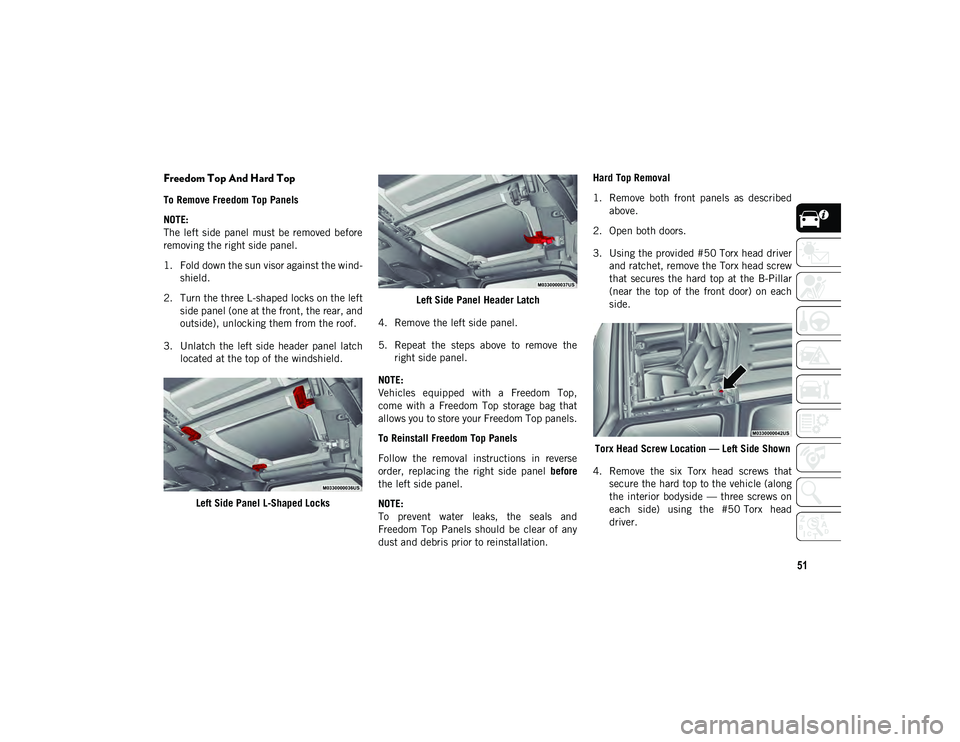
2. Turn the three L-shaped locks on the left side panel (one at the front, the rear, and
outside), unlocking them from the roof.
3. Unlatch the left side header panel latch located at the top of the windshield.
Left Side Panel L-Shaped Locks Left Side Panel Header Latch
4. Remove the left side panel.
5. Repeat the steps above to remove the right side panel.
NOTE:
Vehicles equipped with a Freedom Top,
come with a Freedom Top storage bag that
allows you to store your Freedom Top panels.
To Reinstall Freedom Top Panels
Follow the removal instructions in reverse
order, replacing the right side panel before
the left side panel.
NOTE:
To prevent water leaks, the seals and
Freedom Top Panels should be clear of any
dust and debris prior to reinstallation. Hard Top Removal
1. Remove both front panels as described
above.
2. Open both doors.
3. Using the provided #50 Torx head driver and ratchet, remove the Torx head screw
that secures the hard top at the B-Pillar
(near the top of the front door) on each
side.
Torx Head Screw Location — Left Side Shown
4. Remove the six Torx head screws that secure the hard top to the vehicle (along
the interior bodyside — three screws on
each side) using the #50 Torx head
driver.
2020_JEEP_JL_WRANGLER_UG_RHD_UK.book Page 51
Page 57 of 330
55
NOTE:
The Power Sliding Top may reverse motion
if closing during a severe headwind. If this
occurs, push the Power Sliding Top switch
again to close the top completely.
If three consecutive power top close
attempts result in Pinch Protect reversals,
Pinch Protect will disable and the power
top must be closed in Manual Mode.
HOOD
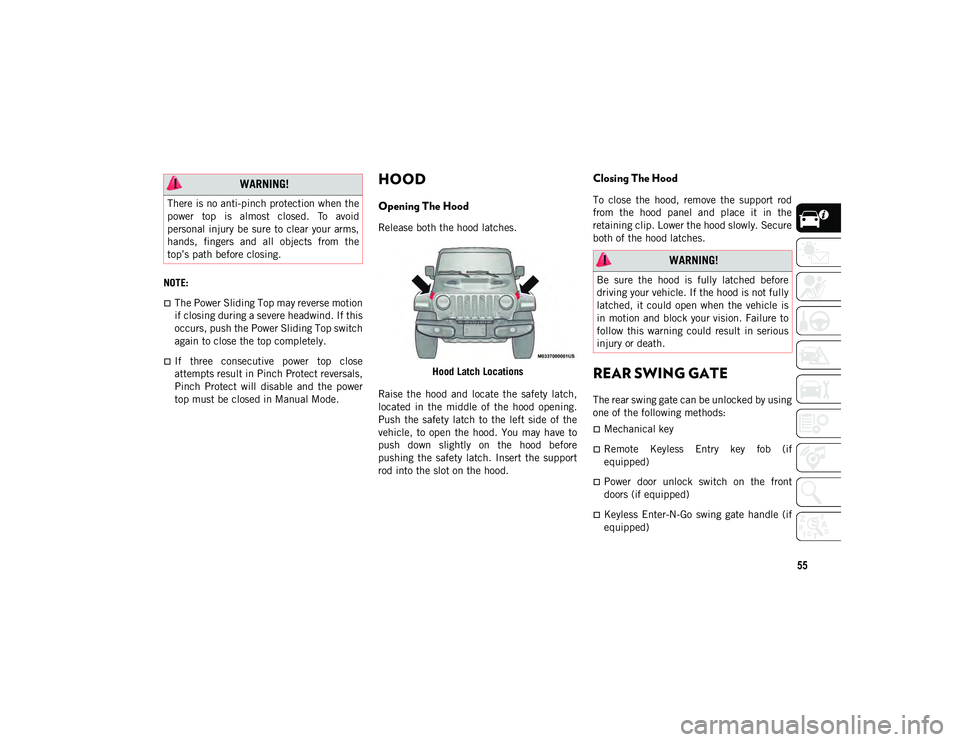
Opening The Hood
Release both the hood latches.Hood Latch Locations
Raise the hood and locate the safety latch,
located in the middle of the hood opening.
Push the safety latch to the left side of the
vehicle, to open the hood. You may have to
push down slightly on the hood before
pushing the safety latch. Insert the support
rod into the slot on the hood.
Closing The Hood
To close the hood, remove the support rod
from the hood panel and place it in the
retaining clip. Lower the hood slowly. Secure
both of the hood latches.
REAR SWING GATE
The rear swing gate can be unlocked by using
one of the following methods:
Mechanical key
Remote Keyless Entry key fob (if
equipped)
Power door unlock switch on the front
doors (if equipped)
Keyless Enter-N-Go swing gate handle (if
equipped)
WARNING!
There is no anti-pinch protection when the
power top is almost closed. To avoid
personal injury be sure to clear your arms,
hands, fingers and all objects from the
top’s path before closing.
WARNING!
Be sure the hood is fully latched before
driving your vehicle. If the hood is not fully
latched, it could open when the vehicle is
in motion and block your vision. Failure to
follow this warning could result in serious
injury or death.
2020_JEEP_JL_WRANGLER_UG_RHD_UK.book Page 55
Page 68 of 330
GETTING TO KNOW YOUR INSTRUMENT PANEL
66
Vehicles equipped with the Anti-Lock Brake
System (ABS) are also equipped with Electronic
Brake Force Distribution (EBD). In the event of an
EBD failure, the Brake Warning Light will turn on
along with the ABS Light. Immediate repair to the
ABS system is required.
Operation of the Brake Warning Light can be
checked by turning the ignition switch from
the OFF position to the ON/RUN position.
The light should illuminate for approximately
four seconds. The light should then turn off
unless the parking brake is applied or a brake
fault is detected. If the light does not illumi-
nate, have the light inspected by an autho -
rized dealer.
The light also will turn on when the parking
brake is applied with the ignition switch in
the ON/RUN position.
NOTE:
This light shows only that the parking brake
is applied. It does not show the degree of
brake application.
— Battery Charge Warning Light
This warning light will illuminate when the battery
is not charging properly. If it stays on while the
engine is running, there may be a malfunction with the charging system. Contact an authorized
dealer as soon as possible.
This indicates a possible problem with the
electrical system or a related component.
— Door Open Warning Light
This indicator will illuminate when a door is
ajar/open or not fully closed.
NOTE:
If the vehicle is moving, there will also be a
single chime.
— Electric Power Steering Fault Warning
Light
This warning light will turn on when there's a
fault with the Electric Power Steering (EPS)
system. Refer to “Electric Power Steering” in
“Starting And Operating” in the Owner’s
Manual for further information.
— Electronic Throttle Control (ETC)
Warning Light
This warning light will illuminate to indicate
a problem with the Electronic Throttle
Control (ETC) system. If a problem is
detected while the vehicle is running, the
light will either stay on or flash depending on
the nature of the problem. Cycle the ignition
when the vehicle is safely and completely
stopped and the transmission is placed in
the PARK (P) position. The light should turn
off. If the light remains on with the vehicle
running, your vehicle will usually be drive -
able; however, see an authorized dealer for
service as soon as possible.
NOTE:
This light may turn on if the accelerator and
brake pedals are pressed at the same time.
If the light continues to flash when the vehicle is
running, immediate service is required and you
may experience reduced performance, an
elevated/rough idle, or engine stall and your
vehicle may require towing. The light will come on
when the ignition is placed in the ON/RUN or
ACC/ON/RUN position and remain on briefly as a
bulb check. If the light does not come on during
starting, have the system checked by an
authorized dealer.
WARNING!
Continued operation with reduced assist
could pose a safety risk to yourself and
others. Service should be obtained as soon
as possible.
2020_JEEP_JL_WRANGLER_UG_RHD_UK.book Page 66
Page 117 of 330
115
As the air bags deflate, you may see some
smoke-like particles. The particles are a
normal by-product of the process that
generates the non-toxic gas used for air
bag inflation. These airborne particles may
irritate the skin, eyes, nose, or throat. If
you have skin or eye irritation, rinse the
area with cool water. For nose or throat irri-
tation, move to fresh air. If the irritation
continues, see your doctor. If these parti -
cles settle on your clothing, follow the
garment manufacturer’s instructions for
cleaning.
Do not drive your vehicle after the air bags
have deployed. If you are involved in another
collision, the air bags will not be in place to
protect you. NOTE:
Air bag covers may not be obvious in the
interior trim, but they will open during air
bag deployment.
After any collision, the vehicle should be
taken to an authorized dealer immediately.
Enhanced Accident Response System
In the event of an impact, if the communica
-
tion network remains intact, and the power
remains intact, depending on the nature of
the event, the Occupant Restraint Controller
(ORC) will determine whether to have the
Enhanced Accident Response System
perform the following functions:
Cut off fuel to the engine (If Equipped)
Cut off battery power to the electric motor
(If Equipped)
Flash hazard lights as long as the battery
has power
Turn on the interior lights, which remain
on as long as the battery has power or for
15 minutes from the intervention of the
Enhanced Accident Response System.
Unlock the power door locks. Your vehicle may also be designed to perform
any of these other functions in response to
the Enhanced Accident Response System:
Turn off the Fuel Filter Heater, Turn off
the HVAC Blower Motor, Close the HVAC
Circulation Door
Cut off battery power to the:
Engine
Electric Motor (if equipped)
Electric power steering
Brake booster
Electric park brake
Automatic transmission gear selector
Horn
Front wiper
Headlamp washer pump
WARNING!
Deployed air bags and seat belt
pretensioners cannot protect you in
another collision. Have the air bags, seat
belt pretensioners, and the seat belt
retractor assemblies replaced by an
authorized dealer immediately. Also, have
the Occupant Restraint Controller System
serviced as well.
2020_JEEP_JL_WRANGLER_UG_RHD_UK.book Page 115
Page 139 of 330
137
(Continued)
Periodic Safety Checks You Should Make
Outside The Vehicle
Tires
Examine tires for excessive tread wear and uneven
wear patterns. Check for stones, nails, glass, or
other objects lodged in the tread or sidewall.
Inspect the tread for cuts and cracks. Inspect side-
walls for cuts, cracks, and bulges. Check the wheel
nuts for tightness. Check the tires (including spare)
for proper cold inflation pressure.
Lights
Have someone observe the operation of brake
lights and exterior lights while you work the
controls. Check turn signal and high beam indi -
cator lights on the instrument panel.
Door Latches
Check for proper closing, latching, and
locking.
Fluid Leaks
Check area under vehicle after overnight
parking for fuel, coolant, oil, or other fluid
leaks. Also, if gasoline fumes are detected or
if fuel, or brake fluid leaks are suspected, the
cause should be located and corrected
immediately.
ALWAYS REMOVE THE EXISTING
FLOOR MAT FROM THE VEHICLE
before installing any other floor mat.
NEVER install or stack an additional
floor mat on top of an existing floor mat.
ONLY install floor mats designed to fit
your vehicle. NEVER install a floor mat
that cannot be properly attached and
secured to your vehicle. If a floor mat
needs to be replaced, only use a FCA
approved floor mat for the specific make,
model, and year of your vehicle.
ONLY use the driver’s side floor mat on
the driver’s side floor area. To check for
interference, with the vehicle properly
parked with the engine off, fully depress
the accelerator, the brake, and the
clutch pedal (if present) to check for
interference. If your floor mat interferes
with the operation of any pedal, or is not
secure to the floor, remove the floor mat
from the vehicle and place the floor mat
in your trunk.
ONLY use the passenger’s side floor mat
on the passenger’s side floor area.
WARNING! (Continued)
ALWAYS make sure objects cannot fall
or slide into the driver’s side floor area
when the vehicle is moving. Objects can
become trapped under accelerator,
brake, or clutch pedals and could cause
a loss of vehicle control.
NEVER place any objects under the floor
mat (e.g., towels, keys, etc.). These
objects could change the position of the
floor mat and may cause interference
with the accelerator, brake, or clutch
pedals.
If the vehicle carpet has been removed
and re-installed, always properly attach
carpet to the floor and check the floor
mat fasteners are secure to the vehicle
carpet. Fully depress each pedal to
check for interference with the acceler -
ator, brake, or clutch pedals then
re-install the floor mats.
It is recommended to only use mild soap
and water to clean your floor mats. After
cleaning, always check your floor mat
has been properly installed and is
secured to your vehicle using the floor
mat fasteners by lightly pulling mat.
WARNING! (Continued)
2020_JEEP_JL_WRANGLER_UG_RHD_UK.book Page 137
Page 261 of 330
259
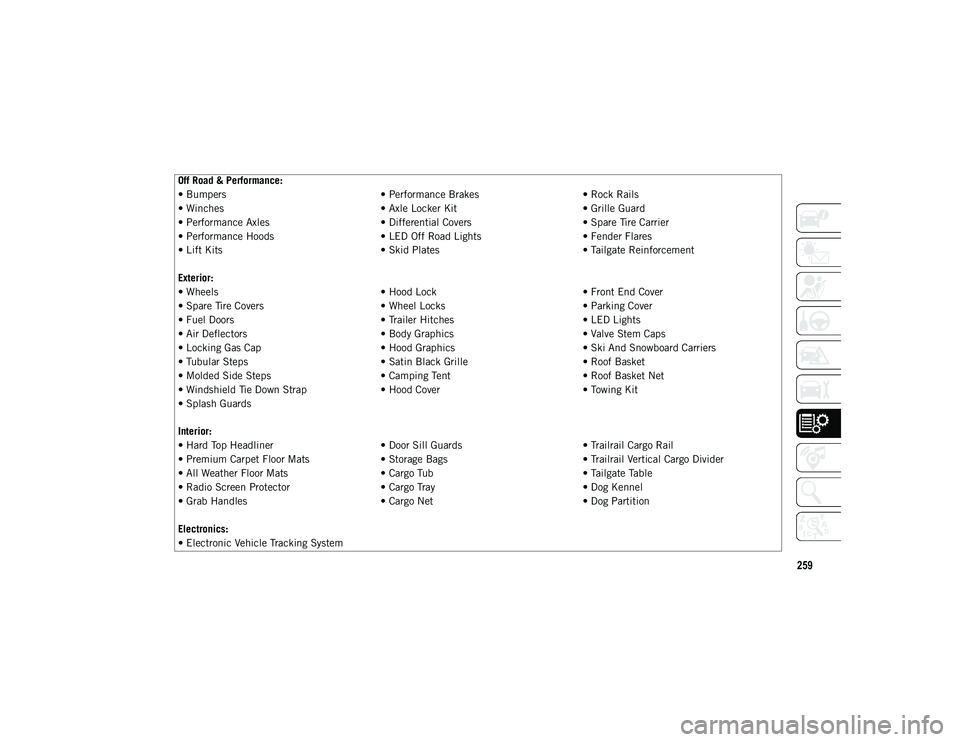
Off Road & Performance:
• Bumpers• Performance Brakes• Rock Rails
• Winches • Axle Locker Kit• Grille Guard
• Performance Axles • Differential Covers• Spare Tire Carrier
• Performance Hoods • LED Off Road Lights• Fender Flares
• Lift Kits • Skid Plates• Tailgate Reinforcement
Exterior:
• Wheels • Hood Lock• Front End Cover
• Spare Tire Covers • Wheel Locks• Parking Cover
• Fuel Doors • Trailer Hitches• LED Lights
• Air Deflectors • Body Graphics• Valve Stem Caps
• Locking Gas Cap • Hood Graphics• Ski And Snowboard Carriers
• Tubular Steps • Satin Black Grille• Roof Basket
• Molded Side Steps • Camping Tent• Roof Basket Net
• Windshield Tie Down Strap • Hood Cover• Towing Kit
• Splash Guards
Interior:
• Hard Top Headliner • Door Sill Guards• Trailrail Cargo Rail
• Premium Carpet Floor Mats • Storage Bags• Trailrail Vertical Cargo Divider
• All Weather Floor Mats • Cargo Tub• Tailgate Table
• Radio Screen Protector • Cargo Tray• Dog Kennel
• Grab Handles • Cargo Net• Dog Partition
Electronics:
• Electronic Vehicle Tracking System
2020_JEEP_JL_WRANGLER_UG_RHD_UK.book Page 259
Page 265 of 330
263
UCONNECT 4 WITH 7-INCH
DISPLAY
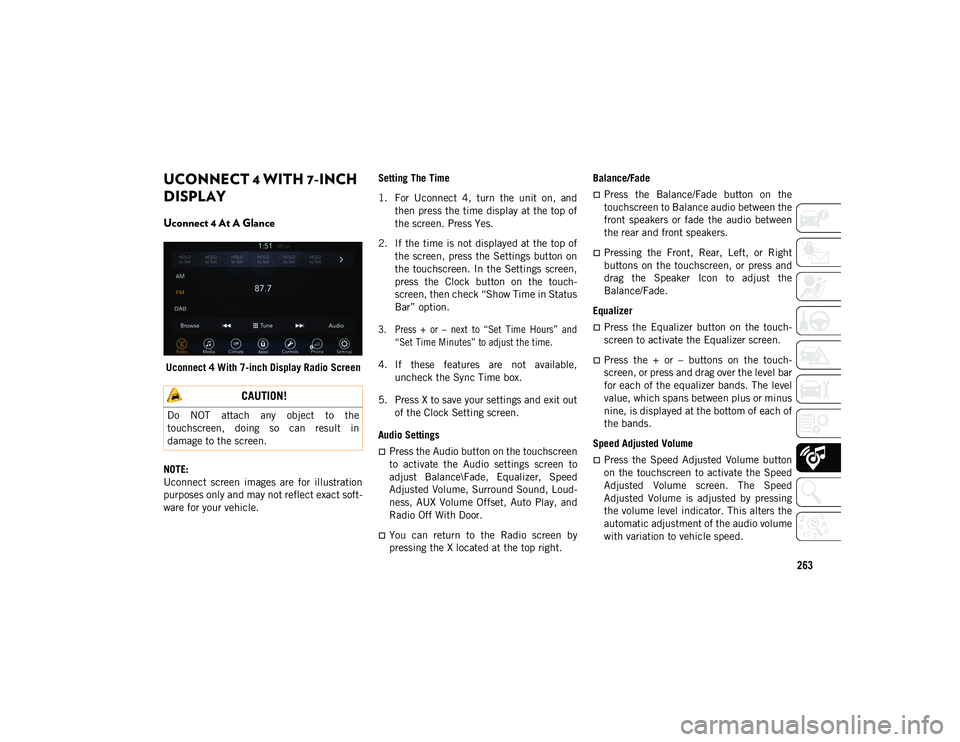
Uconnect 4 At A Glance
Uconnect 4 With 7-inch Display Radio Screen
NOTE:
Uconnect screen images are for illustration
purposes only and may not reflect exact soft -
ware for your vehicle. Setting The Time
1. For Uconnect 4, turn the unit on, and
then press the time display at the top of
the screen. Press Yes.
2. If the time is not displayed at the top of the screen, press the Settings button on
the touchscreen. In the Settings screen,
press the Clock button on the touch -
screen, then check “Show Time in Status
Bar” option.
3. Press + or – next to “Set Time Hours” and “Set Time Minutes” to adjust the time.
4. If these features are not available, uncheck the Sync Time box.
5. Press X to save your settings and exit out of the Clock Setting screen.
Audio Settings
Press the Audio button on the touchscreen
to activate the Audio settings screen to
adjust Balance\Fade, Equalizer, Speed
Adjusted Volume, Surround Sound, Loud -
ness, AUX Volume Offset, Auto Play, and
Radio Off With Door.
You can return to the Radio screen by
pressing the X located at the top right. Balance/Fade
Press the Balance/Fade button on the
touchscreen to Balance audio between the
front speakers or fade the audio between
the rear and front speakers.
Pressing the Front, Rear, Left, or Right
buttons on the touchscreen, or press and
drag the Speaker Icon to adjust the
Balance/Fade.
Equalizer
Press the Equalizer button on the touch -
screen to activate the Equalizer screen.
Press the + or – buttons on the touch -
screen, or press and drag over the level bar
for each of the equalizer bands. The level
value, which spans between plus or minus
nine, is displayed at the bottom of each of
the bands.
Speed Adjusted Volume
Press the Speed Adjusted Volume button
on the touchscreen to activate the Speed
Adjusted Volume screen. The Speed
Adjusted Volume is adjusted by pressing
the volume level indicator. This alters the
automatic adjustment of the audio volume
with variation to vehicle speed.
CAUTION!
Do NOT attach any object to the
touchscreen, doing so can result in
damage to the screen.
2020_JEEP_JL_WRANGLER_UG_RHD_UK.book Page 263
Page 279 of 330
277
Apps — If Equipped
To access Apps, press the Uconnect Apps
button on the touchscreen to browse the list
of applications:
EcoDrive
MyCar
TuneIn
Deezer
Reuters
Twitter
Facebook Check-In
Apple CarPlay®
Android Auto™
TomTom® Live Services, and many more.
UCONNECT SETTINGS
The Uconnect system allows you to access
Customer Programmable feature settings
such as Language, Display, Units, Voice,
Clock, Camera, Safety & Driving Assistance,
Mirrors & Wipers, Lights, Doors & Locks,
Auto-On Comfort, AUX Switches, Engine Off
Options, Audio, Phone/Bluetooth®, Radio
Setup, Restore Settings, and System Infor-
mation through buttons on the touchscreen.
Push the SETTINGS button (Uconnect 3), or
press the Apps button (Uconnect 4/4 NAV)
located near the bottom of the touchscreen,
then press the Settings button on the touch -
screen to access the Settings screen. When
making a selection, scroll up or down until
the preferred setting is highlighted, then
press the preferred setting until a
check-mark appears next to the setting,
showing that setting has been selected.
NOTE:
Depending on the vehicle’s options, feature
settings may vary.
Refer to “Uconnect Settings” in “Multi -
media” in your Owner’s Manual for further
information.
OFF-ROAD PAGES — IF
EQUIPPED
Your vehicle is equipped with Off-Road Pages,
which provides the vehicle status while oper -
ating on off-road conditions. It supplies infor -
mation relating to the vehicle ride height, the
status of the transfer case, the pitch and roll of
the vehicle (if equipped).
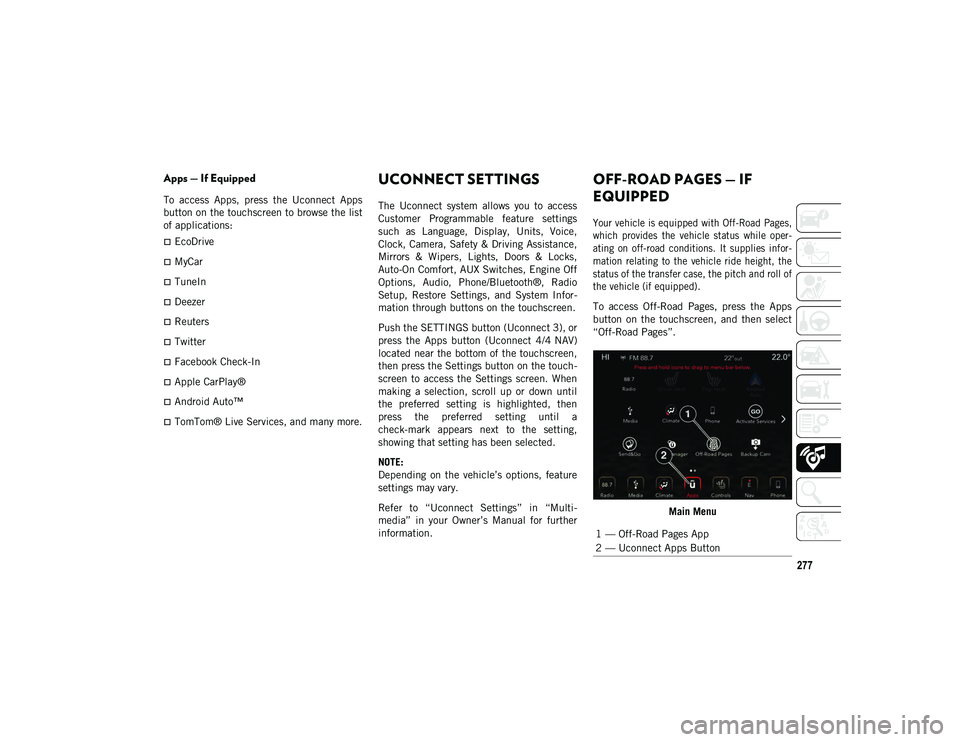
To access Off-Road Pages, press the Apps
button on the touchscreen, and then select
“Off-Road Pages”.
Main Menu
1 — Off-Road Pages App
2 — Uconnect Apps Button
2020_JEEP_JL_WRANGLER_UG_RHD_UK.book Page 277
Page 322 of 330
320
INDEX
C
Camera, Rear .................................... 167
Capacities, Fluid................................ 253
Caps, FillerFuel ...................................... 169 , 170
Oil (Engine) ................................... 221
Car Washes ....................................... 243
Carbon Monoxide Warning .................. 135
Center High Mounted Stop Light ......... 183
Certification Label ............................. 174
Chains, Tire ...................................... 240
Change Oil Indicator ............................ 61
Changing A Flat Tire .......................... 232
Checking Your Vehicle For Safety ........ 135
Checks, Safety .................................. 135
Cleaning Wheels .......................................... 239
Climate Control Automatic........................................ 37
Clock Settings ................................... 261
Compact Spare Tire ........................... 238
Connector UCI ............................................... 280
Universal Consumer Interface (UCI) ........................... 280
Cooling System .................................. 229 Cooling Capacity ............................ 253Inspection ..................................... 230
Selection Of Coolant (Antifreeze) ........................ 253 , 254 Cruise Control (Speed Control) ............ 158
Cruise Light ...................................74
, 76
Customer Assistance .......................... 304
Cybersecurity .................................... 260
D
Daytime Running Lights ....................... 32
Dealer Service ................................... 226
Defroster, Windshield......................... 136
Delay (Intermittent) Wipers .................. 35
Diagnostic System, Onboard ................. 77
Diesel Display Messages ............................. 62
Dimmer Switch Headlight ........................................ 32
Dipsticks Oil (Engine) ................................... 224
Disabled Vehicle Towing .................... 207
Do Not Disturb ...........................292 , 301
Door Ajar .......................................66 , 68
Door Ajar Light ...............................66 , 68
Doors ................................................. 18 Removal.....................................21 , 23
Removal, Front ................................ 21
Removal, Rear ................................. 23
Drag And Drop Menu ..................264 , 269
Driver’s Seat Back Tilt ......................... 24
Dual Top .......................................47 , 53 E
Electric Brake Control System ...............79
Anti-Lock Brake System ....................78
Electronic Roll Mitigation ............ 80 , 87
Electrical Outlet, Auxiliary (Power Outlet) .. 56
Electrical Power Outlets ........................56
Electronic Speed Control
(Cruise Control) ..................................157
Electronic Stability Control (ESC) ..........80
Electronic Throttle Control Warning
Light ...................................................66
Emergency, In Case Of Jacking .................................. 192 , 232
Jump Starting ................................201
Emissions..........................................258
Engine ..............................................221 Break-In Recommendations .............143Compartment ................. 221 , 222 , 223
Compartment Identification .............. 221 , 222 , 223
Coolant (Antifreeze) ........................254
Cooling ..........................................229 Exhaust Gas Caution .......................135
Fuel Requirements ................. 248 , 253
Jump Starting ................................201
Oil ........................................ 253 , 254
Oil Filler Cap ..................................221
Oil Selection ..................................253
Overheating....................................204
Starting .........................................138
2020_JEEP_JL_WRANGLER_UG_RHD_UK.book Page 320
Page 325 of 330
323
Loading Vehicle ................................. 174
LockingAxle .............................................. 151
Locks Child Protection ............................... 20
Low Tire Pressure System ..................... 92
Lowering ............................................. 47
Lowering Four Door .............................. 47
Lowering The Top ................................ 47
Lowering Two Door ............................... 47
Lug Nuts/Bolts .................................. 247
Luggage Carrier ................................... 58
M
Maintenance ....................................... 53
Maintenance Free Battery ................... 225
Maintenance Schedule ............... 210 , 216
Malfunction Indicator
Light (Check Engine)............................ 69
Manual Park Release.................................. 204
Modifications/Alterations Vehicle .............................................. 2
Monitor, Tire Pressure System ............... 92
Mopar Accessories ............................. 258
N
Navigation ........................................ 282
New Vehicle Break-In Period ............... 143 O
Occupant Restraints ............................ 97
Octane Rating, Gasoline
(Fuel) ................................ 248
, 249 , 254
Off Road Pages ................................. 277 Accessory Gauges .......................... 279
Drivetrain ...................................... 278
Pitch And Roll ............................... 279
Status Bar ..................................... 278
Oil Pressure Light ................................ 67
Oil, Engine ....................................... 254 Capacity........................................ 253
Dipstick ........................................ 224
Filter ............................................ 254
Pressure Warning Light..................... 67Recommendation ........................... 253
Viscosity ....................................... 253
Onboard Diagnostic System .................. 77
Operating Precautions .......................... 77
Overheating, Engine........................... 204
P
Paddle Shifters ................................. 145
ParkSense System, Rear .................... 161
Passenger Airbag Disable ................... 107
Passive Entry ...................................... 18
Personalized Main Menu .................... 264
Pets ................................................. 134
Phone (Uconnect).............................. 285 Pairing .......................................... 287 Phonebook ........................................291
Power
Inverter............................................57Windows ..........................................46
Power Sliding Top ................................53 Operation.........................................53
Pinch Protect ...................................53
Power Steering Fluid ..........................257
Pregnant Women And Seat Belts .........104
Preparation For Jacking ......................194
Pretensioners Seat Belts ......................................104
R
Radial Ply Tires..................................234
Radio ................................................268 Presets .................................. 262 , 265
Radio Operation ................. 261 , 263 , 270
Radio Screens ........................... 263 , 268
Raising ...............................................47
Raising Four Door ................................47
Raising The Soft Top ............................47
Raising Two Door .................................47
Rear Camera......................................167
Rear Cross Path ...................................88
Rear ParkSense System ......................161
Rear Swing Gate ..................................55
Rear Wiper/Washer ...............................36
2020_JEEP_JL_WRANGLER_UG_RHD_UK.book Page 323