lock JEEP WRANGLER JK 2019 Owners Manual
[x] Cancel search | Manufacturer: JEEP, Model Year: 2019, Model line: WRANGLER JK, Model: JEEP WRANGLER JK 2019Pages: 515, PDF Size: 5.09 MB
Page 24 of 515
WARNING!
•Before exiting a vehicle, always shift the automatic
transmission into PARK or the manual transmission
into FIRST gear or REVERSE, apply the parking
brake, then turn the engine OFF, remove the key fob
from the vehicle and lock your vehicle.
• Never leave children alone in a vehicle, or with
access to an unlocked vehicle.
• Allowing children to be in a vehicle unattended is
dangerous for a number of reasons. A child or others
could be seriously or fatally injured. Children
should be warned not to touch the parking brake,
brake pedal or the gear selector.
• Do not leave the key fob in or near the vehicle, or in
a location accessible to children. A child could oper-
ate power windows, other controls, or move the
vehicle.
• Do not leave children or animals inside parked
vehicles in hot weather. Interior heat build-up may
cause serious injury or death.
Page 31 of 515
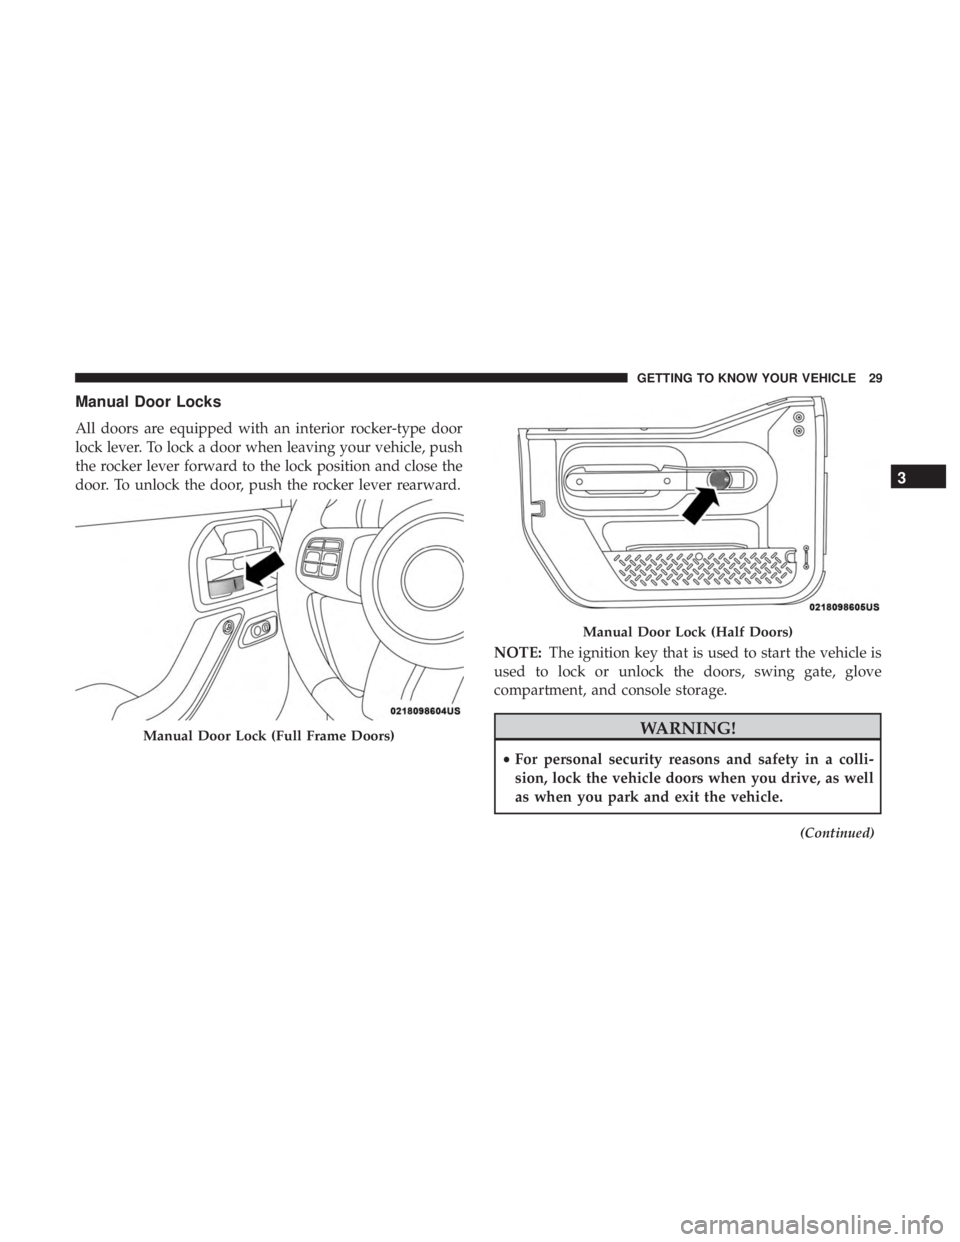
Manual Door Locks
All doors are equipped with an interior rocker-type door
lock lever. To lock a door when leaving your vehicle, push
the rocker lever forward to the lock position and close the
door. To unlock the door, push the rocker lever rearward.NOTE:The ignition key that is used to start the vehicle is
used to lock or unlock the doors, swing gate, glove
compartment, and console storage.
Page 32 of 515

WARNING!(Continued)
•When exiting the vehicle, always remove the key
from the ignition and lock your vehicle. Unsuper-
vised use of vehicle equipment may cause severe
personal injuries and death.
• Never leave children alone in a vehicle, or with
access to an unlocked vehicle.
• Allowing children to be in a vehicle unattended is
dangerous for a number of reasons. A child or others
could be seriously or fatally injured. Children
should be warned not to touch the parking brake,
brake pedal or the gear selector.
• Do not leave the key fob in or near the vehicle or in
a location accessible to children. A child could oper-
ate power windows, other controls, or move the
vehicle.
Power Door Locks — If Equipped
The power door lock switch is located on each front door
panel. Push the switch forward to lock the doors, and
rearward to unlock the doors.
Page 33 of 515

WARNING!(Continued)
•Never leave children alone in a vehicle, or with
access to an unlocked vehicle.
• Allowing children to be in a vehicle unattended is
dangerous for a number of reasons. A child or others
could be seriously or fatally injured. Children
should be warned not to touch the parking brake,
brake pedal or the gear selector.
• Do not leave the key fob in or near the vehicle or in
a location accessible to children. A child could oper-
ate power windows, other controls, or move the
vehicle.
Child-Protection Door Lock System — Rear Doors
To provide a safer environment for small children riding in
the rear seats, the rear doors are equipped with Child-
Protection Door Lock system.
To Engage Or Disengage The Child-Protection Door Lock
System
1. Open the rear door.
2. Insert the tip of the ignition key into the lock and rotate
to the lock or unlock position.
3. Repeat steps one and two for the opposite rear door.
Page 51 of 515
WARNING!
Do not adjust the steering column while driving.
Adjusting the steering column while driving or driv-
ing with the steering column unlocked, could cause the
driver to lose control of the vehicle. Failure to follow
this warning may result in serious injury or death.
MIRRORS
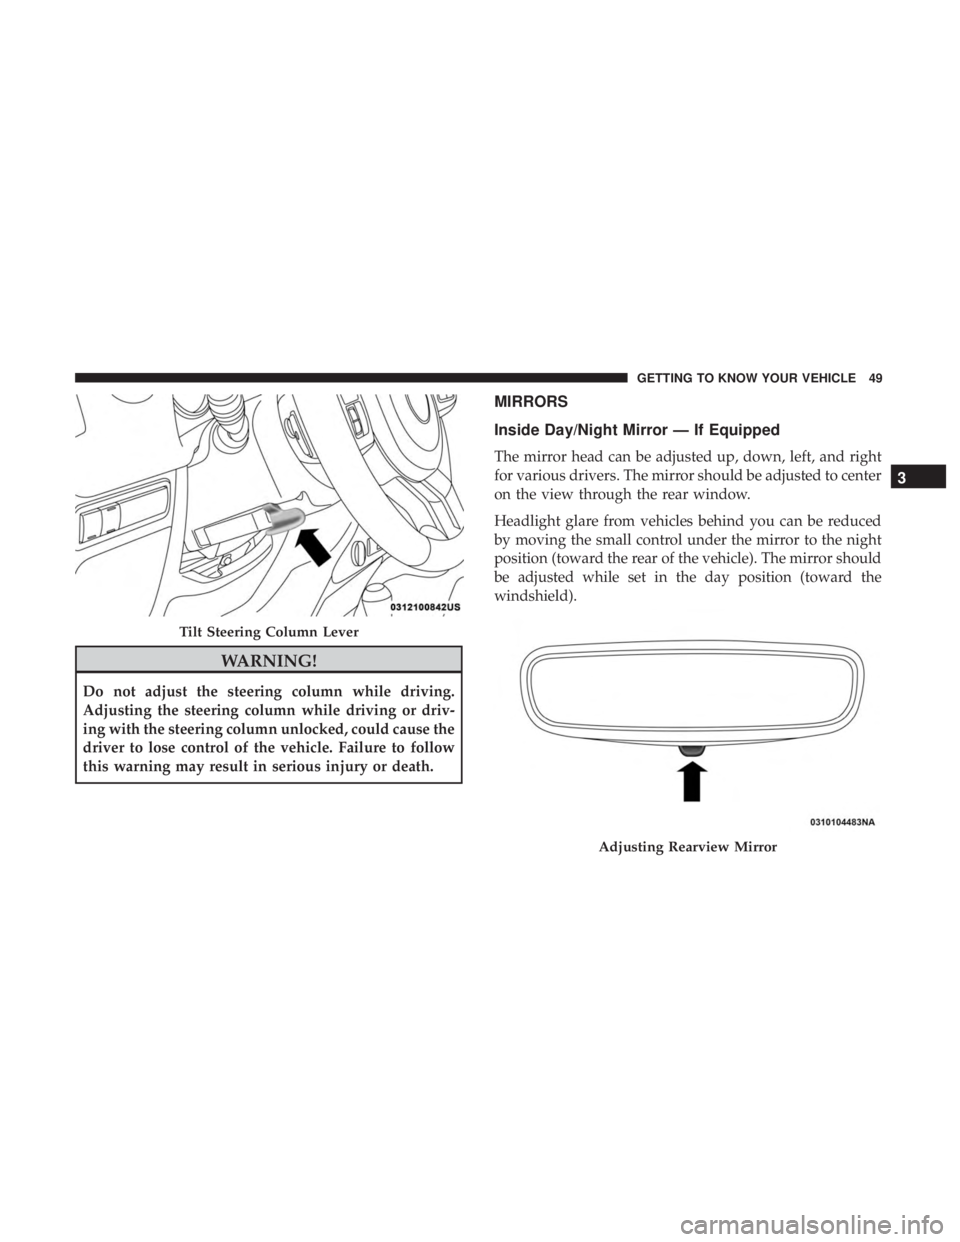
Inside Day/Night Mirror — If Equipped
The mirror head can be adjusted up, down, left, and right
for various drivers. The mirror should be adjusted to center
on the view through the rear window.
Headlight glare from vehicles behind you can be reduced
by moving the small control under the mirror to the night
position (toward the rear of the vehicle). The mirror should
be adjusted while set in the day position (toward the
windshield).
Page 73 of 515
WARNING!
Never leave children unattended in a vehicle, and do
not let children play with power windows. Do not
leave the key fob in or near the vehicle, or in a location
accessible to children. Occupants, particularly unat-
tended children, can become entrapped by the win-
dows while operating the power window switches.
Such entrapment may result in serious injury or death.NOTE:
•
For vehicles not equipped with the instrument cluster
display, the power window switches will remain active
for 45 seconds after the ignition switch is turned to the
LOCK position. Opening either front door will cancel
this feature.
• For vehicles equipped with the instrument cluster dis-
play, the power window switches will remain active for
up to 10 minutes after the ignition switch is turned to the
LOCK position. Opening either front door will cancel
this feature.
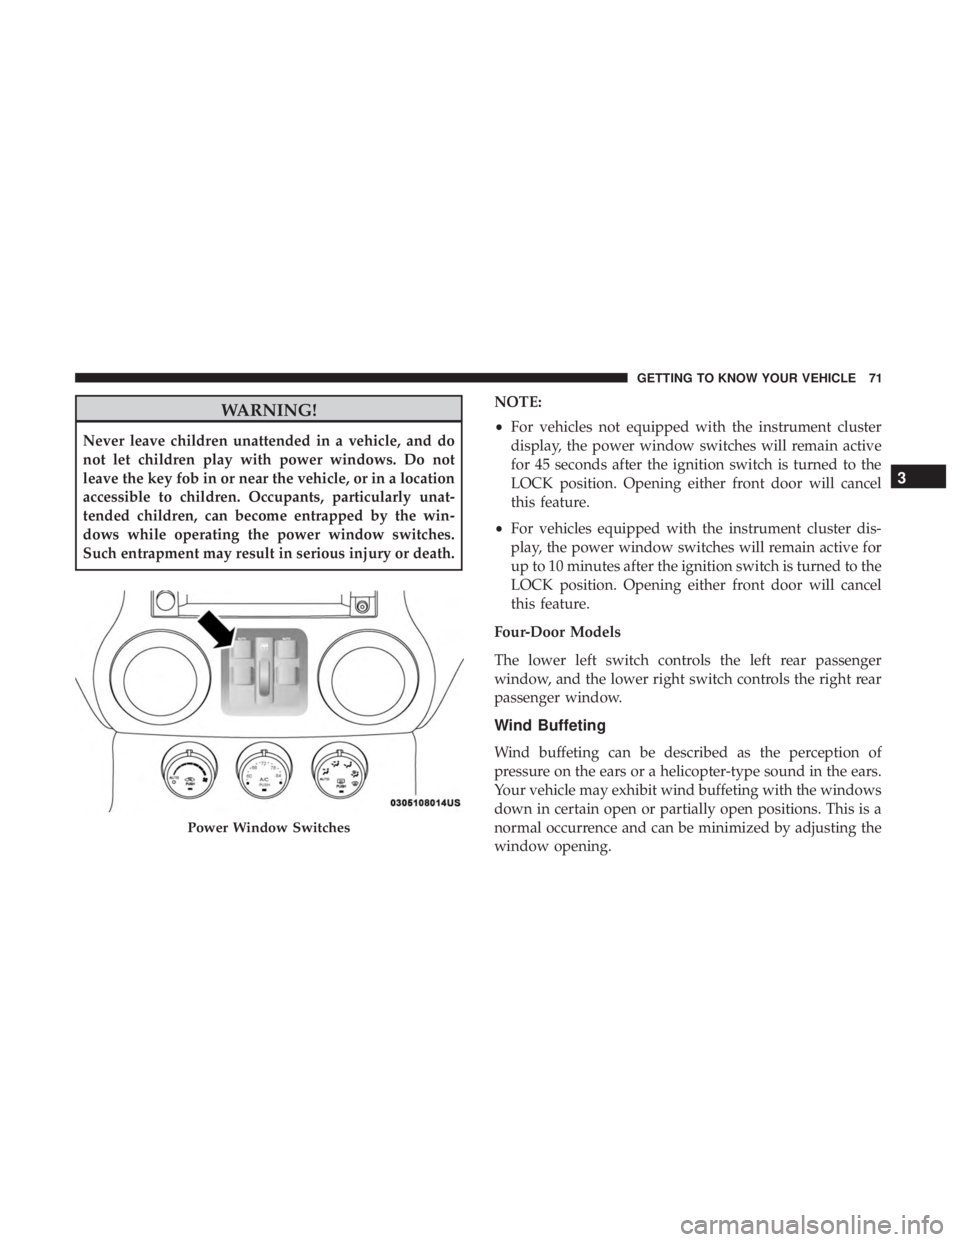
Four-Door Models
The lower left switch controls the left rear passenger
window, and the lower right switch controls the right rear
passenger window.
Wind Buffeting
Wind buffeting can be described as the perception of
pressure on the ears or a helicopter-type sound in the ears.
Your vehicle may exhibit wind buffeting with the windows
down in certain open or partially open positions. This is a
normal occurrence and can be minimized by adjusting the
window opening.
Page 206 of 515
SAFETY FEATURES
Anti-Lock Brake System (ABS)
The Anti-Lock Brake System (ABS) provides increased
vehicle stability and brake performance under most brak-
ing conditions. The system automatically prevents wheel
lock, and enhances vehicle control during braking.
The ABS performs a self-check cycle to ensure that the ABS
is working properly each time the vehicle is started and
driven. During this self-check, you may hear a slight
clicking sound as well as some related motor noises.
ABS is activated during braking when the system detects
one or more wheels begin to lock. Road conditions such as
ice, snow, gravel, bumps, railroad tracks, loose debris, or
panic stops may increase the likelihood of ABS activa-
tion(s).
You also may experience the following when ABS activates:
•The ABS motor noise (it may continue to run for a short
time after the stop).
• The clicking sound of solenoid valves.
• Brake pedal pulsations.
• A slight drop of the brake pedal at the end of the stop. These are all normal characteristics of ABS.
Page 207 of 515
WARNING!(Continued)
•The capabilities of an ABS equipped vehicle must
never be exploited in a reckless or dangerous manner
that could jeopardize the user ’s safety or the safety of
others.
ABS is designed to function with the OEM tires. Modifica-
tion may result in degraded ABS performance.
Anti-Lock Brake Warning Light
The yellow “Anti-Lock Brake Warning Light” will turn on
when the ignition is turned to the ON/RUN mode and
may stay on for as long as four seconds.
If the “Anti-Lock Brake Warning Light” remains on or
comes on while driving, it indicates that the anti-lock
portion of the brake system is not functioning and that
service is required. However, the conventional brake sys-
tem will continue to operate normally if the “Brake System
Warning Light” is not on.
If the “Anti-Lock Brake Warning Light” is on, the brake
system should be serviced as soon as possible to restore the benefits of anti-lock brakes. If the “Anti-Lock Brake Warn-
ing Light” does not come on when the ignition is turned to
the ON/RUN mode, have the light repaired as soon as
possible.
Electronic Brake Control System
Your vehicle is equipped with an advanced Electronic
Brake Control system (EBC). This system includes Elec-
tronic Brake Force Distribution (EBD), Brake Assist System
(BAS), Hill Start Assist (HSA), Traction Control System
(TCS), Electronic Stability Control (ESC), and Electronic
Roll Mitigation (ERM). These systems work together to
enhance both vehicle stability and control in various driv-
ing conditions.
Your vehicle may also be equipped with Trailer Sway
Control (TSC) and Hill Descent Control (HDC).
Electronic Brake Force Distribution (EBD)
This function manages the distribution of the braking
torque between the front and rear axles by limiting braking
pressure to the rear axle. This is done to prevent overslip of
the rear wheels to avoid vehicle instability, and to prevent
the rear axle from entering ABS before the front axle.
5
SAFETY 205
Page 208 of 515
Brake System Warning Light
The red “Brake System Warning Light” will turn on when
the ignition is turned to the ON/RUN mode and may stay
on for as long as four seconds.
If the “Brake System Warning Light” remains on or comes
on while driving, it indicates that the brake system is not
functioning properly and that immediate service is re-
quired. If the “Brake System Warning Light” does not come
on when the ignition is turned to the ON/RUN mode, have
the light repaired as soon as possible.
Brake Assist System (BAS)
The BAS is designed to optimize the vehicle’s braking
capability during emergency braking maneuvers. The sys-
tem detects an emergency braking situation by sensing the
rate and amount of brake application and then applies
optimum pressure to the brakes. This can help reduce
braking distances. The BAS complements the anti-lock
brake system (ABS). Applying the brakes very quickly
results in the best BAS assistance. To receive the benefit of
the system, you must apply continuous braking pressure
during the stopping sequence, (do not “pump” the brakes).
Do not reduce brake pedal pressure unless braking is nolonger desired. Once the brake pedal is released, the BAS is
deactivated.
Page 234 of 515
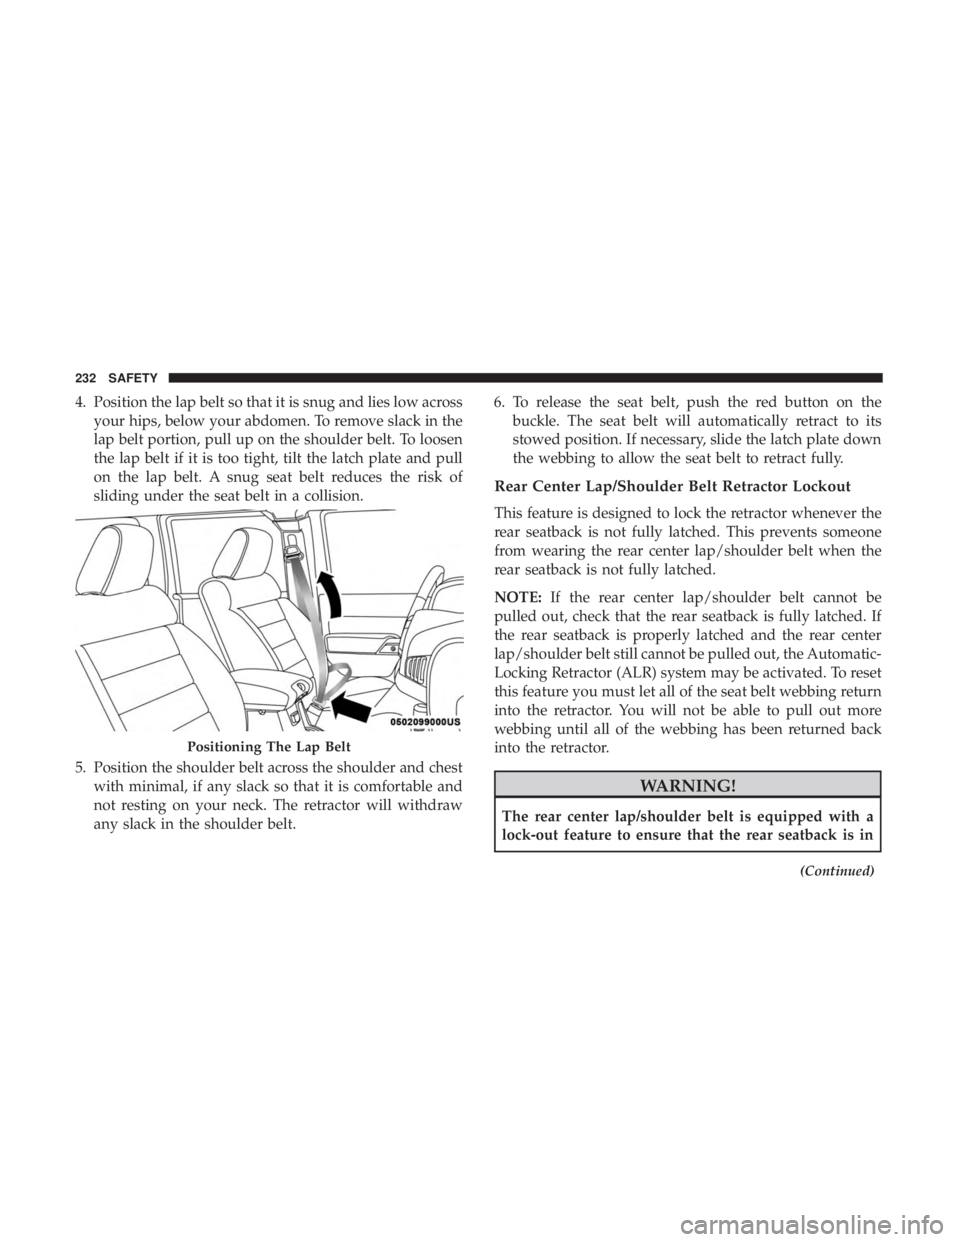
4. Position the lap belt so that it is snug and lies low acrossyour hips, below your abdomen. To remove slack in the
lap belt portion, pull up on the shoulder belt. To loosen
the lap belt if it is too tight, tilt the latch plate and pull
on the lap belt. A snug seat belt reduces the risk of
sliding under the seat belt in a collision.
5. Position the shoulder belt across the shoulder and chest with minimal, if any slack so that it is comfortable and
not resting on your neck. The retractor will withdraw
any slack in the shoulder belt. 6. To release the seat belt, push the red button on the
buckle. The seat belt will automatically retract to its
stowed position. If necessary, slide the latch plate down
the webbing to allow the seat belt to retract fully.
Rear Center Lap/Shoulder Belt Retractor Lockout
This feature is designed to lock the retractor whenever the
rear seatback is not fully latched. This prevents someone
from wearing the rear center lap/shoulder belt when the
rear seatback is not fully latched.
NOTE: If the rear center lap/shoulder belt cannot be
pulled out, check that the rear seatback is fully latched. If
the rear seatback is properly latched and the rear center
lap/shoulder belt still cannot be pulled out, the Automatic-
Locking Retractor (ALR) system may be activated. To reset
this feature you must let all of the seat belt webbing return
into the retractor. You will not be able to pull out more
webbing until all of the webbing has been returned back
into the retractor.