belt JEEP WRANGLER UNLIMITED 2015 User Guide
[x] Cancel search | Manufacturer: JEEP, Model Year: 2015, Model line: WRANGLER UNLIMITED, Model: JEEP WRANGLER UNLIMITED 2015Pages: 695, PDF Size: 4.85 MB
Page 71 of 695
only and a right side impact deploys the right side SAB
only. Vehicle damage by itself is not a good indicator of
whether or not SABs should have deployed.
The SABs will not deploy in all side collisions, including
some collisions at certain angles, or some side collisions
that do not impact the area of the passenger compart-
ment.
SABs are a supplement to the seat belt restraint system.
SABs deploy in less time than it takes to blink your eyes.
Occupants, including children, who are up against or
very close to SABs can be seriously injured or killed.
Occupants, including children, should never lean on or
sleep against the door, side windows, or area where the
SABs inflate, even if they are in an infant or child
restraint.
Seat belts (and child restraints where appropriate) are
necessary for your protection in all collisions. They also
help keep you in position, away from an inflating SAB.To get the best protection from the SABs, occupants must
wear their seat belts properly and sit upright with their
backs against the seats. Children must be properly re-
strained in a child restraint or booster seat that is
appropriate for the size of the child.
Page 73 of 695
WARNING!
Deployed air bags and seat belt pretensioners cannot
protect you in another collision. Have the air bags,
seat belt pretensioners, and the seat belt retractor
assemblies replaced by an authorized dealer imme-
diately. Also, have the Occupant Restraint Controller
System serviced as well.
NOTE:
• Air bag covers may not be obvious in the interior trim,
but they will open during air bag deployment.
• After any collision, the vehicle should be taken to an
authorized dealer immediately.
Enhanced Accident Response System
In the event of an impact, if the communication network
remains intact, and the power remains intact, depending on the nature of the event, the ORC will determine
whether to have the Enhanced Accident Response Sys-
tem perform the following functions:
•
Cut off fuel to the engine.
• Flash hazard lights as long as the battery has power or
until the ignition is placed in the “OFF” position.
• Turn on the interior lights, which remain on as long as
the battery has power or until the ignition is placed in
the “OFF” position.
• Unlock the doors automatically.
System Reset Procedure
In order to reset the Enhanced Accident Response System
functions after an event, the ignition must be changed
from ignition START or ON/RUN to ignition OFF.
2
THINGS TO KNOW BEFORE STARTING YOUR VEHICLE 71
Page 83 of 695
WARNING!
•Improper installation can lead to failure of an
infant or child restraint. It could come loose in a
collision. The child could be badly injured or
killed. Follow the child restraint manufacturer ’s
directions exactly when installing an infant or
child restraint.
• After a child restraint is installed in the vehicle, do
not move the vehicle seat forward or rearward
because it can loosen the child restraint attach-
ments. Remove the child restraint before adjusting
the vehicle seat position. When the vehicle seat has
been adjusted, reinstall the child restraint.
• When your child restraint is not in use, secure it in
the vehicle with the seat belt or LATCH anchor-
ages, or remove it from the vehicle. Do not leave it
loose in the vehicle. In a sudden stop or accident, it
(Continued)
Page 84 of 695
3. Does the shoulder belt cross the child’s shoulderbetween their neck and arm?
4. Is the lap part of the seat belt as low as possible, touching the child’s thighs and not their stomach?
5. Can the child stay seated like this for the whole trip?
If the answer to any of these questions was “no,” then the
child still needs to use a booster seat in this vehicle. If the
child is using the lap/shoulder belt, check seat belt fit
periodically and make sure the seat belt buckle is latched.
A child’s squirming or slouching can move the seat belt
out of position. If the shoulder belt contacts the face or
neck, move the child closer to the center of the vehicle, or
use a booster seat to position the seat belt on the child
correctly.
Page 93 of 695
WARNING!
Never use the same lower anchorage to attach more
than one child restraint. If you are installing LATCH-
compatible child restraints next to each other, you
must use the seat belt for the center position. You can
then use either the LATCH anchors or the vehicle’s
seat belt for installing child seats in the outboard
positions. Please refer to “Installing The LATCH-
Compatible Child Restraint System” for typical in-
stallation instructions.
Always follow the directions of the child restraint
manufacturer when installing your child restraint. Not
all child restraint systems will be installed as described
here.
To Install A LATCH-Compatible Child Restraint
If the selected seating position has a Switchable Auto-
matic Locking Retractor (ALR) seat belt, stow the seat belt, following the instructions below. See the section
“Installing Child Restraints Using the Vehicle Seat Belt”
to check what type of seat belt each seating position has.
1. Loosen the adjusters on the lower straps and on the
tether strap of the child seat so that you can more
easily attach the hooks or connectors to the vehicle
anchorages.
2. Place the child seat between the lower anchorages for that seating position. For some second row seats, you
may need to recline the seat and/or raise the head
restraint to get a better fit. If the rear seat can be moved
forward and rearward in the vehicle, you may wish to
move it to its rear-most position to make room for the
child seat. You may also move the front seat forward
to allow more room for the child seat.
3. Attach the lower hooks or connectors of the child restraint to the lower anchorages in the selected seat-
ing position.
2
THINGS TO KNOW BEFORE STARTING YOUR VEHICLE 91
Page 95 of 695
WARNING!
•Improper installation of a child restraint to the
LATCH anchorages can lead to failure of the re-
straint. The child could be badly injured or killed.
Follow the child restraint manufacturer ’s directions
exactly when installing an infant or child restraint.
• Child restraint anchorages are designed to with-
stand only those loads imposed by correctly-fitted
child restraints. Under no circumstances are they to
be used for adult seat belts, harnesses, or for
attaching other items or equipment to the vehicle.
Installing Child Restraints Using The Vehicle Seat
Belt
The seat belts in the passenger seating positions are
equipped with a Switchable Automatic Locking Retractor
(ALR) that is designed to keep the lap portion of the seat
belt tight around the child restraint so that it is not
necessary to use a locking clip. The ALR retractor can be
“switched” into a locked mode by pulling all of the
webbing out of the retractor and then letting the webbing
retract back into the retractor. If it is locked, the ALR will
make a clicking noise while the webbing is pulled back
into the retractor. Refer to the “Automatic Locking
Mode” description under “Occupant Restraints” for ad-
ditional information on ALR.2
THINGS TO KNOW BEFORE STARTING YOUR VEHICLE 93
Page 99 of 695
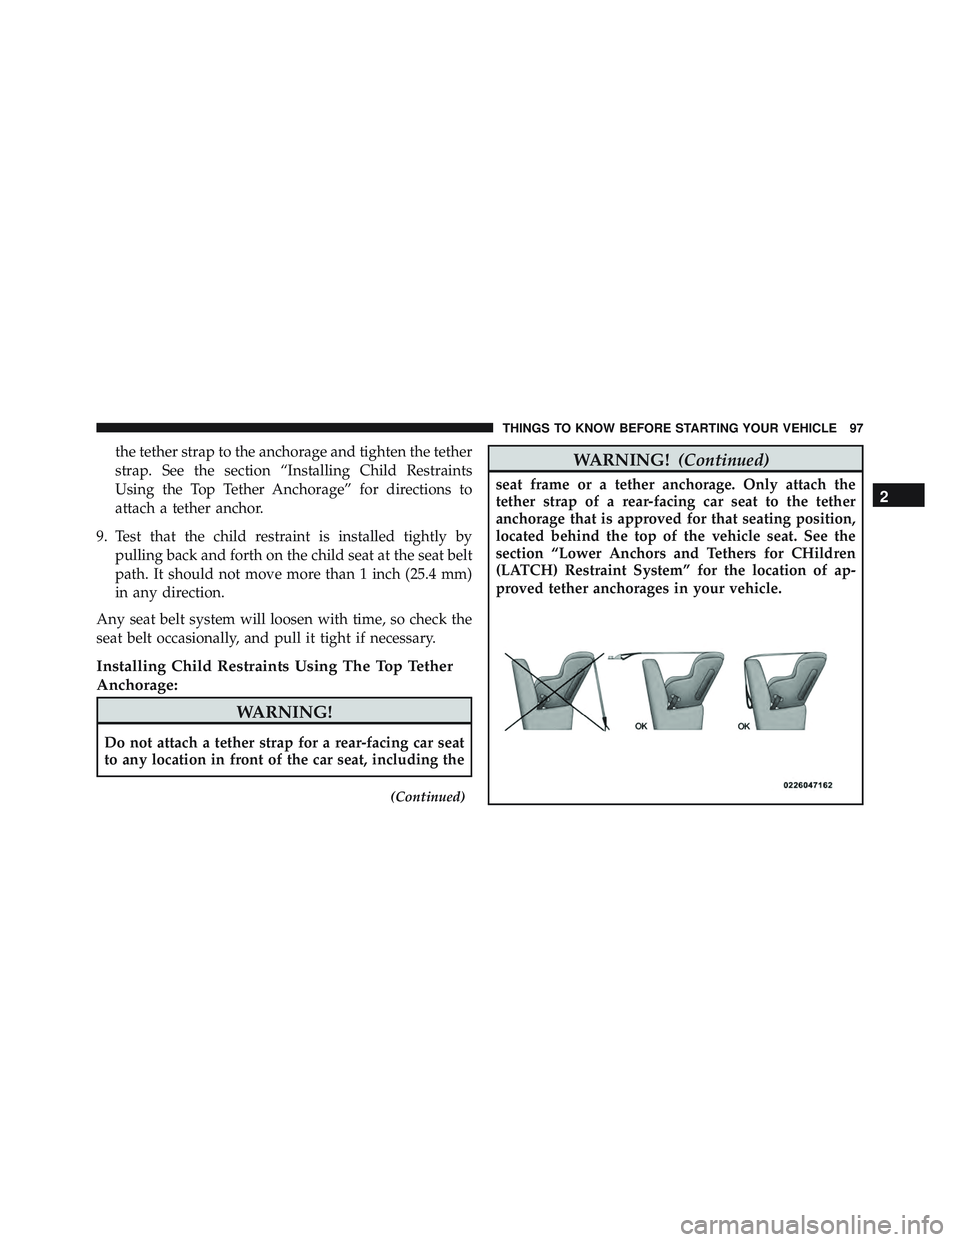
the tether strap to the anchorage and tighten the tether
strap. See the section “Installing Child Restraints
Using the Top Tether Anchorage” for directions to
attach a tether anchor.
9. Test that the child restraint is installed tightly by pulling back and forth on the child seat at the seat belt
path. It should not move more than 1 inch (25.4 mm)
in any direction.
Any seat belt system will loosen with time, so check the
seat belt occasionally, and pull it tight if necessary.
Installing Child Restraints Using The Top Tether
Anchorage:
2
THINGS TO KNOW BEFORE STARTING YOUR VEHICLE 97
Page 103 of 695
WARNING!
•Do not leave children or animals inside parked
vehicles in hot weather. Interior heat build-up may
cause serious injury or death.
• It is extremely dangerous to ride in a cargo area,
inside or outside of a vehicle. In a collision, people
riding in these areas are more likely to be seriously
injured or killed.
• Do not allow people to ride in any area of your
vehicle that is not equipped with seats and seat
belts.
• Be sure everyone in your vehicle is in a seat and
using a seat belt properly.
Exhaust Gas
Page 104 of 695
WARNING!(Continued)
•If it is necessary to sit in a parked vehicle with the
engine running, adjust your heating or cooling
controls to force outside air into the vehicle. Set the
blower at high speed.
The best protection against carbon monoxide entry into
the vehicle body is a properly maintained engine exhaust
system.
Whenever a change is noticed in the sound of the exhaust
system, when exhaust fumes can be detected inside the
vehicle, or when the underside or rear of the vehicle is
damaged, have a competent mechanic inspect the com-
plete exhaust system and adjacent body areas for broken,
damaged, deteriorated, or mispositioned parts. Open
seams or loose connections could permit exhaust fumes
to seep into the passenger compartment. In addition,
inspect the exhaust system each time the vehicle is raised
for lubrication or oil change. Replace as required.
Safety Checks You Should Make Inside The
Vehicle
Seat Belts
Inspect the seat belt system periodically, checking for
cuts, frays, and loose parts. Damaged parts must be
replaced immediately. Do not disassemble or modify the
system.
Front seat belt assemblies must be replaced after a
collision. Rear seat belt assemblies must be replaced after
a collision if they have been damaged (i.e., bent retractor,
torn webbing, etc.). If there is any question regarding seat
belt or retractor condition, replace the seat belt.
102 THINGS TO KNOW BEFORE STARTING YOUR VEHICLE
Page 157 of 695
WARNING!(Continued)
•Do not allow people to ride in any area of your
vehicle that is not equipped with seats and seat
belts. In a collision, people riding in these areas are
more likely to be seriously injured or killed.
• Be sure everyone in your vehicle is in a seat and
using a seat belt properly.
Front Seat Adjustment
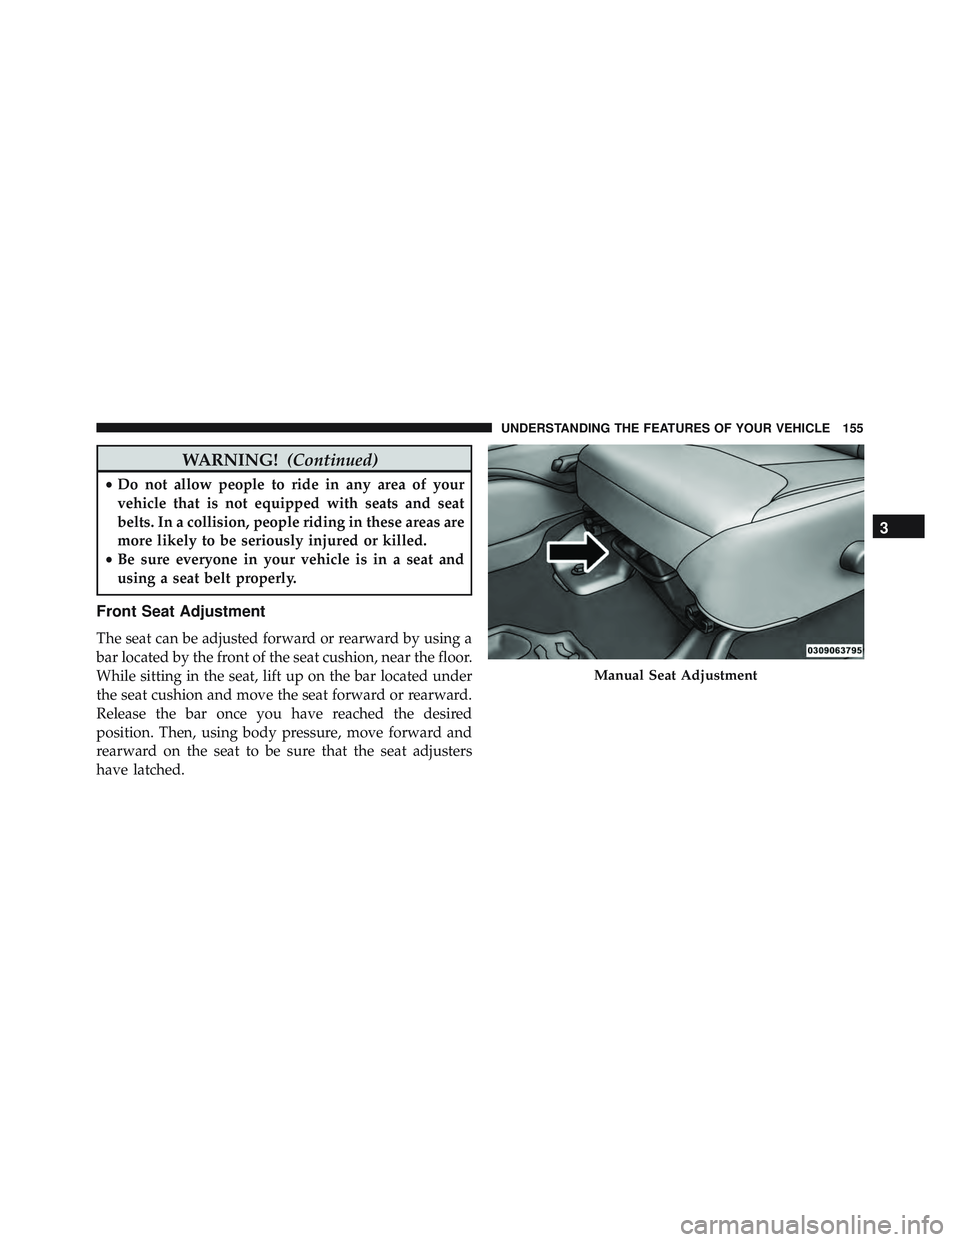
The seat can be adjusted forward or rearward by using a
bar located by the front of the seat cushion, near the floor.
While sitting in the seat, lift up on the bar located under
the seat cushion and move the seat forward or rearward.
Release the bar once you have reached the desired
position. Then, using body pressure, move forward and
rearward on the seat to be sure that the seat adjusters
have latched.