height JEEP WRANGLER UNLIMITED 2019 Owner handbook (in English)
[x] Cancel search | Manufacturer: JEEP, Model Year: 2019, Model line: WRANGLER UNLIMITED, Model: JEEP WRANGLER UNLIMITED 2019Pages: 348, PDF Size: 6.5 MB
Page 32 of 348
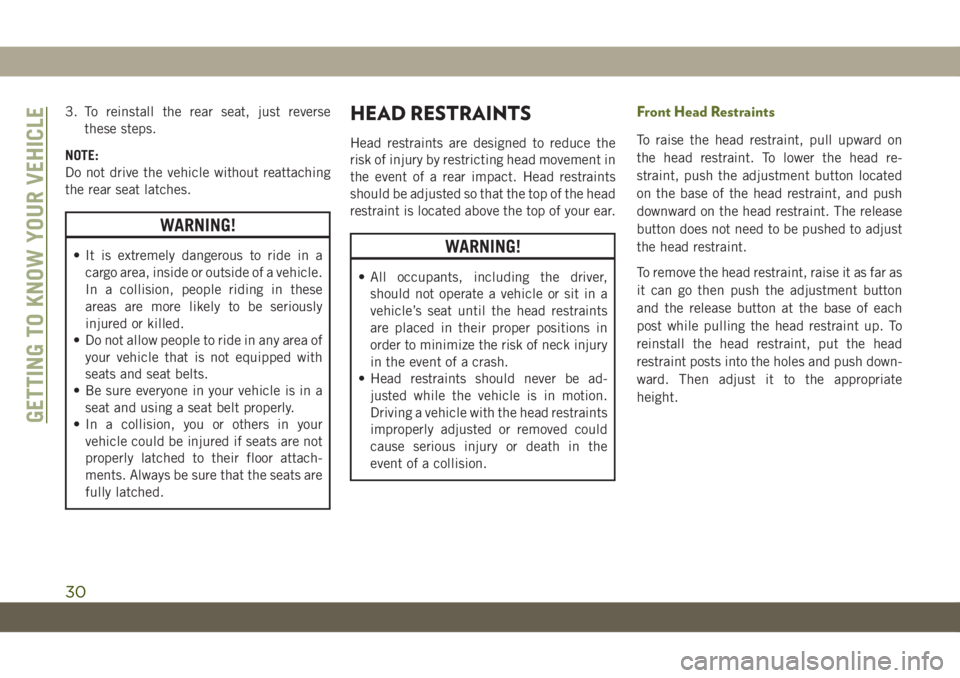
3. To reinstall the rear seat, just reverse
these steps.
NOTE:
Do not drive the vehicle without reattaching
the rear seat latches.
WARNING!
• It is extremely dangerous to ride in a
cargo area, inside or outside of a vehicle.
In a collision, people riding in these
areas are more likely to be seriously
injured or killed.
• Do not allow people to ride in any area of
your vehicle that is not equipped with
seats and seat belts.
• Be sure everyone in your vehicle is in a
seat and using a seat belt properly.
• In a collision, you or others in your
vehicle could be injured if seats are not
properly latched to their floor attach-
ments. Always be sure that the seats are
fully latched.
HEAD RESTRAINTS
Head restraints are designed to reduce the
risk of injury by restricting head movement in
the event of a rear impact. Head restraints
should be adjusted so that the top of the head
restraint is located above the top of your ear.
WARNING!
• All occupants, including the driver,
should not operate a vehicle or sit in a
vehicle’s seat until the head restraints
are placed in their proper positions in
order to minimize the risk of neck injury
in the event of a crash.
• Head restraints should never be ad-
justed while the vehicle is in motion.
Driving a vehicle with the head restraints
improperly adjusted or removed could
cause serious injury or death in the
event of a collision.
Front Head Restraints
To raise the head restraint, pull upward on
the head restraint. To lower the head re-
straint, push the adjustment button located
on the base of the head restraint, and push
downward on the head restraint. The release
button does not need to be pushed to adjust
the head restraint.
To remove the head restraint, raise it as far as
it can go then push the adjustment button
and the release button at the base of each
post while pulling the head restraint up. To
reinstall the head restraint, put the head
restraint posts into the holes and push down-
ward. Then adjust it to the appropriate
height.
GETTING TO KNOW YOUR VEHICLE
30
Page 107 of 348
Lap/Shoulder Belt Untwisting Procedure
Use the following procedure to untwist a
twisted lap/shoulder belt.
1. Position the latch plate as close as pos-
sible to the anchor point.
2. At about 6 to 12 inches (15 to 30 cm)
above the latch plate, grasp and twist the
seat belt webbing 180 degrees to create a
fold that begins immediately above the
latch plate.
3. Slide the latch plate upward over the
folded webbing. The folded webbing must
enter the slot at the top of the latch plate.
4. Continue to slide the latch plate up until it
clears the folded webbing and the seat
belt is no longer twisted.
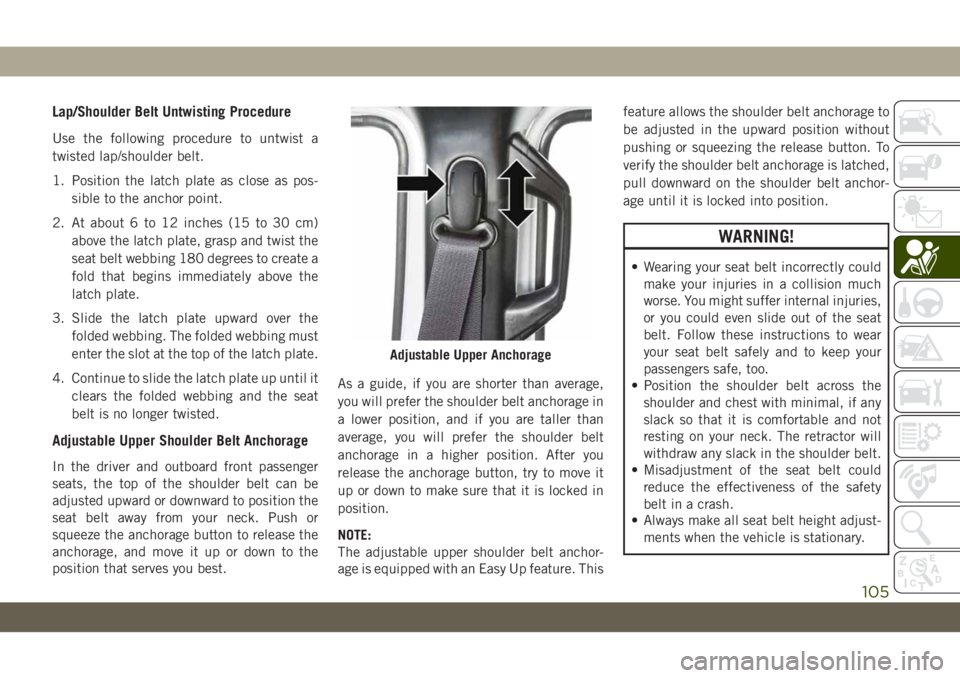
Adjustable Upper Shoulder Belt Anchorage
In the driver and outboard front passenger
seats, the top of the shoulder belt can be
adjusted upward or downward to position the
seat belt away from your neck. Push or
squeeze the anchorage button to release the
anchorage, and move it up or down to the
position that serves you best.As a guide, if you are shorter than average,
you will prefer the shoulder belt anchorage in
a lower position, and if you are taller than
average, you will prefer the shoulder belt
anchorage in a higher position. After you
release the anchorage button, try to move it
up or down to make sure that it is locked in
position.
NOTE:
The adjustable upper shoulder belt anchor-
age is equipped with an Easy Up feature. Thisfeature allows the shoulder belt anchorage to
be adjusted in the upward position without
pushing or squeezing the release button. To
verify the shoulder belt anchorage is latched,
pull downward on the shoulder belt anchor-
age until it is locked into position.
WARNING!
• Wearing your seat belt incorrectly could
make your injuries in a collision much
worse. You might suffer internal injuries,
or you could even slide out of the seat
belt. Follow these instructions to wear
your seat belt safely and to keep your
passengers safe, too.
• Position the shoulder belt across the
shoulder and chest with minimal, if any
slack so that it is comfortable and not
resting on your neck. The retractor will
withdraw any slack in the shoulder belt.
• Misadjustment of the seat belt could
reduce the effectiveness of the safety
belt in a crash.
• Always make all seat belt height adjust-
ments when the vehicle is stationary.
Adjustable Upper Anchorage
105
Page 130 of 348
Seat Belts For Older Children
Children over 1.50 m in height can wear seat
belts instead of using child restraints.
Use this simple 5-step test to decide whether
the seat belt properly fits the child or if they
should still use a Group 2 or Group 3 child
restraint to improve the fit of the seat belt:
1. Can the child sit all the way back against
the back of the vehicle seat?
2. Do the child’s knees bend comfortably
over the front of the vehicle seat – while
the child is still sitting all the way back?
3. Does the shoulder belt cross the child’s
shoulder between the neck and arm?
4. Is the lap part of the belt as low as
possible, touching the child’s thighs and
not the stomach?
5. Can the child stay seated like this for the
whole trip?
If the answer to any of these questions was
“no,” then the child still needs to use a Group
2 or 3 child restraint in this vehicle. If the
child is using the lap/shoulder belt, check
belt fit periodically and make sure the seatbelt buckle is latched. A child’s squirming or
slouching can move the belt out of position.
If the shoulder belt contacts the face or neck,
move the child closer to the center of the
vehicle, or use a booster seat to position the
seat belt on the child correctly.
WARNING!
Never allow a child to put the shoulder belt
under an arm or behind their back. In a
crash, the shoulder belt will not protect a
child properly, which may result in serious
injury or death. A child must always wear
both the lap and shoulder portions of the
seat belt correctly.
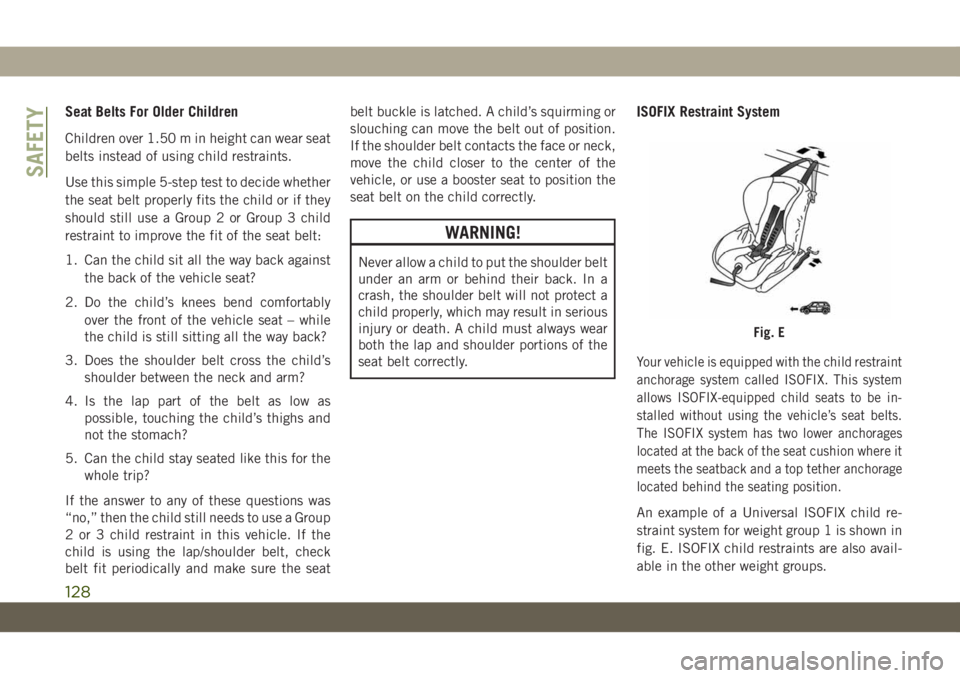
ISOFIX Restraint System
Your vehicle is equipped with the child restraint
anchorage system called ISOFIX. This system
allows ISOFIX-equipped child seats to be in-
stalled without using the vehicle’s seat belts.
The ISOFIX system has two lower anchorages
located at the back of the seat cushion where it
meets the seatback and a top tether anchorage
located behind the seating position.
An example of a Universal ISOFIX child re-
straint system for weight group 1 is shown in
fig. E. ISOFIX child restraints are also avail-
able in the other weight groups.
Fig. E
SAFETY
128
Page 138 of 348
These child restraint systems, built and type-
approved according to the i-Size (ECE R129)
standard, ensure better safety conditions to
carry children on board a vehicle:
• The child must be transported rearward
facing until 15 months;
• Child restraint system protection is in-
creased in the event of a side collision;
• The use of the ISOFIX system is promoted
to avoid faulty installation of the child re-
straint system;
• Efficiency in the choice of the child re-
straint system, which isn't made according
to weight anymore but according to the
child's height, is increased;
• Compatibility between the vehicle seats
and the child restraint systems is better:
the i-Size child restraint systems can be
considered as "Super ISOFIX"; this means
that they can be perfectly fitted in type-
approved i-Size seats, but can also be fitted
in ISOFIX (ECE R44) type-approved seats.NOTE:
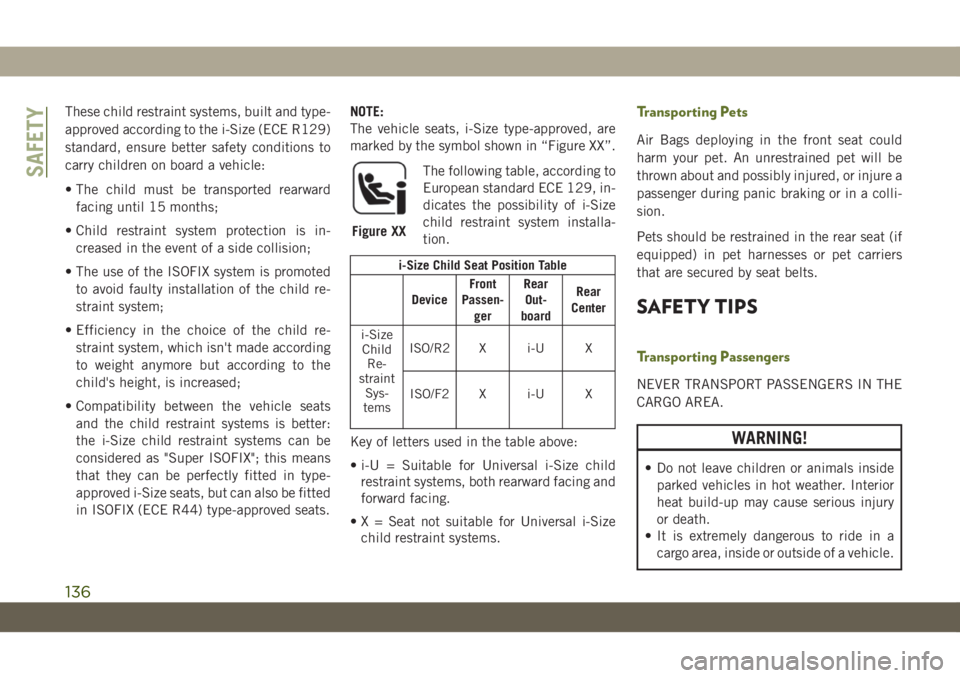
The vehicle seats, i-Size type-approved, are
marked by the symbol shown in “Figure XX”.
The following table, according to
European standard ECE 129, in-
dicates the possibility of i-Size
child restraint system installa-
tion.
i-Size Child Seat Position Table
DeviceFront
Passen-
gerRear
Out-
boardRear
Center
i-Size
Child
Re-
straint
Sys-
temsISO/R2 X i-U X
ISO/F2 X i-U X
Key of letters used in the table above:
• i-U = Suitable for Universal i-Size child
restraint systems, both rearward facing and
forward facing.
• X = Seat not suitable for Universal i-Size
child restraint systems.
Transporting Pets
Air Bags deploying in the front seat could
harm your pet. An unrestrained pet will be
thrown about and possibly injured, or injure a
passenger during panic braking or in a colli-
sion.
Pets should be restrained in the rear seat (if
equipped) in pet harnesses or pet carriers
that are secured by seat belts.
SAFETY TIPS
Transporting Passengers
NEVER TRANSPORT PASSENGERS IN THE
CARGO AREA.
WARNING!
• Do not leave children or animals inside
parked vehicles in hot weather. Interior
heat build-up may cause serious injury
or death.
• It is extremely dangerous to ride in a
cargo area, inside or outside of a vehicle.
Figure XX
SAFETY
136
Page 159 of 348
Push the SWAY BAR switch to activate the
system. Push the switch again to deactivate
the system. The “Sway Bar Indicator Light”
(located in the instrument cluster) will illumi-
nate when the bar is disconnected. The
“Sway Bar Indicator Light” will flash during
activation transition, or when activation con-
ditions are not met. The stabilizer/sway bar
should remain in on-road mode during nor-
mal driving conditions.
WARNING!
Ensure the stabilizer/sway bar is recon-
nected before driving on hard surfaced
roads or at speeds above 18 mph
(29 km/h); a disconnected stabilizer/sway
bar may contribute to the loss of vehicle
control, which could result in serious in-
jury. Under certain circumstances, the
front stabilizer/sway bar enhances vehicle
stability and assists with vehicle control.
The system monitors vehicle speed and
will attempt to reconnect the stabilizer/
sway bar at speeds over 18 mph
(29 km/h). This is indicated by a flashing
or solid “Sway Bar Indicator Light.” Once
WARNING!
vehicle speed is reduced below 14 mph
(22 km/h), the system will once again
attempt to return to off-road mode.
To disconnect the stabilizer/sway bar, shift to
either 4H or 4L and push the SWAY BAR
switch to obtain the off-road position. Refer
to “Four-Wheel Drive Operation” in this sec-
tion for further information. The “Sway Bar
Indicator Light” will flash until the stabilizer/
sway bar has been fully disconnected.
NOTE:
The stabilizer/sway bar may be torque locked
due to left and right suspension height differ-
ences. This condition is due to driving sur-
face differences or vehicle loading. In order
for the stabilizer/sway bar to disconnect/
reconnect, the right and left halves of the bar
must be aligned. This alignment may require
that the vehicle be driven onto level ground or
rocked from side to side.
To return to on-road mode, push the SWAY
BAR switch again.
WARNING!
If the stabilizer/sway bar will not return to
on-road mode, the “Sway Bar Indicator
Light” will flash in the instrument cluster
and vehicle stability may be reduced. Do
not attempt to drive the vehicle over
18 mph (29 km/h). Driving faster than
18 mph (29 km/h) with a disconnected
stabilizer/sway bar may contribute to the
loss of vehicle control, which could result
in serious injury.
STOP/START SYSTEM —
AUTOMATIC
TRANSMISSION (IF
EQUIPPED)
The Stop/Start function is developed to re-
duce fuel consumption. The system will stop
the engine automatically during a vehicle
stop if the required conditions are met. Re-
leasing the brake pedal or pressing the accel-
erator pedal will automatically re-start the
engine.
157
Page 249 of 348
Tighten the lug nuts/bolts in a star pattern
until each nut/bolt has been tightened twice.
Ensure that the socket is fully engaged on the
lug nut/bolt (do not insert it halfway).After 25 miles (40 km), check the lug nut/
bolt torque to be sure that all the lug nuts/
bolts are properly seated against the wheel.
WARNING!
To avoid the risk of forcing the vehicle off
the jack, do not tighten the lug nuts/bolts
fully until the vehicle has been lowered.
Failure to follow this warning may result in
personal injury.
DIMENSIONS
Contour Dimension / inches (mm)
Length Width Height Wheelbase
Wrangler Sport 170.6 (4334) 74.6 (1894)71.7 (1821) (*) / 73.1
(1858) (**)96.8 (2459)
Wrangler Unlimited Sport 192.2 (4882) 74.6 (1894)72.0 (1828) (*) / 74.1
(1881) (**)118.4 (3008)
Wrangler Sahara 170.6 (4334) 74.6 (1894)72.4 (1839) (*) / 73.9
(1878) (**)96.8 (2459)
Wrangler Unlimited Sahara 192.2 (4882) 74.6 (1894)72.4 (1838) (*) / 74.4
(1891) (**)118.4 (3008)
Torque Patterns
247