ECO mode JEEP WRANGLER UNLIMITED 2020 Owner handbook (in English)
[x] Cancel search | Manufacturer: JEEP, Model Year: 2020, Model line: WRANGLER UNLIMITED, Model: JEEP WRANGLER UNLIMITED 2020Pages: 330, PDF Size: 9.16 MB
Page 141 of 330
139
NOTE:
The system will automatically time out and
the ignition will cycle to the OFF mode after
30 minutes of inactivity if the ignition is left
in the ACC or RUN (engine not running)
mode and the transmission is in PARK.
ENGINE START/STOP Button Functions ŌĆö With
DriverŌĆÖs Foot OFF The Brake Pedal (In PARK Or
NEUTRAL Position)
The ENGINE START/STOP button operates
similar to an ignition switch. It has three
modes: OFF, ACC, and RUN. To change the
ignition modes without starting the vehicle
and use the accessories, follow these steps:
1. Starting with the ignition in the OFF mode,
2. Push the ENGINE START/STOP button onceto place the ignition to the ACC mode (instru -
ment cluster will display ŌĆ£ACCŌĆØ),
3. Push the ENGINE START/STOP button a second time to place the ignition to the
RUN mode (instrument cluster will
display ŌĆ£ON/RUNŌĆØ),
4. Push the ENGINE START/STOP button a third time to return the ignition to the
OFF mode (instrument cluster will
display ŌĆ£OFFŌĆØ).AutoPark
AutoPark is a supplemental feature to assist
in placing the vehicle in PARK should the
situations on the following pages occur. It is
a back up system and should not be relied
upon as the primary method by which the
driver shifts the vehicle into PARK.
The conditions under which AutoPark will
engage are outlined on the following pages. If the vehicle is not in PARK and the driver turns
off the engine, the vehicle may AutoPark.
AutoPark will engage when all of these
conditions are met:
’ü»Vehicle is equipped with an 8-speed trans-
mission
’ü»DriverŌĆÖs door is ajar or in conditions where
driver door is removed an additional
trigger would be if the driver is off the seat
(seat pad sensor detects driver missing).
’ü»Vehicle is not in PARK
’ü»Vehicle speed is 0 mph (0 km/h)
’ü»Ignition switched from RUN to OFF
NOTE:
For Keyless Enter-N-Go equipped vehicles,
The engine will turn off and the ignition
switch will change to ACC mode. After
30 minutes the ignition switches to OFF
automatically, unless the driver turns the
ignition switch OFF.
WARNING!
’ü»Driver inattention could lead to failure to
place the vehicle in PARK. ALWAYS DO
A VISUAL CHECK that your vehicle is in
PARK by verifying that a solid (not
blinking) ŌĆ£PŌĆØ is indicated in the instru -
ment cluster display and on the gear
selector. If the "P" indicator is blinking,
your vehicle is not in PARK. As an added
precaution, always apply the parking
brake when exiting the vehicle.
’ü»AutoPark is a supplemental feature. It is
not designed to replace the need to shift
your vehicle into PARK. It is a back up
system and should not be relied upon as
the primary method by which the driver
shifts the vehicle into PARK.
2020_JEEP_JL_WRANGLER_UG_RHD_UK.book Page 139
Page 143 of 330
141
NORMAL STARTING ŌĆö
DIESEL ENGINE
1. The gear selector must be in theNEUTRAL or PARK position before you
can start the engine.
2. Place the ignition in the ON position.
3. Watch for the ŌĆ£Wait To Start LightŌĆØ in the instrument cluster. Refer to ŌĆ£Instrument
ClusterŌĆØ in ŌĆ£Getting To Know Your Instru -
ment PanelŌĆØ for further review. It will
glow for two to ten seconds or more,
depending on engine temperature. When
the ŌĆ£Wait To Start LightŌĆØ goes out, the
engine is ready to start.
4. After the engine starts, allow it to idle for approximately 30 seconds before driving.
This allows oil to circulate and lubricate
the turbocharger. Tip Start Feature:
5.
Do not press the accelerator. Cycle the igni -
tion to the START position and then release
it. The starter motor will continue to run,
and it will automatically disengage when
the engine is running. If the engine fails to
start, the starter will disengage automati -
cally in 25 seconds. If this occurs, cycle
the ignition to the LOCK position, wait 25
to 30 seconds, then repeat the ŌĆ£Normal
StartingŌĆØ procedure.
NOTE:
The starter motor may run up to 30 seconds
in very cold conditions until the engine is
started. The starter can be disengaged by
cycling the ignition to the OFF position, if
required.
Diesel Engine Warm-Up
Avoid full throttle operation when the engine
is cold. When starting a cold engine, bring
the engine up to operating speed slowly to
allow the oil pressure to stabilize as the
engine warms up.
NOTE:
High-speed, no-load running of a cold engine
can result in excessive white smoke and poor
engine performance. No-load engine speeds
should be kept under 1,200 RPM during the
warm-up period, especially in cold, ambient
temperature conditions.
If temperatures are below 32┬░F (0┬░C),
operate the engine at moderate speeds for
5 minutes before full loads are applied.
2020_JEEP_JL_WRANGLER_UG_RHD_UK.book Page 141
Page 145 of 330
143
(Continued)
ENGINE BREAK-IN
RECOMMENDATIONS
A long break-in period is not required for the
engine and drivetrain (transmission and axle)
in your vehicle.
Drive moderately during the first 300 miles
(500 km). After the initial 60 miles
(100 km), speeds up to 50 or 55 mph (80 or
90 km/h) are desirable.
While cruising, brief full-throttle accelera-
tion within the limits of local traffic laws
contributes to a good break-in. Wide-open
throttle acceleration in low gear can be detri -
mental and should be avoided.
The engine oil installed in the engine at the
factory is a high-quality energy conserving
type lubricant. Oil changes should be consis -
tent with anticipated climate conditions
under which vehicle operations will occur.
For the recommended viscosity and quality
grades, refer to ŌĆ£Fluids And LubricantsŌĆØ in
ŌĆ£Technical SpecificationsŌĆØ. NOTE:
A new engine may consume some oil during
its first few thousand miles (kilometers) of
operation. This should be considered a
normal part of the break-in and not inter
-
preted as a problem.
AUTOMATIC
TRANSMISSION
NOTE:
You must press and hold the brake pedal
while shifting out of PARK. CAUTION!
Never use Non-Detergent Oil or Straight
Mineral Oil in the engine or damage may
result.
CAUTION!
’ü»Shift into or out of PARK or REVERSE
only after the vehicle has come to a
complete stop.
’ü»Do not shift between PARK, REVERSE,
NEUTRAL, or DRIVE when the engine is
above idle speed.
’ü»Before shifting into any gear, make sure
your foot is firmly pressing the brake
pedal.
WARNING!
’ü»Never use the PARK position as a substi -
tute for the parking brake. Always apply
the parking brake fully when exiting the
vehicle to guard against vehicle move-
ment and possible injury or damage.
’ü»Your vehicle could move and injure you
and others if it is not in PARK. Check by
trying to move the transmission gear
selector out of PARK with the brake
pedal released. Make sure the transmis-
sion is in PARK before exiting the
vehicle.
’ü»The transmission may not engage PARK
if the vehicle is moving. Always bring the
vehicle to a complete stop before
shifting to PARK, and verify that the
transmission gear position indicator
solidly indicates PARK (P) without
blinking. Ensure that the vehicle is
completely stopped, and the PARK posi -
tion is properly indicated, before exiting
the vehicle.
2020_JEEP_JL_WRANGLER_UG_RHD_UK.book Page 143
Page 148 of 330
STARTING AND OPERATING
146
’ü»The transmission will automatically down-
shift to FIRST gear when coming to a stop.
After a stop, the driver should manually
upshift (+) the transmission as the vehicle
is accelerated.
’ü»You can start out, from a stop, in FIRST or
SECOND gear (or THIRD gear, in 4L
range). Tapping (+) (at a stop) will allow
starting in SECOND gear. Starting out in
SECOND or THIRD gear can be helpful in
snowy or icy conditions.
’ü»If a requested downshift would cause the
engine to over-speed, that shift will not
occur.
’ü»The system will ignore attempts to upshift
at too low of a vehicle speed.
’ü»Holding the gear selector in the (-) posi -
tion will downshift the transmission to the
lowest gear possible at the current speed.
’ü»Transmission shifting will be more notice-
able when AutoStick is enabled.
’ü»The system may revert to automatic shift
mode if a fault or overheat condition is
detected. NOTE:
When Hill Descent Control is enabled, Auto
-
Stick is not active.
To disengage AutoStick mode, return the
gear selector to the DRIVE position. You can
shift in or out of the AutoStick position at any
time without taking your foot off the acceler -
ator pedal.
FOURŌĆōWHEEL DRIVE
OPERATION
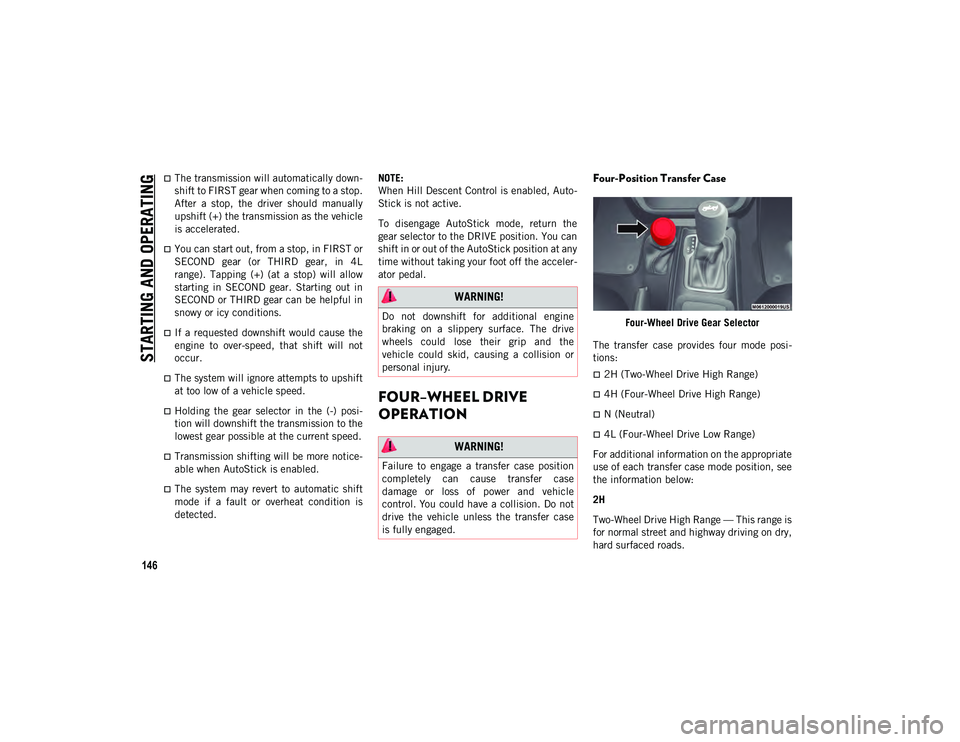
Four-Position Transfer Case
Four-Wheel Drive Gear Selector
The transfer case provides four mode posi -
tions:
’ü»2H (Two-Wheel Drive High Range)
’ü»4H (Four-Wheel Drive High Range)
’ü»N (Neutral)
’ü»4L (Four-Wheel Drive Low Range)
For additional information on the appropriate
use of each transfer case mode position, see
the information below:
2H
Two-Wheel Drive High Range ŌĆö This range is
for normal street and highway driving on dry,
hard surfaced roads.
WARNING!
Do not downshift for additional engine
braking on a slippery surface. The drive
wheels could lose their grip and the
vehicle could skid, causing a collision or
personal injury.
WARNING!
Failure to engage a transfer case position
completely can cause transfer case
damage or loss of power and vehicle
control. You could have a collision. Do not
drive the vehicle unless the transfer case
is fully engaged.
2020_JEEP_JL_WRANGLER_UG_RHD_UK.book Page 146
Page 151 of 330
149
For additional information on the appropriate
use of each transfer case mode position, see
the information below:
2H
Two-Wheel Drive High Range ŌĆö This range is
for normal street and highway driving on dry,
hard surfaced roads.
4H AUTO
Four-Wheel Drive Auto High Range ŌĆö This
range sends power to the front wheels. The
four-wheel drive system will be automatically
engaged when the vehicle senses a loss of
traction. Additional traction for varying road
conditions.
4H PT
Four-Wheel Drive Part Time High Range ŌĆö
This range maximizes torque to the front
driveshaft, forcing the front and rear wheels
to rotate at the same speed. This range
provides additional traction for loose, slip-
pery road surfaces only. NEUTRAL (N)
Neutral ŌĆö This range disengages both the
front and rear driveshafts from the power
-
train. To be used for flat towing behind
another vehicle.
Refer to ŌĆ£Recreational TowingŌĆØ in this
chapter for further information. 4L
Four-Wheel Drive Low Range ŌĆö This range
provides low speed four-wheel drive. It maxi
-
mizes torque to the front driveshaft, forcing
the front and rear wheels to rotate at the
same speed. This range provides additional
traction and maximum pulling power for
loose, slippery road surfaces only. Do not
exceed 25 mph (40 km/h).
This transfer case is designed to be driven in
the 2H mode or 4H AUTO mode for normal
street and highway conditions on dry hard
surfaced roads. Driving the vehicle in 2H will
have greater fuel economy benefits as the
front axle is not engaged in 2H.
For variable driving conditions, the 4H AUTO
mode can be used. In this mode, the front
axle is engaged, but the vehicle's power is
sent to the rear wheels. Four-wheel drive will
be automatically engaged when the vehicle
senses a loss of traction. Because the front
axle is engaged, this mode will result in lower
fuel economy than the 2H mode.
WARNING!
You or others could be injured or killed if
you leave the vehicle unattended with the
transfer case in the NEUTRAL (N) position
without first fully engaging the parking
brake. The transfer case NEUTRAL (N)
position disengages both the front and rear
driveshafts from the powertrain, and will
allow the vehicle to roll, even if the
automatic transmission is in PARK. The
parking brake should always be applied
when the driver is not in the vehicle.
2020_JEEP_JL_WRANGLER_UG_RHD_UK.book Page 149
Page 154 of 330
STARTING AND OPERATING
152
(the ŌĆ£FRONT + REARŌĆØ will illuminate).
When the rear axle is locked, pushing the
bottom of switch again will lock or unlock the
front axle.
NOTE:
The indicator lights will flash until the axles
are fully locked or unlocked.
To unlock the axles, push the AXLE LOCK
OFF button.
Axle lock will disengage if the vehicle is
taken out of 4L (Low) range, or the ignition
switch is turned to the OFF position.
The axle lock disengages at speeds above
30 mph (48 km/h), and will automaticallyre-lock once vehicle speed is less than
10 mph (16 km/h).
Electronic Sway Bar Disconnect ŌĆö If
Equipped
Your vehicle may be equipped with an elec -
tronic disconnecting stabilizer/sway bar. This
system allows greater front suspension travel
in off-road situations. This system is controlled by the SWAY BAR
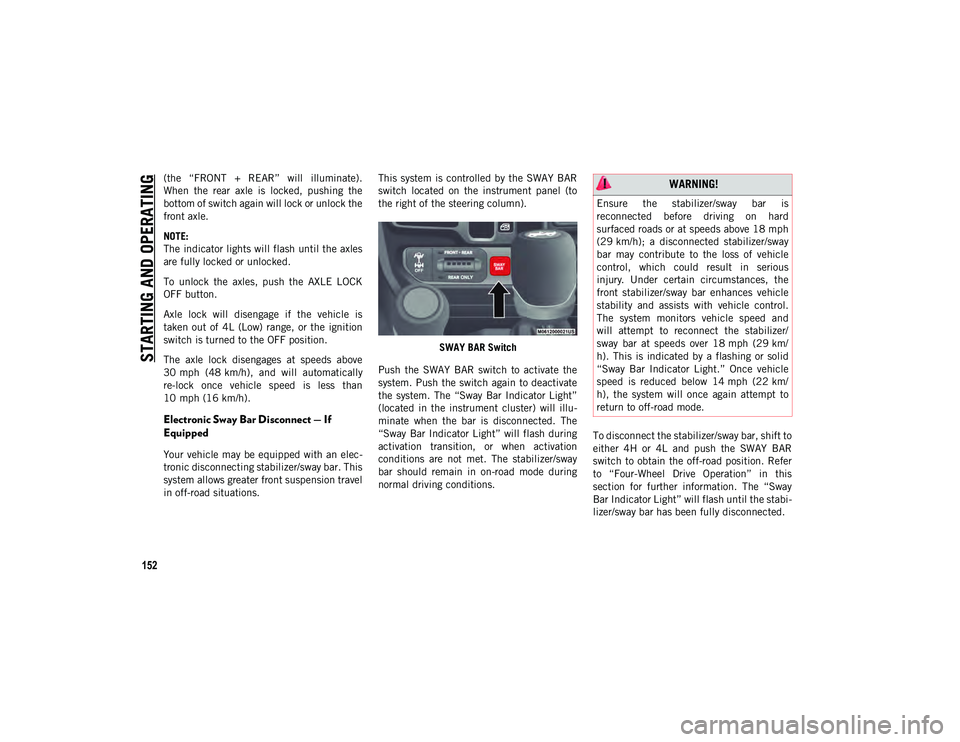
switch located on the instrument panel (to
the right of the steering column).
SWAY BAR Switch
Push the SWAY BAR switch to activate the
system. Push the switch again to deactivate
the system. The ŌĆ£Sway Bar Indicator LightŌĆØ
(located in the instrument cluster) will illu -
minate when the bar is disconnected. The
ŌĆ£Sway Bar Indicator LightŌĆØ will flash during
activation transition, or when activation
conditions are not met. The stabilizer/sway
bar should remain in on-road mode during
normal driving conditions. To disconnect the stabilizer/sway bar, shift to
either 4H or 4L and push the SWAY BAR
switch to obtain the off-road position. Refer
to ŌĆ£Four-Wheel Drive OperationŌĆØ in this
section for further information. The ŌĆ£Sway
Bar Indicator LightŌĆØ will flash until the stabi
-
lizer/sway bar has been fully disconnected.
WARNING!
Ensure the stabilizer/sway bar is
reconnected before driving on hard
surfaced roads or at speeds above 18 mph
(29 km/h); a disconnected stabilizer/sway
bar may contribute to the loss of vehicle
control, which could result in serious
injury. Under certain circumstances, the
front stabilizer/sway bar enhances vehicle
stability and assists with vehicle control.
The system monitors vehicle speed and
will attempt to reconnect the stabilizer/
sway bar at speeds over 18 mph (29 km/
h). This is indicated by a flashing or solid
ŌĆ£Sway Bar Indicator Light.ŌĆØ Once vehicle
speed is reduced below 14 mph (22 km/
h), the system will once again attempt to
return to off-road mode.
2020_JEEP_JL_WRANGLER_UG_RHD_UK.book Page 152
Page 155 of 330
153
NOTE:
The stabilizer/sway bar may be torque locked
due to left and right suspension height
differences. This condition is due to driving
surface differences or vehicle loading. In
order for the stabilizer/sway bar to discon-
nect/reconnect, the right and left halves of
the bar must be aligned. This alignment may
require that the vehicle be driven onto level
ground or rocked from side to side.
To return to on-road mode, push the SWAY
BAR switch again.
STOP/START SYSTEM ŌĆö
AUTOMATIC TRANSMISSION
(IF EQUIPPED)
The Stop/Start function is developed to
reduce fuel consumption. The system will
stop the engine automatically during a
vehicle stop if the required conditions are
met. Releasing the brake pedal or pressing
the accelerator pedal will automatically
re-start the engine.
Engine Stop/Start (ESS) vehicles have been
upgraded with a heavy duty starter,
enhanced battery, and other upgraded
engine parts, to handle the additional engine
starts.
NOTE:
It is recommended that the Stop/Start
System be disabled during off-road use. Secondary Battery
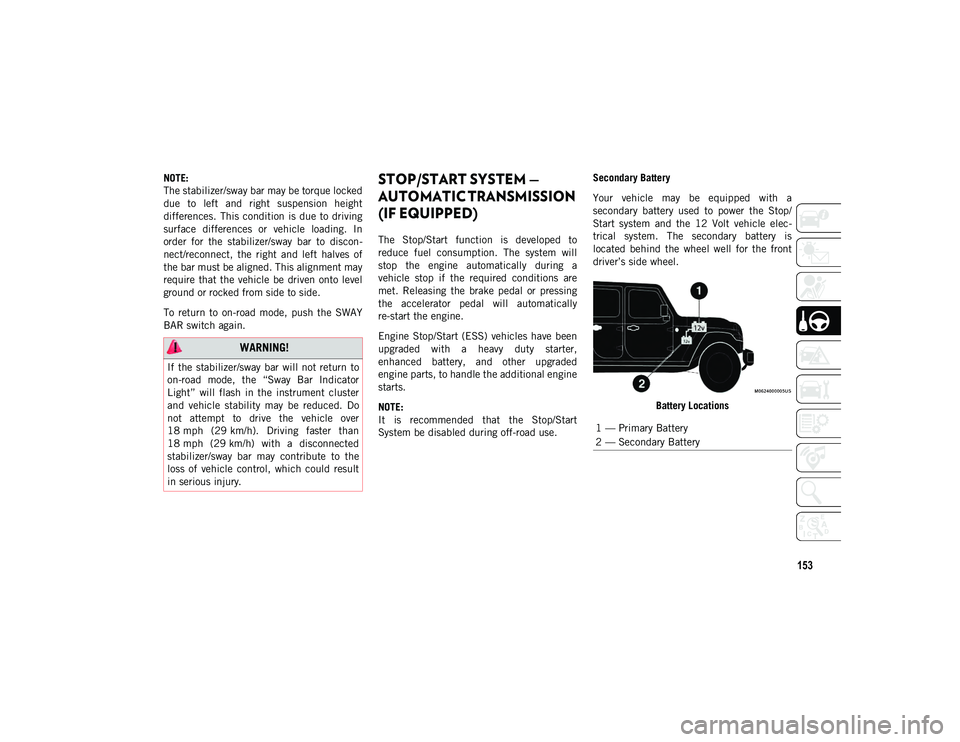
Your vehicle may be equipped with a
secondary battery used to power the Stop/
Start system and the 12 Volt vehicle elec
-
trical system. The secondary battery is
located behind the wheel well for the front
driverŌĆÖs side wheel.
Battery Locations
WARNING!
If the stabilizer/sway bar will not return to
on-road mode, the ŌĆ£Sway Bar Indicator
LightŌĆØ will flash in the instrument cluster
and vehicle stability may be reduced. Do
not attempt to drive the vehicle over
18 mph (29 km/h). Driving faster than
18 mph (29 km/h) with a disconnected
stabilizer/sway bar may contribute to the
loss of vehicle control, which could result
in serious injury.
1 ŌĆö Primary Battery
2 ŌĆö Secondary Battery
2020_JEEP_JL_WRANGLER_UG_RHD_UK.book Page 153
Page 162 of 330
STARTING AND OPERATING
160
Metric Speed (km/h)
’ü»Pushing the SET (+) button once will
result in a 1 km/h increase in set speed.
Each subsequent tap of the button results
in an increase of 1 km/h.
’ü»If the button is continually pushed, the set
speed will continue to increase in 10 km/
h increments until the button is released.
The increase in set speed is reflected in
the instrument cluster display.
To Decrease Speed
While ACC is set, the set speed can be
decreased by pushing the SET (-) button.
The driver's preferred units can be selected
through the instrument panel settings. Refer
to ŌĆ£Getting To Know Your Instrument PanelŌĆØ
in the OwnerŌĆÖs Manual for more information.
The speed increment shown is dependent on
the chosen speed unit of U.S. (mph) or
Metric (km/h):
U.S. Speed (mph)
’ü»Pushing the SET (-) button once will result
in a 1 mph decrease in set speed. Each
subsequent tap of the button results in a
decrease of 1 mph.
’ü»If the button is continually pushed, the set
speed will continue to decrease in 5 mph
decrements until the button is released.
The decrease in set speed is reflected in
the instrument cluster display.
Metric Speed (km/h)
’ü»Pushing the SET (-) button once will result
in a 1 km/h decrease in set speed. Each
subsequent tap of the button results in a
decrease of 1 km/h.
’ü»If the button is continually pushed, the set
speed will continue to decrease in 10 km/
h decrements until the button is released.
The decrease in set speed is reflected in
the instrument cluster display.
NOTE:
’ü»When you override and push the SET (+)
button or SET (-) buttons, the new set
speed will be the current speed of the
vehicle.
’ü»When you use the SET (-) button to decel -
erate, if the engineŌĆÖs braking power does
not slow the vehicle sufficiently to reach
the set speed, the brake system will auto-
matically slow the vehicle.
’ü»The ACC system applies the brake down to
a full stop when following a target vehicle.
If an ACC host vehicle follows a target
vehicle to a standstill, the host vehicle will
release the vehicle brakes two seconds
after coming to a full stop.
’ü»The ACC system maintains set speed when
driving uphill and downhill. However, a
slight speed change on moderate hills is
normal. In addition, downshifting may
occur while climbing uphill or descending
downhill. This is normal operation and
necessary to maintain set speed. When
driving uphill and downhill, the ACC
system will cancel if the braking tempera-
ture exceeds normal range (overheated).
Setting The Following Distance In ACC
The specified following distance for ACC can
be set by varying the distance setting
between four bars (longest), three bars
(long), two bars (medium) and one bar
(short). Using this distance setting and the
vehicle speed, ACC calculates and sets the
distance to the vehicle ahead. This distance
setting displays in the instrument cluster
display.
2020_JEEP_JL_WRANGLER_UG_RHD_UK.book Page 160
Page 170 of 330
STARTING AND OPERATING
168
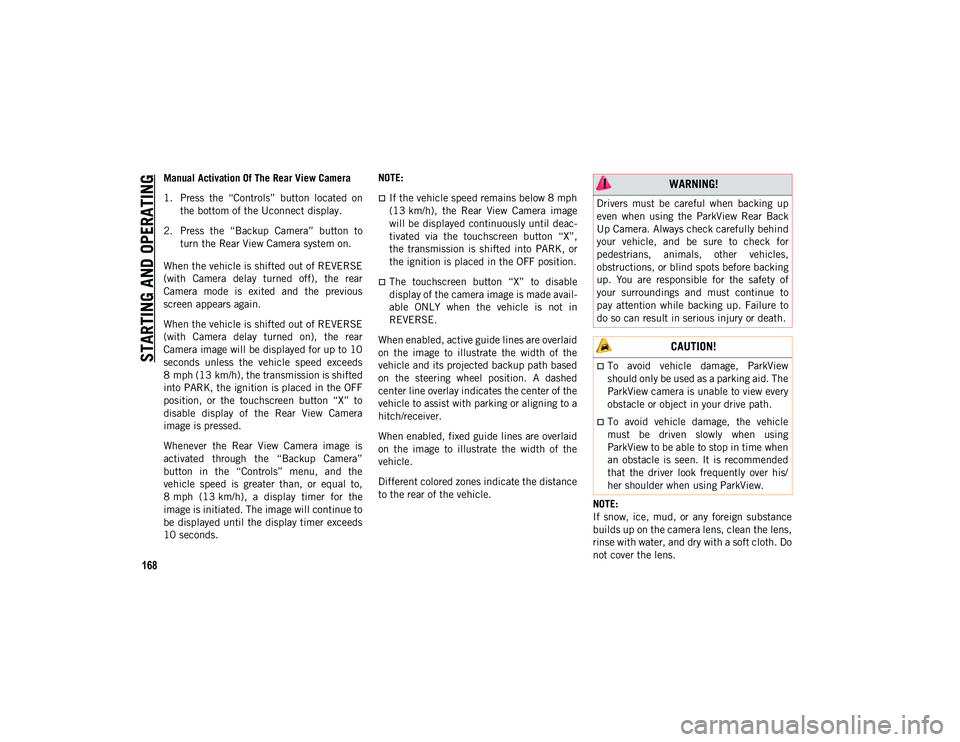
Manual Activation Of The Rear View Camera
1. Press the ŌĆ£ControlsŌĆØ button located onthe bottom of the Uconnect display.
2. Press the ŌĆ£Backup CameraŌĆØ button to turn the Rear View Camera system on.
When the vehicle is shifted out of REVERSE
(with Camera delay turned off), the rear
Camera mode is exited and the previous
screen appears again.
When the vehicle is shifted out of REVERSE
(with Camera delay turned on), the rear
Camera image will be displayed for up to 10
seconds unless the vehicle speed exceeds
8 mph (13 km/h), the transmission is shifted
into PARK, the ignition is placed in the OFF
position, or the touchscreen button ŌĆ£XŌĆØ to
disable display of the Rear View Camera
image is pressed.
Whenever the Rear View Camera image is
activated through the ŌĆ£Backup CameraŌĆØ
button in the ŌĆ£ControlsŌĆØ menu, and the
vehicle speed is greater than, or equal to,
8 mph (13 km/h), a display timer for the
image is initiated. The image will continue to
be displayed until the display timer exceeds
10 seconds. NOTE:
’ü»If the vehicle speed remains below 8 mph
(13 km/h), the Rear View Camera image
will be displayed continuously until deac-
tivated via the touchscreen button ŌĆ£XŌĆØ,
the transmission is shifted into PARK, or
the ignition is placed in the OFF position.
’ü»The touchscreen button ŌĆ£XŌĆØ to disable
display of the camera image is made avail
-
able ONLY when the vehicle is not in
REVERSE.
When enabled, active guide lines are overlaid
on the image to illustrate the width of the
vehicle and its projected backup path based
on the steering wheel position. A dashed
center line overlay indicates the center of the
vehicle to assist with parking or aligning to a
hitch/receiver.
When enabled, fixed guide lines are overlaid
on the image to illustrate the width of the
vehicle.
Different colored zones indicate the distance
to the rear of the vehicle. NOTE:
If snow, ice, mud, or any foreign substance
builds up on the camera lens, clean the lens,
rinse with water, and dry with a soft cloth. Do
not cover the lens.
WARNING!
Drivers must be careful when backing up
even when using the ParkView Rear Back
Up Camera. Always check carefully behind
your vehicle, and be sure to check for
pedestrians, animals, other vehicles,
obstructions, or blind spots before backing
up. You are responsible for the safety of
your surroundings and must continue to
pay attention while backing up. Failure to
do so can result in serious injury or death.
CAUTION!
’ü»To avoid vehicle damage, ParkView
should only be used as a parking aid. The
ParkView camera is unable to view every
obstacle or object in your drive path.
’ü»To avoid vehicle damage, the vehicle
must be driven slowly when using
ParkView to be able to stop in time when
an obstacle is seen. It is recommended
that the driver look frequently over his/
her shoulder when using ParkView.
2020_JEEP_JL_WRANGLER_UG_RHD_UK.book Page 168
Page 177 of 330
175
Curb Weight
The curb weight of a vehicle is defined as the
total weight of the vehicle with all fluids,
including vehicle fuel, at full capacity condi-
tions, and with no occupants or cargo loaded
into the vehicle. The front and rear curb
weight values are determined by weighing
your vehicle on a commercial scale before
any occupants or cargo are added.
Loading
The actual total weight and the weight of the
front and rear of your vehicle at the ground
can best be determined by weighing it when
it is loaded and ready for operation. The entire vehicle should first be weighed on
a commercial scale to ensure that the GVWR
has not been exceeded. The weight on the
front and rear of the vehicle should then be
determined separately to be sure that the
load is properly distributed over the front and
rear axle. Weighing the vehicle may show
that the GAWR of either the front or rear
axles has been exceeded but the total load is
within the specified GVWR. If so, weight
must be shifted from front to rear or rear to
front as appropriate until the specified
weight limitations are met. Store the heavier
items down low and be sure that the weight
is distributed equally. Stow all loose items
securely before driving.Improper weight distributions can have an
adverse effect on the way your vehicle steers
and handles and the way the brakes operate.
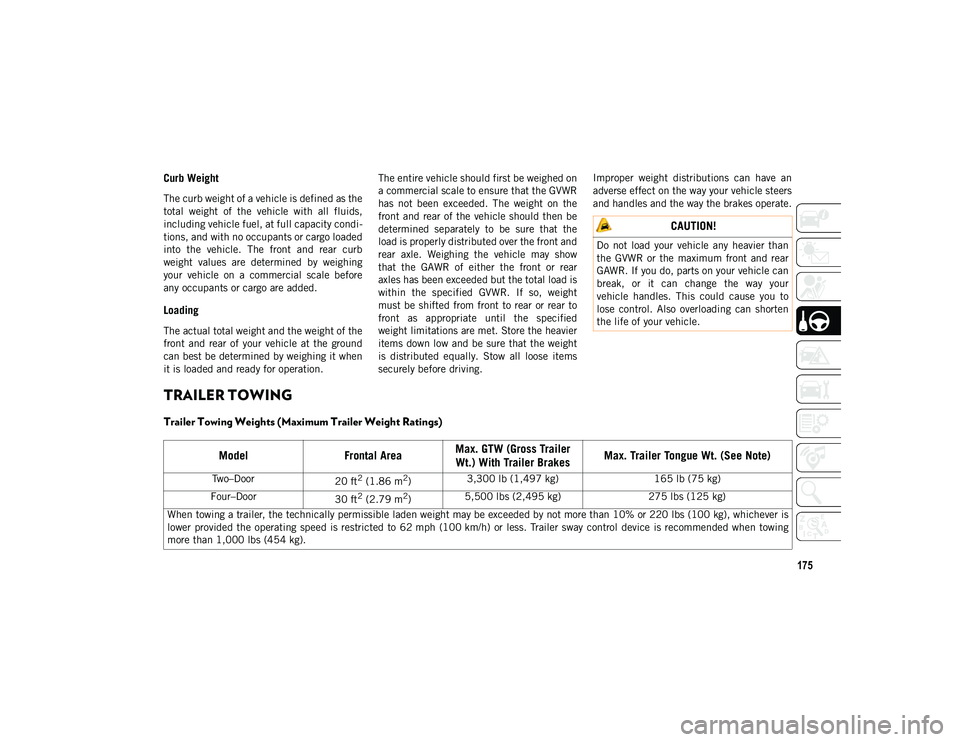
TRAILER TOWING
Trailer Towing Weights (Maximum Trailer Weight Ratings)
CAUTION!
Do not load your vehicle any heavier than
the GVWR or the maximum front and rear
GAWR. If you do, parts on your vehicle can
break, or it can change the way your
vehicle handles. This could cause you to
lose control. Also overloading can shorten
the life of your vehicle.
Model
Frontal AreaMax. GTW (Gross Trailer
Wt.) With Trailer Brakes Max. Trailer Tongue Wt. (See Note)
TwoŌĆōDoor
20 ft2 (1.86 m2)3,300 lb (1,497 kg)
165 lb (75 kg)
FourŌĆōDoor 30 ft
2 (2.79 m2)5,500 lbs (2,495 kg)
275 lbs (125 kg)
When towing a trailer, the technically permissible laden weight may be exceeded by not more than 10% or 220 lbs (100 kg), whichever is
lower provided the operating speed is restricted to 62 mph (100 km/h) or less. Trailer sway control device is recommended when towing
more than 1,000 lbs (454 kg).
2020_JEEP_JL_WRANGLER_UG_RHD_UK.book Page 175