instrument cluster JEEP WRANGLER UNLIMITED 2021 Owner handbook (in English)
[x] Cancel search | Manufacturer: JEEP, Model Year: 2021, Model line: WRANGLER UNLIMITED, Model: JEEP WRANGLER UNLIMITED 2021Pages: 330, PDF Size: 9.16 MB
Page 7 of 330
5
POWER WINDOWS — IF EQUIPPED ........ 46
Auto-Down Feature ........................ 46
Wind Buffeting .............................. 47
REMOVABLE TOP INFORMATION ............. 47
Soft Top — Two And Four Door
Models ......................................... 47 Freedom Top And Hard Top ............. 51
Dual Top — If Equipped ................ 53
POWER SLIDING TOP — IF EQUIPPED ...... 53
Opening The Power Top .................. 54
Closing The Power Top .................... 54
Pinch Protect Feature ..................... 54
HOOD .................................................... 55
Opening The Hood .......................... 55
Closing The Hood ........................... 55
REAR SWING GATE................................. 55
INTERNAL EQUIPMENT ........................... 56
Electrical Power Outlets .................. 56
Power Inverter — If Equipped ......... 57
Auxiliary Switches — If Equipped .... 58
ROOF LUGGAGE RACK — IF EQUIPPED ..... 58
ENVIRONMENTAL PROTECTION
SYSTEMS — IF EQUIPPED ...................... 59 GETTING TO KNOW YOUR INSTRUMENT
PANEL
INSTRUMENT CLUSTER DISPLAY ............ 60
Instrument Cluster Display Location
And Controls .................................. 60 Oil Change Indicator System —
If Equipped .................................. 61 Instrument Cluster Display
Selectable Items ........................... 61 Gear Shift Indicator (GSI) —
If Equipped ................................... 62 Diesel Displays .............................. 62
Diesel Particulate Filter (DPF)
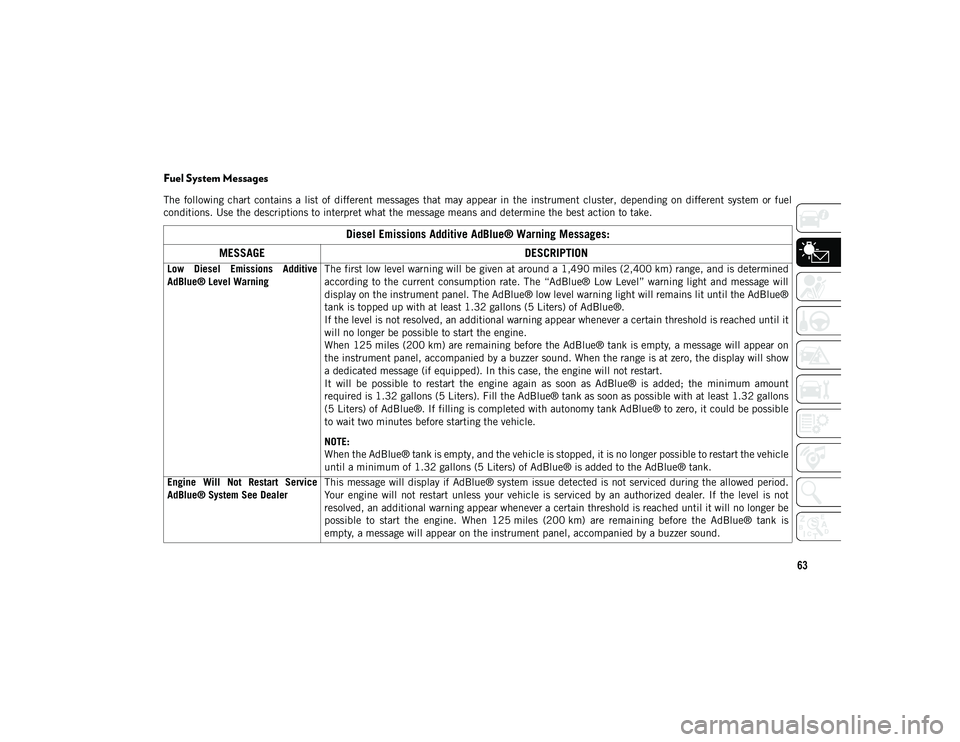
Messages ..................................... 62 Fuel System Messages .................... 63
WARNING LIGHTS AND MESSAGES.......... 65
Red Warning Lights ........................ 65
Yellow Warning Lights..................... 68
Yellow Indicator Lights ................... 72
Green Indicator Lights .................... 73
White Indicator Lights .................... 74
Blue Indicator Lights ...................... 76
ONBOARD DIAGNOSTIC SYSTEM —
OBD II ..................................................77
Onboard Diagnostic System (OBD II)
Cybersecurity ................................. 77
SAFETY
SAFETY FEATURES .................................78
Anti-Lock Brake System (ABS) ........78
Electronic Brake Control (EBC)
System .........................................79
AUXILIARY DRIVING SYSTEMS ................87
Blind Spot Monitoring (BSM) —
If Equipped ...................................87 Forward Collision Warning (FCW) With
Mitigation — If Equipped ................89 Tire Pressure Monitoring
System (TPMS) ..............................92
OCCUPANT RESTRAINT SYSTEMS ..........97
Occupant Restraint Systems
Features ........................................97 Important Safety Precautions ...........97
Seat Belt Systems ..........................98
Supplemental Restraint
Systems (SRS)..............................104 Child Restraints — Carrying Children
Safely ..........................................117 Transporting Pets .........................134
SAFETY TIPS ......................................135
Transporting Passengers ................135
Exhaust Gas ................................135
Safety Checks You Should Make
Inside The Vehicle .......................136 Periodic Safety Checks You Should
Make Outside The Vehicle..............137
2020_JEEP_JL_WRANGLER_UG_RHD_UK.book Page 5
Page 13 of 330
11
GETTING TO KNOW YOUR VEHICLE
KEYS
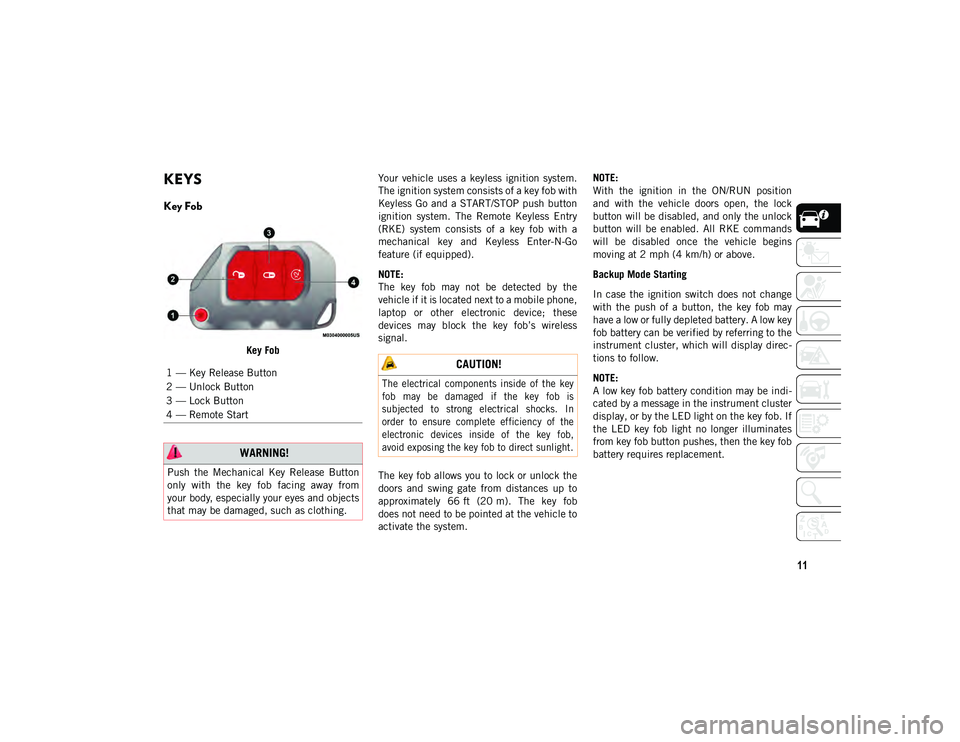
Key Fob
Key FobYour vehicle uses a keyless ignition system.
The ignition system consists of a key fob with
Keyless Go and a START/STOP push button
ignition system. The Remote Keyless Entry
(RKE) system consists of a key fob with a
mechanical key and Keyless Enter-N-Go
feature (if equipped).
NOTE:
The key fob may not be detected by the
vehicle if it is located next to a mobile phone,
laptop or other electronic device; these
devices may block the key fob’s wireless
signal.
The key fob allows you to lock or unlock the
doors and swing gate from distances up to
approximately 66 ft (20 m). The key fob
does not need to be pointed at the vehicle to
activate the system. NOTE:
With the ignition in the ON/RUN position
and with the vehicle doors open, the lock
button will be disabled, and only the unlock
button will be enabled. All RKE commands
will be disabled once the vehicle begins
moving at 2 mph (4 km/h) or above.
Backup Mode Starting
In case the ignition switch does not change
with the push of a button, the key fob may
have a low or fully depleted battery. A low key
fob battery can be verified by referring to the
instrument cluster, which will display direc
-
tions to follow.
NOTE:
A low key fob battery condition may be indi -
cated by a message in the instrument cluster
display, or by the LED light on the key fob. If
the LED key fob light no longer illuminates
from key fob button pushes, then the key fob
battery requires replacement.
1 — Key Release Button
2 — Unlock Button
3 — Lock Button
4 — Remote Start
WARNING!
Push the Mechanical Key Release Button
only with the key fob facing away from
your body, especially your eyes and objects
that may be damaged, such as clothing.
CAUTION!
The electrical components inside of the key
fob may be damaged if the key fob is
subjected to strong electrical shocks. In
order to ensure complete efficiency of the
electronic devices inside of the key fob,
avoid exposing the key fob to direct sunlight.
2020_JEEP_JL_WRANGLER_UG_RHD_UK.book Page 11
Page 17 of 330
15
To Enter Remote Start Mode
Push and release the Remote Start button on
the key fob twice within five seconds. The
vehicle doors will lock, the turn signals will
flash twice, and the horn will chirp twice.
Then the engine will start, and the vehicle
will remain in the Remote Start mode for a
15 minute cycle.
NOTE:
If an engine fault is present or fuel level is
low, the vehicle will start and then shut
down in 10 seconds.
The park lamps will turn on and remain on
during Remote Start mode.
For security, power window operation is
disabled when the vehicle is in the
Remote Start mode.
The engine can be started two consecutive
times (two 15 minute cycles) with the key
fob. However, the ignition must be placed
in the ON/RUN position before you can
repeat the start sequence for a third cycle.
VEHICLE SECURITY ALARM —
IF EQUIPPED
The vehicle security alarm monitors the
vehicle doors for unauthorized entry and the
ignition switch for unauthorized operation.
When the alarm is activated, the interior
switches for door locks are disabled. The
vehicle security alarm provides both audible
and visible signals. If something triggers the
alarm, the vehicle security alarm will provide
the following audible and visible signals: the
horn will pulse, the park lamps and/or turn
signals will flash, and the vehicle security
light in the instrument cluster will flash.
To Arm The System
Follow these steps to arm the vehicle secu-
rity alarm:
1. Make sure the vehicle’s ignition is placed in the OFF position. Refer to "Starting
The Engine" in "Starting And Operating"
for further information. 2. Perform one of the following methods to
lock the vehicle:
Push lock on the interior power doorlock switch with the driver and/or
passenger door open.
Push the lock button on the exterior Passive Entry Door Handle with a valid
key fob available in the same exterior
zone. Refer to "Keyless Enter-N-Go —
Passive Entry" in “Doors” in this
chapter for further information.
Push the lock button on the key fob.
3. If any doors are open, close them.
To Disarm The System
The vehicle security alarm can be disarmed
using any of the following methods:
Push the unlock button on the key fob.
Grasp the Passive Entry Unlock Door
Handle (if equipped). Refer to "Keyless
Enter-N-Go — Passive Entry" in “Doors” in
this chapter for further information.
Cycle the vehicle ignition system out of
the OFF position.
2020_JEEP_JL_WRANGLER_UG_RHD_UK.book Page 15
Page 35 of 330
33
Automatic High Beam — If Equipped
The Automatic High Beam Headlamp Control
system provides increased forward lighting at
night by automating high beam control
through the use of a digital camera mounted
on the vehicle’s header. This camera detects
vehicle specific light and automatically
switches from high beams to low beams until
the approaching vehicle is out of view.
NOTE:
The Automatic High Beam Headlamp
Control can be turned on or off by selecting
“ON” under “Auto High Beam” within your
Uconnect settings, as well as turning the
headlight switch to the AUTO position and
placing the multifunction lever in the high
beam position. Refer to “Uconnect Settings”
in “Multimedia” in the Owner’s Manual for
further information.
Broken, muddy, or obstructed headlights
and taillights of vehicles in the field of
view will cause headlights to remain on
longer (closer to the vehicle). Also, dirt,
film, and other obstructions on the wind-
shield or camera lens will cause the
system to function improperly.
Flash-To-Pass
You can signal another vehicle with your
headlights by lightly pulling the multifunc -
tion lever toward you. This will cause the
high beam headlights to turn on, and remain
on, until the lever is released.
Automatic Headlights — If Equipped
This system automatically turns the head -
lights on or off according to ambient light
levels. To turn the system on, rotate the
headlight switch clockwise to the last detent
for automatic headlight operation. When the
system is on, the headlight time delay
feature is also on. This means the headlights
will stay on for up to 90 seconds after you
place the ignition into the OFF position. To
turn the automatic system off, move the
headlight switch out of the AUTO position.
NOTE:
The engine must be running before the head -
lights will come on in the automatic mode.
Front And Rear Fog Lights — If Equipped
The fog light switches are built into the head -
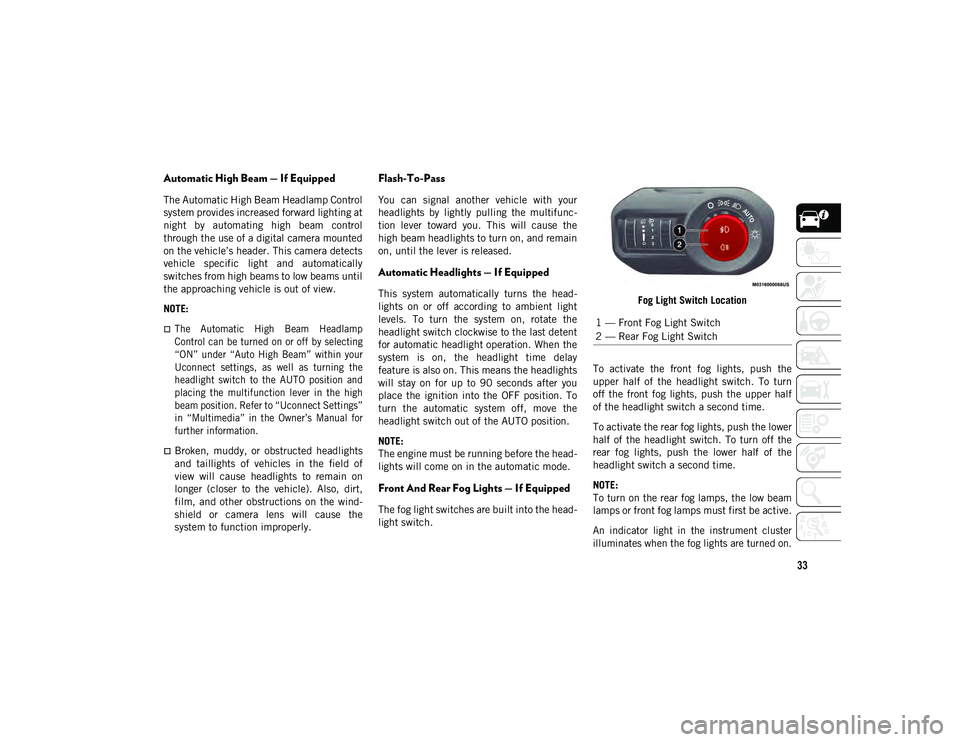
light switch. Fog Light Switch Location
To activate the front fog lights, push the
upper half of the headlight switch. To turn
off the front fog lights, push the upper half
of the headlight switch a second time.
To activate the rear fog lights, push the lower
half of the headlight switch. To turn off the
rear fog lights, push the lower half of the
headlight switch a second time.
NOTE:
To turn on the rear fog lamps, the low beam
lamps or front fog lamps must first be active.
An indicator light in the instrument cluster
illuminates when the fog lights are turned on.
1 — Front Fog Light Switch
2 — Rear Fog Light Switch
2020_JEEP_JL_WRANGLER_UG_RHD_UK.book Page 33
Page 36 of 330
GETTING TO KNOW YOUR VEHICLE
34
Turn Signals
Move the multifunction lever up or down and
the arrows on each side of the instrument
cluster flash to show proper operation of the
front and rear turn signal lights.
NOTE:
If either light remains on and does not flash,
or there is a very fast flash rate, check for a
defective outside light bulb. If an indicator
fails to light when the lever is moved, it
would suggest that the indicator bulb is
defective.
Lights-On Reminder
If the headlights, parking lights, or cargo
lights are left on after the ignition is placed
in the OFF position, a chime will sound when
the driver’s door is opened.
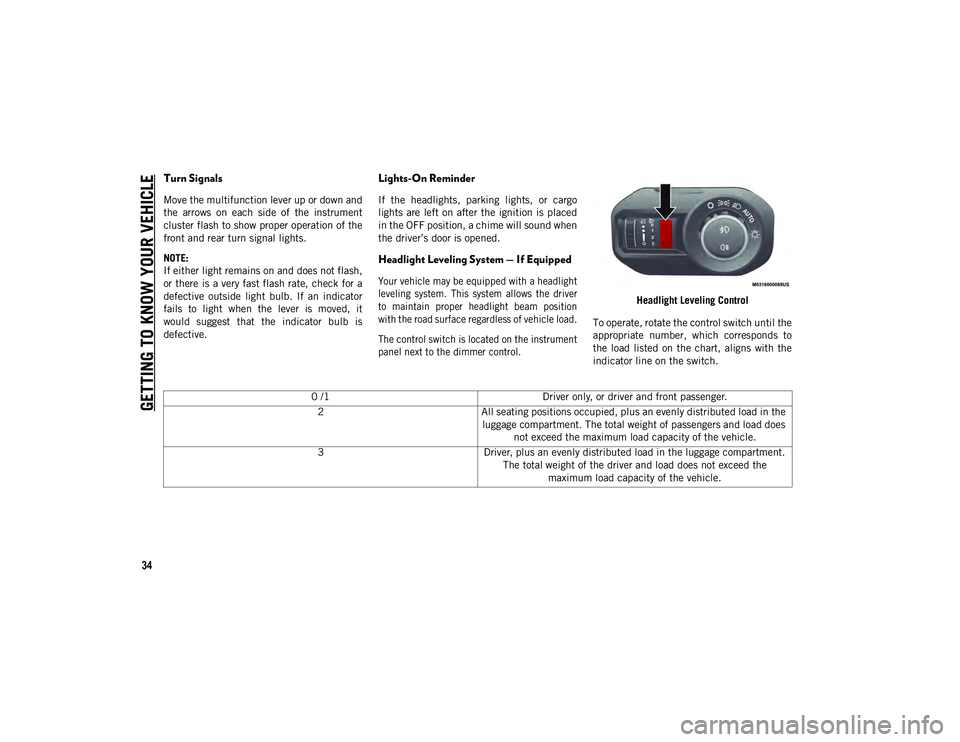
Headlight Leveling System — If Equipped
Your vehicle may be equipped with a headlight
leveling system. This system allows the driver
to maintain proper headlight beam position
with the road surface regardless of vehicle load.
The control switch is located on the instrument
panel next to the dimmer control.
Headlight Leveling Control
To operate, rotate the control switch until the
appropriate number, which corresponds to
the load listed on the chart, aligns with the
indicator line on the switch.
0 /1 Driver only, or driver and front passenger.
2 All seating positions occupied, plus an evenly distributed load in the
luggage compartment. The total weight of passengers and load does not exceed the maximum load capacity of the vehicle.
3 Driver, plus an evenly distributed load in the luggage compartment.
The total weight of the driver and load does not exceed the maximum load capacity of the vehicle.
2020_JEEP_JL_WRANGLER_UG_RHD_UK.book Page 34
Page 61 of 330
59
(Continued)
ENVIRONMENTAL PROTECTION
SYSTEMS — IF EQUIPPED
Gasoline Particulate Filter (GPF) — 2.0L T4
Petrol Versions Only
The Gasoline Particulate Filter is a mechan-
ical filter, integral to the exhaust system,
which physically traps carbon particles present in the exhaust gases of 2.0L T4
petrol engines.
The particulate filter is needed to eliminate
almost all carbon particle emissions in
compliance with current/future regulations
and standards.
Since this filter physically traps particulates,
it must be cleaned (regenerated) during
normal driving operation to remove carbon
particles. The regeneration procedure is
controlled automatically by the engine
control unit according to the filter conditions
and car use conditions.
The following may occur during regeneration:
increased levels of noise vibration and
harshness (NVH) and reduced engine
performance.
Dedicated messages can appear in the
instrument cluster display as a result of the
condition of the filter. Refer to the opening
paragraph of the "Warning Lights And
Messages" section for further information.
WARNING!
Cargo must be securely tied down before
driving your vehicle. Improperly secured
loads can fly off the vehicle, particularly
at high speeds, resulting in personal
injury or property damage. Follow the roof
rack cautions when carrying cargo on your
roof rack.
CAUTION!
To avoid damage to the roof rack and
vehicle, do not exceed the maximum roof
rack load capacity. Always distribute
heavy loads as evenly as possible and
secure the load appropriately.
Long loads, which extend over the wind
-
shield, should be secured to both the
front and rear of the vehicle.
Place a blanket or other protection
between the surface of the roof and the
load.
Travel at reduced speeds and turn
corners carefully when carrying large or
heavy loads on the roof rack. Wind
forces, due to natural causes or nearby
truck traffic, can add sudden upward
loads. It is recommended to not carry
large flat loads, such as wood panels or
surfboards, which may result in damage
to the cargo or your vehicle.
Load should always be secured to cross
bars first, with tie down loops used as
additional securing points if needed. Tie
loops are intended as supplementary tie
down points only. Do not use ratcheting
mechanisms with the tie loops. Check
the straps frequently to be sure that the
load remains securely attached.
CAUTION! (Continued)
2020_JEEP_JL_WRANGLER_UG_RHD_UK.book Page 59
Page 62 of 330
60
GETTING TO KNOW YOUR INSTRUMENT PANEL
INSTRUMENT CLUSTER
DISPLAY
Your vehicle may be equipped with an instru-
ment cluster display, which offers useful
information to the driver. With the ignition in
the STOP/OFF mode, opening/closing of a
door will activate the display for viewing, and
display the total miles, or kilometers, in the
odometer. Your instrument cluster display is
designed to display important information
about your vehicle’s systems and features.
Using a driver interactive display located on
the instrument panel, your instrument
cluster display can show how systems are
working and give warnings when they aren’t.
The steering wheel mounted controls allow
you to scroll through and enter the main
menus and submenus. You can access the
specific information you want and make
selections and adjustments.
Instrument Cluster Display Location And
Controls
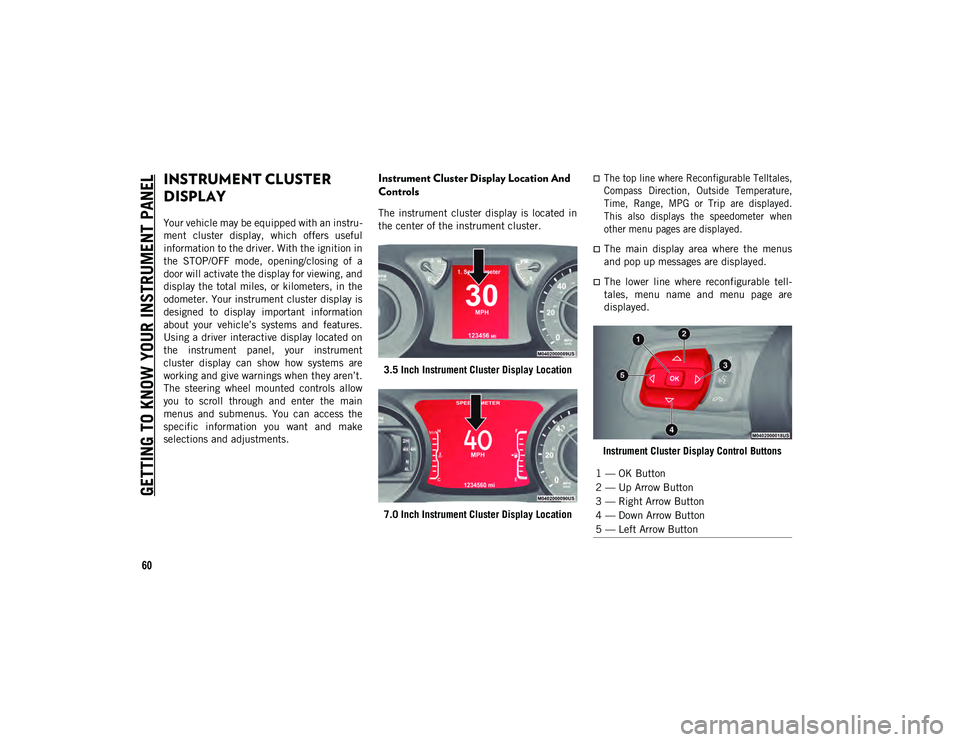
The instrument cluster display is located in
the center of the instrument cluster.
3.5 Inch Instrument Cluster Display Location
7.0 Inch Instrument Cluster Display Location
The top line where Reconfigurable Telltales,
Compass Direction, Outside Temperature,
Time, Range, MPG or Trip are displayed.
This also displays the speedometer when
other menu pages are displayed.
The main display area where the menus
and pop up messages are displayed.
The lower line where reconfigurable tell -
tales, menu name and menu page are
displayed.
Instrument Cluster Display Control Buttons
1 — OK Button
2 — Up Arrow Button
3 — Right Arrow Button
4 — Down Arrow Button
5 — Left Arrow Button
2020_JEEP_JL_WRANGLER_UG_RHD_UK.book Page 60
Page 63 of 330
61
Push the up arrow button to scroll upward
through the main menus (Speedometer,
mph/km/h, Vehicle Info, Terrain, Driver
Assist, Fuel Economy, Trip A, Trip B, Stop/
Start, Audio, Navigation, Stored Messages,
Screen Setup and Speed Warning).
Push the down arrow button to scroll
downward through the main menu and
submenus (Speedometer, mph/km/h,
Vehicle Info, Terrain, Driver Assist, Fuel
Economy, Trip A, Trip B, Stop/Start,
Audio, Navigation, Stored Messages,
Screen Setup and Speed Warning).
Push the right arrow button to access the
information screens or submenu screens
of a main menu item.
Push the left arrow button to access the
information screens or submenu screens
of a main menu item.
Push the OK button to access/select the
information screens or submenu screens of a
main menu item. Push and hold the OK
button for two seconds to reset displayed/
selected features that can be reset.
Oil Change Indicator System — If
Equipped
Your vehicle is equipped with an engine oil
change indicator system. The “Oil Change
Due” message will display in the instrument
cluster display for five seconds after a single
chime has sounded, to indicate the next
scheduled oil change interval. The engine oil
change indicator system is duty cycle based,
which means the engine oil change interval
may fluctuate, dependent upon your
personal driving style.
Refer to an authorized dealership for an oil
change.
Instrument Cluster Display Selectable
Items
The instrument cluster display can be used
to view the following main menu items:
NOTE:
Depending on the vehicles options, feature
settings may vary.
NOTE:
Refer to “Getting To Know Your Instrument
Panel” in your Owner’s Manual for further
information. • Speedometer • Stop/Start
• Vehicle Info • Audio
• Off-Road • Messages
• Fuel Economy • Screen Setup
• Trip Info • Driver Assistance
— If Equipped
2020_JEEP_JL_WRANGLER_UG_RHD_UK.book Page 61
Page 64 of 330
GETTING TO KNOW YOUR INSTRUMENT PANEL
62
Gear Shift Indicator (GSI) — If Equipped
The Gear Shift Indicator (GSI) system is
enabled on vehicles when automatic trans-
mission is in manual shift mode. The GSI
provides the driver with a visual indication
when the recommended gear shift point has
been reached. This indication notifies the
driver that changing gears will allow a reduc -
tion in fuel consumption. When the up shift
indicator is shown on the instrument cluster
display, the GSI is advising the driver to
engage a higher gear. When the down shift
indicator is shown on the display, the GSI is
advising the driver to engage a lower gear.
The GSI remains illuminated until the driver
changes gear, or the driving conditions
return to a situation where changing gears is
not required to improve fuel consumption.
Diesel Displays
When the appropriate conditions exist, the
following messages display in the instrument
cluster display:
Exhaust Filter Nearing Full Safely Drive at
Consistent Speeds to Clear
Exhaust Filter Full – Power Reduced See
Dealer
Exhaust System Service Required – See
Dealer
Exhaust System – Filter XX% Full Service
Required See Dealer
Exhaust System Regeneration in Process
Continue Driving
Exhaust System – Regeneration Completed
Diesel Particulate Filter (DPF) Messages
This engine meets all required diesel engine
emissions standards. To achieve these emis -
sions standards, your vehicle is equipped
with a state-of-the-art engine and exhaust
system. These systems are seamlessly inte -
grated into your vehicle and managed by the
Powertrain Control Module (PCM). The PCM
manages engine combustion to allow the
exhaust system’s catalyst to trap and burn
Particulate Matter (PM) pollutants, with no
input or interaction on your part.
WARNING!
A hot exhaust system can start a fire if you
park over materials that can burn. Such
materials might be grass or leaves coming
into contact with your exhaust system. Do
not park or operate your vehicle in areas
where your exhaust system can contact
anything that can burn.
CAUTION!
Always drive at a speed appropriate to the
traffic conditions, the weather and traffic
regulations. The engine may be switched
off even if the warning light is on: repeated
interruptions of the regeneration process
could cause an early deterioration of
engine oil. For this reason it is always
advisable to wait for the symbol to go off
before turning off the engine, following the
instructions above. Do not complete the
DPF regeneration process when the vehicle
is stopped.
2020_JEEP_JL_WRANGLER_UG_RHD_UK.book Page 62
Page 65 of 330
63
Fuel System Messages
The following chart contains a list of different messages that may appear in the instrument cluster, depending on different system or fuel
conditions. Use the descriptions to interpret what the message means and determine the best action to take.
Diesel Emissions Additive AdBlue® Warning Messages:
MESSAGE DESCRIPTION
Low Diesel Emissions Additive
AdBlue® Level WarningThe first low level warning will be given at around a 1,490 miles (2,400 km) range, and is determined
according to the current consumption rate. The “AdBlue® Low Level” warning light and message will
display on the instrument panel. The AdBlue® low level warning light will remains lit until the AdBlue®
tank is topped up with at least 1.32 gallons (5 Liters) of AdBlue®.
If the level is not resolved, an additional warning appear whenever a certain threshold is reached until it
will no longer be possible to start the engine.
When 125 miles (200 km) are remaining before the AdBlue® tank is empty, a message will appear on
the instrument panel, accompanied by a buzzer sound. When the range is at zero, the display will show
a dedicated message (if equipped). In this case, the engine will not restart.
It will be possible to restart the engine again as soon as AdBlue® is added; the minimum amount
required is 1.32 gallons (5 Liters). Fill the AdBlue® tank as soon as possible with at least 1.32 gallons
(5 Liters) of AdBlue®. If filling is completed with autonomy tank AdBlue® to zero, it could be possible
to wait two minutes before starting the vehicle.
NOTE:
When the AdBlue® tank is empty, and the vehicle is stopped, it is no longer possible to restart the vehicle
until a minimum of 1.32 gallons (5 Liters) of AdBlue® is added to the AdBlue® tank.
Engine Will Not Restart Service
AdBlue® System See Dealer This message will display if AdBlue® system issue detected is not serviced during the allowed period.
Your engine will not restart unless your vehicle is serviced by an authorized dealer. If the level is not
resolved, an additional warning appear whenever a certain threshold is reached until it will no longer be
possible to start the engine. When 125 miles (200 km) are remaining before the AdBlue® tank is
empty, a message will appear on the instrument panel, accompanied by a buzzer sound.
2020_JEEP_JL_WRANGLER_UG_RHD_UK.book Page 63