window KIA Amanti 2008 1.G User Guide
[x] Cancel search | Manufacturer: KIA, Model Year: 2008, Model line: Amanti, Model: KIA Amanti 2008 1.GPages: 283, PDF Size: 20.47 MB
Page 96 of 283
Knowing your vehicle
863
Outside rearview mirror heater (if equipped)
The outside rearview mirror heater is
actuated in connection with the rear win-
dow defroster. To heat the outside
rearview mirror glass, push the button for
the rear window defroster.
The outside rearview mirror glass will be
heated for defrosting or defogging and
will give you improved rear vision in
inclement weather conditions. Push the
button again to turn the heater off. The
outside rearview mirror heater automati-
cally turns off after 20 minutes.
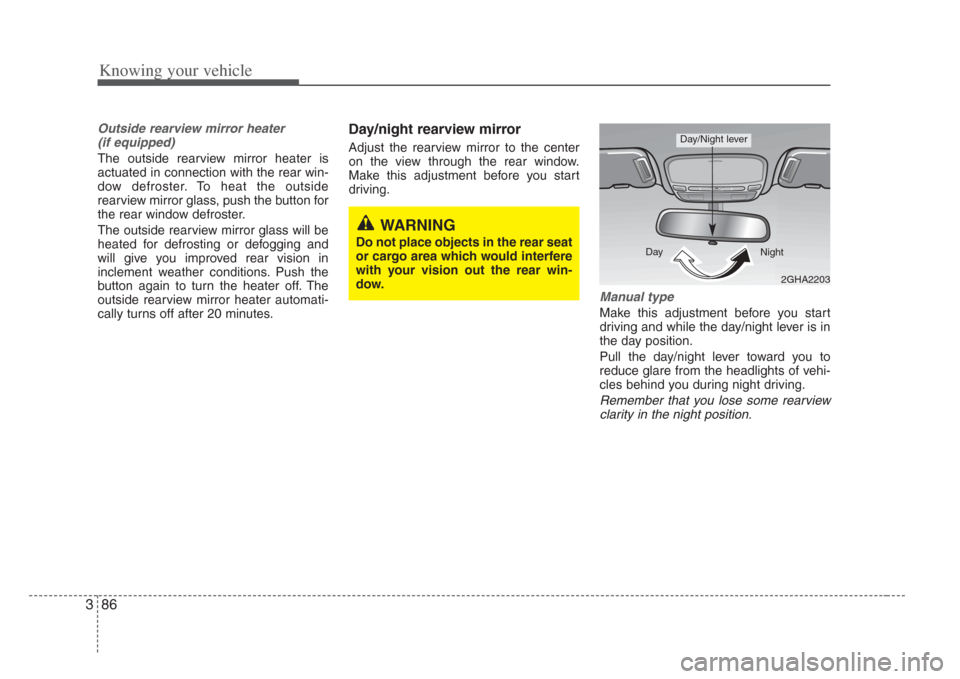
Day/night rearview mirror
Adjust the rearview mirror to the center
on the view through the rear window.
Make this adjustment before you start
driving.
Manual type
Make this adjustment before you start
driving and while the day/night lever is in
the day position.
Pull the day/night lever toward you to
reduce glare from the headlights of vehi-
cles behind you during night driving.
Remember that you lose some rearviewclarity in the night position.
WARNING
Do not place objects in the rear seat
or cargo area which would interfere
with your vi sion out the rear win-
dow.
2GHA2203
Day
Night
Day/Night lever
Page 103 of 283
393
Knowing your vehicle
Rear
To use cup holders in rear seat, pull
down the rear seat armrest.
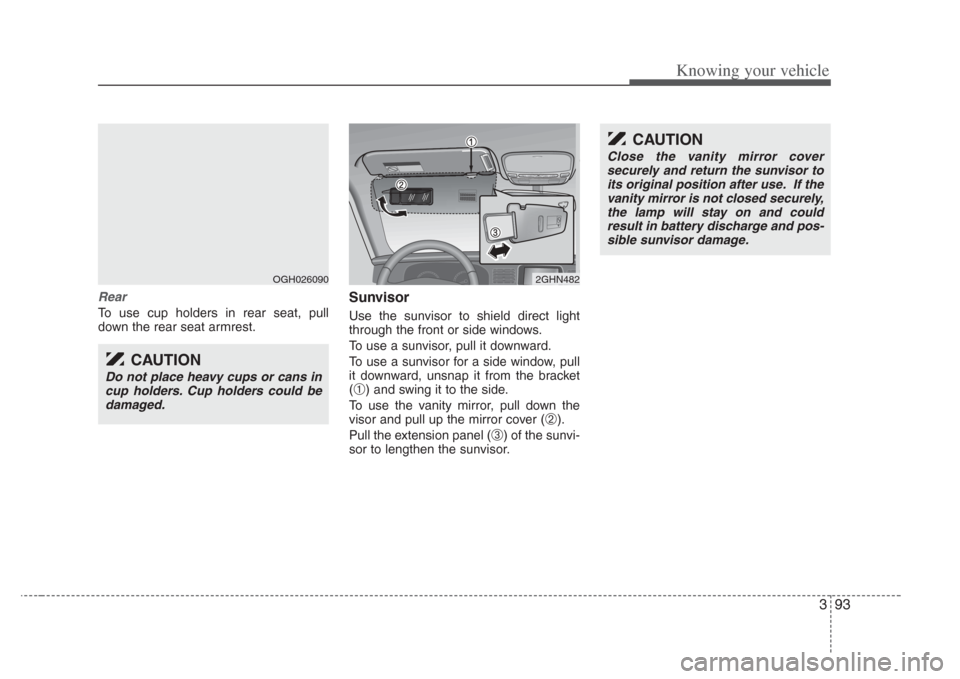
Sunvisor
Use the sunvisor to shield direct light
through the front or side windows.
To use a sunvisor, pull it downward.
To use a sunvisor for a side window, pull
it downward, unsnap it from the bracket
(
➀) and swing it to the side.
To use the vanity mirror, pull down the
visor and pull up the mirror cover (
➁).
Pull the extension panel (
➂) of the sunvi-
sor to lengthen the sunvisor.
OGH0260902GHN482
CAUTION
Do not place heavy cups or cans in cup holder s. Cup holder s could be
damaged.
CAUTION
Clos e the vanity mirror cover
securely and return the sunvisor to
its original position after use. If the vanity mirror is not clo sed securely,
the lamp will stay on and could result in battery di scharge and pos-
sible sunvisor damage.
Page 108 of 283
Knowing your vehicle
983
Resetting the sunroof
Whenever the vehicle battery is discon-
nected or discharged, or you use the
emergency handle to operate the sun-
roof, you have to reset your sunroof sys-
tem as follows:
1. Turn the ignition key to the ON posi-tion.
2. According to the position of the sun- roof, do as follows.
1) in case that the sunroof has closedcompletely or been tilted
: Press the TILT UP button for 1 second.
2) in case that the sunroof has slide- opened
: Press and hold the CLOSE button for more than 5 seconds until the
sunroof has closed completely.
And then press the TILT UP but-
ton for 1 second
3. Then, release it.
4. Press and hold the TILT UP button once again until the sunroof has
returned to the original position of
TILT UP after it is raised a little higher
than the maximum TILT UP position.
When this is complete, the sunroof sys-
tem is reset.
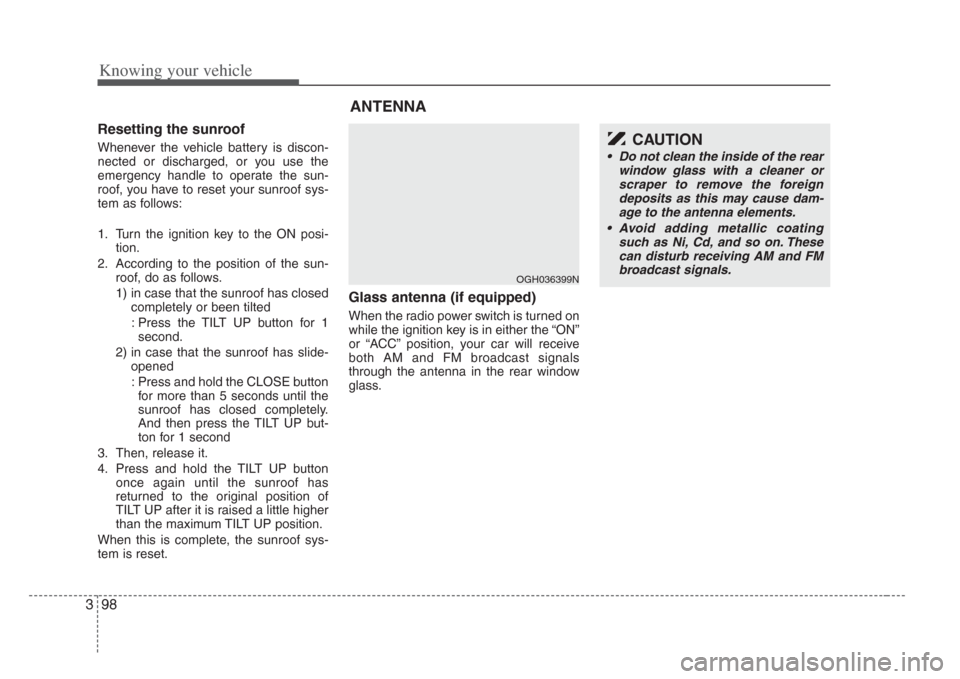
Glass antenna (if equipped)
When the radio power switch is turned on
while the ignition key is in either the “ON”
or “ACC” position, your car will receive
both AM and FM broadcast signals
through the antenna in the rear window
glass.
ANTENNA
OGH036399N
CAUTION
• Do not clean the in side of the rear
window gla ss with a cleaner or
s craper to remove the foreign
deposits a s this may cause dam-
age to the antenna element s.
• Avoid adding metallic coating such as Ni, Cd, and so on. Thesecan disturb receiving AM and FMbroadcast signals.
Page 112 of 283
Knowing your vehicle
1023
Care of cassette tapes
(if equipped)
• Because the thickness of a cassette
tape with the total playback time of
over 60 minutes (C-60) are too thin, we
suggest that you do not use any of
them to avoid having tapes being tan-
gled.
• To achieve better sound quality, period- ically clean the tape head using a cot-
ton stick with colorless alcohol (once
per month).
• If a tape is too loose, fasten it to reel by winding with objects like a pencil.
• Because dust or foreign objects on a cassette tape may damage the play-
back head, always store tapes in their
cases when not in use.
• Make sure cassette tapes are kept away from magnetic devices (TV,
stereo system, etc) in order to achieve
better sound quality.
• Be certain that no objects or sub- stances other than cassette tapes are
inserted into the cassette tape player.
• Because tape media can be distorted when exposed to direct sunlight, Do
not leave cassette tapes on the seats,
dashboard or near the back wind-
shield.
Care of di sc (if equipped)
• If the temperature inside the car is too
high, open the car windows for ventilation
before using your car audio.
• Do not apply volatile agents such as benzene and thinner, normal cleaners
and magnetic sprays made for ana-
logue disc onto CDs.
• To prevent the disc surface from get- ting damaged. Hold and carry CDs by
the edges or the edges of the center
hole only.
• Clean the disc surface with a piece of soft cloth before playback (wipe it from the
center to the outside edge.)
• Do not damage the disc surface or attach pieces of sticky tape or paper
onto it.
• Make sure on undesirable matter other than CDs are inserted into the CD
player (Do not insert more than one
CD at a time).
• Keep CDs in their cases after use to protect them from scratches or dirt. • Depending on the type of CD-R/CD-
RW CDs, certain CDs may not operate
normally according to manufacturing
companies or making and recording
methods. In such circumstances, if you
still continue to use those CDs, they
may cause the malfunction of your car
audio system.
✽ NOTICE-Playing an
Incompatible Copy-Protected
Audio CD
Some copy-protected CDs, which do not
comply with the international audio CD
standards (Red Book), may not play on
your car audio. Please note that if you
try to play copy protected CDs and the
CD player of your car audio is not per-
forming to your expectation, this may be
caused by those CDs and not a defect in
the device itself. Please replace those
CDs.
Page 172 of 283
441
Driving your vehicle
If the washer does not work, check the
washer fluid level. If the fluid level is not
sufficient, you will need to add appropri-
ate non-abrasive windshield washer fluid
to the washer reservoir.
The reservoir filler neck is located in the
front of the engine compartment on the
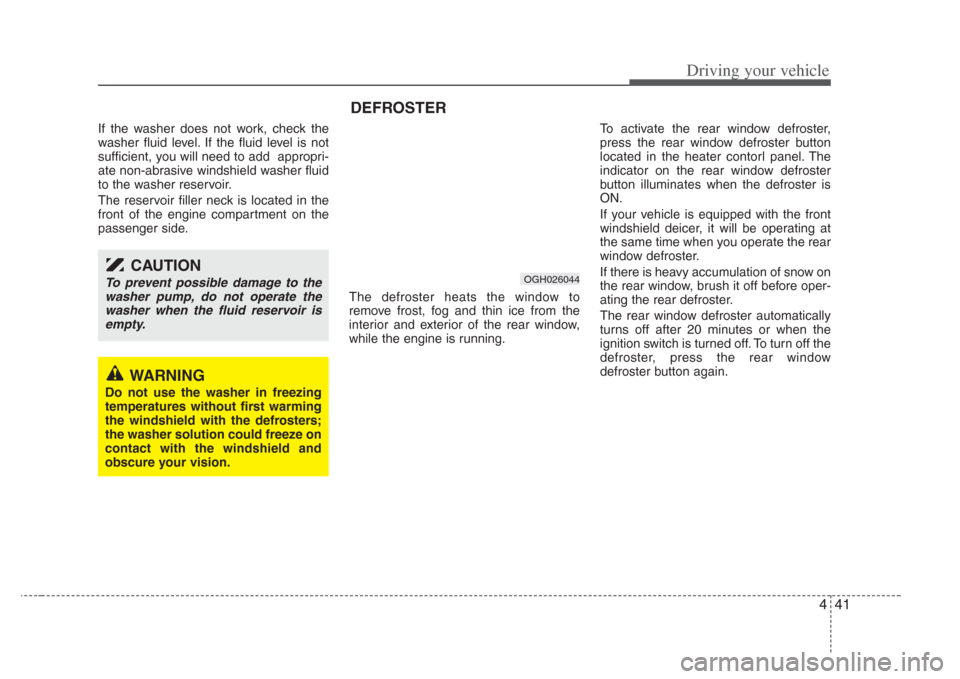
passenger side.The defroster heats the window to
remove frost, fog and thin ice from the
interior and exterior of the rear window,
while the engine is running.To activate the rear window defroster,
press the rear window defroster button
located in the heater contorl panel. The
indicator on the rear window defroster
button illuminates when the defroster is
ON.
If your vehicle is equipped with the front
windshield deicer, it will be operating at
the same time when you operate the rear
window defroster.
If there is heavy accumulation of snow on
the rear window, brush it off before oper-
ating the rear defroster.
The rear window defroster automatically
turns off after 20 minutes or when the
ignition switch is turned off. To turn off the
defroster, press the rear window
defroster button again.
WARNING
Do not use the washer in freezing
temperature s without fir st warming
the windshield with the defroster s;
the washer solution could freeze on
contact with the winds hield and
obscure your vision.
DEFROSTER
OGH026044
CAUTION
To prevent possible damage to the washer pump, do not operate thewasher when the fluid reservoir isempty.
Page 173 of 283
Driving your vehicle
424
✽NOTICE
To prevent damage to the conductors
bonded to the inside surface of the
bottom of the front windshield and the
rear window, never use sharp instru-
ments or window cleaners containing
abrasives to clean the window.
To prevent the battery from being dis- charged, operate the defroster only
while the engine is running.
The front windshield defroster is designed to defrost wiper blades. If
you want to defrost and defog the
front windshield, refer to “Windshield
Defrosting and Defogging” in this sec-
tion.
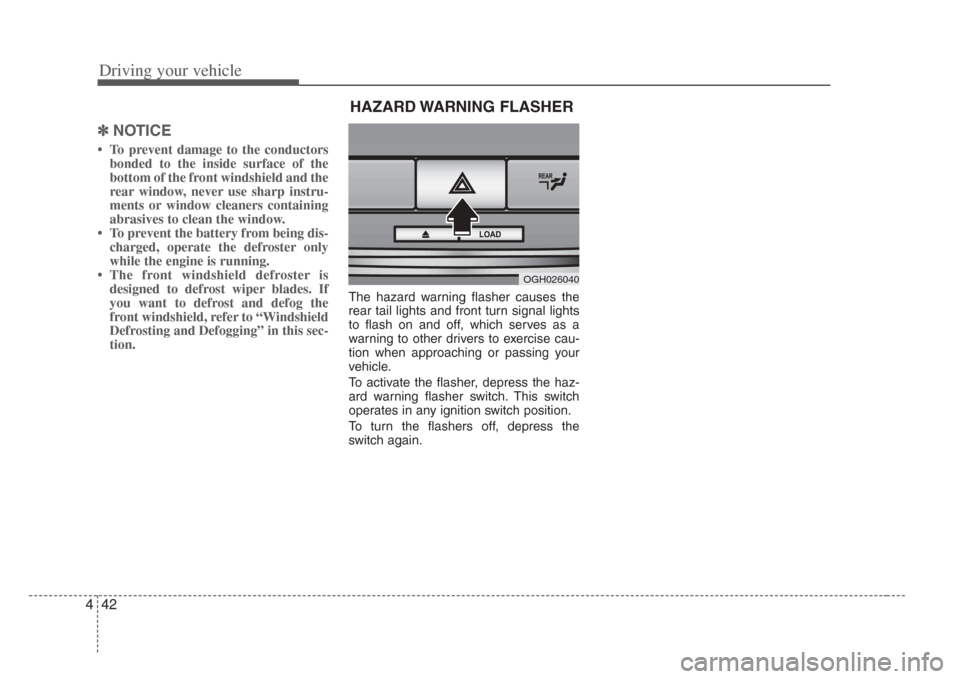
The hazard warning flasher causes the
rear tail lights and front turn signal lights
to flash on and off, which serves as a
warning to other drivers to exercise cau-
tion when approaching or passing your
vehicle.
To activate the flasher, depress the haz-
ard warning flasher switch. This switch
operates in any ignition switch position.
To turn the flashers off, depress the
switch again.
OGH026040
HAZARD WARNING FLASHER
Page 174 of 283

443
Driving your vehicle
AUTOMATIC CLIMATE CONTROL SYSTEM
OGH026051N/OGH026052
1. A/C display
2. Driver’s temperature control button
3. AUTO (automatic control) button
4. Air conditioning button
5. Fan speed control button
6. Mode selection button
7. Dual temperature control selection button8. Front windshield defrost button
9. Rear window defrost button
10. OFF button
11. Recirculated air position button
12. Outside (fresh) air position button
13. Passenger’s temperature control button
14. Rear climate control selection button
Page 178 of 283
447
Driving your vehicle
Recirculated air position
The indicator light on the button is illumi-
nated when the recirculated air position
button is depressed.
With the recirculated air position select-
ed, air from the passenger compartment
will be drawn through the heating system
and heated or cooled according to the
function selected.
Outside (fresh) air position
The indicator light on the button is illumi-
nated when the outside (fresh) air posi-
tion button is depressed.
With the outside (fresh) air position
selected, air enters the vehicle from out-
side and is heated or cooled according to
the function selected.
When starting the vehicle, the system is
automatically set to the outside (fresh) air
position. Press the button once to select
the recirculated air position.
✽
NOTICE
Prolonged operation of the heating in
recirculated air position will cause fog-
ging of the windshield and side windows
and the air within the passenger com-
partment will become stale.
In addition, prolonged use of the air con-
ditioning with the “recirculated air posi-
tion” selected, will result in excessively
dry air in the passenger compartment.
OGH026061N
WARNING
• Continued climate control system
operation in the recirculated air
position may allow humidity to
increas e inside vehicle which
may fog the glass and obscure
visibility.
• Do not sleep in a vehicle with air conditioning or heating system
on. It may cause serious harm or
death due to a drop in the oxygen
level and/or body temperature.
• Continued climate control system
operation in the reciruclated air
position can cause drowsiness or
sleepiness, and loss of vehicle
control. Set the air intake control
to the out side (fresh) air position
as much a s possible while driv-
ing.
OGH026063N
Page 180 of 283
449
Driving your vehicle
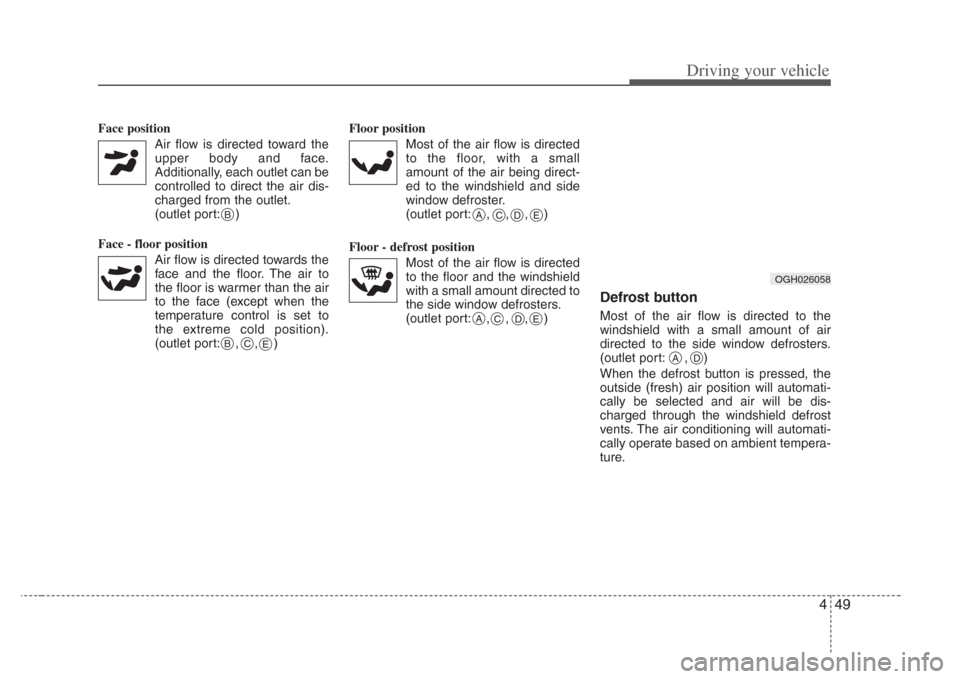
Face position Air flow is directed toward theupper body and face.
Additionally, each outlet can be controlled to direct the air dis-
charged from the outlet.
(outlet port: )
Face - floor position Air flow is directed towards theface and the floor. The air to
the floor is warmer than the air
to the face (except when the
temperature control is set to
the extreme cold position).
(outlet port: , , ) Floor position
Most of the air flow is directedto the floor, with a small
amount of the air being direct-
ed to the windshield and side
window defroster.
(outlet port: , , , )
Floor - defrost position Most of the air flow is directedto the floor and the windshield
with a small amount directed to
the side window defrosters.
(outlet port: , , , )
Defrost button
Most of the air flow is directed to the
windshield with a small amount of air
directed to the side window defrosters.
(outlet port: , )
When the defrost button is pressed, the
outside (fresh) air position will automati-
cally be selected and air will be dis-
charged through the windshield defrost
vents. The air conditioning will automati-
cally operate based on ambient tempera-
ture.
B
BC
A
E
E
CDE
ACD
OGH026058
AD
Page 182 of 283
451
Driving your vehicle
Air conditioning system opera-
tion tips
• If the vehicle has been parked in directsunlight during hot weather, open the
windows for a short time to let the hot
air inside the vehicle escape.
• To help reduce moisture inside of the windows on rainy humid days,
decrease the humidity inside the vehi-
cle by operating the air conditioning
system.
• During air conditioning system opera- tion, you may occasionally notice a
slight change in the engine speed as
the air conditioning compressor cycles
on. This is a normal system operation
characteristics.
• Use the air conditioning system every month only for a few minutes to ensure
maximum system performance.
• When using the air conditioning sys- tem, you may notice clear water drip-
ping (or even pudding) on the ground
under the passenger side of the vehi-
cle. This is a normal system operation
characteristics. • Operating the air conditioning system
in the recirculated air position does
provide maximum cooling, however,
continual operation in this mode may
cause the air inside the vehicle to
become stale.
Checking the amount of air con-
ditioner refrigerant and compres-
sor lubricant
When the amount of refrigerant is low,
the performance of the air conditioning is
reduced. Overfilling also has a bad influ-
ence on the air conditioning system.
Therefore, if abnormal operation is
found, have the system inspected by an
authorized Kia dealer.
CAUTION
When the performance of the air
conditioning system is reduced it is
important that the correct type and amount of oil and refrigerant isu sed. Otherwis e, damage to the
compressor and abnormal system operation may occur.
CAUTION
When us ing the air conditioning
s ystem, monitor the temperature
gauge closely while driving up hill s
or in heavy traffic when out side
temperatures are high. Air condi- tioning system operation may
caus e engine overheating.
Continue to use the blower fan but turn the air conditioning system off
if the temperature gauge indicate s
engine overheating.
WARNING
The air conditioning system should
be serviced by an authorized Kia
dealer. Improper service may cause
serious injury to the per son per-
forming the service.