ECO mode KIA CEED 2010 User Guide
[x] Cancel search | Manufacturer: KIA, Model Year: 2010, Model line: CEED, Model: KIA CEED 2010Pages: 442, PDF Size: 28.25 MB
Page 148 of 442
477
Features of your vehicle
Air conditioning (if equipped)
All KIA Air Conditioning Systems are
filled with environmentally friendly
R-134a refrigerant which does not dam-
age the ozone layer.
1. Start the engine. Push the air condi-tioning button.
2. Set the mode to the position.
3. Set the air intake control to the outside air or recirculated air position.
4. Adjust the fan speed control and tem- perature control to maintain maximum
comfort.
When maximum cooling is desired, set the temperature control to the extremeleft position, set the mode control to
the MAX A/C position, then set the fanspeed control to the highest speed.✽✽ NOTICE
When using the air conditioning sys- tem, monitor the temperature gauge
closely while driving up hills or in
heavy traffic when outside tempera-
tures are high. Air conditioning sys-
tem operation may cause engine over-
heating. Continue to use the blower
fan but turn the air conditioning sys-
tem off if the temperature gauge indi-
cates engine overheating.
When opening the windows in humid weather air conditioning may create
water droplets inside the vehicle.
Since excessive water droplets may
cause damage to electrical equipment,
air conditioning should only be run
with the windows closed.
Air conditioning system operation tips
If the vehicle has been parked in directsunlight during hot weather, open the
windows for a short time to let the hot
air inside the vehicle escape.
To help reduce moisture inside of the windows on rainy or humid days,
decrease the humidity inside the vehi-
cle by operating the air conditioningsystem. During air conditioning system opera-
tion, you may occasionally notice aslight change in engine speed as the
air conditioning compressor cycles.
This is a normal system operation
characteristic.
Use the air conditioning system every month only for a few minutes to ensure
maximum system performance.
When using the air conditioning sys- tem, you may notice clear water drip-
ping (or even puddling) on the ground
under the passenger side of the vehi-
cle. This is a normal system operation
characteristic.
Operating the air conditioning system in the recirculated air position provides
maximum cooling, however, continual
operation in this mode may cause the
air inside the vehicle to become stale.
During cooling operation, you may occasionally notice a misty air flow
because of rapid cooling and humid air
intake. This is a normal system opera-
tion characteristics.
Page 152 of 442
481
Features of your vehicle
Manual heating and air condition- ing The heating and cooling system can be
controlled manually by pushing buttons
other than the AUTO button. In this case,
the system works sequentially according
to the order of buttons selected.
When pressing any button (or turning
any knob) except AUTO button while
automatic operation, the functions not
selected will be controlled automatically.
1. Start the engine.
2. Set the mode to the desired position.
3. Set the temperature control to thedesired position.
4. Set the air intake control to the outside (fresh) air position.
5. Set the fan speed control to the desired speed.
6. If air conditioning is desired, turn the air conditioning system on.
Press the AUTO button in order to con-
vert to full automatic control of the sys-tem.
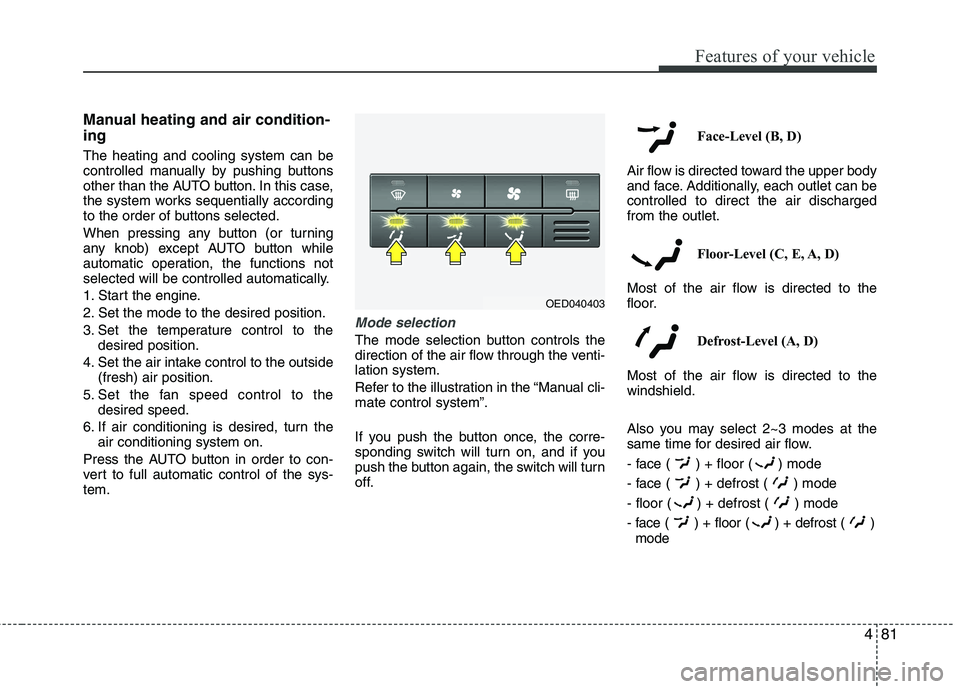
Mode selection
The mode selection button controls the
direction of the air flow through the venti-lation system.
Refer to the illustration in the “Manual cli- mate control system”.
If you push the button once, the corre-
sponding switch will turn on, and if you
push the button again, the switch will turn
off. Face-Level (B, D)
Air flow is directed toward the upper body
and face. Additionally, each outlet can becontrolled to direct the air dischargedfrom the outlet.
Floor-Level (C, E, A, D)
Most of the air flow is directed to the
floor.
Defrost-Level (A, D)
Most of the air flow is directed to thewindshield.
Also you may select 2~3 modes at the
same time for desired air flow.
- face ( ) + floor ( ) mode
- face ( ) + defrost ( ) mode
- floor ( ) + defrost ( ) mode
- face ( ) + floor ( ) + defrost ( ) mode
OED040403
Page 154 of 442
483
Features of your vehicle
Adjusting the driver and passenger side
temperature individually
If you turn the passenger side tempera-
ture control, the driver and passenger
side temperature will be set individually.
Operate the left temperature control to
adjust the driver side temperature.
Operate the right temperature control to
adjust the passenger side temperature.
Adjusting the driver and passenger side
temperature equally
If you press the "AUTO" button for 3 sec-
onds or more, the driver and passenger
side temperature individual mode will be
canceled. The passenger side tempera-
ture will be set equally to the driver’s tem-
perature.
Operate the left temperature control to
adjust the driver or passenger side tem-
perature.
✽✽NOTICE
The temperature defaults to the driver's
temperature control whenever the igni-
tion switch is turned on.
Temperature conversion
If the battery has been discharged or dis-
connected, the temperature mode dis-
play will reset to Centigrade.
This is normal condition. You can switch the
temperature mode between Centigrade to
Fahrenheit as follows;
While depressing the AUTO button,
depress the OFF button for 3 seconds or
more. The display will change from
Centigrade to Fahrenheit, or from
Fahrenheit to Centigrade.
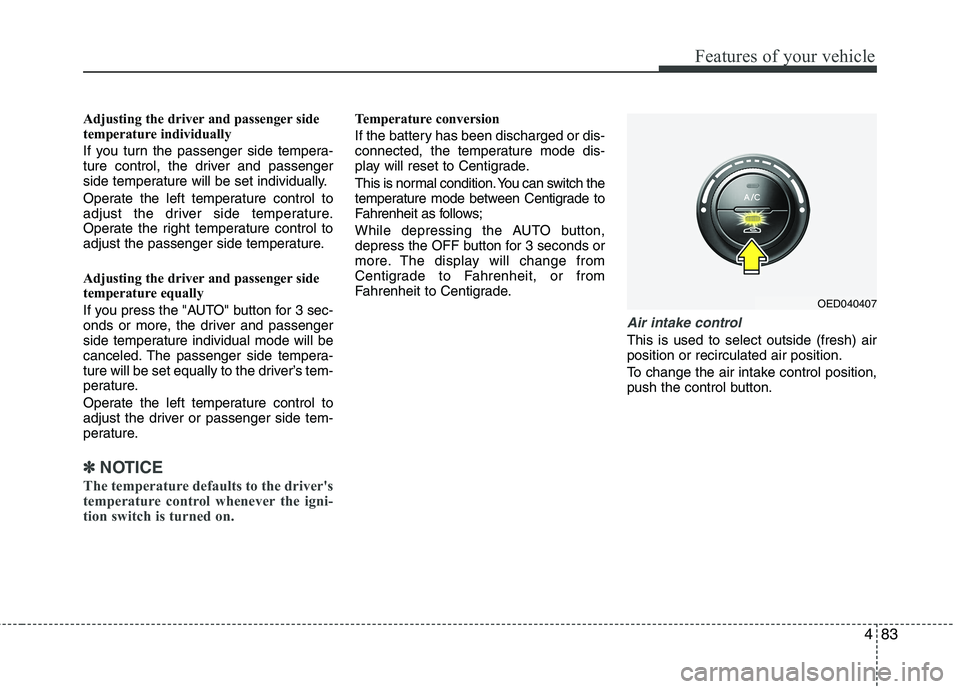
Air intake control
This is used to select outside (fresh) air position or recirculated air position.
To change the air intake control position,
push the control button.
OED040407
Page 160 of 442
489
Features of your vehicle
Defogging logic
To reduce the possibility of fogging up
the inside of the windshield, the air intakecontrol is set to the outside (fresh) airposition automatically according to cer-
tain conditions such as or posi-
tion. Additionally, the air conditioning will
automatically operate if the mode is
selected to the position. To cancel or
return to the defogging logic, do the fol-
lowing.
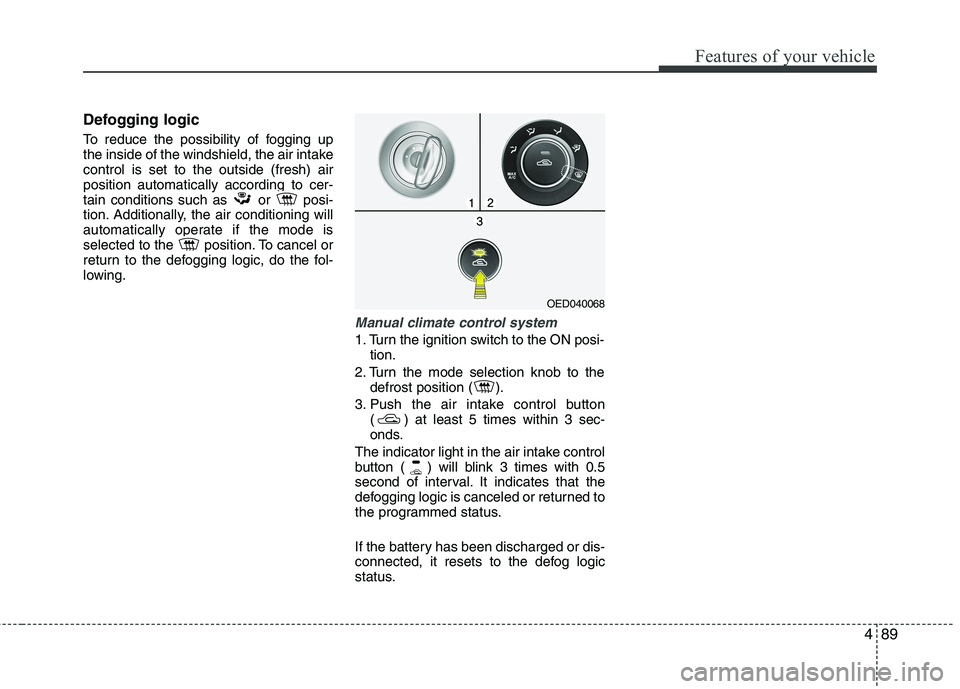
Manual climate control system
1. Turn the ignition switch to the ON posi-tion.
2. Turn the mode selection knob to the defrost position ( ).
3. Push the air intake control button ( ) at least 5 times within 3 sec-
onds.
The indicator light in the air intake control
button ( ) will blink 3 times with 0.5
second of interval. It indicates that the
defogging logic is canceled or returned to
the programmed status.
If the battery has been discharged or dis-
connected, it resets to the defog logic
status.
OED040068
Page 187 of 442
Features of your vehicle
116
4
Frequency Scan
The tuner will tune to each available sta-
tion from the current waveband for 5 sec-
onds before scanning for the next higherfrequency station.
� Short press the SCANbutton to acti-
vate/ deactivate the scan function.
Storing preset stations
In the FM 1 and 2 waveband there are 12
station presets and in the AM waveband
there are 6 station presets.
(Also see “Selecting FM or AM wave- band”).
� Select the waveband, FM or AM.
� Tune to the desired station.
� Press and hold one of the preset (1 -
6) button till you hear a beep.
� The station selected is stored under
the preset button.
Recalling preset stations
With this function you can recall a preset station.
� Short press the desired preset button
(1 through 6) to recall the previouslyset station. Radio Data System (RDS)
Many FM stations broadcast RDS infor-
mation. The RDS provides you with infor-
mation of the following:
Traffic announcement (TA)
This function enables you to hear traffic
announcements (TA). You will also hear
traffic announcements when in CD/USB/
iPOD/ AUX mode.
�
Short press the TA button to
enable/disable function.
� Press the SCAN button to scan for
Traffic Programme (TP) stations.
OR
� Press the or to search for TP
stations.
� Set the required volume for the traffic
announcements in the SETUP menu.
� The TA symbol will be displayed when
TA is enabled.
✎ In FM mode: If no TP stations are
found, the unit will remain at the cur-
rent station displaying “NO TA/TP” for
5 seconds.
✎ In CD/USB/IPOD/AUX: If no TP sta-
tion is found, the unit will remain at the
current station. TP seek will be carried
out at the background periodically
every 30 seconds until a TP station is
found or TA will be disabled. TP lost ✎
If the TP signal of tuned station is lost
after 30 seconds, an automatic TP
seek for the next TP station will be
performed. If no TP station is found,the unit will remain at the current sta-
tion and display “TP LOST” for 5 sec-
onds.
� TP seek will be performed periodical-
ly every 30 seconds until a TP station
is found.
Traffic announcements from other sta-
tions – EON With the EON function (Enhanced Other
Networks) you will hear traffic announce-
ments even if the set station does not
provide this service but is operating on a
network with other stations. ✎ If you have activated Traffic info, sta-
tions with EON will be treated like traf-
fic stations, i.e. the search will also
stop at these stations.
✎ When a traffic announcement is
made, the unit switches to a traffic
information station linked to EON.After the announcement, the unit
returns to the previous programme.
Page 190 of 442

4119
Features of your vehicle
Viewing Information of Audio Files
�Short press the INFObutton.
� Disk Title, Disk Artist, Track Title and
Track Artist can be displayed.
✎ If no information is available “NO
INFO” will be displayed, otherwise the
corresponding information will be dis-
played for 5 seconds.
� To abort this mode: press one of the
following buttons - / , Fast
/ , RPT, RDM, LIST.
List Function Audio Files ✎ With this mode you can browse all
supported tracks on the CD.
� The main menu of the LIST functionconsists of:
� Short press LIST to enter track brows-ing.
� Short press or button to
browse through the list of the selected
category.
� Short press OK to playback of the
selected track.
� To abort this mode: press one of the
following buttons / , Fast
/ , RPT, RDM, INFO, SOUND,
SETUP and LIST. Notes on WMA files
The following WMA files are supported:
�
Bit rate: Up to 192 kbit/s
� Sampling frequency: Up to 44.1 kHz
� WMA file names must have the
“.wma” extension.
Notes on MP3 files
The following MP3 files are supported by
the CD player:
� Files conform with MPEG1/2 or 2.5-
Layer 3.
� The format of the CD must be ISO
9660 Level 1 or Level 2 or Joliet with
sector format in Mode 1 or Mode 2
Form 1. Other formats cannot be
played reliably.
� The maximum number of folders is99.
� The Maximum number of folders and
number of files is 490. Additional files
and folders will be ignored.
� Bit rate: Maximum of 320 kbit/s, con-
stant or variable.
� Sampling frequency: Maximum of 48kHz. �
Text display: ID3 tag V1 and ID3 tag
V2. MP3 tracks can contain addition
information such as artist, track and
album names (ID3 tags with maxi-
mum not more than 12 characters).
Characters other than upper
case/lower case letters (“Aa to Zz”)
and underscore (“_”) may not be dis-
played.
� Only files with .mp3 extension are
recognized as MP3 files.
� The unit may not play the first track in
the order that you wrote them to thedisc.
� The unit plays only the first session ifthe disc contains both CD audio
tracks and MP3 files.
� When playing a disc of 8 kbps or vari-
able bit rate (VBR), the elapsed play-
ing time in the display window maynot be correct.
� Make sure that a MP3 CD-R/CD-RW
is burned that is formatted as a data
disc and NOT as an audio disc.
� MP3 files are not compatible with
packet write data transfer.
Page 191 of 442
Features of your vehicle
120
4
Playing MP3/WMA files
Starting/Stopping playback
� Press CD button to start playback.
� Playback will stop when another source is selected.
Previous/Next Track
� Press the or buttons to select
previous or next track.
Previous/Next Folder
� Press the or button to select
the previous or next folder.
Fast Forward/Reverse
� Press and hold the or button to
for fast reverse and fast forward.
✎ During fast forward and fast reverse
audio is audible at reduced volume.
Random
� Short press the RDM button to select
the Random Folder option.
✎ All files in the Random Folder will be
played randomly.
� Long press the RDM button to selectthe Random All option.
✎ All files on the CD will be played ran-
domly. Repeat
�
Short press the RPT button to select the Repeat file option.
✎ The current file will be repeated.
� Long press the RPT button to select
the Repeat Folder option.
✎ All files in the current folder will berepeated.
Scan
� Short press the SCAN button to select the Scan All option.
✎ All files in the CD will be scanned.
� Long press the SCAN button to select
the Scan Folder option.
✎ The first file in each folder will bescanned.
� CD plays the first 10 seconds of thesong.
� When a folder ends: scanning contin-
ues with the first file of the next folder.
� When a CD ends: scanning continues
with the first file of the first folder. Viewing Information of Compressed
Audio Files
�
Short press the INFObutton.
� File name, Song title*, Album name,
Artist name, Directory name and Total
track can be displayed.
✎ If no ID3 Tag is available “NO INFO”
will be displayed, otherwise the corre-
sponding information will be displayed
for 5 seconds.
� To abort this mode: press one of the
following buttons: or , Fast
or , RPT, RDM, INFO, SOUND,
SETUP and LIST.
List Function Compressed Audio Files ✎ With this mode you can browse fold-
ers and files located on the CD.
� The main menu of the LIST functionconsists of:
� Short press LIST to enter track brows-ing.
� Short press or button to
browse through the list of the selected
category.
� Short press OK to playback of the
selected track.
� To abort this mode: press one of the
following buttons: or , Fast
or , RPT, RDM, INFO, SOUND,
SETUP and LIST.
Page 195 of 442
Features of your vehicle
124
4
Manual Seek – Fast Forward/Fast back-
ward
� Press and hold the or button to
go fast forward or fast backward.
� During manual seek audio is audible
at reduced volume.
Repeat File/Folder
� Short press the RPTbutton to select
Repeat File.
� The current file will be repeated.
� Long press the RPTbutton to select
Repeat Folder.
� All files within the current folder will be repeated.
� To cancel the “Repeat File/Folder”
mode, short press the RPTbutton
again. Random Folder/All Files
�
Short press the RDMbutton to acti-
vate the “Random Folder” option.
� All files in the folder will be played at
random.
OR
� Long press the RDMbutton to acti-
vate the “Random All” option.
� All files on the USB device will be
played at random.
� To deactivate the “Random Folder/All
Files” feature, press the RDMbutton
again.
Scan File/Folder
� Long press the SCANbutton to acti-
vate the “Scan Folder” option.
✎ The first track of each folder will be
scanned, except the root directory.
OR
� Short press the SCANbutton to acti-
vate the “Scan All” option.
� All files on the USB device will be scanned.
� To deactivate the “Scan Folder/All
Files” feature, short press the SCAN
button again to abort “Scan All” Viewing MP3 Information
With this function text information of the
MP3 files can displayed on the LCD-
Display.
�
Short press the press INFObutton.
The following information will be shown
in the following sequence.
� Filename (“NO INFO” will appear if
the file name contains characters that
do not pertain to the ASCII characterset)
� ID3 tag info – Song Title (“NO INFO”
will appear if there is no Song Title
available)
� ID3 tag info – Artist name (“NO INFO”
will appear if there is no Artist Name
available)
� ID3 tag info – Album name (“NO
INFO” will appear if will appear if there
is no Album Name available).
� Directory name
� Total no. of files on the USB device
� The information will be visible on the
LCD-display for 5 seconds.
Page 196 of 442

4125
Features of your vehicle
Auxiliary In
�Via the Auxiliary Input (3.5 mm plug)
you can connect your portable deviceto the Head Unit.
� Insert the 3.5 mm plug (connected to
your portable device) into the Auxinput.
✎ Audio output from the auxiliary source
is directly audible when the device isplugged in.
✎ The Auxiliary Source is aborted when
another source becomes active.
� To re-select the Auxiliary Sourcewhen it is plugged in already:
� Short press the AUXbutton on the
Head Unit.
OR
� Short press the Modebutton on the
Steering Wheel Remote Control.
✎ If no Auxiliary Source is detected,
“NO MEDIA” will be displayed for 5
seconds and the Head Unit will return
to the previous selected source.
✽✽
NOTICE
The AUX source is not available if an
iPod is connected
Page 197 of 442

Features of your vehicle
126
4
Bluetooth
You can use a Bluetooth device in your
car to make a hands-free phone call or to
stream music onto your in-car speakers
(via this Head Unit). This Head Unit sup-
ports HFP, A2DP and AVRCP connec-tion.
Advanced Audio Distribution Profile
(A2DP)
This profile defines how high quality audio (stereo or mono) can be streamed
from one device to another over a
Bluetooth connection. For example:
music streamed from a mobile phone to
a wireless headset or car audio.
Audio/Video Remote Control Profile
(AVRCP)
This profile is designed to provide a stan-
dard interface to control TVs, Hi-fi equip-
ment, etc. to allow a single remote con-
trol (or other device) to control all of theA/V equipment to which a user has
access. It may be used in concert with
A2DP or VDP. Hands-Free Profile (HFP)
This is commonly used to allow car
handsfree kits to communicate with
mobile phones in the car.
Notes for mobile phones
Some functions (e.g. starting of speech
recognition) are not supported by all
mobile phones. We cannot guarantee
that all functions described will be sup-
ported by all mobile phones withBluetooth.
New device
This function allows you to add a new phone to the Head Units Bluetooth
Device List. Maximum of 5 devices can
be added to the list. If the list is full, the
oldest device will be replaced by the
newly added Bluetooth device, based on
last pairing date.
Pairing
To pair your Bluetooth-enabled device to
this Head Unit, make sure that no deviceis currently streaming to this Head Unitfirst.
�
Short press the SETUPbutton to
enter the Setup menu.
� Short press the or button to
access the Bluetooth sub-menu.
� Now select “New Device”.
� Press the or button to select
the number of the first digit.
� Press the or button to select the
next digit.
� Repeat the above steps for the other
three digits.
� Press the OKbutton to confirm the 4-
digit PIN for authentication and acti-
vate the “Discoverable Mode”.
� In “Discoverable Mode” the Head Unit
broadcasts a Bluetooth ID.
� Look for the “KIA-BLUETOOTH” on
your Bluetooth device.
� Enter identically the same PIN in your
Bluetooth device and authenticate
pairing on your Bluetooth device.
� When pairing is established, the ID of
the Bluetooth device and the service
list info will be stored in the Head Unit
Bluetooth Device List.