ESP KIA CEED 2010 User Guide
[x] Cancel search | Manufacturer: KIA, Model Year: 2010, Model line: CEED, Model: KIA CEED 2010Pages: 442, PDF Size: 28.25 MB
Page 86 of 442
415
Features of your vehicle
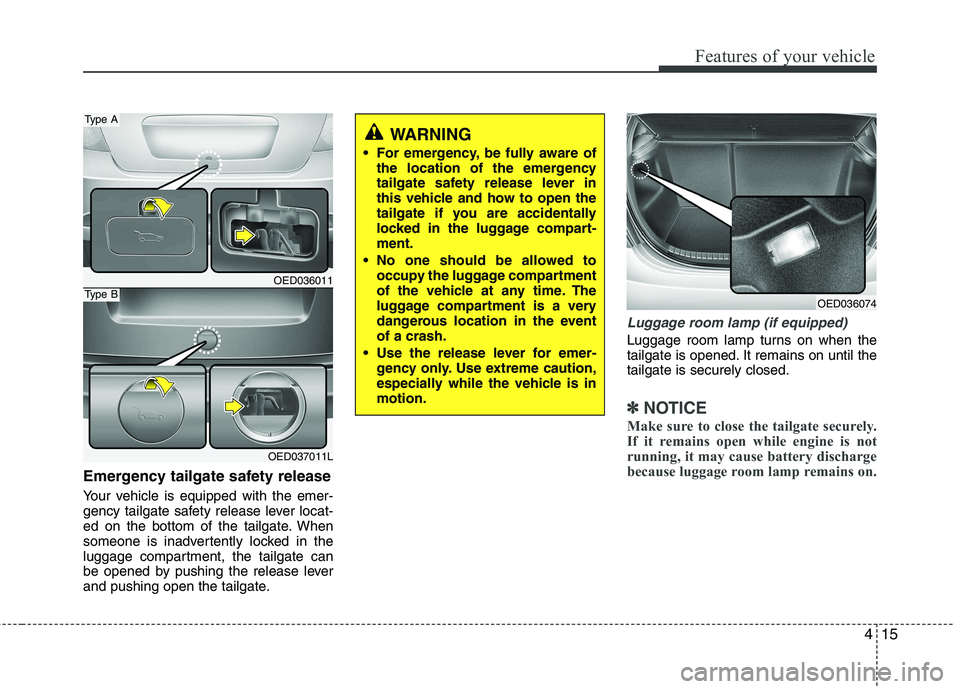
Emergency tailgate safety release
Your vehicle is equipped with the emer-
gency tailgate safety release lever locat-
ed on the bottom of the tailgate. When
someone is inadvertently locked in the
luggage compartment, the tailgate can
be opened by pushing the release lever
and pushing open the tailgate.
Luggage room lamp (if equipped)
Luggage room lamp turns on when the
tailgate is opened. It remains on until thetailgate is securely closed.
✽✽NOTICE
Make sure to close the tailgate securely.
If it remains open while engine is not
running, it may cause battery discharge
because luggage room lamp remains on.
WARNING
For emergency, be fully aware of the location of the emergency
tailgate safety release lever in
this vehicle and how to open the
tailgate if you are accidentally
locked in the luggage compart-ment.
No one should be allowed to occupy the luggage compartment
of the vehicle at any time. The
luggage compartment is a very
dangerous location in the eventof a crash.
Use the release lever for emer- gency only. Use extreme caution,
especially while the vehicle is inmotion.
OED036011
OED037011L
Type A
Type BOED036074
Page 95 of 442
Features of your vehicle
24
4
(Continued)
Use only approved portable plas-
tic fuel containers designed to
carry and store gasoline.
Do not use cellular phones while refueling. Electric current and/or
electronic interference from cel-
lular phones can potentially
ignite fuel vapors causing a fire.
When refueling, always shut the engine off. Sparks produced byelectrical components related to
the engine can ignite fuel vapors
causing a fire. Once refueling is
complete, check to make sure thefiller cap and filler door are
securely closed, before starting
the engine.
DO NOT use matches or a lighter and DO NOT SMOKE or leave a lit
cigarette in your vehicle while at
a gas station especially during
refueling. Automotive fuel is
highly flammable and can, when
ignited, result in fire.
(Continued)(Continued)
Do not get back into a vehicleonce you have begun refueling
since you can generate static
electricity by touching, rubbing
or sliding against any item or fab-
ric (polyester, satin, nylon, etc.)
capable of producing static elec-
tricity. Static electricity discharge
can ignite fuel vapors resulting in
rapid burning. If you must re-
enter the vehicle, you should
once again eliminate potentially
dangerous static electricity dis-
charge by touching a metal part
of the vehicle, away from the fuel
filler neck, nozzle or other gaso-
line source.
When using an approved portable fuel container, be sure toplace the container on the
ground prior to refueling. Static
electricity discharge from the
container can ignite fuel vapors
causing a fire. Once refueling has
begun, contact with the vehicleshould be maintained until the
filling is complete.
(Continued)WARNING - Refueling dan-
gers
Automotive fuels are flammable
materials. When refueling, please
note the following guidelines care-
fully. Failure to follow these guide-
lines may result in severe personal
injury, severe burns or death by fire
or explosion.
Read and follow all warning at the gas station facility.
Before refueling note the location of the Emergency Gasoline Shut-
Off, if available, at the gas station
facility.
Before touching the fuel nozzle, you should eliminate potentially
dangerous static electricity dis-
charge by touching another metal
part of the vehicle, a safe dis-
tance away from the fuel filler
neck, nozzle, or other gas source.
(Continued)
Page 100 of 442
429
Features of your vehicle
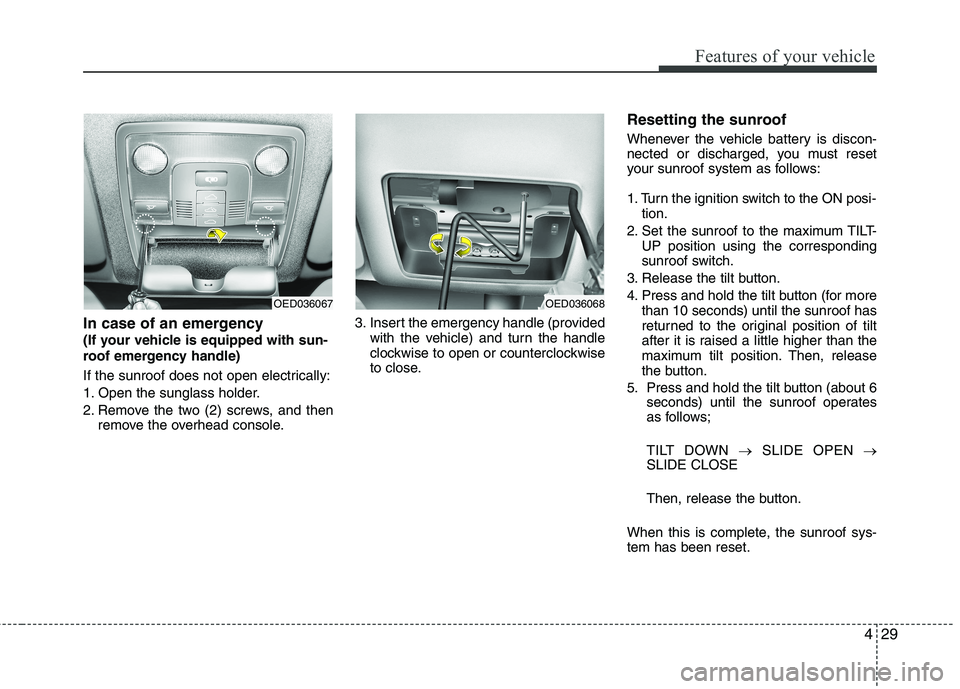
In case of an emergency
(If your vehicle is equipped with sun-
roof emergency handle)
If the sunroof does not open electrically:
1. Open the sunglass holder.
2. Remove the two (2) screws, and thenremove the overhead console. 3. Insert the emergency handle (provided
with the vehicle) and turn the handle
clockwise to open or counterclockwise
to close. Resetting the sunroof
Whenever the vehicle battery is discon-
nected or discharged, you must reset
your sunroof system as follows:
1. Turn the ignition switch to the ON posi-
tion.
2. Set the sunroof to the maximum TILT- UP position using the corresponding
sunroof switch.
3. Release the tilt button.
4. Press and hold the tilt button (for more than 10 seconds) until the sunroof has
returned to the original position of tilt
after it is raised a little higher than the
maximum tilt position. Then, release
the button.
5. Press and hold the tilt button (about 6 seconds) until the sunroof operates
as follows;
TILT DOWN �SLIDE OPEN �
SLIDE CLOSE
Then, release the button.
When this is complete, the sunroof sys- tem has been reset.
OED036067OED036068
Page 105 of 442

Features of your vehicle
34
4
Remote control
Manual type (if equipped)
To adjust an outside mirror, move the
control lever. Electric type (if equipped)
The electric remote control mirror switch
allows you to adjust the position of the
left and right outside rearview mirrors. To
adjust the position of either mirror, move
the lever (1) to R or L to select the right
side mirror or the left side mirror, thenpress a corresponding point on the mirroradjustment control to position the select-
ed mirror up, down, left or right.
After adjustment, put the lever into neu-
tral (center) position to prevent the inad-
vertent adjustment.
CAUTION
The mirrors stop moving when
they reach the maximum adjust-
ing angles, but the motor contin- ues to operate while the switch isdepressed. Do not depress theswitch longer than necessary, the
motor may be damaged.
Do not attempt to adjust the out- side rearview mirror by hand.Doing so may damage the parts.
B510A01EOED036047
Page 113 of 442

Features of your vehicle
42
4
Instant fuel consumption (if equipped) ( l/100 km or MPG)
This mode calculates the instant fuel
consumption during the last few sec-
onds.
✽✽ NOTICE
If the vehicle is not on level ground or the battery power has been interrupt-
ed, the “Distance to empty” function
may not operate correctly.
The trip computer may not register
additional fuel if less than 6 liters (1.6
gallons) of fuel are added to the vehi-
cle.
The fuel consumption and distance to
empty values may vary significantly
based on driving conditions, driving
habits, and condition of the vehicle.
The distance to empty value is an esti-
mate of the available driving distance.
This value may differ from the actual
driving distance available.
Average speed (if equipped)
(km/h or MPH)
This mode calculates the average speed
of the vehicle since the last averagespeed reset.
Even if the vehicle is not in motion, the
average speed keeps going while the
engine is running.
Pressing the TRIP button for more than 1
second, when the average speed is
being displayed, clears the average
speed to zero (---).
OED040024
■
Type A
■ Type BOED040025
■
Type A
■ Type B
Page 121 of 442

Features of your vehicle
50
4
ESP (Electronic Stability
Program) indicator(if equipped)
The ESP indicator will illuminate when
the ignition switch is turned ON, but
should go off after approximately 3 sec-
onds. When the ESP is on, it monitors the
driving conditions. Under normal driving
conditions, the ESP indicator will remain
off. When a slippery or low traction con-dition is encountered, the ESP will oper-
ate, and the ESP indicator will blink to
indicate the ESP is operating. But, if the ESP system malfunctions the
indicator illuminates and stays on. Take
your vehicle to an authorized KIA dealer
and have the system checked.
ESP OFF indicator (if equipped)
The ESP OFF indicator will illuminate
when the ignition switch is turned ON,
but should go off after approximately 3
seconds. To switch to ESP OFF mode,
press the ESP OFF button. The ESPOFF indicator will illuminate indicating
the ESP is deactivated.
Cruise indicator (if equipped)
CRUISE indicator
The indicator illuminates when the cruise
control system is enabled.
The cruise indicator in the instrument
cluster is illuminated when the cruise
control ON-OFF button on the steeringwheel is pushed.
The indicator goes off when the cruise
control ON-OFF button is pushed again.
For more information about the use of
cruise control, refer to “Cruise control
system” in section 5.
Cruise SET indicator
The indicator illuminates when the cruise
control switch (-/SET or RES/+) is ON.
The cruise SET indicator in the instru- ment cluster is illuminated when the
cruise control switch (-/SET or RES/+) ispushed.
The cruise SET indicator does not illumi-
nate when the cruise control switch(CANCEL) is pushed or the system isdisengaged.
Speed limit indicator (if equipped)
(1) Speed limit indicator
(2) Set speed limit indicator The speed limit indicator illuminates when the speed limit control system is
enabled.
The speed limit indicator in the instru- ment cluster illuminates when the speed
limit ON.OFF button on the steeringwheel is pressed.
The set speed limit will display when the
speed limit control switch(SET-/RES+) isON.
If you drive over the speed limit, the set
speed limit will blink and chime willsound.
The set speed limit turns off when the
speed limit is cancelled by pressing the
CANCEL button. The speed limit indicator goes off when
the speed limit is deactivated.
For more information about the speed
limit control usage, refer to “Speed Limit
control System” in section 5.
SET
Limit 98
km/h
①
②
Page 122 of 442
451
Features of your vehicle
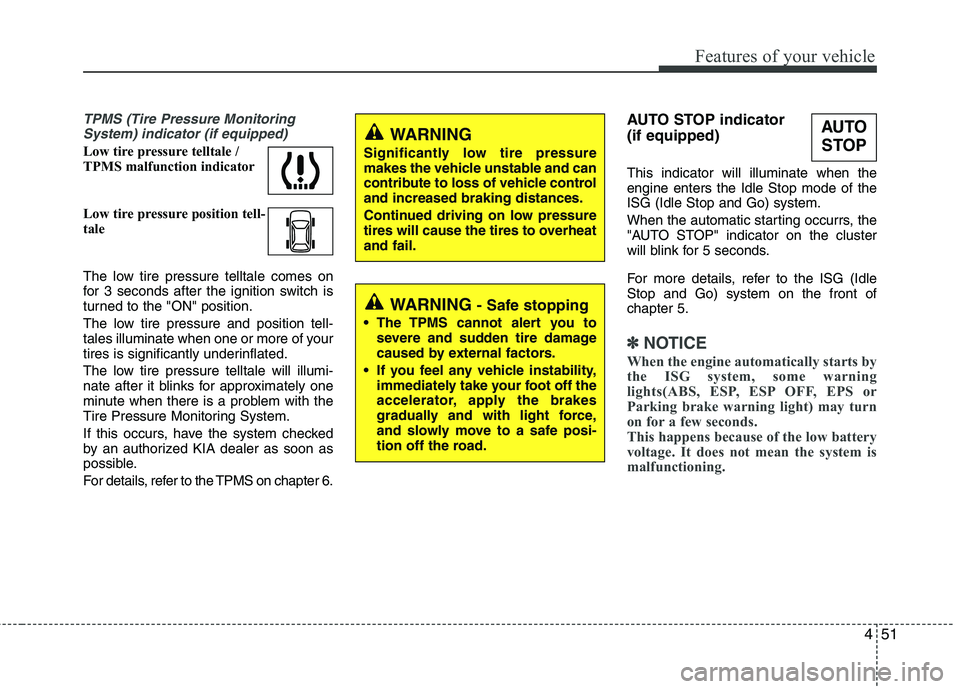
TPMS (Tire Pressure MonitoringSystem) indicator (if equipped)
Low tire pressure telltale /
TPMS malfunction indicator
Low tire pressure position tell-
tale
The low tire pressure telltale comes on
for 3 seconds after the ignition switch is
turned to the "ON" position.
The low tire pressure and position tell-
tales illuminate when one or more of your
tires is significantly underinflated.
The low tire pressure telltale will illumi-
nate after it blinks for approximately one
minute when there is a problem with the
Tire Pressure Monitoring System.
If this occurs, have the system checked
by an authorized KIA dealer as soon as
possible.
For details, refer to the TPMS on chapter 6. AUTO STOP indicator (if equipped) This indicator will illuminate when the engine enters the Idle Stop mode of theISG (Idle Stop and Go) system.
When the automatic starting occurrs, the
"AUTO STOP" indicator on the cluster
will blink for 5 seconds.
For more details, refer to the ISG (Idle Stop and Go) system on the front ofchapter 5.
✽✽
NOTICE
When the engine automatically starts by
the ISG system, some warning
lights(ABS, ESP, ESP OFF, EPS or
Parking brake warning light) may turn
on for a few seconds.
This happens because of the low battery
voltage. It does not mean the system is
malfunctioning.
WARNING
Significantly low tire pressure
makes the vehicle unstable and can
contribute to loss of vehicle controland increased braking distances.
Continued driving on low pressure
tires will cause the tires to overheatand fail.
WARNING - Safe stopping
The TPMS cannot alert you to severe and sudden tire damage
caused by external factors.
If you feel any vehicle instability, immediately take your foot off the
accelerator, apply the brakes
gradually and with light force,
and slowly move to a safe posi-
tion off the road.
AUTO
STOP
Page 124 of 442
453
Features of your vehicle
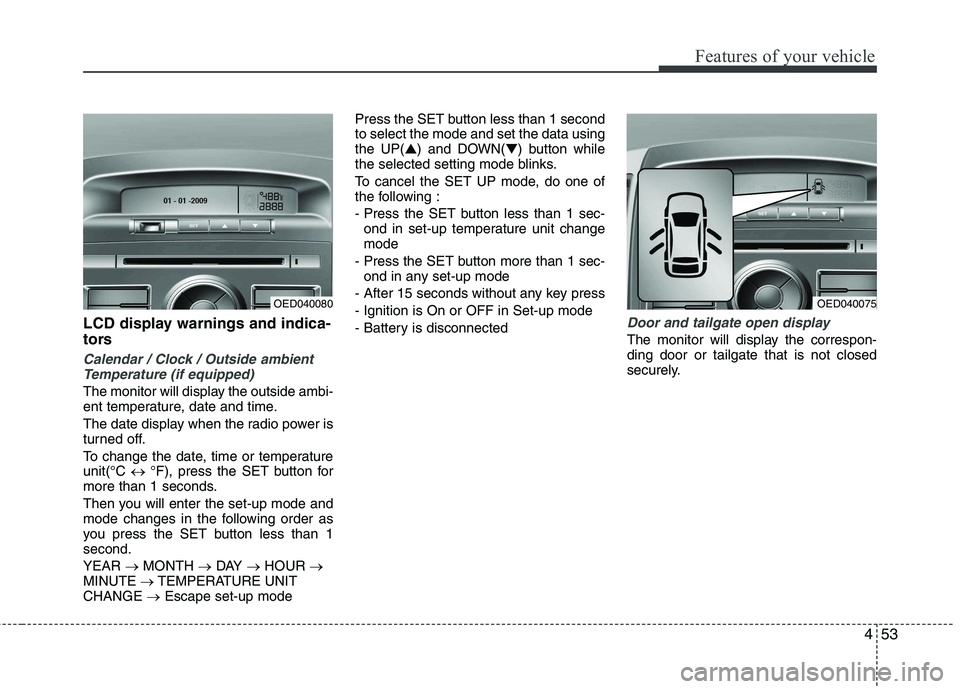
LCD display warnings and indica-
tors
Calendar / Clock / Outside ambientTemperature (if equipped)
The monitor will display the outside ambi-
ent temperature, date and time.
The date display when the radio power is
turned off.
To change the date, time or temperature unit(°C � °F), press the SET button for
more than 1 seconds.
Then you will enter the set-up mode and
mode changes in the following order as
you press the SET button less than 1second. YEAR �MONTH �DAY �HOUR �
MINUTE �TEMPERATURE UNIT
CHANGE �Escape set-up mode Press the SET button less than 1 second to select the mode and set the data usingthe UP(
▲) and DOWN( ▼) button while
the selected setting mode blinks.
To cancel the SET UP mode, do one of
the following :
- Press the SET button less than 1 sec- ond in set-up temperature unit change mode
- Press the SET button more than 1 sec- ond in any set-up mode
- After 15 seconds without any key press
- Ignition is On or OFF in Set-up mode
- Battery is disconnected
Door and tailgate open display
The monitor will display the correspon- ding door or tailgate that is not closed
securely.
OED040075OED040080
Page 125 of 442

Features of your vehicle
54
4
TPMS (if equipped)
The monitor will display the correspon-
ding tire that is low with pressure.
For details, see Tire Pressure Monitoring System on chapter 6.
Stop lamp fail display (if equipped)
The monitor will display the correspon- ding stop lamp that has malfunctioned.
(1) Right stop lamp failure
(2) Left stop lamp failure
(3) Left and Right stop lamp failure
OED040077OED040076 ① ② ③
Page 126 of 442
455
Features of your vehicle
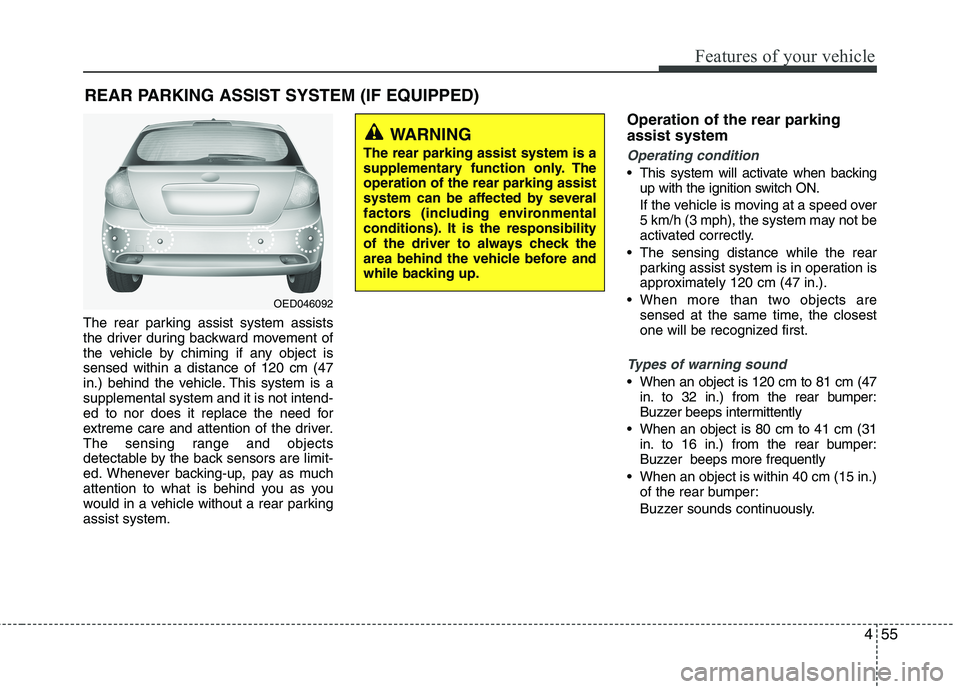
The rear parking assist system assists
the driver during backward movement of
the vehicle by chiming if any object issensed within a distance of 120 cm (47
in.) behind the vehicle. This system is asupplemental system and it is not intend-
ed to nor does it replace the need for
extreme care and attention of the driver.
The sensing range and objects
detectable by the back sensors are limit-
ed. Whenever backing-up, pay as much
attention to what is behind you as you
would in a vehicle without a rear parkingassist system.Operation of the rear parking assist system
Operating condition
This system will activate when backing
up with the ignition switch ON.
If the vehicle is moving at a speed over
5 km/h (3 mph), the system may not be
activated correctly.
The sensing distance while the rear parking assist system is in operation is
approximately 120 cm (47 in.).
When more than two objects are sensed at the same time, the closest
one will be recognized first.
Types of warning sound
When an object is 120 cm to 81 cm (47in. to 32 in.) from the rear bumper:
Buzzer beeps intermittently
When an object is 80 cm to 41 cm (31 in. to 16 in.) from the rear bumper:
Buzzer beeps more frequently
When an object is within 40 cm (15 in.) of the rear bumper:
Buzzer sounds continuously.
REAR PARKING ASSIST SYSTEM (IF EQUIPPED)
WARNING
The rear parking assist system is a
supplementary function only. Theoperation of the rear parking assist
system can be affected by several
factors (including environmental
conditions). It is the responsibility
of the driver to always check the
area behind the vehicle before and
while backing up.
OED046092