Car seat KIA CEED 2013 Service Manual
[x] Cancel search | Manufacturer: KIA, Model Year: 2013, Model line: CEED, Model: KIA CEED 2013Pages: 1168, PDF Size: 48.01 MB
Page 658 of 1168

Safety system of your vehicle
58
3
Side impact and curtain air bags (if equipped)
Side impact and/or curtain air bags are designed to inflate when an impact is
detected by side collision sensorsdepending on the strength, speed orangles of impact resulting from a sideimpact collision. Although the front air bags (driver’s and
front passenger’s air bags) are designed
to inflate only in frontal collisions, they
also may inflate in other types of colli-sions if the front impact sensors detect a
sufficient impact. Side air bags (side
impact and/or curtain air bags) aredesigned to inflate only in side impact
collisions, but they may inflate in othercollisions if the side impact sensorsdetect a sufficient impact.
If the vehicle chassis is impacted by
bumps or objects on unimproved roads
or sidewalks, air bags may deploy. Drive
carefully on unimproved roads or on sur-
faces not designed for vehicle traffic to
prevent unintended air bag deployment.
Air bag non-inflation conditions
In certain low-speed collisions the air
bags may not deploy. The air bags are
designed not to deploy in such cases
because they may not provide benefits
beyond the protection of the seat belts
in such collisions.
OED036099/H
OJD032048
OGDE031045
❈The actual air bags in the vehicle may dif-
fer from the illustration.
JD RHD 3.QXP 7/21/2012 1:08 PM Page 58
Page 662 of 1168
Safety system of your vehicle
62
3
Additional safety precautions Never let passengers ride in the
cargo area or on top of a folded-
down back seat. All occupants should
sit upright, fully back in their seats with
their seat belts on and their feet on the
floor.
Passengers should not move out of
or change seats whilst the vehicle is
moving. A passenger who is not wear-
ing a seat belt during a crash or emer-
gency stop can be thrown against the
inside of the vehicle, against other
occupants, or out of the vehicle.
Each seat belt is designed torestrain one occupant. If more than
one person uses the same seat belt,
they could be seriously injured or killedin a collision.
Do not use any accessories on seatbelts. Devices claiming to improve
occupant comfort or reposition the seat
belt can reduce the protection provided
by the seat belt and increase the
chance of serious injury in a crash.
Passengers should not place hardor sharp objects between them-
selves and the air bags. Carrying
hard or sharp objects on your lap or in
your mouth can result in injuries if an
air bag inflates.
Keep occupants away from the air
bag covers. All occupants should sit
upright, fully back in their seats with
their seat belts on and their feet on the
floor. If occupants are too close to the
air bag covers, they could be injured if
the air bags inflate.
Do not attach or place objects on or
near the air bag covers. Any object
attached to or placed on the front or
side impact air bag covers could inter-
fere with the proper operation of the air
bags.
Do not modify the front seats.Modification of the front seats could
interfere with the operation of the sup-
plemental restraint system sensing
components or side air bags.
Do not place items under the frontseats. Placing items under the front
seats could interfere with the operation
of the supplemental restraint system
sensing components and wiring har-
nesses.
Never hold an infant or child on yourlap. The infant or child could be seri-
ously injured or killed in the event of a
crash. All infants and children should
be properly restrained in appropriate
child safety seats or seat belts in therear seat. Adding equipment to or modify-
ing your air bag-equipped vehicle
If you modify your vehicle by changing
your vehicle's frame, bumper system,
front end or side sheet metal or ride
height, this may affect the operation of
your vehicle's air bag system.
WARNING
Sitting improperly or out of posi- tion can cause occupants to be
shifted too close to a deploying
air bag, strike the interior struc-
ture or be thrown from the vehicle
resulting in serious injury ordeath.
Always sit upright with the seat- back in an upright position, cen-tred on the seat cushion with
your seat belt on, legs comfort-
ably extended and your feet on
the floor.
JD RHD 3.QXP 7/21/2012 1:08 PM Page 62
Page 698 of 1168

435
Features of your vehicle
Closing the sunroof
To close the sunroof glass with thesunshade
Push the sunroof control lever forward or
full it down.
The sunroof glass will close.Then to close sunshade
- Press the sunshade control switch(2).
- Push the sunroof control lever forward or full it down
To stop the sunroof movement at any point, pull or push the sunroof control
lever momentarily.
Automatic reversal
If an object or part of the body is detect- ed whilst the sunroof glass or sunshade
is closing automatically, it will reverse the
direction, and then stop.
The auto reverse function does not work
if a tiny obstacle is between the slidingglass or sunshade and the sunroof sash.
You should always check that all passen-
gers and objects are away from the sun-
roof before closing it.
OYF049215
WARNING - Sunroof
Be careful that someone’s head, hands and body are not trapped by
a closing sunroof.
Do not extend the face, neck, arms or body outside through an
opened sunroof whilst driving.
Make sure your hands and face are safely out of the way before clos-
ing a sunroof.
A panorama sunroof is made of glass, therefore it may break in an
accident. If you do not have your
seat belt on, you may stick out of
the broken glass and get injured or
killed. For all passengers safety,
have an appropriate protection on.
(ex. seat belt, CRS, etc.)
CAUTION
Periodically remove any dirt that
may accumulate on the guide rail.
If you try to open the sunroof when the temperature is below freezingor when the sunroof is coveredwith snow or ice, the glass or the motor could be damaged.
If you drive with the sunroof opened right after a car wash or rain, watermay get inside the vehicle.
JD RHD 4a(~168).QXP 7/21/2012 12:06 PM Page 35
Page 705 of 1168
Features of your vehicle
42
4
Inside rearview mirror
Adjust the rearview mirror so that the
centre view through the rear window is
seen. Make this adjustment before you
start driving.
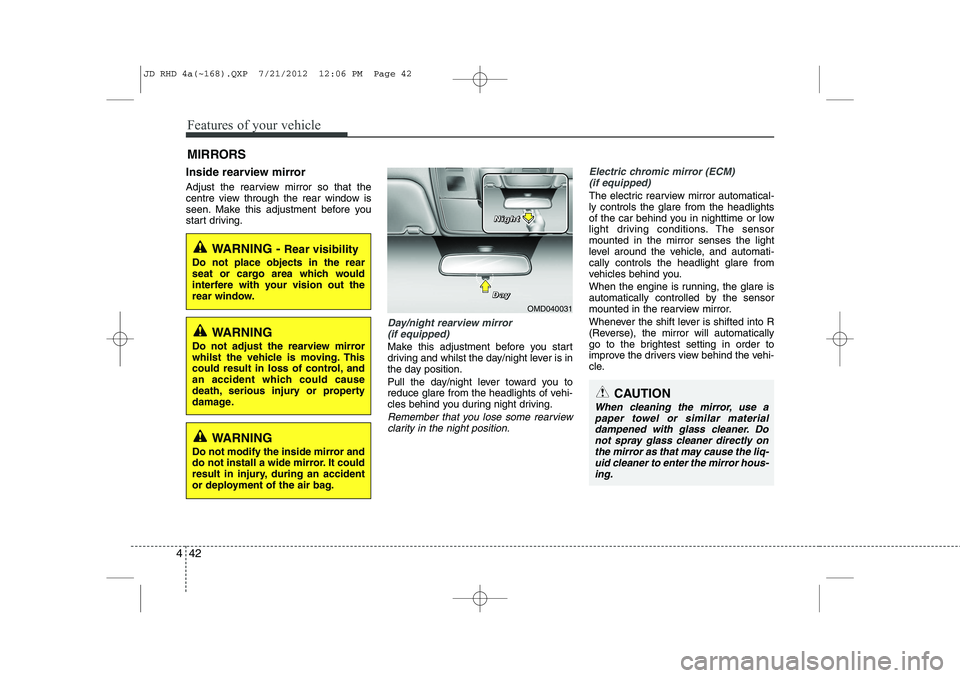
Day/night rearview mirror
(if equipped)
Make this adjustment before you start
driving and whilst the day/night lever is in
the day position.
Pull the day/night lever toward you to
reduce glare from the headlights of vehi-
cles behind you during night driving.
Remember that you lose some rearviewclarity in the night position.
Electric chromic mirror (ECM)
(if equipped)
The electric rearview mirror automatical- ly controls the glare from the headlights
of the car behind you in nighttime or low
light driving conditions. The sensormounted in the mirror senses the light
level around the vehicle, and automati-cally controls the headlight glare from
vehicles behind you.
When the engine is running, the glare is
automatically controlled by the sensor
mounted in the rearview mirror.
Whenever the shift lever is shifted into R
(Reverse), the mirror will automatically
go to the brightest setting in order to
improve the drivers view behind the vehi-
cle.
MIRRORS
WARNING -
Rear visibility
Do not place objects in the rear
seat or cargo area which would
interfere with your vision out the
rear window.
CAUTION
When cleaning the mirror, use a paper towel or similar materialdampened with glass cleaner. Do not spray glass cleaner directly on
the mirror as that may cause the liq- uid cleaner to enter the mirror hous-ing.
WARNING
Do not adjust the rearview mirror
whilst the vehicle is moving. This
could result in loss of control, and
an accident which could cause
death, serious injury or property
damage.
WARNING
Do not modify the inside mirror and
do not install a wide mirror. It could
result in injury, during an accident
or deployment of the air bag.
OMD040031
D
DDDaaaayyyy
NNNNiiiigggghhhhtttt
JD RHD 4a(~168).QXP 7/21/2012 12:06 PM Page 42
Page 824 of 1168

4 161
Features of your vehicle
Barrier net (wagon) (if equipped)
Your vehicle is equipped with a barrier net.
When you load some cargoes on the rear
seat or rear cargo area, you must install
the barrier net behind front seatback or
rear seatback. It is designed to help protect the heads of
the occupants by obstructing objects fly-
ing forward in frontal collisions. There are eight hook holders on both
side of the headliner over the headrests
for upper side fixation and on the floor
behind the front seats or rear seats for
lower side fixation.To install the barrier net
1. Open the cover for the holder position(1) or (2) you want to install.
2. Insert the net upper shaft into the large hole (3) and then secure by sliding into the small hole (4).
3. Hang the net strap hooks in the corre-sponding hook holders on the floorbehind the front seat or rear seat. This symbol indicates theposition of the hook holderson the floor behind the rearseat.
OGDE042299OJD042244OJD032057
OGDE042302
JD RHD 4a(~168).QXP 7/21/2012 12:17 PM Page 161
Page 825 of 1168

Features of your vehicle
162
4
4. Fasten the straps, by using the
adjuster (1).
To remove the barrier net
1. Loosen the straps by using the strap adjusters and remove the strap hooks
from the hook holders.
2. Remove the net upper shaft by pulling it through the large holes.
3. Remove the barrier net.
OGDE042303
WARNING
Make sure that there is no slack in the barrier net by fastening the
strap securely when installing the
net. The strap should be fastenedafter confirming that the hook is
inserted into the upper hook
holder securely.
Make sure that the seatbacks are locked securely.
WARNING
Do not put passengers in the rear seat or cargo area behind the bar- rier net.
Do not put passenger in the rear centre seat when the barrier netis installed behind the rear seats.
The barrier net may interfere with
use of the rear centre safety belt.
Do not load cargo in the area higher than the barrier net'supper end.
Do not load heavy cargo in the area higher than the seatback to
avoid accident even if the barriernet is installed.
Do not load cargo which has sharp edge that can pass throughthe barrier net.
Do not apply excessive force to the barrier net by hanging on to
the net or by suspending heavy
cargo and so on.
JD RHD 4a(~168).QXP 7/21/2012 12:17 PM Page 162
Page 964 of 1168
539
Driving your vehicle
EPB (electric parking brake) may be automatically applied when:
The EPB is overheated
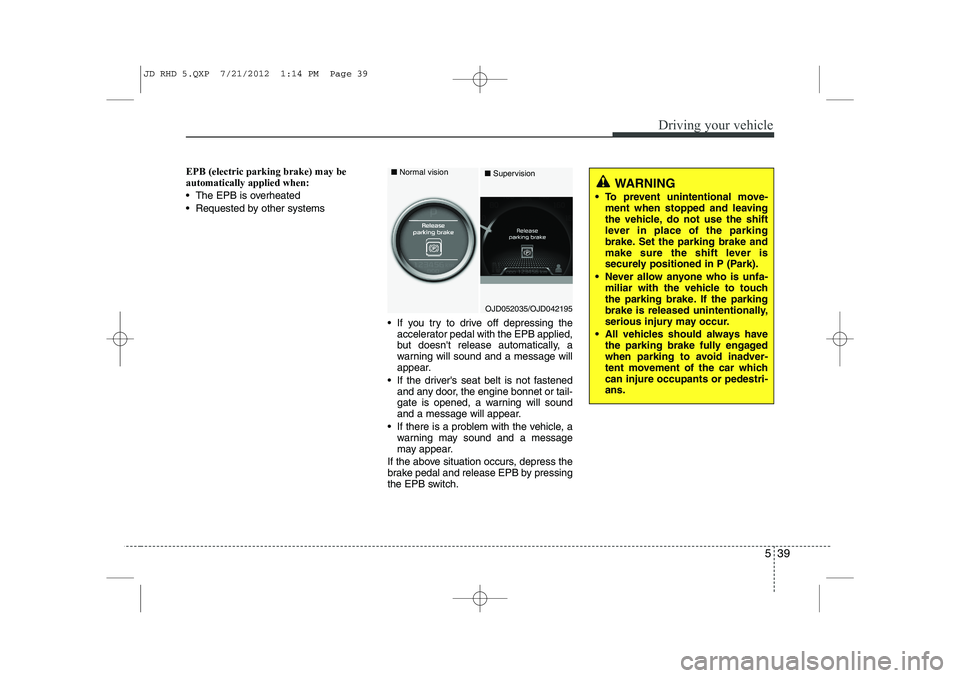
Requested by other systems If you try to drive off depressing theaccelerator pedal with the EPB applied,
but doesn't release automatically, a
warning will sound and a message will
appear.
If the driver's seat belt is not fastened and any door, the engine bonnet or tail-
gate is opened, a warning will sound
and a message will appear.
If there is a problem with the vehicle, a warning may sound and a message
may appear.
If the above situation occurs, depress the
brake pedal and release EPB by pressing
the EPB switch.
WARNING
To prevent unintentional move- ment when stopped and leaving
the vehicle, do not use the shift
lever in place of the parking
brake. Set the parking brake and
make sure the shift lever is
securely positioned in P (Park).
Never allow anyone who is unfa- miliar with the vehicle to touch
the parking brake. If the parking
brake is released unintentionally,
serious injury may occur.
All vehicles should always have the parking brake fully engaged
when parking to avoid inadver-
tent movement of the car whichcan injure occupants or pedestri-ans.
OJD052035/OJD042195
■
Normal vision
■Supervision
JD RHD 5.QXP 7/21/2012 1:14 PM Page 39
Page 1018 of 1168
613
What to do in an emergency
10. To reinstall the wheel, hold it onthe studs, put the wheel nuts on the studs and tighten them finger
tight. The nuts should be installedwith their tapered small diameter
ends directed inward. Jiggle thetyre to be sure it is completely
seated, then tighten the nuts as
much as possible with your fin-gers again.
11. Lower the vehicle to the ground by turning the wheel nut wrench
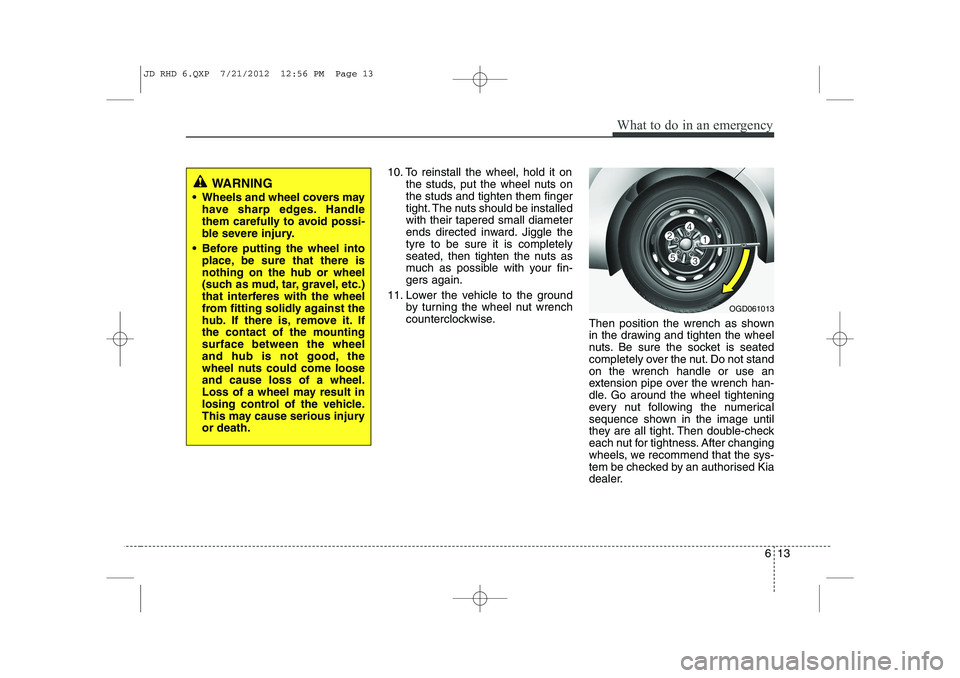
counterclockwise. Then position the wrench as shown
in the drawing and tighten the wheel
nuts. Be sure the socket is seated
completely over the nut. Do not standon the wrench handle or use an
extension pipe over the wrench han-
dle. Go around the wheel tightening
every nut following the numerical
sequence shown in the image until
they are all tight. Then double-check
each nut for tightness. After changing
wheels, we recommend that the sys-
tem be checked by an authorised Kia
dealer.
WARNING
Wheels and wheel covers may have sharp edges. Handle
them carefully to avoid possi-
ble severe injury.
Before putting the wheel into place, be sure that there isnothing on the hub or wheel
(such as mud, tar, gravel, etc.)
that interferes with the wheel
from fitting solidly against the
hub. If there is, remove it. Ifthe contact of the mountingsurface between the wheel
and hub is not good, the
wheel nuts could come looseand cause loss of a wheel.
Loss of a wheel may result in
losing control of the vehicle.
This may cause serious injuryor death.
OGD061013
JD RHD 6.QXP 7/21/2012 12:56 PM Page 13
Page 1140 of 1168

7 103
Maintenance
Interior care
Interior general precautions
Prevent chemicals such as perfume, cos-
metic oil, sun cream, hand cleaner, and
air freshener from contacting the interior
parts because they may cause damage
or discoloration. If they do contact the
interior parts, wipe them off immediately.
See the instructions that follow for the
proper way to clean vinyl.
Cleaning the upholstery and interiortrim
Vinyl
Remove dust and loose dirt from vinyl
with a whisk broom or vacuum cleaner.
Clean vinyl surfaces with a vinyl cleaner. Fabric
Remove dust and loose dirt from fabric
with a whisk broom or vacuum cleaner.Clean with a mild soap solution recom-
mended for upholstery or carpets.
Remove fresh spots immediately with a
fabric spot cleaner. If fresh spots do not
receive immediate attention, the fabriccan be stained and its colour can be
affected. Also, its fire-resistant properties
can be reduced if the material is not
properly maintained.
Cleaning the lap/shoulder belt web- bing
Clean the belt webbing with any mild
soap solution recommended for cleaning
upholstery or carpet. Follow the instruc-
tions provided with the soap. Do not
bleach or re-dye the webbing because
this may weaken it.
Cleaning the interior window glass
If the interior glass surfaces of the vehi-
cle become fogged (that is, covered with
an oily, greasy or waxy film), they should
be cleaned with glass cleaner. Follow the
directions on the glass cleaner container.
CAUTION
Never allow water or other liquidsto come in contact with
electrical/electronic components inside the vehicle as this may dam-age them.
CAUTION
Using anything but recommended
cleaners and procedures may affect the fabric’s appearance and fire-resistant properties.
CAUTION
When cleaning leather products
(steering wheel, seats etc.), useneutral detergents or low alcohol content solutions. If you use highalcohol content solutions or
acid/alkaline detergents, the colour of the leather may fade or the sur-face may get stripped off.
CAUTION
Do not scrape or scratch the insideof the rear window. This may result
in damage to the rear windowdefroster grid.
JD RHD 7.QXP 7/21/2012 12:53 PM Page 103
Page 1157 of 1168

Index
2
I
Active ECO system . . . . . . . . . . . . . . . . . . . . . . . . . . . 5-32
AFLS (Adaptive Front Lighting System) . . . . . . . . 4-117
Air bag warning label . . . . . . . . . . . . . . . . . . . . . . . . . 3-63
Air bag warning light . . . . . . . . . . . . . . . . . . . . . . . . . 3-43
Air bags . . . . . . . . . . . . . . . . . . . . . . . . . . . . . . . . . . . . 3-40
Air bag warning label . . . . . . . . . . . . . . . . . . . . . . . 3-54
Air bag warning light . . . . . . . . . . . . . . . . . . . . . . . . 3-43
Curtain air bag . . . . . . . . . . . . . . . . . . . . . . . . . . . . . 3-54
Driver's and passenger's front air bag . . . . . . . . . . 3-48
Passenger’s front air bag ON indicator . . . . . . . . . 3-44
Passenger’s front air bag ON/OFF switch . . . . . . . 3-50
Side impact air bag. . . . . . . . . . . . . . . . . . . . . . . . . . 3-53
SRS components and functions . . . . . . . . . . . . . . . . 3-45
Air cleaner . . . . . . . . . . . . . . . . . . . . . . . . . . . . . . . . . . 7-43
Air conditioner compressor label . . . . . . . . . . . . . . . 8-11
Air conditioning system . . . . . . . . . . . . . . . . . . . . . . . . 8-3
Alarm system. . . . . . . . . . . . . . . . . . . . . . . . . . . . . . . . 4-14
Aming . . . . . . . . . . . . . . . . . . . . . . . . . . . . . . . . . . . . . . 7-87
Anti-lock brake system (ABS) . . . . . . . . . . . . . . . . . . 5-41
Appearance care Interior care . . . . . . . . . . . . . . . . . . . . . . . . . . . . . . 7-103
Armrest (Rear seat) . . . . . . . . . . . . . . . . . . . . . . . . . . 3-14
Ashtray. . . . . . . . . . . . . . . . . . . . . . . . . . . . . . . . . . . . 4-154
Audio remote control . . . . . . . . . . . . . . . . . . . . . . . . 4-164 Audio system . . . . . . . . . . . . . . . . . . . . . . . . . . . . . . . 4-169
Audio remote control . . . . . . . . . . . . . . . . . . . . . . . 4-170
Roof antenna . . . . . . . . . . . . . . . . . . . . . . . . . . . . . . 4-169
Auto defogging system . . . . . . . . . . . . . . . . . . . . . . . 4-149
Auto light/AFLS position . . . . . . . . . . . . . . . . . . . . . 4-112
Automatic climate control system . . . . . . . . . . . . . . 4-136 Air conditioning . . . . . . . . . . . . . . . . . . . . . . . . . . . 4-145
Automatic heating and air conditioning . . . . . . . 4-137
Climate control air filter . . . . . . . . . . . . . . . . . . . . 4-146
Manual heating and air conditioning . . . . . . . . . . 4-139
Automatic transaxle / DCT . . . . . . . . . . . . . . . . . . . . 5-23 DS mode. . . . . . . . . . . . . . . . . . . . . . . . . . . . . . . . . . . 5-27
Paddle shifter . . . . . . . . . . . . . . . . . . . . . . . . . . . . . . 5-28
Shift lock system . . . . . . . . . . . . . . . . . . . . . . . . . . . . 5-29
Sports mode. . . . . . . . . . . . . . . . . . . . . . . . . . . . . . . . 5-27
Automatic transaxle shift position indicator (Normal vision) . . . . . . . . . . . . . . . . . . . . . . . . . . . . . 4-49
Automatic transaxle shift position indicator (Super vision) . . . . . . . . . . . . . . . . . . . . . . . . . . . . . . 4-62
Aux, USB and iPod . . . . . . . . . . . . . . . . . . . . . . . . . . 4-158
Barrier net . . . . . . . . . . . . . . . . . . . . . . . . . . . . . . . . . 4-161
Battery . . . . . . . . . . . . . . . . . . . . . . . . . . . . . . . . . . . . . 7-50
Battery replacement (Remote keyless entry) . . . . . . . 4-9
Battery saver function . . . . . . . . . . . . . . . . . . . . . . . 4-110
A
B
JD RHD Index.QXP 7/21/2012 1:10 PM Page 2