headlight aiming KIA CEED 2014 Owners Manual
[x] Cancel search | Manufacturer: KIA, Model Year: 2014, Model line: CEED, Model: KIA CEED 2014Pages: 1206, PDF Size: 50.15 MB
Page 411 of 1206
565
Driving your vehicle
✽✽NOTICE
The ESC system should be turned OFF
prior to rocking the vehicle.
Smooth cornering
Avoid braking or gear changing in cor-
ners, especially when roads are wet.
Ideally, corners should always be taken
under gentle acceleration. If you follow
these suggestions, tire wear will be held
to a minimum. Driving at night
Because night driving presents more
hazards than driving in the daylight, here
are some important tips to remember:
Slow down and keep more distance between you and other vehicles, as it
may be more difficult to see at night,
especially in areas where there may
not be any street lights.
Adjust your mirrors to reduce the glare from other driver's headlights.
Keep your headlights clean and prop- erly aimed on vehicles not equippedwith the automatic headlight aiming
feature. Dirty or improperly aimed
headlights will make it much more diffi-cult to see at night.
Avoid staring directly at the headlights of oncoming vehicles. You could be
temporarily blinded, and it will take
several seconds for your eyes to read-
just to the darkness. Driving in the rain
Rain and wet roads can make driving
dangerous, especially if you’re not pre-
pared for the slick pavement. Here are a
few things to consider when driving in the
rain:
A heavy rainfall will make it harder to
see and will increase the distance
needed to stop your vehicle, so slow
down.
Keep your windshield wiping equip- ment in good shape. Replace your
windshield wiper blades when they
show signs of streaking or missingareas on the windshield.
If your tires are not in good condition, making a quick stop on wet pavement
can cause a skid and possibly lead to
an accident. Be sure your tires are in
good shape.
Turn on your headlights to make it eas- ier for others to see you.
Driving too fast through large puddles can affect your brakes. If you must go
through puddles, try to drive through
them slowly.
If you believe you may have gotten your brakes wet, apply them lightly
while driving until normal braking oper-
ation returns.
WARNING - Spinning tires
Do not spin the wheels, especially at speeds more than 56 km/h (35
mph). Spinning the wheels at high
speeds when the vehicle is station-
ary could cause a tire to overheat
which could result in tire damage
that may injure bystanders.
WARNING
If your vehicle becomes stuck in
snow, mud, sand, etc., then you
may attempt to rock the vehicle free
by moving it forward and backward.
Do not attempt this procedure if
people or objects are anywhere
near the vehicle. During the rocking
operation the vehicle may suddenly
move forward or backward as it
becomes unstuck, causing injury
or damage to nearby people orobjects.
JD eng 5.QXP 5/6/2013 10:09 AM Page 65
Page 550 of 1206

Maintenance
92
7
13. Connect the headlight bulb socket
connector.
14. Install the headlight bulb cover by turning it clockwise.
15. Connect the power connector to the back of the headlight assembly.
Position light (3, bulb type)
Follow the steps 1 to 9 from the previous
page.
10. Pull out the socket from the assembly.
11. Pull the bulb out of the socket.
12. Insert a new bulb into the socket.
13. Install the socket into the assembly.
14. Install the headlight bulb cover byturning it clockwise.
Headlight (Low, Non-HID Type)
Follow the steps 1 to 7 from the previous
page.
8. Remove the cover by turning it coun-terclockwise.
9. Remove the socket from the assembly by turning the socket counterclockwise
until the tabs on the socket align with
the slots on the assembly.
10. Pull the bulb out of the socket.
11. Insert a new bulb into the socket.
12. Install the socket in the assembly by aligning the tabs on the socket with
the slots in the assembly. Push the
socket into the assembly and turn the
socket clockwise.
13. Install the headlight bulb cover by turning it clockwise.
✽✽NOTICE
If the headlight aiming adjustment is
necessary after the headlight assembly is
reinstalled, consult an authorized Kia
dealer.
OJD072042
JD eng 7.QXP 5/6/2013 9:51 AM Page 92
Page 551 of 1206

793
Maintenance
Headlight (Low, HID type),Position light/DRL (LED type)
If the light does not operate, we recom-
mend that the system be checked by an
authorized Kia dealer.
✽✽ NOTICE
HID lamps have superior performance
vs. halogen bulbs. HID lamps are esti-
mated by the manufacturer to last twice
as long or longer than halogen bulbs
depending on their frequency of use.
They will probably require replacementat some point in the life of the vehicle.
Cycling the headlamps on and off morethan typical use will shorten HID lampslife. HID lamps do not fail in the same
manner as halogen incandescent lamps.
If a headlamp goes out after a period of
operation but will immediately relightwhen the headlamp switch is cycled it is
likely the HID lamp needs to be replaced.
HID lighting components are more com-plex than conventional halogen bulbs
thus have higher replacement cost.
❈❈ Traffic Change (For Europe)
The low beam light distribution is asym-
metric. If you go abroad to a country with
opposite traffic direction, this asymmetric
part will dazzle oncoming car driver. To
prevent dazzle, ECE regulation demand
several technical solutions (ex. automatic
change system, adhesive sheet, down
aiming). This headlamps are designed
not to dazzle opposite drivers. So, you
need not change your headlamps in a
country with opposite traffic direction.
WARNING - HID Headlight
low beam (if equipped)
Do not attempt to replace or
inspect the low beam (XENON bulb)
due to electric shock danger. If the
low beam (XENON bulb) is not
working, we recommend that the
system be checked by an author-
ized Kia dealer.
OHD076046
WARNING - Halogen bulbs
Halogen bulbs contain pressurized
gas that will produce flying pieces
of glass if broken.
Always handle them carefully, and avoid scratches and abrasions. If
the bulbs are lit, avoid contact with
liquids. Never touch the glass with
bare hands. Residual oil may cause
the bulb to overheat and burst
when lit. A bulb should be operated
only when installed in a headlight.
If a bulb is damaged or cracked, replace it immediately and carefullydispose of it.
Wear eye protection when chang- ing a bulb. Allow the bulb to cool
down before handling it.
JD eng 7.QXP 5/6/2013 9:51 AM Page 93
Page 553 of 1206

795
Maintenance
4. Remove the bulb-socket from thehousing by turning the socket counter
clockwise until the tabs on the socketalign with the slots on the housing.
5. Install the new bulb-socket into the housing by aligning the tabs on the
socket with the slots in the housing.
Push the socket into the housing and
turn the socket clockwise.
6. Connect the power connector to the socket. Headlight and front fog light aim-
ing (for Europe)
Headlight aiming
Without AFLS
1. Inflate the tires to the specified pres-
sure and remove any loads from the
vehicle except the driver, spare tire,
and tools.
2. The vehicle should be placed on a flat floor.
3. Draw vertical lines (Vertical lines pass- ing through respective head lamp cen-
ters) and a horizontal line (Horizontalline passing through center of headlamps) on the screen. 4. With the head lamp and battery in nor-
mal condition, aim the head lamps so
the brightest portion falls on the hori-
zontal and vertical lines.
5. To aim the low beam left or right, turn the driver (1) clockwise or counter-
clockwise. To aim the low beam up or
down, turn the driver (2) clockwise or
counterclockwise.
To aim the high beam up or down, turnthe driver (3) clockwise or counter-
clockwise.
OJD072027
■ Fog light
■Fog light+DRL (Bulb type) ■
DRL
OJD073067/OJD073068/OJD073069
JD eng 7.QXP 5/6/2013 9:52 AM Page 95
Page 1014 of 1206
565
Driving your vehicle
✽✽NOTICE
The ESC system should be turned OFF
prior to rocking the vehicle.
Smooth cornering
Avoid braking or gear changing in cor-
ners, especially when roads are wet.
Ideally, corners should always be taken
under gentle acceleration. If you follow
these suggestions, tyre wear will be held
to a minimum. Driving at night
Because night driving presents more
hazards than driving in the daylight, here
are some important tips to remember:
Slow down and keep more distance between you and other vehicles, as it
may be more difficult to see at night,
especially in areas where there may
not be any street lights.
Adjust your mirrors to reduce the glare from other driver's headlights.
Keep your headlights clean and prop- erly aimed on vehicles not equippedwith the automatic headlight aiming
feature. Dirty or improperly aimed
headlights will make it much more diffi-cult to see at night.
Avoid staring directly at the headlights of oncoming vehicles. You could be
temporarily blinded, and it will take
several seconds for your eyes to read-
just to the darkness. Driving in the rain
Rain and wet roads can make driving
dangerous, especially if you’re not pre-
pared for the slick pavement. Here are a
few things to consider when driving in the
rain:
A heavy rainfall will make it harder to
see and will increase the distance
needed to stop your vehicle, so slow
down.
Keep your windscreen wiping equip- ment in good shape. Replace your
windscreen wiper blades when they
show signs of streaking or missingareas on the windscreen.
If your tyres are not in good condition, making a quick stop on wet pavement
can cause a skid and possibly lead to
an accident. Be sure your tyres are in
good shape.
Turn on your headlights to make it eas- ier for others to see you.
Driving too fast through large puddles can affect your brakes. If you must go
through puddles, try to drive through
them slowly.
If you believe you may have gotten your brakes wet, apply them lightly
whilst driving until normal braking
operation returns.
WARNING - Spinning tyres
Do not spin the wheels, especially at speeds more than 56 km/h (35
mph). Spinning the wheels at high
speeds when the vehicle is station-
ary could cause a tyre to overheat
which could result in tyre damage
that may injure bystanders.
WARNING
If your vehicle becomes stuck in
snow, mud, sand, etc., then you
may attempt to rock the vehicle free
by moving it forward and backward.
Do not attempt this procedure if
people or objects are anywhere
near the vehicle. During the rocking
operation the vehicle may suddenly
move forward or backward as it
becomes unstuck, causing injury
or damage to nearby people orobjects.
JD RHD 5.QXP 4/29/2013 11:28 AM Page 65
Page 1153 of 1206
Maintenance
92
7
13. Connect the headlight bulb socket
connector.
14. Install the headlight bulb cover by turning it clockwise.
15. Connect the power connector to the back of the headlight assembly.
Position light (3, bulb type)
Follow the steps 1 to 9 from the previous
page.
10. Pull out the socket from the assembly.
11. Pull the bulb out of the socket.
12. Insert a new bulb into the socket.
13. Install the socket into the assembly.
14. Install the headlight bulb cover byturning it clockwise.
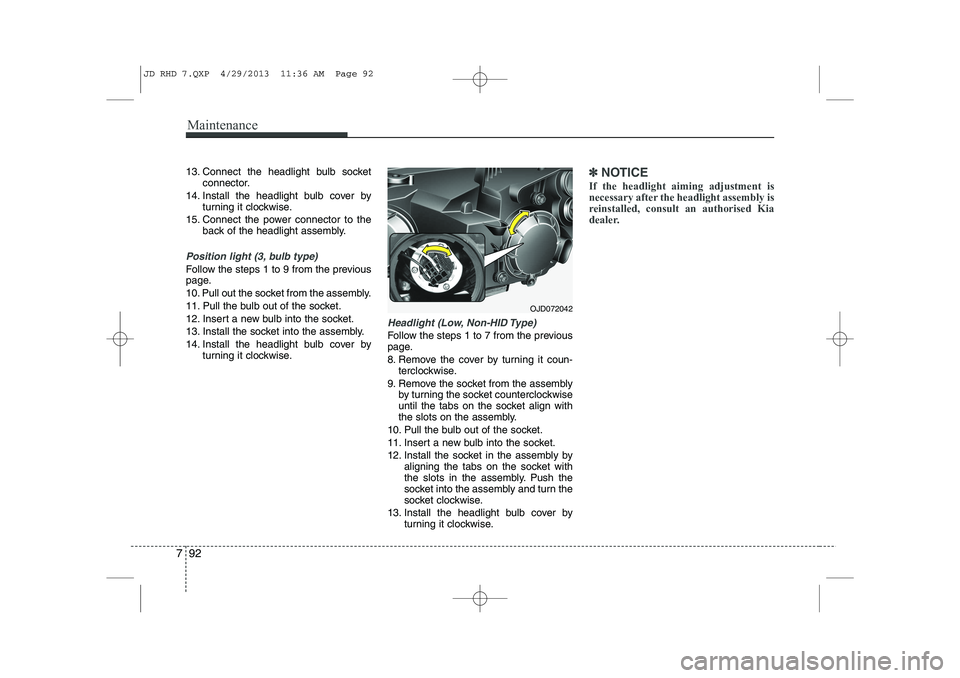
Headlight (Low, Non-HID Type)
Follow the steps 1 to 7 from the previous
page.
8. Remove the cover by turning it coun-terclockwise.
9. Remove the socket from the assembly by turning the socket counterclockwise
until the tabs on the socket align with
the slots on the assembly.
10. Pull the bulb out of the socket.
11. Insert a new bulb into the socket.
12. Install the socket in the assembly by aligning the tabs on the socket with
the slots in the assembly. Push the
socket into the assembly and turn the
socket clockwise.
13. Install the headlight bulb cover by turning it clockwise.
✽✽NOTICE
If the headlight aiming adjustment is
necessary after the headlight assembly is
reinstalled, consult an authorised Kia
dealer.
OJD072042
JD RHD 7.QXP 4/29/2013 11:36 AM Page 92
Page 1154 of 1206
793
Maintenance
Headlight (Low, HID type),Position light/DRL (LED type)
If the light does not operate, we recom-
mend that the system be checked by an
authorised Kia dealer.
✽✽ NOTICE
HID lamps have superior performance
vs. halogen bulbs. HID lamps are esti-
mated by the manufacturer to last twice
as long or longer than halogen bulbs
depending on their frequency of use.
They will probably require replacementat some point in the life of the vehicle.
Cycling the headlamps on and off morethan typical use will shorten HID lampslife. HID lamps do not fail in the same
manner as halogen incandescent lamps.
If a headlamp goes out after a period of
operation but will immediately relightwhen the headlamp switch is cycled it is
likely the HID lamp needs to be replaced.
HID lighting components are more com-plex than conventional halogen bulbs
thus have higher replacement cost.
❈❈ Traffic Change (For Europe)
The low beam light distribution is asym-
metric. If you go abroad to a country with
opposite traffic direction, this asymmetric
part will dazzle oncoming car driver. To
prevent dazzle, ECE regulation demand
several technical solutions (ex. automatic
change system, adhesive sheet, down
aiming). This headlamps are designed
not to dazzle opposite drivers. So, you
need not change your headlamps in a
country with opposite traffic direction.
WARNING - HID Headlight
low beam (if equipped)
Do not attempt to replace or
inspect the low beam (XENON bulb)
due to electric shock danger. If the
low beam (XENON bulb) is not
working, we recommend that the
system be checked by an autho-
rised Kia dealer.
OHD076046
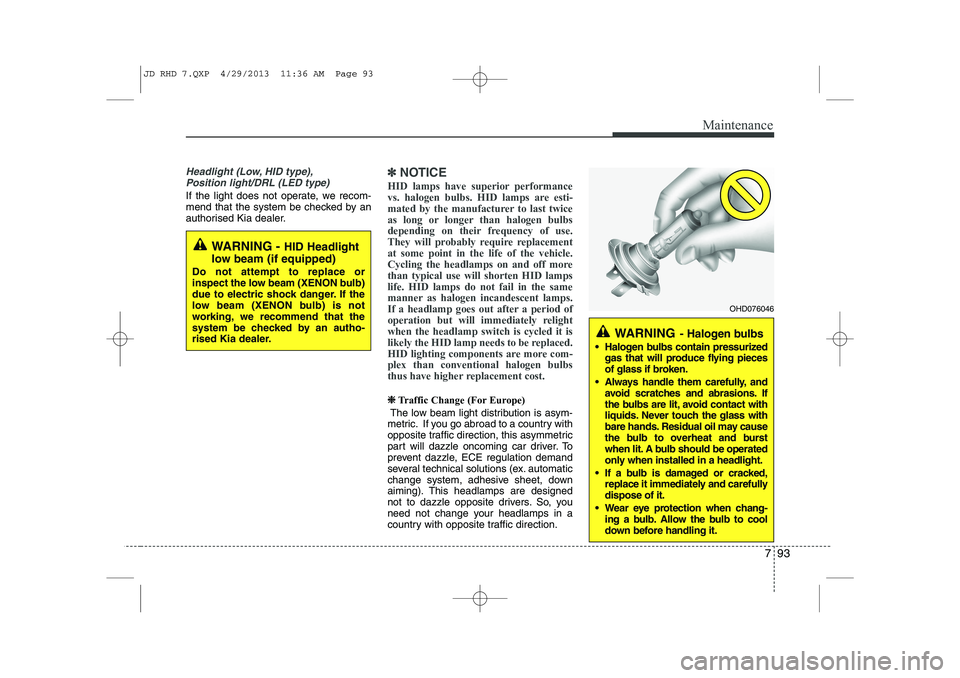
WARNING - Halogen bulbs
Halogen bulbs contain pressurized
gas that will produce flying pieces
of glass if broken.
Always handle them carefully, and avoid scratches and abrasions. If
the bulbs are lit, avoid contact with
liquids. Never touch the glass with
bare hands. Residual oil may cause
the bulb to overheat and burst
when lit. A bulb should be operated
only when installed in a headlight.
If a bulb is damaged or cracked, replace it immediately and carefullydispose of it.
Wear eye protection when chang- ing a bulb. Allow the bulb to cool
down before handling it.
JD RHD 7.QXP 4/29/2013 11:36 AM Page 93
Page 1156 of 1206
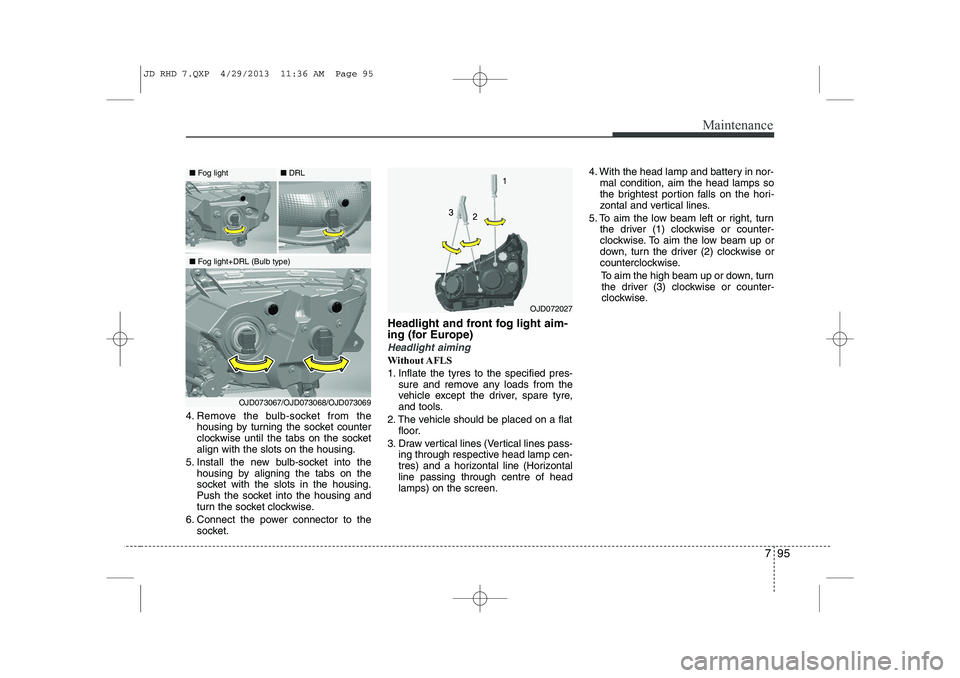
795
Maintenance
4. Remove the bulb-socket from thehousing by turning the socket counter
clockwise until the tabs on the socketalign with the slots on the housing.
5. Install the new bulb-socket into the housing by aligning the tabs on the
socket with the slots in the housing.
Push the socket into the housing and
turn the socket clockwise.
6. Connect the power connector to the socket. Headlight and front fog light aim-
ing (for Europe)
Headlight aiming
Without AFLS
1. Inflate the tyres to the specified pres-
sure and remove any loads from the
vehicle except the driver, spare tyre,
and tools.
2. The vehicle should be placed on a flat floor.
3. Draw vertical lines (Vertical lines pass- ing through respective head lamp cen-
tres) and a horizontal line (Horizontalline passing through centre of headlamps) on the screen. 4. With the head lamp and battery in nor-
mal condition, aim the head lamps so
the brightest portion falls on the hori-
zontal and vertical lines.
5. To aim the low beam left or right, turn the driver (1) clockwise or counter-
clockwise. To aim the low beam up or
down, turn the driver (2) clockwise or
counterclockwise.
To aim the high beam up or down, turnthe driver (3) clockwise or counter-
clockwise.
OJD072027
■ Fog light
■Fog light+DRL (Bulb type) ■
DRL
OJD073067/OJD073068/OJD073069
JD RHD 7.QXP 4/29/2013 11:36 AM Page 95