headrest KIA CERATO 2008 Owners Manual
[x] Cancel search | Manufacturer: KIA, Model Year: 2008, Model line: CERATO, Model: KIA CERATO 2008Pages: 327, PDF Size: 42.19 MB
Page 26 of 327
Knowing your vehicle
16
3
1 23456789
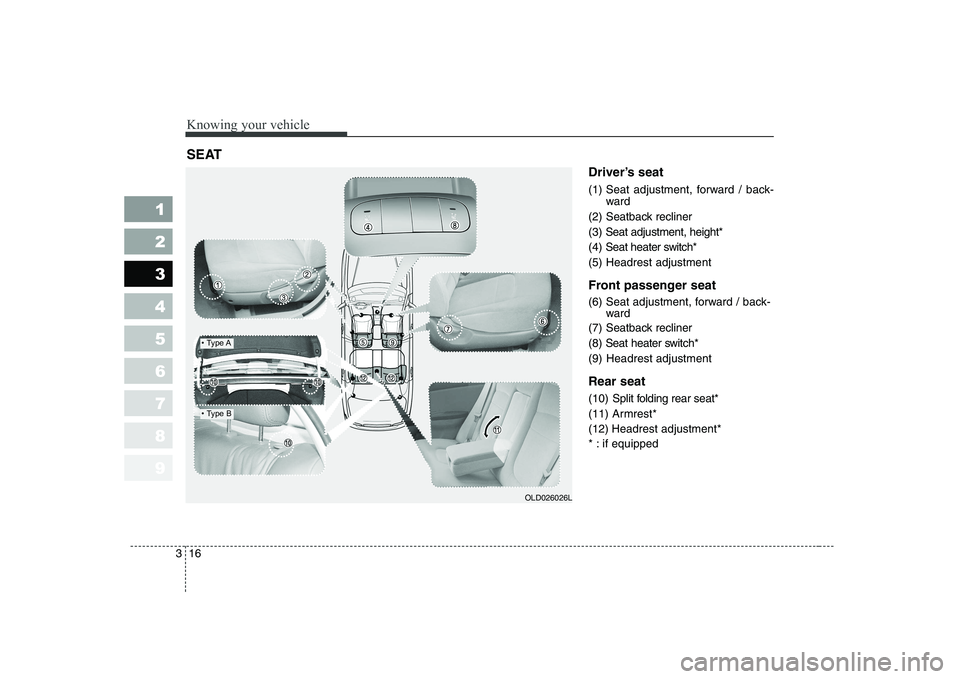
Driver’s seat
(1) Seat adjustment, forward / back-
ward
(2) Seatback recliner
(3) Seat adjustment, height*
(4) Seat heater switch*(5) Headrest adjustment
Front passenger seat
(6) Seat adjustment, forward / back- ward
(7) Seatback recliner (8)
Seat heater switch*
(9) Headrest adjustment Rear seat (10) Split folding rear seat*
(11) Armrest*
(12) Headrest adjustment*
* : if equipped
SEAT
OLD026026L
Page 31 of 327
321
1 23456789
Knowing your vehicle
Headrest adjustment
Adjusting the height up and down
The headrest not only provides com-
fort for the driver and passengers,
but also helps to protect the head
and neck in the event of a collision.
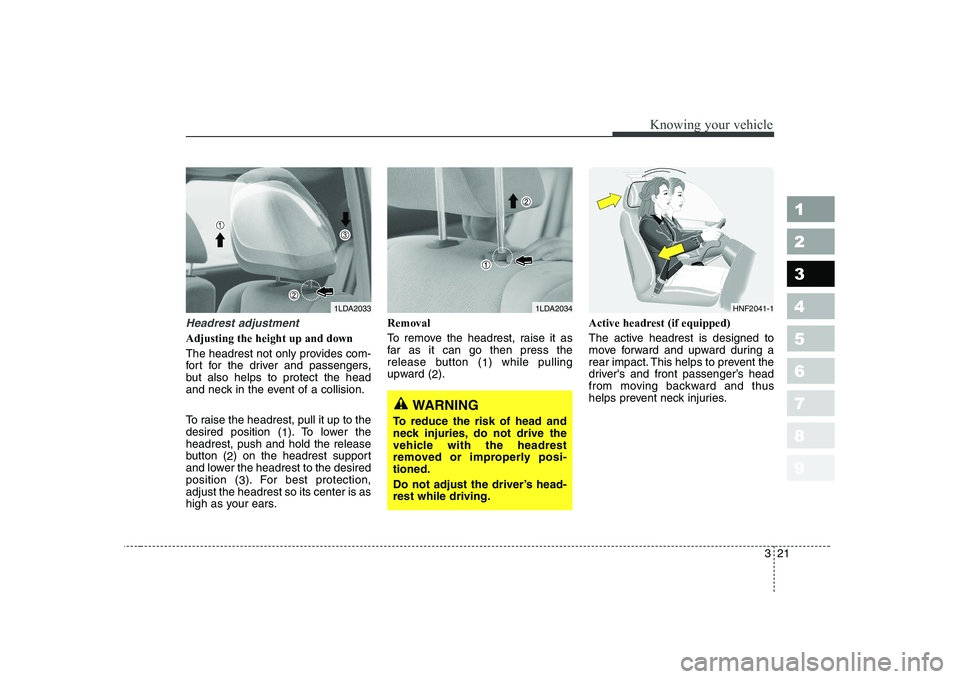
To raise the headrest, pull it up to the desired position (1). To lower the
headrest, push and hold the release
button ( 2) on the headrest support
and lower the headrest to the desiredposition ( 3). For best protection,
adjust the headrest so its center is as
high as your ears. Removal
To remove the headrest, raise it as
far as it can go then press the
release button (
1) while pulling
upward ( 2). Active headrest (if equipped)
The active headrest is designed to
move forward and upward during a
rear impact. This helps to prevent the
driver's and front passenger’s head
from moving backward and thus
helps prevent neck injuries.
1LDA20331LDA2034
WARNING
To reduce the risk of head and
neck injuries, do not drive the
vehicle with the headrest
removed or improperly posi-tioned.
Do not adjust the driver’s head- rest while driving.
HNF2041-1
Page 35 of 327
325
1 23456789
Knowing your vehicle
Headrest adjustment
Adjusting the height up and down
The headrest not only provides com-
fort for the driver and passengers,
but also helps to protect the head
and neck in the event of a collision.
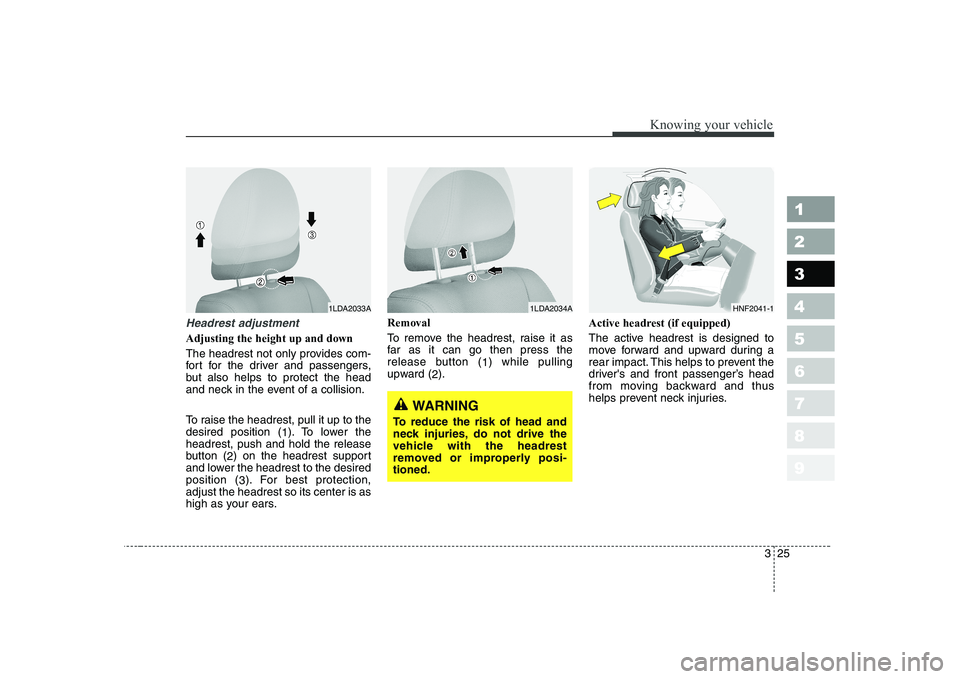
To raise the headrest, pull it up to the desired position (1). To lower the
headrest, push and hold the release
button ( 2) on the headrest support
and lower the headrest to the desiredposition ( 3). For best protection,
adjust the headrest so its center is as
high as your ears. Removal
To remove the headrest, raise it as
far as it can go then press the
release button (
1) while pulling
upward ( 2). Active headrest (if equipped)
The active headrest is designed to
move forward and upward during a
rear impact. This helps to prevent the
driver's and front passenger’s head
from moving backward and thus
helps prevent neck injuries.
1LDA2033A1LDA2034A
WARNING
To reduce the risk of head and
neck injuries, do not drive the
vehicle with the headrest
removed or improperly posi-tioned.
HNF2041-1
Page 37 of 327
327
1 23456789
Knowing your vehicle
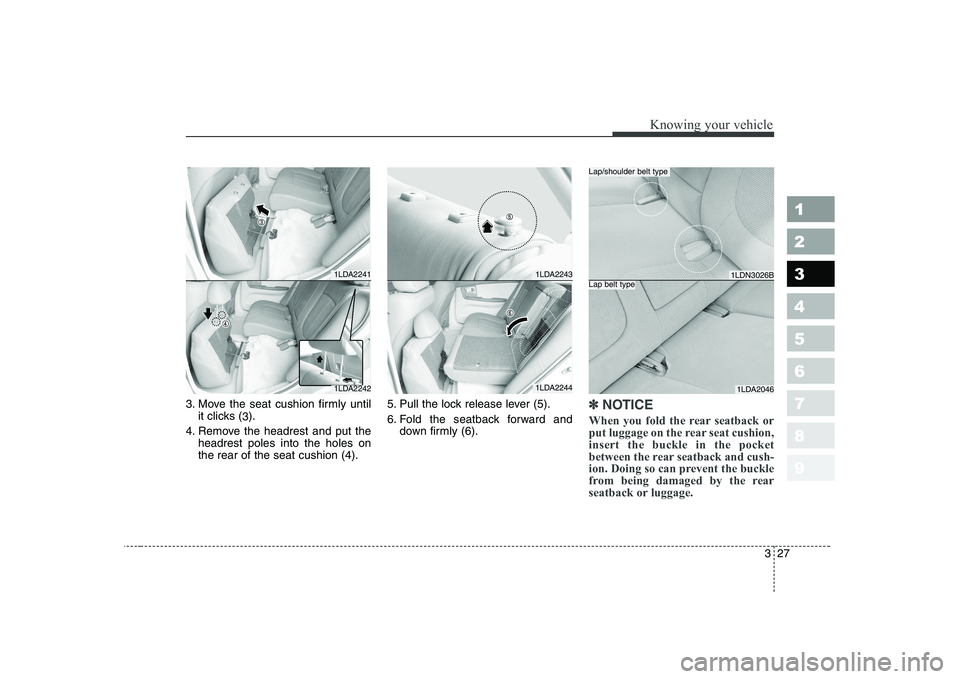
3. Move the seat cushion firmly untilit clicks ( 3).
4. Remove the headrest and put the headrest poles into the holes on the rear of the seat cushion (4). 5. Pull the lock release lever (5).
6. Fold the seatback forward and
down firmly (6).✽✽ NOTICE
When you fold the rear seatback or
put luggage on the rear seat cushion,insert the buckle in the pocket
between the rear seatback and cush-
ion. Doing so can prevent the buckle
from being damaged by the rear
seatback or luggage.
1LDA2243
1LDA2244
1LDA2241
1LDA2242
1LDN3026B
1LDA2046
Lap/shoulder belt type
Lap belt type
Page 39 of 327
329
1 23456789
Knowing your vehicle
Armrest (if equipped)
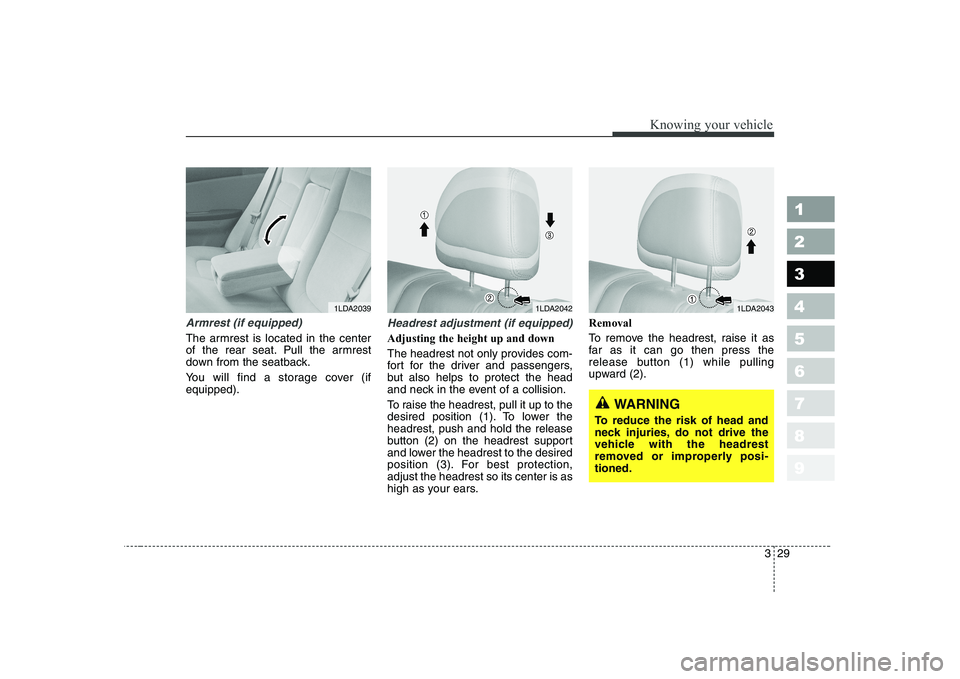
The armrest is located in the center
of the rear seat. Pull the armrest
down from the seatback.
You will find a storage cover (if equipped).
Headrest adjustment (if equipped)
Adjusting the height up and down
The headrest not only provides com-
fort for the driver and passengers,
but also helps to protect the head
and neck in the event of a collision.
To raise the headrest, pull it up to the
desired position (1). To lower theheadrest, push and hold the release
button (2) on the headrest support
and lower the headrest to the desired
position (3). For best protection,adjust the headrest so its center is as
high as your ears.Removal
To remove the headrest, raise it as
far as it can go then press the
release button (1) while pulling
upward (2).
1LDA2042
WARNING
To reduce the risk of head and
neck injuries, do not drive the
vehicle with the headrest
removed or improperly posi-tioned.
1LDA20431LDA2039
Page 61 of 327
351
1 23456789
Knowing your vehicle
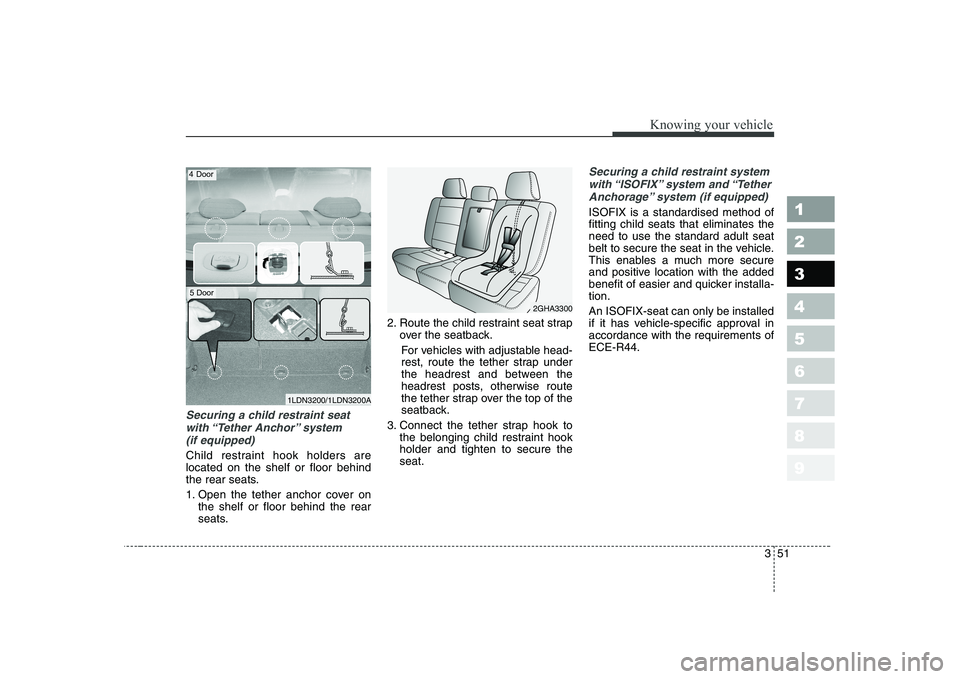
Securing a child restraint seatwith “Tether Anchor” system (if equipped)
Child restraint hook holders are located on the shelf or floor behind
the rear seats.
1. Open the tether anchor cover on the shelf or floor behind the rear
seats. 2. Route the child restraint seat strap
over the seatback.
For vehicles with adjustable head-
rest, route the tether strap under
the headrest and between the
headrest posts, otherwise route
the tether strap over the top of the
seatback.
3. Connect the tether strap hook to the belonging child restraint hookholder and tighten to secure theseat.
Securing a child restraint system
with “ISOFIX” system and “Tether Anchorage” system (if equipped)
ISOFIX is a standardised method of fitting child seats that eliminates theneed to use the standard adult seat
belt to secure the seat in the vehicle.
This enables a much more secure
and positive location with the added
benefit of easier and quicker installa-tion. An ISOFIX-seat can only be installed
if it has vehicle-specific approval inaccordance with the requirements ofECE-R44.
1LDN3200/1LDN3200A
2GHA3300
4 Door
5 Door