automatic KIA Cerato 2010 1.G Repair Manual
[x] Cancel search | Manufacturer: KIA, Model Year: 2010, Model line: Cerato, Model: KIA Cerato 2010 1.GPages: 321, PDF Size: 6.3 MB
Page 239 of 321
65
What to do in an emergency
F040101AUNJump starting procedure 1. Make sure the booster battery is 12-volt and that its negative terminal is
grounded.
2. If the booster battery is in another vehicle, do not allow the vehicles to
touch.
3. Turn off all unnecessary electrical loads.
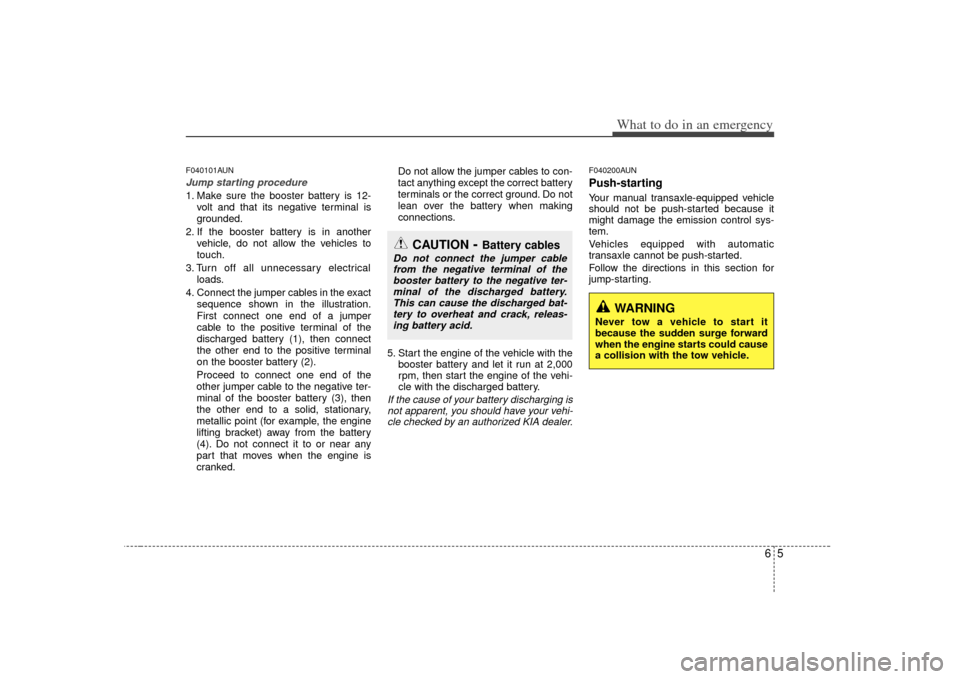
4. Connect the jumper cables in the exact sequence shown in the illustration.
First connect one end of a jumper
cable to the positive terminal of the
discharged battery (1), then connect
the other end to the positive terminal
on the booster battery (2).
Proceed to connect one end of the
other jumper cable to the negative ter-
minal of the booster battery (3), then
the other end to a solid, stationary,
metallic point (for example, the engine
lifting bracket) away from the battery
(4). Do not connect it to or near any
part that moves when the engine is
cranked. Do not allow the jumper cables to con-
tact anything except the correct battery
terminals or the correct ground. Do not
lean over the battery when making
connections.
5. Start the engine of the vehicle with the booster battery and let it run at 2,000
rpm, then start the engine of the vehi-
cle with the discharged battery.
If the cause of your battery discharging isnot apparent, you should have your vehi- cle checked by an authorized KIA dealer.
F040200AUNPush-starting Your manual transaxle-equipped vehicle
should not be push-started because it
might damage the emission control sys-
tem.
Vehicles equipped with automatic
transaxle cannot be push-started.
Follow the directions in this section for
jump-starting.
WARNING
Never tow a vehicle to start it
because the sudden surge forward
when the engine starts could cause
a collision with the tow vehicle.
CAUTION
- Battery cables
Do not connect the jumper cablefrom the negative terminal of thebooster battery to the negative ter- minal of the discharged battery.This can cause the discharged bat- tery to overheat and crack, releas-ing battery acid.
Page 240 of 321
What to do in an emergency66IF THE ENGINE OVERHEATSF050000ATDIf your temperature gauge indicates over-
heating, you will experience a loss of
power, or hear loud pinging or knocking,
the engine is probably too hot. If this hap-
pens, you should:
1. Pull off the road and stop as soon as itis safe to do so.
2. Place the shift lever in P (automatic transaxle) or neutral (manual
transaxle) and set the parking brake. If
the air conditioning is on, turn it off.
3. If engine coolant is running out under the vehicle or steam is coming out
from underneath the hood, stop the
engine. Do not open the hood until the
coolant has stopped running or the
steaming has stopped. If there is no
visible loss of engine coolant and no
steam, leave the engine running and
check to be sure the engine cooling
fan is operating. If the fan is not run-
ning, turn the engine off.
4. Check to see if the water pump drive belt is missing. If it is not missing,
check to see that it is tight. If the drive
belt seems to be satisfactory, check for
coolant leaking from the radiator,
hoses or under the vehicle. (If the air
conditioning had been in use, it is nor-
mal for cold water to be draining from
it when you stop). 5. If the water pump drive belt is broken
or engine coolant leaks, stop the
engine immediately and call the near-
est authorized KIA dealer for assis-
tance. 6. If you cannot find the cause of the
overheating, wait until the engine tem-
perature has returned to normal. Then,
if coolant has been lost, carefully add
coolant to the reservoir to bring the
fluid level in the reservoir up to the
halfway mark.
7. Proceed with caution, keeping alert for further signs of overheating. If over-
heating happens again, call an author-
ized KIA dealer for assistance.
CAUTION
Serious loss of coolant indicates
there is a leak in the cooling systemand this should be checked as soonas possible by an authorized KIAdealer.
WARNING
While the engine is running, keep
hair, hands and clothing away from
moving parts such as the fan and
drive belts to prevent injury.
WARNING
Do not remove the radiator cap
when the engine is hot. This can
allow coolant to be blown out of the
opening and cause serious burns.
Page 242 of 321
What to do in an emergency86
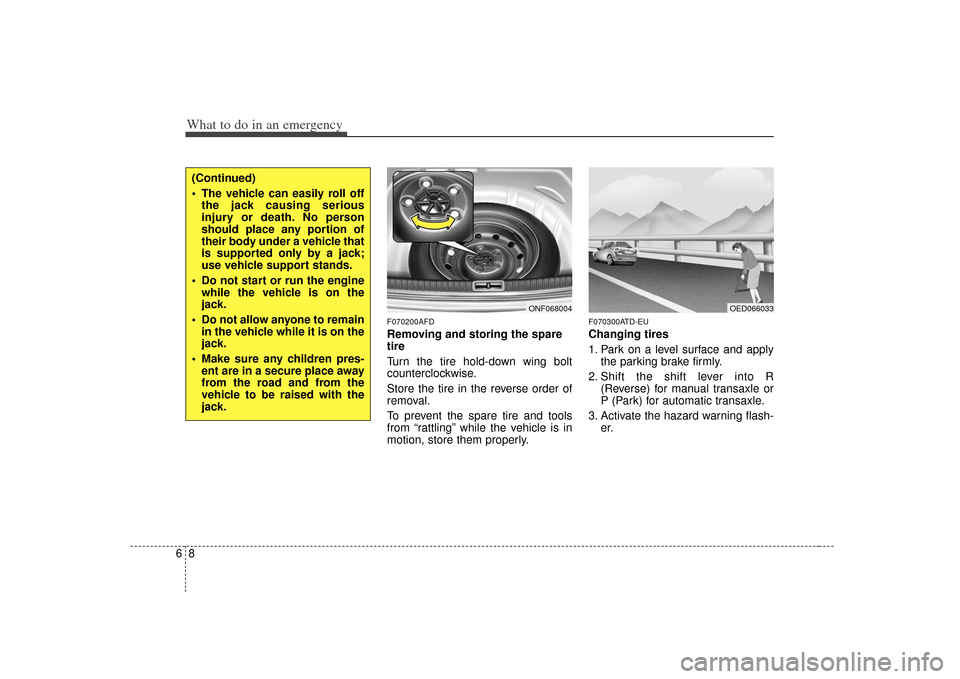
F070200AFDRemoving and storing the spare
tire
Turn the tire hold-down wing bolt
counterclockwise.
Store the tire in the reverse order of
removal.
To prevent the spare tire and tools
from “rattling” while the vehicle is in
motion, store them properly.
F070300ATD-EUChanging tires
1. Park on a level surface and applythe parking brake firmly.
2. Shift the shift lever into R (Reverse) for manual transaxle or
P (Park) for automatic transaxle.
3. Activate the hazard warning flash- er.
ONF068004
(Continued)
The vehicle can easily roll offthe jack causing serious
injury or death. No person
should place any portion of
their body under a vehicle that
is supported only by a jack;
use vehicle support stands.
Do not start or run the engine while the vehicle is on the
jack.
Do not allow anyone to remain in the vehicle while it is on the
jack.
Make sure any children pres- ent are in a secure place away
from the road and from the
vehicle to be raised with the
jack.
OED066033
Page 248 of 321
What to do in an emergency14
6 Do not take this vehicle through an
automatic car wash while the com-
pact spare tire is installed.
The compact spare tire should not be installed on the front axle if the
vehicle must be driven in snow or
on ice.
Do not use the compact spare tire on any other vehicle because this
tire has been designed especially
for your vehicle.
The compact spare tire’s tread life is shorter than a regular tire.
Inspect your compact spare tire
regularly and replace worn com-
pact spare tires with the same size
and design, mounted on the same
wheel. The compact spare tire should not
be used on any other wheels, nor
should standard tires, snow tires,
wheel covers or trim rings be used
with the compact spare wheel. If
such use is attempted, damage to
these items or other car compo-
nents may occur.
Do not use more than one compact spare tire at a time.
Do not tow a trailer while the com- pact spare tire is installed.
Page 252 of 321
What to do in an emergency18
6F080301AUN-EUEmergency towing precautions Turn the ignition switch to ACC so the
steering wheel isn’t locked.
Place the transaxle shift lever in N (Neutral).
Release the parking brake.
Press the brake pedal with more force than normal since you will have
reduced brake performance.
More steering effort will be required because the power steering system
will be disabled.
If you are driving down a long hill, the brakes may overheat and brake per-
formance will be reduced. Stop often
and let the brakes cool off.
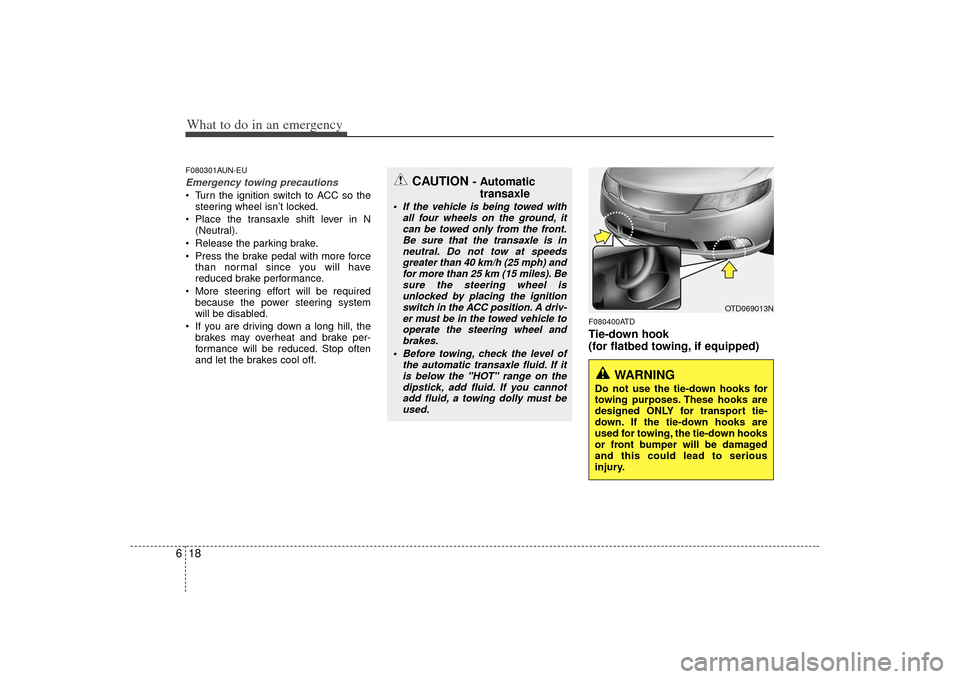
F080400ATDTie-down hook
(for flatbed towing, if equipped)
CAUTION
- Automatictransaxle
If the vehicle is being towed with
all four wheels on the ground, itcan be towed only from the front.Be sure that the transaxle is in neutral. Do not tow at speedsgreater than 40 km/h (25 mph) and for more than 25 km (15 miles). Besure the steering wheel is unlocked by placing the ignitionswitch in the ACC position. A driv-er must be in the towed vehicle to operate the steering wheel andbrakes.
Before towing, check the level of the automatic transaxle fluid. If itis below the "HOT" range on the dipstick, add fluid. If you cannotadd fluid, a towing dolly must be used.
WARNING
Do not use the tie-down hooks for
towing purposes. These hooks are
designed ONLY for transport tie-
down. If the tie-down hooks are
used for towing, the tie-down hooks
or front bumper will be damaged
and this could lead to serious
injury.
OTD069013N
Page 253 of 321
7
Engine compartment / 7-2
Maintenance services / 7-3
Owner maintenance / 7-4
Maintenance schedule / 7-6
Explanation of scheduled maintenance items / 7-10
Engine oil / 7-13
Engine coolant / 7-14
Brake/clutch fluid / 7-17
Power steering fluid / 7-18
Automatic transaxle fluid / 7-19
Washer fluid / 7-21
Parking brake / 7-21
Air cleaner / 7-22
Climate control air filter / 7-22
Wiper blades / 7-23
Battery / 7-25
Tires and wheels / 7-28
Fuses / 7-41
Appearance care / 7-50
Emission control system / 7-56
Maintenance
Page 254 of 321
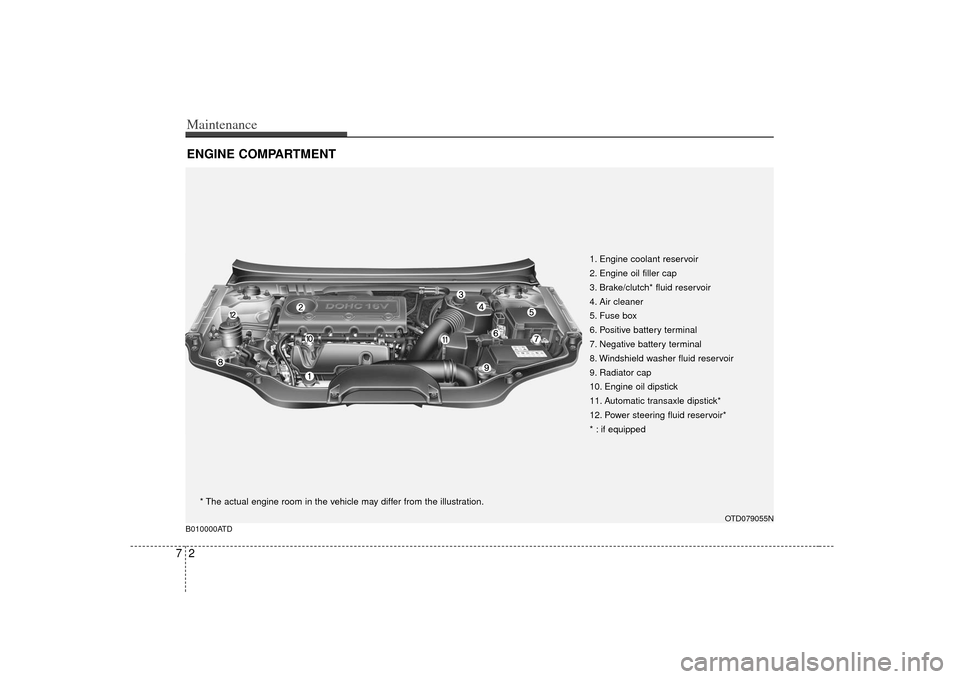
Maintenance27ENGINE COMPARTMENT
1. Engine coolant reservoir
2. Engine oil filler cap
3. Brake/clutch* fluid reservoir
4. Air cleaner
5. Fuse box
6. Positive battery terminal
7. Negative battery terminal
8. Windshield washer fluid reservoir
9. Radiator cap
10. Engine oil dipstick
11. Automatic transaxle dipstick*
12. Power steering fluid reservoir*
* : if equipped
OTD079055N
B010000ATD
* The actual engine room in the vehicle may differ from the illustration.
Page 257 of 321
75
Maintenance
G030102ATDWhile operating your vehicle: Note any changes in the sound of theexhaust or any smell of exhaust fumes
in the vehicle.
Check for vibrations in the steering wheel. Notice any increased steering
effort or looseness in the steering
wheel, or change in its straight-ahead
position.
Notice if your vehicle constantly turns slightly or “pulls” to one side when trav-
eling on smooth, level road.
When stopping, listen and check for unusual sounds, pulling to one side,
increased brake pedal travel or “hard-
to-push” brake pedal.
If any slipping or changes in the oper- ation of your transaxle occurs, check
the transaxle fluid level.
Check the automatic transaxle P (Park) function.
Check the parking brake.
Check for fluid leaks under your vehicle (water dripping from the air condition-
ing system during or after use is nor-
mal).
G030103AHMAt least monthly: Check the coolant level in the enginecoolant reservoir.
Check the operation of all exterior lights, including the stoplights, turn sig-
nals and hazard warning flashers.
Check the inflation pressures of all tires including the spare.G030104AHMAt least twice a year (i.e., every Spring and Fall) : Check the radiator, heater and air con- ditioning hoses for leaks or damage.
Check the windshield washer spray and wiper operation. Clean the wiper
blades with clean cloth dampened with
washer fluid.
Check the headlight alignment.
Check the muffler, exhaust pipes, shields and clamps.
Check the lap/shoulder belts for wear and function.
Check for worn tires and loose wheel lug nuts.
G030105ATD At least once a year : Clean the body and door drain holes.
Lubricate the door hinges and checks,and hood hinges.
Lubricate the door and hood locks and latches.
Lubricate the door rubber weather- strips.
Check the air conditioning system.
Check the power steering fluid level.
Inspect and lubricate automatic transaxle linkage and controls.
Clean the battery and terminals.
Check the brake/clutch fluid level.
Page 260 of 321
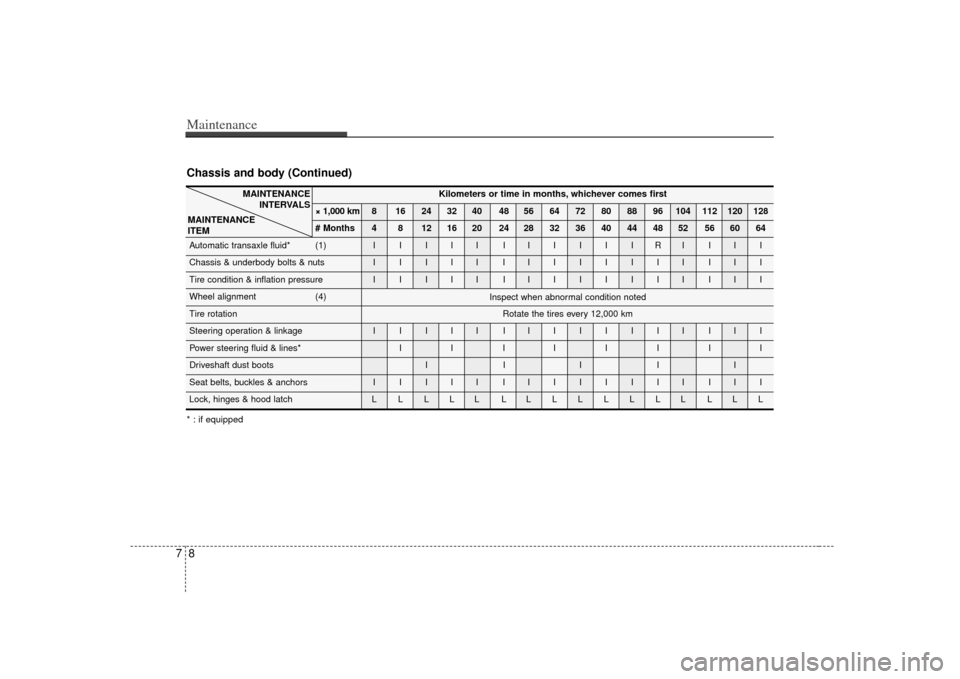
Maintenance87Chassis and body (Continued)
Kilometers or time in months, whichever comes first
× 1,000 km 8 16 24 32 40 48 56 64 72 80 88 96 104 112 120 128
# Months 4 8 12 16 20 24 28 32 36 40 44 48 52 56 60 64
Automatic transaxle fluid* (1) I I I I I I IIIIIRI III
Chassis & underbody bolts & nuts I I I I I I IIIIIII III
Tire condition & inflation pressure I I I I I I IIIIIII III
Wheel alignment (4)
Tire rotation
Steering operation & linkage I I I I I I IIIIIII III
Power steering fluid & lines* I I I IIIII
Driveshaft dust boots I I I I I
Seat belts, buckles & anchors I I I I I I IIIIIII III
Lock, hinges & hood latch L L L L L L LLLLLLL LLL
MAINTENANCE
INTERVALS
MAINTENANCE
ITEM
Inspect when abnormal condition noted
Rotate the tires every 12,000 km
* : if equipped
Page 263 of 321
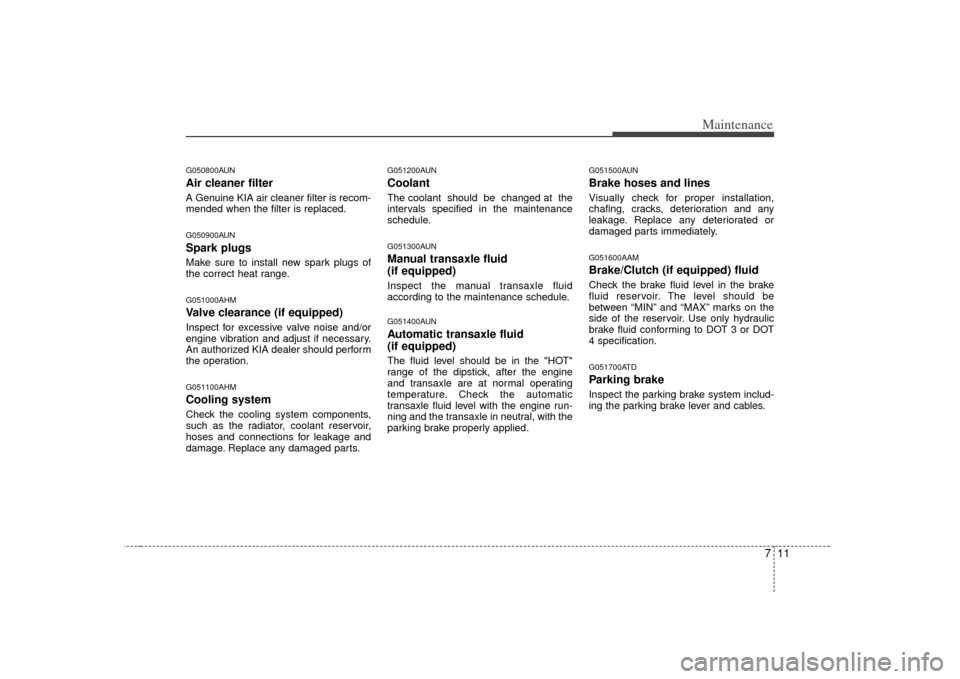
711
Maintenance
G050800AUNAir cleaner filterA Genuine KIA air cleaner filter is recom-
mended when the filter is replaced.G050900AUNSpark plugs Make sure to install new spark plugs of
the correct heat range.G051000AHMValve clearance (if equipped)Inspect for excessive valve noise and/or
engine vibration and adjust if necessary.
An authorized KIA dealer should perform
the operation.G051100AHMCooling systemCheck the cooling system components,
such as the radiator, coolant reservoir,
hoses and connections for leakage and
damage. Replace any damaged parts.
G051200AUNCoolantThe coolant should be changed at the
intervals specified in the maintenance
schedule.G051300AUNManual transaxle fluid
(if equipped)Inspect the manual transaxle fluid
according to the maintenance schedule.G051400AUNAutomatic transaxle fluid
(if equipped)The fluid level should be in the "HOT"
range of the dipstick, after the engine
and transaxle are at normal operating
temperature. Check the automatic
transaxle fluid level with the engine run-
ning and the transaxle in neutral, with the
parking brake properly applied.
G051500AUNBrake hoses and linesVisually check for proper installation,
chafing, cracks, deterioration and any
leakage. Replace any deteriorated or
damaged parts immediately.G051600AAMBrake/Clutch (if equipped) fluid Check the brake fluid level in the brake
fluid reservoir. The level should be
between “MIN” and “MAX” marks on the
side of the reservoir. Use only hydraulic
brake fluid conforming to DOT 3 or DOT
4 specification.G051700ATDParking brakeInspect the parking brake system includ-
ing the parking brake lever and cables.