shift to p position KIA Cerato 2010 1.G Owner's Manual
[x] Cancel search | Manufacturer: KIA, Model Year: 2010, Model line: Cerato, Model: KIA Cerato 2010 1.GPages: 321, PDF Size: 6.3 MB
Page 24 of 321
Safety features of your vehicle12
3
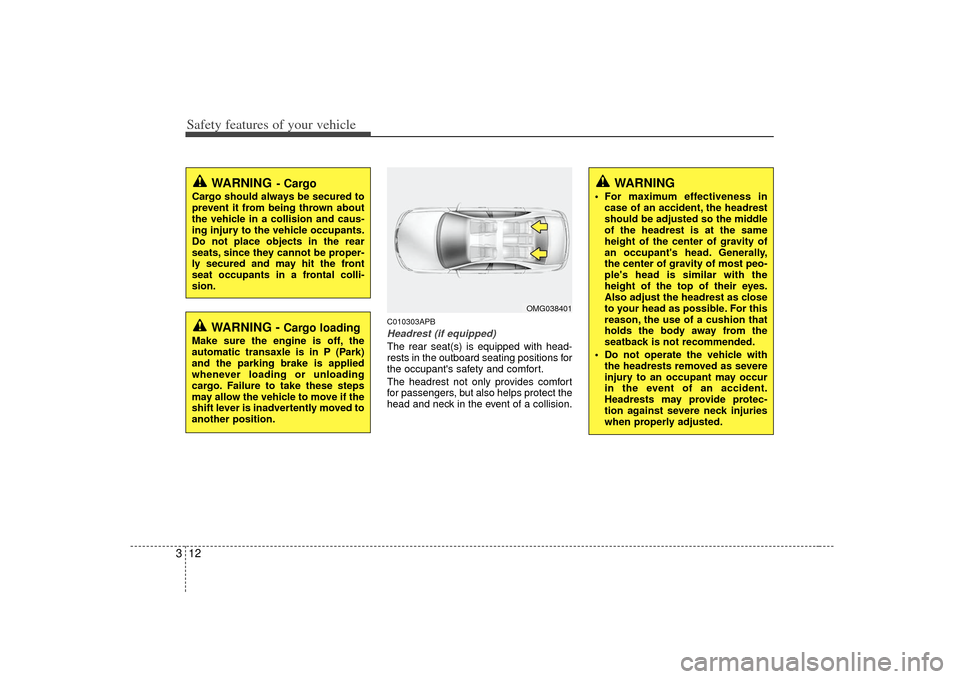
C010303APBHeadrest (if equipped)The rear seat(s) is equipped with head-
rests in the outboard seating positions for
the occupant's safety and comfort.
The headrest not only provides comfort
for passengers, but also helps protect the
head and neck in the event of a collision.
WARNING
For maximum effectiveness in
case of an accident, the headrest
should be adjusted so the middle
of the headrest is at the same
height of the center of gravity of
an occupant's head. Generally,
the center of gravity of most peo-
ple's head is similar with the
height of the top of their eyes.
Also adjust the headrest as close
to your head as possible. For this
reason, the use of a cushion that
holds the body away from the
seatback is not recommended.
Do not operate the vehicle with the headrests removed as severe
injury to an occupant may occur
in the event of an accident.
Headrests may provide protec-
tion against severe neck injuries
when properly adjusted.
OMG038401
WARNING -
Cargo loading
Make sure the engine is off, the
automatic transaxle is in P (Park)
and the parking brake is applied
whenever loading or unloading
cargo. Failure to take these steps
may allow the vehicle to move if the
shift lever is inadvertently moved to
another position.
WARNING
- Cargo
Cargo should always be secured to
prevent it from being thrown about
the vehicle in a collision and caus-
ing injury to the vehicle occupants.
Do not place objects in the rear
seats, since they cannot be proper-
ly secured and may hit the front
seat occupants in a frontal colli-
sion.
Page 41 of 321
329
Safety features of your vehicle
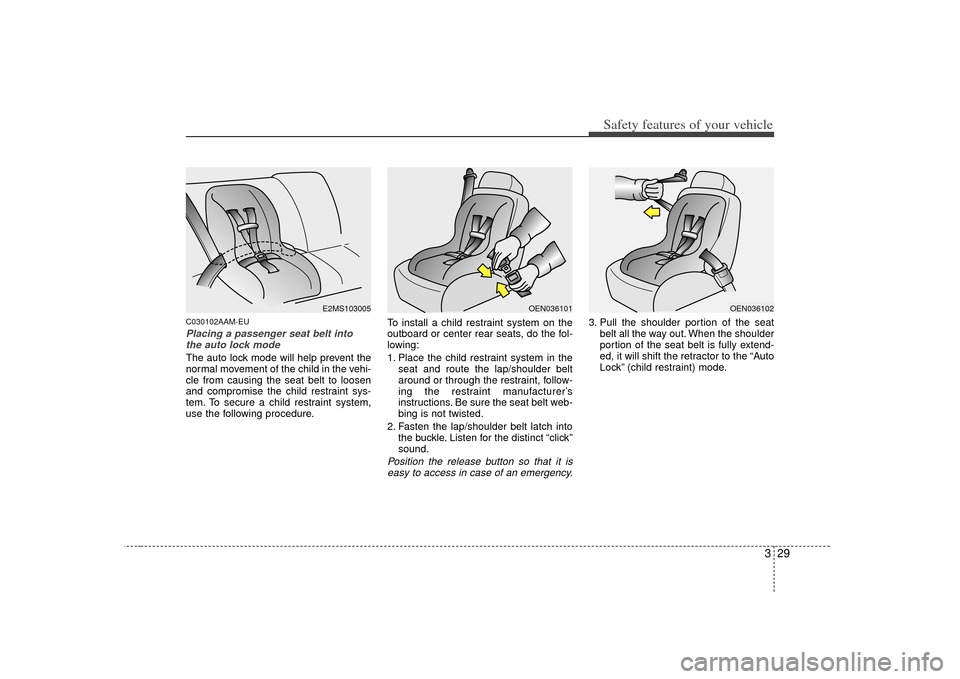
C030102AAM-EUPlacing a passenger seat belt intothe auto lock mode The auto lock mode will help prevent the
normal movement of the child in the vehi-
cle from causing the seat belt to loosen
and compromise the child restraint sys-
tem. To secure a child restraint system,
use the following procedure. To install a child restraint system on the
outboard or center rear seats, do the fol-
lowing:
1. Place the child restraint system in the
seat and route the lap/shoulder belt
around or through the restraint, follow-
ing the restraint manufacturer’s
instructions. Be sure the seat belt web-
bing is not twisted.
2. Fasten the lap/shoulder belt latch into the buckle. Listen for the distinct “click”
sound.
Position the release button so that it iseasy to access in case of an emergency.
3. Pull the shoulder portion of the seat belt all the way out. When the shoulder
portion of the seat belt is fully extend-
ed, it will shift the retractor to the “Auto
Lock” (child restraint) mode.
E2MS103005
OEN036101
OEN036102
Page 64 of 321
Safety features of your vehicle52
3C041300AUNAdditional safety precautions Never let passengers ride in the
cargo area or on top of a folded-
down back seat. All occupants should
sit upright, fully back in their seats with
their seat belts on and their feet on the
floor.
Passengers should not move out of
or change seats while the vehicle is
moving. A passenger who is not wear-
ing a seat belt during a crash or emer-
gency stop can be thrown against the
inside of the vehicle, against other
occupants, or out of the vehicle.
Each seat belt is designed to
restrain one occupant. If more than
one person uses the same seat belt,
they could be seriously injured or killed
in a collision.
Do not use any accessories on seat
belts. Devices claiming to improve
occupant comfort or reposition the seat
belt can reduce the protection provided
by the seat belt and increase the
chance of serious injury in a crash.
Passengers should not place hard
or sharp objects between them-
selves and the air bags. Carrying
hard or sharp objects on your lap or in
your mouth can result in injuries if an
air bag inflates.
Keep occupants away from the air
bag covers. All occupants should sit
upright, fully back in their seats with
their seat belts on and their feet on the
floor. If occupants are too close to the
air bag covers, they could be injured if
the air bags inflate.
Do not attach or place objects on or
near the air bag covers. Any object
attached to or placed on the front or
side air bag covers could interfere with
the proper operation of the air bags.
Do not modify the front seats.
Modification of the front seats could
interfere with the operation of the sup-
plemental restraint system sensing
components or side air bags.
Do not place items under the front
seats. Placing items under the front
seats could interfere with the operation
of the supplemental restraint system
sensing components and wiring har-
nesses.
Never hold an infant or child on your
lap. The infant or child could be seri-
ously injured or killed in the event of a
crash. All infants and children should
be properly restrained in appropriate
child safety seats or seat belts in the
rear seat.
C041400AUNAdding equipment to or modify-
ing your air bag-equipped vehicleIf you modify your vehicle by changing
your vehicle's frame, bumper system,
front end or side sheet metal or ride
height, this may affect the operation of
your vehicle's air bag system.
WARNING
Sitting improperly or out of posi- tion can cause occupants to be
shifted too close to a deploying
air bag, strike the interior struc-
ture or be thrown from the vehicle
resulting in serious injury or
death.
Always sit upright with the seat- back in an upright position, cen-
tered on the seat cushion with
your seat belt on, legs comfort-
ably extended and your feet on
the floor.
Page 79 of 321
Features of your vehicle14
4 Press the switch to the "Lock" position
(1), all vehicle doors will lock.
Press the switch to the "Unlock" posi- tion (2), all vehicle doors will unlock.
If the key is in the ignition switch (or if the smart key is in the vehicle) and any
front door is opened, the doors will not
lock when the “Lock” position (1) of the
central door lock switch is pressed. (if
equipped)
D050300AHMImpact sensing door unlock sys-
tem (if equipped)All doors will automatically unlock when
an impact causes the air bags to deploy.D050400ATD-EUAuto door lock/unlock feature
(if equipped) All doors will automatically lock whenthe transaxle shift lever is shifted out of
P (Park).
All doors will automatically unlock when the transaxle shift lever is shifted
into P (Park).
WARNING
- Unlocked
vehicles
Leaving your vehicle unlocked can
invite theft or possible harm to you
or others from someone hiding in
your vehicle while you are gone.
Always remove the ignition key,
engage the parking brake, close all
windows and lock all doors when
leaving your vehicle unattended.
WARNING
- Unattendedchildren
An enclosed vehicle can become
extremely hot, causing death or
severe injury to unattended chil-
dren or animals who cannot escape
the vehicle. Furthermore, children
might operate features of the vehi-
cle that could injure them, or they
could encounter other harm, possi-
bly from someone gaining entry to
the vehicle. Never leave children or
animals unattended in your vehicle.
WARNING -
Doors
The doors should always be fully
closed and locked while the vehi-
cle is in motion to prevent acci-
dental opening of the door.
Locked doors will also discour-
age potential intruders when the
vehicle stops or slows.
Be careful when opening doors and watch for vehicles, motorcy-
cles, bicycles or pedestrians
approaching the vehicle in the
path of the door. Opening a door
when something is approaching
can cause damage or injury.
Page 80 of 321
415
Features of your vehicle
D050400ATD-EE✽
✽NOTICEAn authorized KIA dealer can activate
or deactivate some auto door lock/
unlock features as follows;
• Auto door unlock by using the dri-
ver's door lock button
• Auto door lock/unlock by shifting the transaxle shift lever out of P (Park) or
into P (Park)
• Auto door unlock when the ignition key is removed from the ignition
switch (for smart key, when the
ENGINE START/STOP button is
turned to the OFF position)
If you want to activate or deactivate
some door lock/unlock feature, consult
an authorized KIA dealer.
D050500ATD-EUChild-protector rear door lock
(for 4door vehicle only)The child safety lock is provided to help
prevent children from accidentally open-
ing the rear doors from inside the vehicle.
The rear door safety locks should be
used whenever children are in the vehi-
cle.
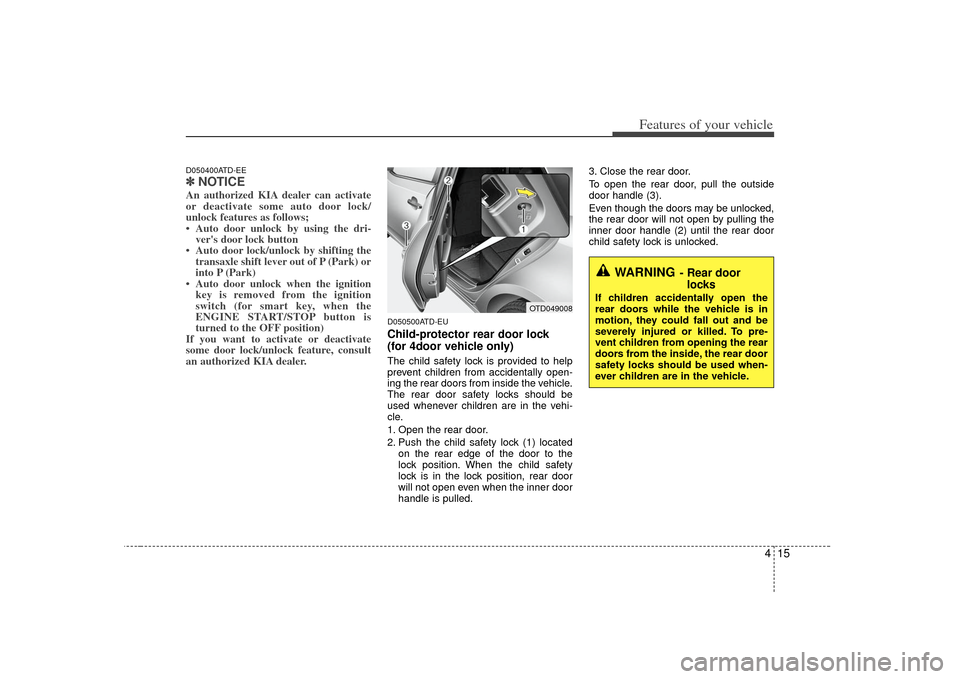
1. Open the rear door.
2. Push the child safety lock (1) located
on the rear edge of the door to the
lock position. When the child safety
lock is in the lock position, rear door
will not open even when the inner door
handle is pulled. 3. Close the rear door.
To open the rear door, pull the outside
door handle (3).
Even though the doors may be unlocked,
the rear door will not open by pulling the
inner door handle (2) until the rear door
child safety lock is unlocked.
WARNING
- Rear door
locks
If children accidentally open the
rear doors while the vehicle is in
motion, they could fall out and be
severely injured or killed. To pre-
vent children from opening the rear
doors from the inside, the rear door
safety locks should be used when-
ever children are in the vehicle.
OTD049008
Page 98 of 321
433
Features of your vehicle
D140100ATDInside rearview mirrorAdjust the rearview mirror so that the
center view through the rear window is
seen. Make this adjustment before you
start driving.
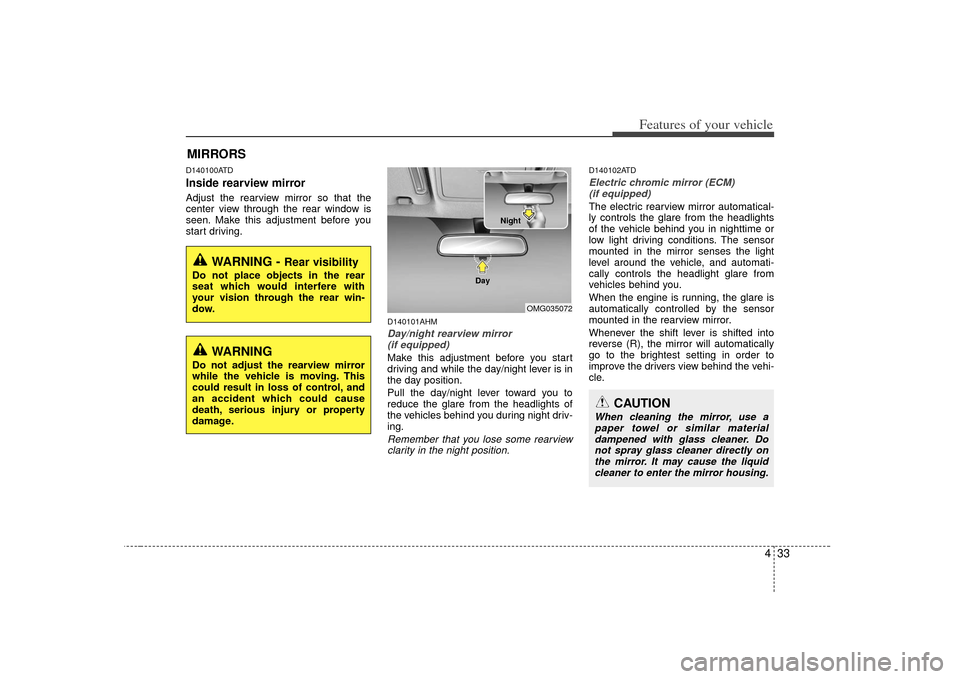
D140101AHMDay/night rearview mirror (if equipped)Make this adjustment before you start
driving and while the day/night lever is in
the day position.
Pull the day/night lever toward you to
reduce the glare from the headlights of
the vehicles behind you during night driv-
ing.Remember that you lose some rearviewclarity in the night position.
D140102ATDElectric chromic mirror (ECM) (if equipped)The electric rearview mirror automatical-
ly controls the glare from the headlights
of the vehicle behind you in nighttime or
low light driving conditions. The sensor
mounted in the mirror senses the light
level around the vehicle, and automati-
cally controls the headlight glare from
vehicles behind you.
When the engine is running, the glare is
automatically controlled by the sensor
mounted in the rearview mirror.
Whenever the shift lever is shifted into
reverse (R), the mirror will automatically
go to the brightest setting in order to
improve the drivers view behind the vehi-
cle.
MIRRORS
WARNING -
Rear visibility
Do not place objects in the rear
seat which would interfere with
your vision through the rear win-
dow.
OMG035072
CAUTION
When cleaning the mirror, use apaper towel or similar material dampened with glass cleaner. Donot spray glass cleaner directly on the mirror. It may cause the liquidcleaner to enter the mirror housing.
WARNING
Do not adjust the rearview mirror
while the vehicle is moving. This
could result in loss of control, and
an accident which could cause
death, serious injury or property
damage.
Night
Day
Page 103 of 321
Features of your vehicle38
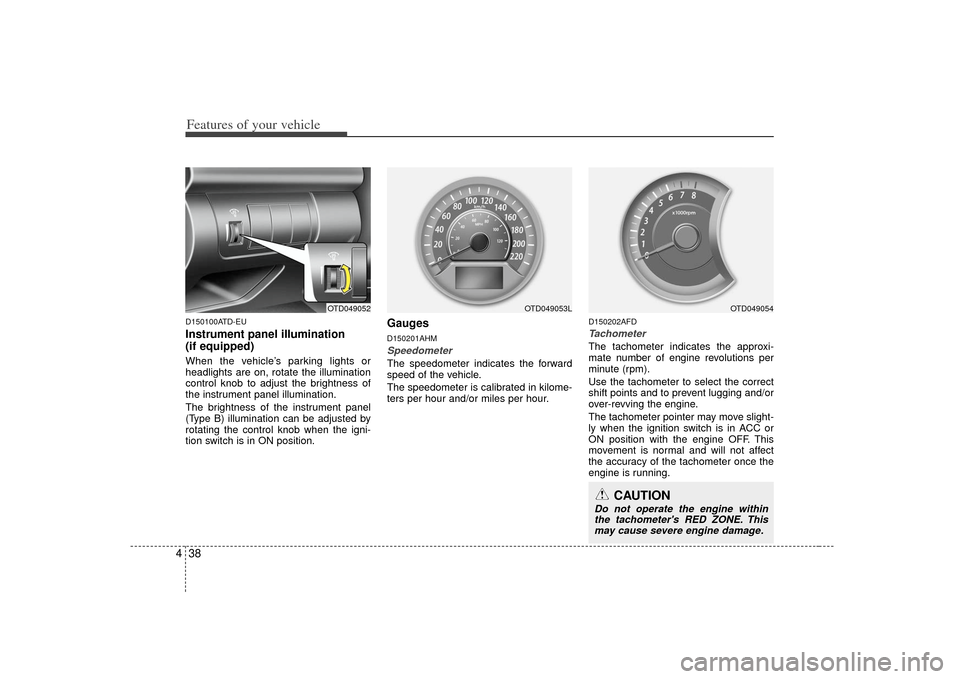
4D150100ATD-EUInstrument panel illumination
(if equipped)When the vehicle’s parking lights or
headlights are on, rotate the illumination
control knob to adjust the brightness of
the instrument panel illumination.
The brightness of the instrument panel
(Type B) illumination can be adjusted by
rotating the control knob when the igni-
tion switch is in ON position.
GaugesD150201AHMSpeedometer The speedometer indicates the forward
speed of the vehicle.
The speedometer is calibrated in kilome-
ters per hour and/or miles per hour.
D150202AFDTachometer The tachometer indicates the approxi-
mate number of engine revolutions per
minute (rpm).
Use the tachometer to select the correct
shift points and to prevent lugging and/or
over-revving the engine.
The tachometer pointer may move slight-
ly when the ignition switch is in ACC or
ON position with the engine OFF. This
movement is normal and will not affect
the accuracy of the tachometer once the
engine is running.
OTD049052
OTD049053L
CAUTION
Do not operate the engine within
the tachometer's RED ZONE. Thismay cause severe engine damage.
OTD049054
Page 112 of 321
447
Features of your vehicle
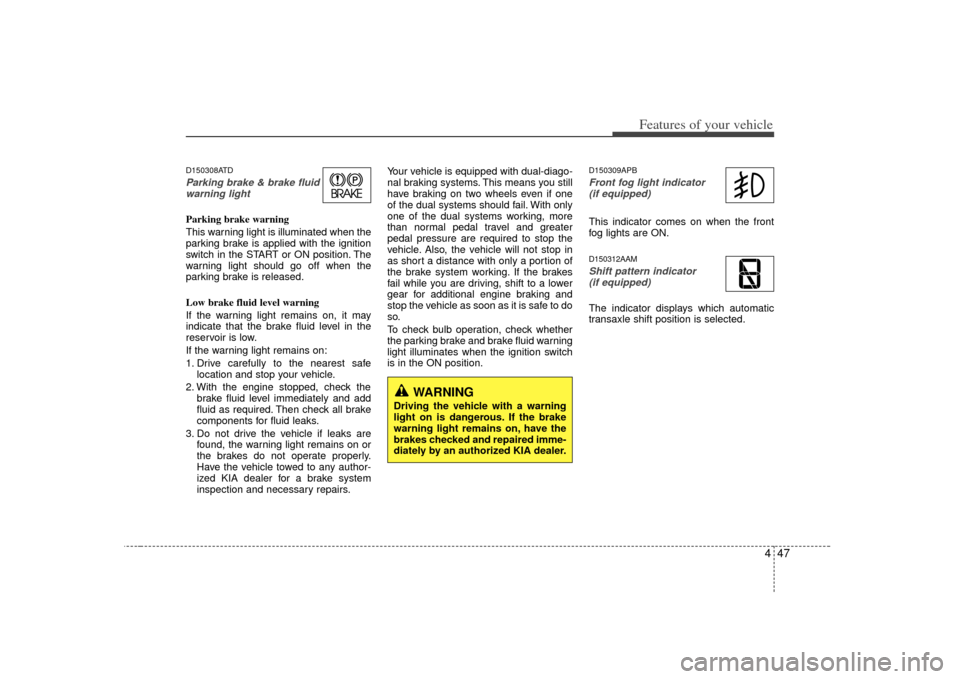
D150308ATDParking brake & brake fluidwarning light Parking brake warning
This warning light is illuminated when the
parking brake is applied with the ignition
switch in the START or ON position. The
warning light should go off when the
parking brake is released.
Low brake fluid level warning
If the warning light remains on, it may
indicate that the brake fluid level in the
reservoir is low.
If the warning light remains on:
1. Drive carefully to the nearest safe location and stop your vehicle.
2. With the engine stopped, check the brake fluid level immediately and add
fluid as required. Then check all brake
components for fluid leaks.
3. Do not drive the vehicle if leaks are found, the warning light remains on or
the brakes do not operate properly.
Have the vehicle towed to any author-
ized KIA dealer for a brake system
inspection and necessary repairs. Your vehicle is equipped with dual-diago-
nal braking systems. This means you still
have braking on two wheels even if one
of the dual systems should fail. With only
one of the dual systems working, more
than normal pedal travel and greater
pedal pressure are required to stop the
vehicle. Also, the vehicle will not stop in
as short a distance with only a portion of
the brake system working. If the brakes
fail while you are driving, shift to a lower
gear for additional engine braking and
stop the vehicle as soon as it is safe to do
so.
To check bulb operation, check whether
the parking brake and brake fluid warning
light illuminates when the ignition switch
is in the ON position.
D150309APBFront fog light indicator
(if equipped) This indicator comes on when the front
fog lights are ON.D150312AAMShift pattern indicator (if equipped)The indicator displays which automatic
transaxle shift position is selected.
WARNING
Driving the vehicle with a warning
light on is dangerous. If the brake
warning light remains on, have the
brakes checked and repaired imme-
diately by an authorized KIA dealer.
Page 118 of 321
453
Features of your vehicle
Low Fuel!
This warning indicates the fuel tank is
nearly empty. When it comes on, you
should add fuel as soon as possible.
Driving with the fuel level warning on or
with the fuel level below "E" can cause
the engine to misfire and damage the
catalytic converter (if equipped).
Key is not in vehicle
If the smart key is not in the vehicle and
if any door is opened or closed with the
ENGINE START/STOP button in the ACC,
ON, or START position, the warning illu-
minates on the LCD display. Also, the
chime sounds for 5 seconds when the
smart key is not in the vehicle and the
door is closed.
Always have the smart key with you. Key is not detected
If the smart key is not in the vehicle or is
not detected and you press the ENGINE
START/STOP button, the warning illumi-
nates on the LCD display for 10 seconds.
Also, the immobilizer indicator and the
key holder light blinks for 10 seconds.
Low key battery
If the ENGINE START/STOP button is
pressed to the OFF position when the
smart key in the vehicle discharges, the
warning illuminates on the LCD display
for about 10 seconds.
Replace the battery with a new one.
Press brake pedal to start engine
If the ENGINE START/STOP button is
pressed to the ACC position twice by
pressing the button repeatedly without
depressing the brake pedal, the warning
illuminates on the LCD display for about
10 seconds to indicate that you should
depress the brake pedal to start the
engine.
Shift to "P" position
If you try to turn off the engine without the
shift lever in the P (Park) position, the
ENGINE START/STOP button will change
to the ACC position. If the button is
pressed once more it will change to the
ON position. The warning illuminates on
the LCD display for about 10 seconds to
indicate that you should press the ENGINE
START/ STOP button with the shift lever
in the P (Park) position to turn off the
engine.
Page 119 of 321
Features of your vehicle54
4Remove key
When you turn off the engine with the
smart key in the smart key holder, the
warning illuminates on the LCD display
for about 10 seconds. Also, the smart key
holder light blinks for about 10 seconds.
To remove the smart key push the smart
key once and pull it out from the smart
key holder.
Insert key
If you press the ENGINE START/STOP
button while "Key is not detected" illumi-
nates on the LCD display, the warning
“Insert key” illuminates for about 10 sec-
onds. Also, the immobilizer indicator and
the key holder light blinks for about 10
seconds. Press start button again
If you can not operate the ENGINE
START/STOP button when there is a
problem with the ENGINE START/STOP
button system, the warning illuminates
for 10 seconds and the chime sounds
continuously to
indicate that you could
start the engine by pressing the ENGINE
START/STOP button once more.
The chime will stop if the ENGINE START/
STOP button system works normally.
If the warning illuminates each time you
press the ENGINE START/STOP button,
take your vehicle to an authorized KIA
dealer and have the system checked. Shift to "P" or "N" to start the engine
If you try to start the engine with the shift
lever not in the P (Park) or N (Neutral)
position, the warning illuminates for
about 10 seconds on the LCD display.
You can also start the engine with the
shift lever in the N (Neutral) position, but
for your safety start the engine with the
shift lever in the P (Park) position.