API KIA Cerato 2012 1.G Owner's Manual
[x] Cancel search | Manufacturer: KIA, Model Year: 2012, Model line: Cerato, Model: KIA Cerato 2012 1.GPages: 353, PDF Size: 7.3 MB
Page 52 of 353
Safety features of your vehicle
36
3
C040900ATD
How does the air bag system
operate
Air bags are activated (able to inflate if
necessary) only when the ignition
switch is turned to the ON or START
position.
Air bags inflate instantly in the event of serious frontal or side collision (if
equipped with side air bag or curtain
air bag) in order to help protect the
occupants from serious physical injury.
There is no single speed at which the air bags will inflate.
Generally, air bags are designed to
inflate based upon the severity of a col-
lision and its direction. These two fac-
tors determine whether the sensors
produce an electronic deployment/
inflation signal.
Air bag deployment depends on a number of complex factors including
vehicle speed, angles of impact and
the density and stiffness of the vehi-
cles or objects which your vehicle hits
in the collision. The determining, fac-
tors are not limited to those mentioned
above.
The front air bags will completely inflate and deflate in an instant. It is virtually impossible for you to see
the air bags inflate during an accident.
It is much more likely that you will sim-
ply see the deflated air bags hanging
out of their storage compartments after
the collision.
In order to help provide protection in a severe collision, the air bags must
inflate rapidly. The speed of air bag
inflation is a consequence of extremely
short time in which a collision occurs
and the need to get the air bag
between the occupant and the vehicle
structures before the occupant impacts
those structures. This speed of inflation
reduces the risk of serious or life-
threatening injuries in a severe collision
and is thus a necessary part of air bag
design.
However, air bag inflation can also
cause injuries which can include facial
abrasions, bruises and broken bones
because the inflation speed also caus-
es the air bags to expand with a great
deal of force.
There are even circumstances under which contact with the steer-
ing wheel air bag can cause fatal
injuries, especially if the occupant
is positioned excessively close to
the steering wheel.
WARNING
To avoid severe personal injuryor death caused by deploying air
bags in a collision, the driver
should sit as far back from the
steering wheel air bag as possi-
ble (at least 250 mm (10 inches)
away). The front passenger
should always move their seat as
far back as possible and sit back
in their seat.
Air bags inflate instantly in an event of a collision, passengers
may be injured by the air bag
expansion force if they are not in
a proper position.
Air bag inflation may cause injuries including facial or bodily
abrasions, injuries from broken
glasses or burns.
Page 67 of 353
351
Safety features of your vehicle
C040600ATD-EC
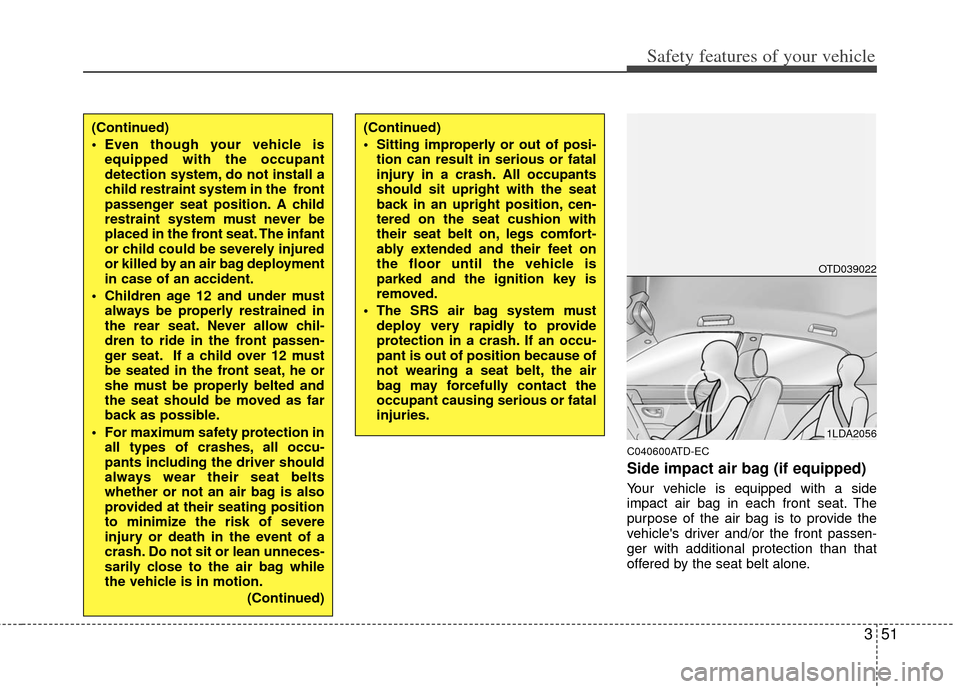
Side impact air bag (if equipped)
Your vehicle is equipped with a side
impact air bag in each front seat. The
purpose of the air bag is to provide the
vehicle's driver and/or the front passen-
ger with additional protection than that
offered by the seat belt alone.
(Continued)
Sitting improperly or out of posi-tion can result in serious or fatal
injury in a crash. All occupants
should sit upright with the seat
back in an upright position, cen-
tered on the seat cushion with
their seat belt on, legs comfort-
ably extended and their feet on
the floor until the vehicle is
parked and the ignition key is
removed.
The SRS air bag system must deploy very rapidly to provide
protection in a crash. If an occu-
pant is out of position because of
not wearing a seat belt, the air
bag may forcefully contact the
occupant causing serious or fatal
injuries.(Continued)
Even though your vehicle isequipped with the occupant
detection system, do not install a
child restraint system in the front
passenger seat position. A child
restraint system must never be
placed in the front seat. The infant
or child could be severely injured
or killed by an air bag deployment
in case of an accident.
Children age 12 and under must always be properly restrained in
the rear seat. Never allow chil-
dren to ride in the front passen-
ger seat. If a child over 12 must
be seated in the front seat, he or
she must be properly belted and
the seat should be moved as far
back as possible.
For maximum safety protection in all types of crashes, all occu-
pants including the driver should
always wear their seat belts
whether or not an air bag is also
provided at their seating position
to minimize the risk of severe
injury or death in the event of a
crash. Do not sit or lean unneces-
sarily close to the air bag while
the vehicle is in motion.
(Continued)
OTD039022
1LDA2056
Page 90 of 353
Features of your vehicle
12
4
D050100ATD-EU
Operating door locks from out-
side the vehicle
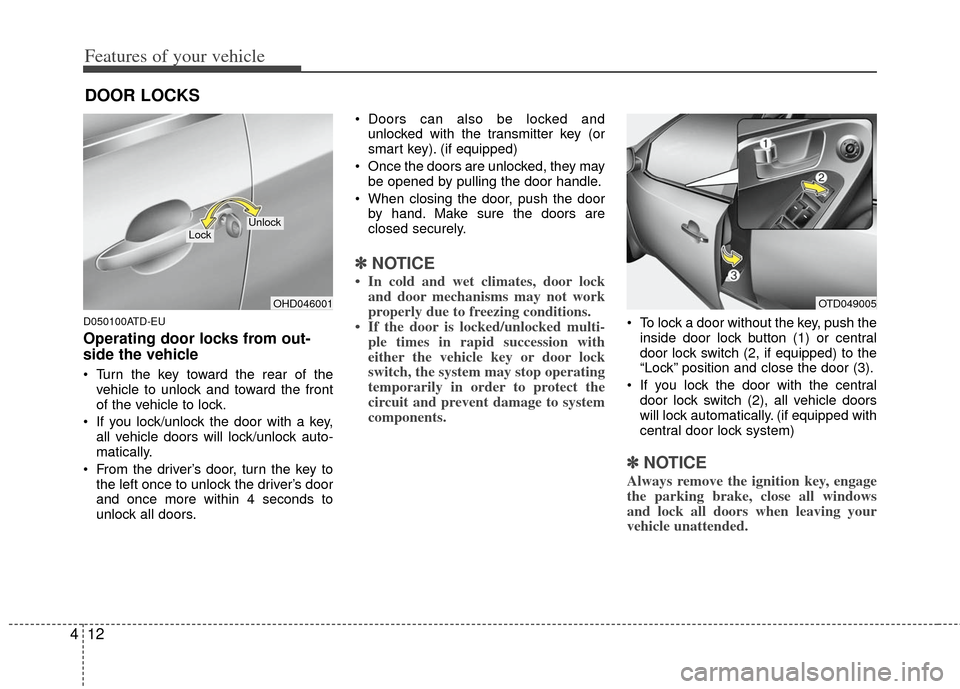
Turn the key toward the rear of the
vehicle to unlock and toward the front
of the vehicle to lock.
If you lock/unlock the door with a key, all vehicle doors will lock/unlock auto-
matically.
From the driver’s door, turn the key to the left once to unlock the driver’s door
and once more within 4 seconds to
unlock all doors. Doors can also be locked and
unlocked with the transmitter key (or
smart key). (if equipped)
Once the doors are unlocked, they may be opened by pulling the door handle.
When closing the door, push the door by hand. Make sure the doors are
closed securely.
✽ ✽ NOTICE
• In cold and wet climates, door lock
and door mechanisms may not work
properly due to freezing conditions.
• If the door is locked/unlocked multi- ple times in rapid succession with
either the vehicle key or door lock
switch, the system may stop operating
temporarily in order to protect the
circuit and prevent damage to system
components.
To lock a door without the key, push the
inside door lock button (1) or central
door lock switch (2, if equipped )to the
“Lock” position and close the door (3).
If you lock the door with the central door lock switch (2), all vehicle doors
will lock automatically. (if equipped with
central door lock system)
✽ ✽ NOTICE
Always remove the ignition key, engage
the parking brake, close all windows
and lock all doors when leaving your
vehicle unattended.
DOOR LOCKS
OHD046001
LockUnlock
OTD049005
Page 95 of 353
417
Features of your vehicle
D070300ATD
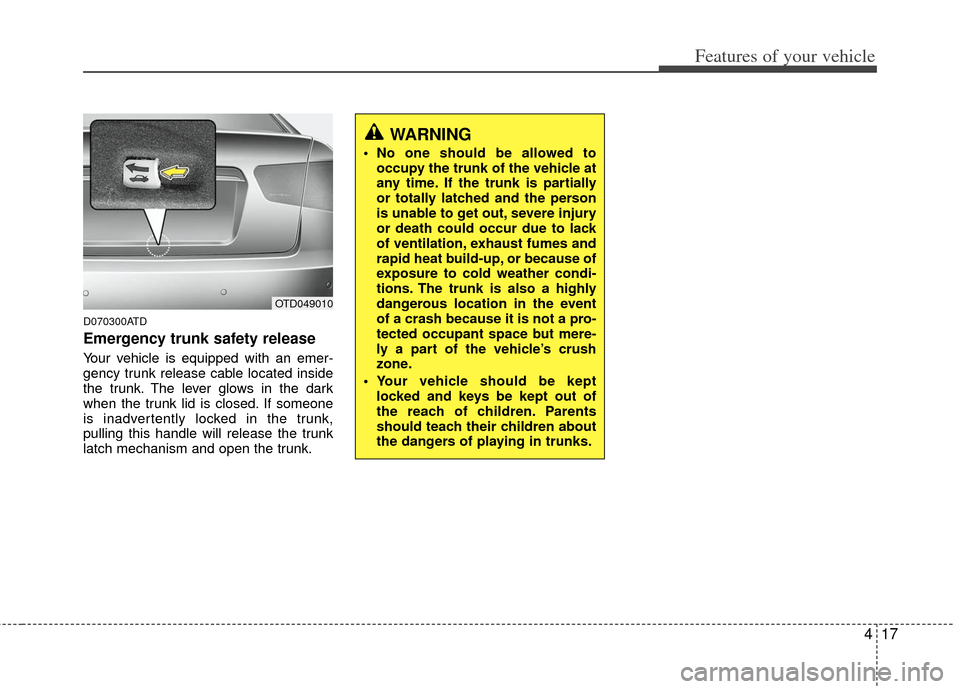
Emergency trunk safety release
Your vehicle is equipped with an emer-
gency trunk release cable located inside
the trunk. The lever glows in the dark
when the trunk lid is closed. If someone
is inadvertently locked in the trunk,
pulling this handle will release the trunk
latch mechanism and open the trunk.
WARNING
No one should be allowed tooccupy the trunk of the vehicle at
any time. If the trunk is partially
or totally latched and the person
is unable to get out, severe injury
or death could occur due to lack
of ventilation, exhaust fumes and
rapid heat build-up, or because of
exposure to cold weather condi-
tions. The trunk is also a highly
dangerous location in the event
of a crash because it is not a pro-
tected occupant space but mere-
ly a part of the vehicle’s crush
zone.
Your vehicle should be kept locked and keys be kept out of
the reach of children. Parents
should teach their children about
the dangers of playing in trunks.
OTD049010
Page 104 of 353
Features of your vehicle
26
4
WARNING - Refueling dan-
gers
Automotive fuels are flammable
materials. When refueling, please
note the following guidelines care-
fully. Failure to follow these guide-
lines may result in severe personal
injury, severe burns or death by fire
or explosion.
Read and follow all warnings
posted at the gas station facility.
Before refueling, note the loca- tion of the Emergency Gasoline
Shut-Off, if available, at the gas
station facility.
Before touching the fuel nozzle, you should eliminate potentially
dangerous static electricity dis-
charge by touching another metal
part of the vehicle, a safe dis-
tance away from the fuel filler
neck, nozzle, or other gas source.
(Continued)
(Continued)
Do not get back into a vehicleonce you have begun refueling
since you can generate static
electricity by touching, rubbing
or sliding against any item or fab-
ric (polyester, satin, nylon, etc.)
capable of producing static elec-
tricity. Static electricity discharge
can ignite fuel vapors resulting in
rapid burning. If you must re-
enter the vehicle, you should
once again eliminate potentially
dangerous static electricity dis-
charge by touching a metal part
of the vehicle, away from the fuel
filler neck, nozzle or other gaso-
line source.
When using an approved portable fuel container be sure to
place the container on the
ground prior to refueling. Static
electricity discharge from the
container can ignite fuel vapors
causing a fire. Once refueling has
begun, contact with the vehicle
should be maintained until the
filling is complete.
(Continued)(Continued)Use only approved portable plas-
tic fuel containers designed to
carry and store gasoline.
Do not use cellular phones while refueling. Electric current and/or
electronic interference from cel-
lular phones can potentially
ignite fuel vapors causing a fire.
When refueling, always shut the engine off. Sparks produced by
electrical components related to
the engine can ignite fuel vapors
causing a fire. Once refueling is
complete, check to make sure the
filler cap and filler door are
securely closed, before starting
the engine.
DO NOT use matches or a lighter and DO NOT SMOKE or leave a lit
cigarette in your vehicle while at
a gas station especially during
refueling. Automotive fuel is
highly flammable and can, when
ignited, result in fire.
(Continued)
Page 126 of 353
Features of your vehicle
48
4
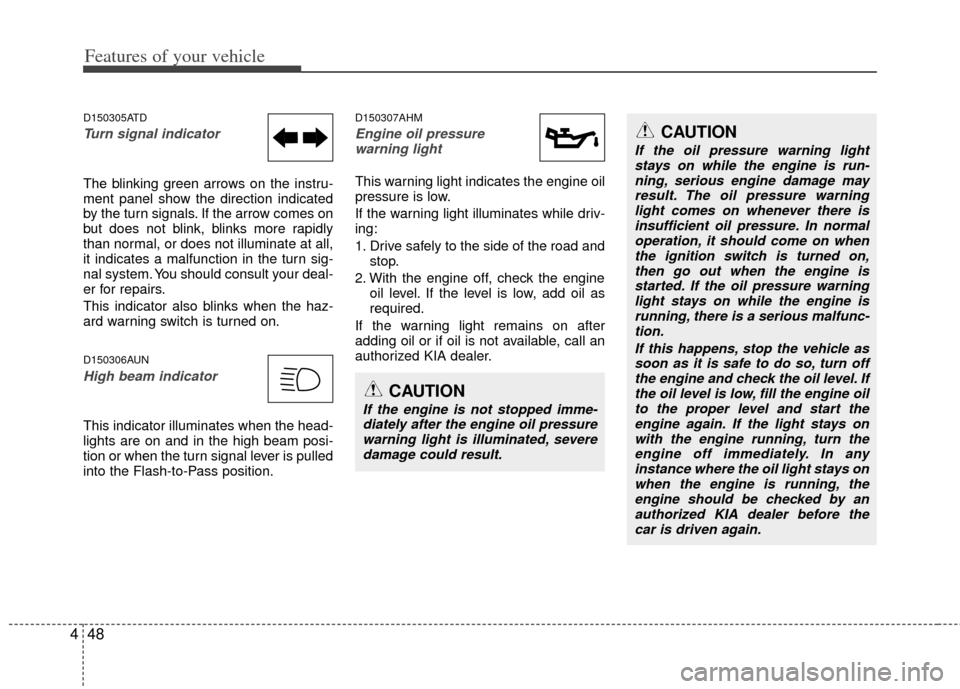
D150305ATD
Turn signal indicator
The blinking green arrows on the instru-
ment panel show the direction indicated
by the turn signals. If the arrow comes on
but does not blink, blinks more rapidly
than normal, or does not illuminate at all,
it indicates a malfunction in the turn sig-
nal system. You should consult your deal-
er for repairs.
This indicator also blinks when the haz-
ard warning switch is turned on.
D150306AUN
High beam indicator
This indicator illuminates when the head-
lights are on and in the high beam posi-
tion or when the turn signal lever is pulled
into the Flash-to-Pass position.
D150307AHM
Engine oil pressure
warning light
This warning light indicates the engine oil
pressure is low.
If the warning light illuminates while driv-
ing:
1. Drive safely to the side of the road and stop.
2. With the engine off, check the engine oil level. If the level is low, add oil as
required.
If the warning light remains on after
adding oil or if oil is not available, call an
authorized KIA dealer.
CAUTION
If the engine is not stopped imme- diately after the engine oil pressurewarning light is illuminated, severe damage could result.
CAUTION
If the oil pressure warning lightstays on while the engine is run-ning, serious engine damage may result. The oil pressure warninglight comes on whenever there isinsufficient oil pressure. In normal operation, it should come on whenthe ignition switch is turned on, then go out when the engine isstarted. If the oil pressure warning light stays on while the engine isrunning, there is a serious malfunc-tion.
If this happens, stop the vehicle assoon as it is safe to do so, turn offthe engine and check the oil level. If the oil level is low, fill the engine oilto the proper level and start the engine again. If the light stays onwith the engine running, turn theengine off immediately. In any instance where the oil light stays onwhen the engine is running, theengine should be checked by an authorized KIA dealer before thecar is driven again.
Page 154 of 353
Features of your vehicle
76
4
Air conditioning system operation tips
If the vehicle has been parked in direct
sunlight during hot weather, open the
windows for a short time to let the hot
air inside the vehicle escape.
To help reduce moisture inside of the windows on rainy or humid days,
decrease the humidity inside the vehi-
cle by operating the air conditioning
system.
During air conditioning system opera- tion, you may occasionally notice a
slight change in engine speed as the
air conditioning compressor cycles.
This is a normal system operation
characteristic.
Use the air conditioning system every month only for a few minutes to ensure
maximum system performance.
When using the air conditioning sys- tem, you may notice clear water drip-
ping (or even puddling) on the ground
under the passenger side of the vehi-
cle. This is a normal system operation
characteristic. Operating the air conditioning system
in the recirculated air position provides
maximum cooling, however, continual
operation in this mode may cause the
air inside the vehicle to become stale.
During cooling operation, you may occasionally notice a misty air flow
because of rapid cooling and humid air
intake. This is a normal system opera-
tion characteristic.
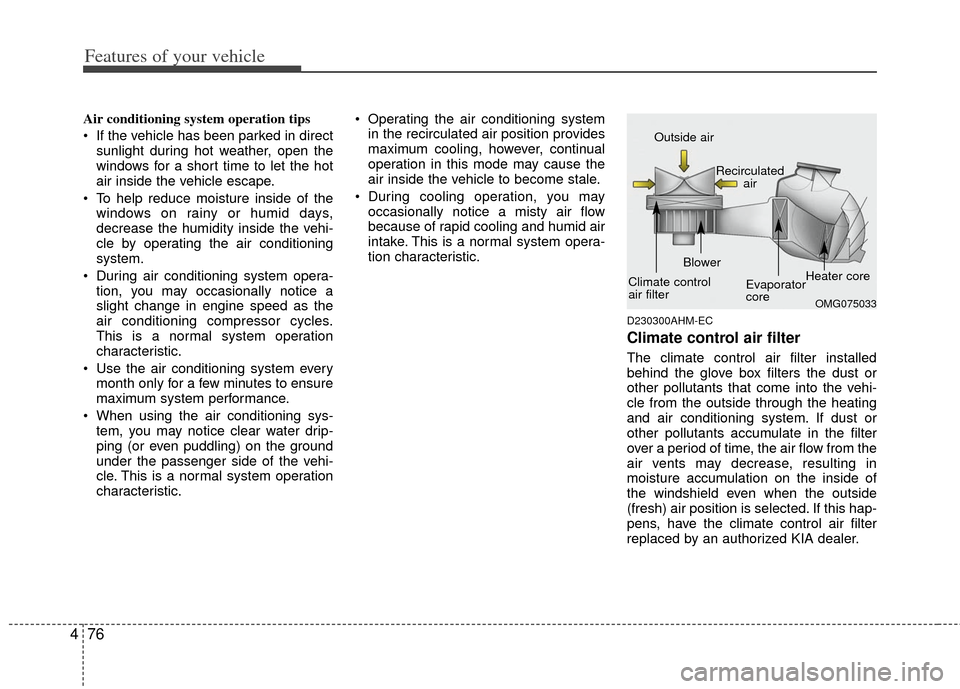
D230300AHM-EC
Climate control air filter
The climate control air filter installed
behind the glove box filters the dust or
other pollutants that come into the vehi-
cle from the outside through the heating
and air conditioning system. If dust or
other pollutants accumulate in the filter
over a period of time, the air flow from the
air vents may decrease, resulting in
moisture accumulation on the inside of
the windshield even when the outside
(fresh) air position is selected. If this hap-
pens, have the climate control air filter
replaced by an authorized KIA dealer.
OMG075033
Outside air
Recirculatedair
Climate control
air filter Blower
Evaporator
coreHeater core
Page 223 of 353
513
Driving your vehicle
During cold weather, shifting may bedifficult until the transaxle lubricant is
warmed up. This is normal and not
harmful to the transaxle.
If you've come to a complete stop and it's hard to shift into 1st or R (Reverse),
leave the shift lever at neutral position
and release the clutch. Depress the
clutch pedal back down, and then shift
into 1st or R (Reverse) gear position.E050101APB
Using the clutch
The clutch should be depressed all the
way to the floor before shifting, then
released slowly. The clutch pedal should
always be fully released while driving. Do
not rest your foot on the clutch pedal
while driving. This can cause unneces-
sary wear. Do not partially engage the
clutch to hold the vehicle on an incline.
This causes unnecessary wear. Use the
foot brake or parking brake to hold the
vehicle on an incline. Do not operate the
clutch pedal rapidly and repeatedly.
E050102APB
Downshifting
When you must slow down in heavy traf-
fic or while driving up steep hills, down-
shift before the engine starts to labor.
Downshifting reduces the chance of
stalling and gives better acceleration
when you need to increase your speed
again. When the vehicle is traveling down
steep hills, downshifting helps maintain
safe speed and prolongs brake life.
CAUTION
To avoid premature clutch wear and damage, do not drive withyour foot resting on the clutchpedal. Also, don’t use the clutchto hold the vehicle on an uphillgrade, while waiting for a trafficlight, etc.
Do not use the shift lever as a handrest during driving, as thiscan result in premature wear ofthe transaxle shift forks.
WARNING
Before leaving the driver’s seat, always set the parking brake fully
and shut the engine off. Then
make sure the transaxle is shifted
into 1st gear when the vehicle is
parked on a level or uphill grade,
and shifted into R (Reverse) on a
downhill grade. Unexpected and
sudden vehicle movement can
occur if these precautions are not
followed in the order identified.
Page 228 of 353
Driving your vehicle
18
5
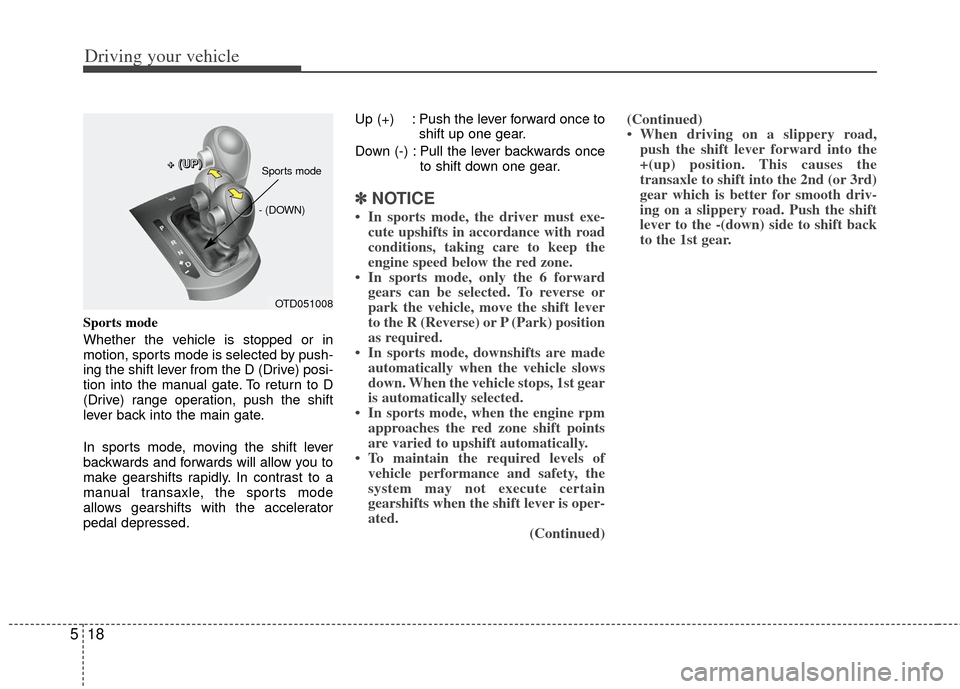
Sports mode
Whether the vehicle is stopped or in
motion, sports mode is selected by push-
ing the shift lever from the D (Drive) posi-
tion into the manual gate. To return to D
(Drive) range operation, push the shift
lever back into the main gate.
In sports mode, moving the shift lever
backwards and forwards will allow you to
make gearshifts rapidly. In contrast to a
manual transaxle, the sports mode
allows gearshifts with the accelerator
pedal depressed. Up (+) : Push the lever forward once to
shift up one gear.
Down (-) : Pull the lever backwards once to shift down one gear.
✽ ✽NOTICE
• In sports mode, the driver must exe-
cute upshifts in accordance with road
conditions, taking care to keep the
engine speed below the red zone.
• In sports mode, only the 6 forward gears can be selected. To reverse or
park the vehicle, move the shift lever
to the R (Reverse) or P (Park) position
as required.
• In sports mode, downshifts are made automatically when the vehicle slows
down. When the vehicle stops, 1st gear
is automatically selected.
• In sports mode, when the engine rpm approaches the red zone shift points
are varied to upshift automatically.
• To maintain the required levels of vehicle performance and safety, the
system may not execute certain
gearshifts when the shift lever is oper-
ated. (Continued)(Continued)
• When driving on a slippery road,
push the shift lever forward into the
+(up) position. This causes the
transaxle to shift into the 2nd (or 3rd)
gear which is better for smooth driv-
ing on a slippery road. Push the shift
lever to the -(down) side to shift back
to the 1st gear.
OTD051008
+
+
+
+
(
(
(
(
U
U
U
U
P
P
P
P
)
)
)
)
- (DOWN)
Sports mode
Page 253 of 353
543
Driving your vehicle
E120000ASA
Severe weather conditions in the winter
result in greater wear and other prob-
lems. To minimize the problems of winter
driving, you should follow these sugges-
tions:
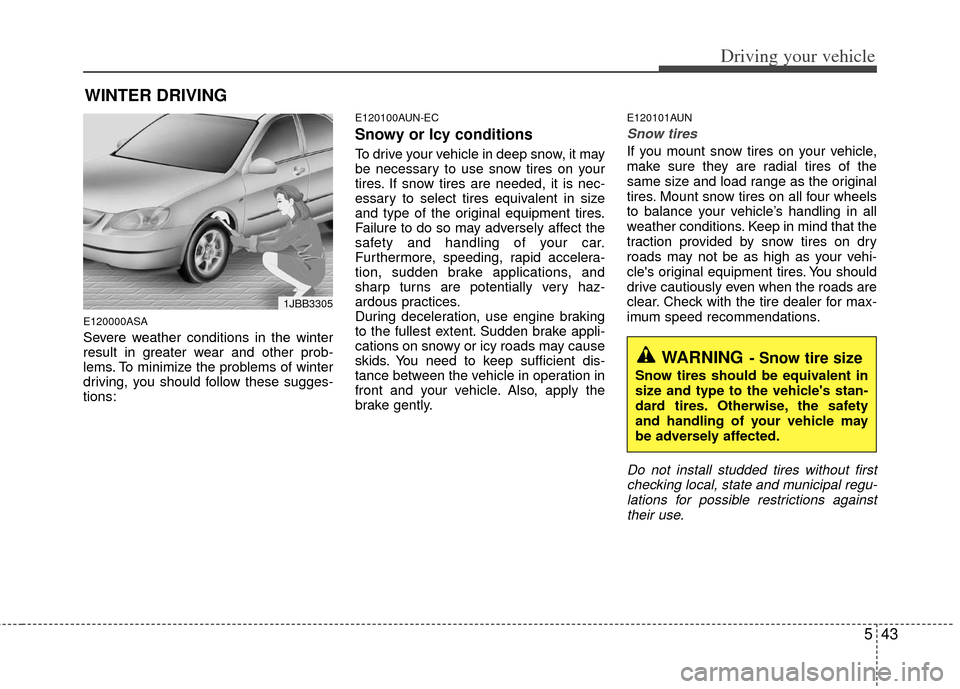
E120100AUN-EC
Snowy or Icy conditions
To drive your vehicle in deep snow, it may
be necessary to use snow tires on your
tires. If snow tires are needed, it is nec-
essary to select tires equivalent in size
and type of the original equipment tires.
Failure to do so may adversely affect the
safety and handling of your car.
Furthermore, speeding, rapid accelera-
tion, sudden brake applications, and
sharp turns are potentially very haz-
ardous practices.
During deceleration, use engine braking
to the fullest extent. Sudden brake appli-
cations on snowy or icy roads may cause
skids. You need to keep sufficient dis-
tance between the vehicle in operation in
front and your vehicle. Also, apply the
brake gently.
E120101AUN
Snow tires
If you mount snow tires on your vehicle,
make sure they are radial tires of the
same size and load range as the original
tires. Mount snow tires on all four wheels
to balance your vehicle’s handling in all
weather conditions. Keep in mind that the
traction provided by snow tires on dry
roads may not be as high as your vehi-
cle's original equipment tires. You should
drive cautiously even when the roads are
clear. Check with the tire dealer for max-
imum speed recommendations.
Do not install studded tires without firstchecking local, state and municipal regu-lations for possible restrictions againsttheir use.
WINTER DRIVING
WARNING- Snow tire size
Snow tires should be equivalent in
size and type to the vehicle's stan-
dard tires. Otherwise, the safety
and handling of your vehicle may
be adversely affected.
1JBB3305