infotainment KIA EV6 2022 Features and Functions Guide
[x] Cancel search | Manufacturer: KIA, Model Year: 2022, Model line: EV6, Model: KIA EV6 2022Pages: 70, PDF Size: 6.39 MB
Page 35 of 70
33†LEGAL DISCL AIMERS ON BACK INSIDE COVER | *IF EQUIPPEDALWAYS CHECK THE OWNER ’S MANUAL FOR COMPLETE OPER ATING INFORMATION AND SAFET Y WARNINGS.
Refer to the inside front cover for more information on QR codes.www.youtube.com/KiaFeatureVideos
Leading Vehicle Departure Alert (LVDA) Video
QR CODE
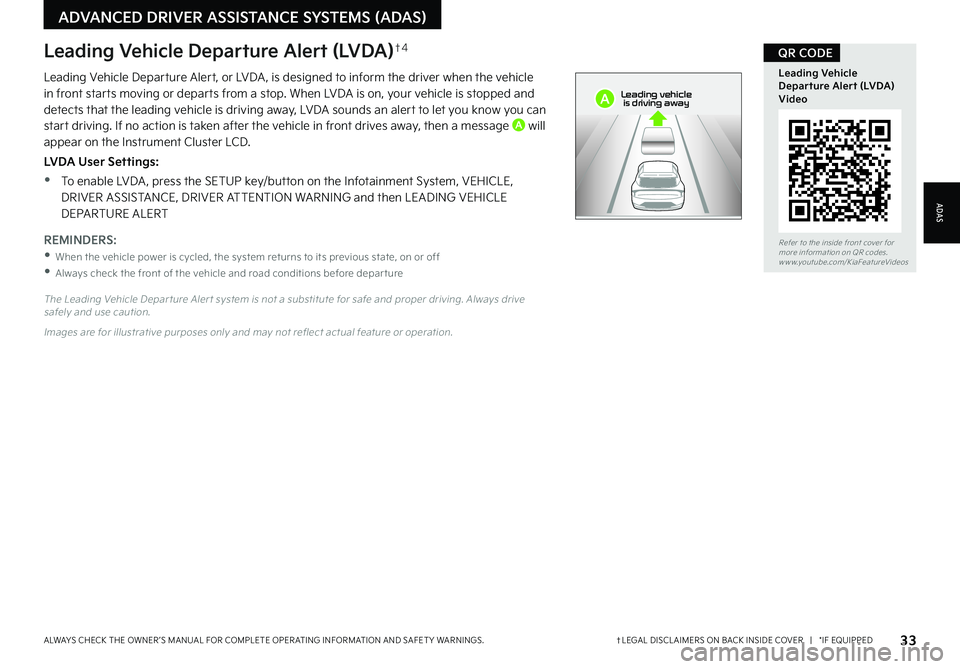
Leading Vehicle Departure Alert, or LVDA , is designed to inform the driver when the vehicle in front starts moving or departs from a stop. When LVDA is on, your vehicle is stopped and detects that the leading vehicle is driving away, LVDA sounds an alert to let you know you can start driving. If no action is taken after the vehicle in front drives away, then a message A will appear on the Instrument Cluster LCD.
LVDA User Settings:
•To enable LVDA , press the SETUP key/button on the Infotainment System, VEHICLE, DRIVER ASSISTANCE, DRIVER ATTENTION WARNING and then LEADING VEHICLE DEPARTURE ALERT
The Leading Vehicle Depar ture Aler t system is not a substitute for safe and proper driving. Always drive safely and use caution.
Images are for illustrative purposes only and may not reflect actual feature or operation.
Leading Vehicle Departure Alert (LVDA)†4
REMINDERS:
•When the vehicle power is cycled, the system returns to its previous state, on or off
•
Always check the front of the vehicle and road conditions before depar ture
ADAS
ADVANCED DRIVER ASSISTANCE SYSTEMS (ADAS)
0mph
0 KMH020 4060
202 m100 kWh/ 100m96%Lv 1READY66°F
2 72m
CHG
PWR
Leading vehicle
is driving awayA
Page 36 of 70
34†LEGAL DISCL AIMERS ON BACK INSIDE COVER | *IF EQUIPPEDEV6 FEATURES & FUNCTIONS GUIDE
Refer to the inside front cover for more information on QR codes.www.youtube.com/KiaFeatureVideos
Remote Smart Parking Assist (RSPA) Video
QR CODE
(But tons located below gear shift knob)
Remotely moving for ward or backward
Parallel reverse parking and for ward exit
HOLDHOLD
ADVANCED DRIVER ASSISTANCE SYSTEMS (ADAS)
ADAS
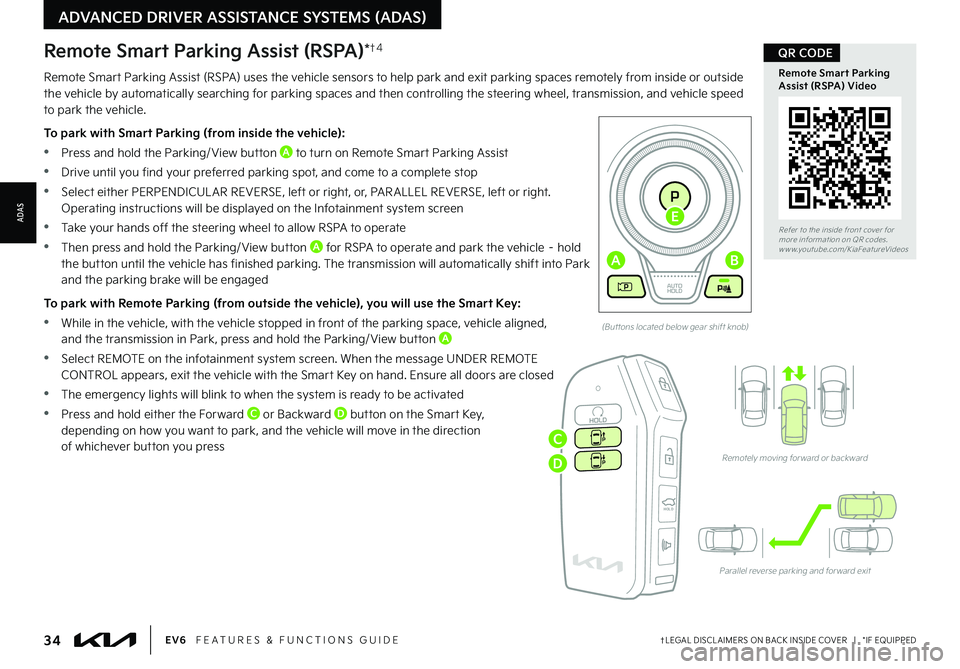
Remote Smart Parking Assist (RSPA) uses the vehicle sensors to help park and exit parking spaces remotely from inside or outside the vehicle by automatically searching for parking spaces and then controlling the steering wheel, transmission, and vehicle speed to park the vehicle.
To park with Smart Parking (from inside the vehicle):
•Press and hold the Parking/ View button A to turn on Remote Smart Parking Assist
•Drive until you find your preferred parking spot, and come to a complete stop
•Select either PERPENDICUL AR REVERSE, left or right, or, PAR ALLEL REVERSE, left or right. Operating instructions will be displayed on the Infotainment system screen
•Take your hands off the steering wheel to allow RSPA to operate
•Then press and hold the Parking/ View button A for RSPA to operate and park the vehicle – hold
the button until the vehicle has finished parking. The transmission will automatically shift into Park and the parking brake will be engaged
To park with Remote Parking (from outside the vehicle), you will use the Smart Key:
•While in the vehicle, with the vehicle stopped in front of the parking space, vehicle aligned, and the transmission in Park, press and hold the Parking/ View button A
•Select REMOTE on the infotainment system screen. When the message UNDER REMOTE CONTROL appears, exit the vehicle with the Smart Key on hand. Ensure all doors are closed
•The emergency lights will blink to when the system is ready to be activated
•Press and hold either the Forward C or Backward D button on the Smart Key, depending on how you want to park, and the vehicle will move in the direction of whichever button you press
Remote Smart Parking Assist (RSPA)*†4
EV
RN
P
AUTO
HOLD
D
AB
E
C
D
Page 37 of 70
35†LEGAL DISCL AIMERS ON BACK INSIDE COVER | *IF EQUIPPEDALWAYS CHECK THE OWNER ’S MANUAL FOR COMPLETE OPER ATING INFORMATION AND SAFET Y WARNINGS.
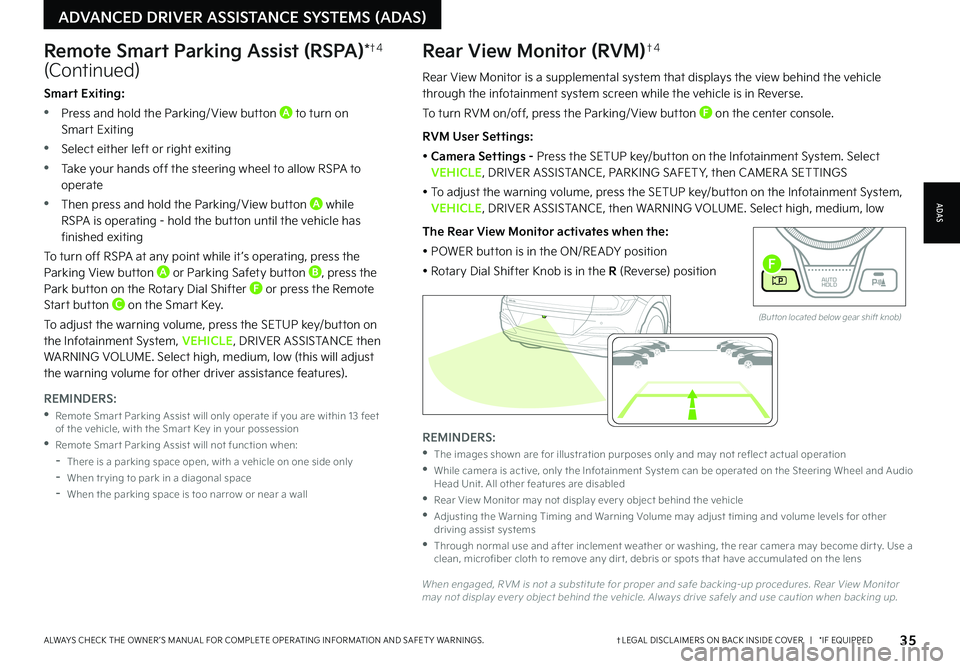
Rear View Monitor is a supplemental system that displays the view behind the vehicle through the infotainment system screen while the vehicle is in Reverse.
To turn RVM on/off, press the Parking/ View button F on the center console.
RVM User Settings:
• Camera Settings - Press the SETUP key/button on the Infotainment System. Select VEHICLE, DRIVER ASSISTANCE, PARKING SAFET Y, then CAMER A SETTINGS
• To adjust the warning volume, press the SETUP key/button on the Infotainment System, VEHICLE, DRIVER ASSISTANCE, then WARNING VOLUME. Select high, medium, low
The Rear View Monitor activates when the:
• POWER button is in the ON/READY position
• Rotary Dial Shifter Knob is in the R (Reverse) position
Rear View Monitor (RVM)†4
ADAS
ADVANCED DRIVER ASSISTANCE SYSTEMS (ADAS)
Remote Smart Parking Assist (RSPA)*†4
(Continued)
REMINDERS:
•
The images shown are for illustration purposes only and may not reflect actual operation
•
While camera is active, only the Infotainment System can be operated on the Steering Wheel and Audio Head Unit. All other features are disabled
•
Rear View Monitor may not display ever y object behind the vehicle
•
Adjusting the Warning Timing and Warning Volume may adjust timing and volume levels for other driving assist systems
•
Through normal use and after inclement weather or washing, the rear camera may become dir t y. Use a clean, microfiber cloth to remove any dir t, debris or spots that have accumulated on the lens
When engaged, RVM is not a substitute for proper and safe backing-up procedures. Rear View Monitor may not display ever y object behind the vehicle. Always drive safely and use caution when backing up.
Smart Exiting:
•Press and hold the Parking/ View button A to turn on Smart Exiting
•Select either left or right exiting
•Take your hands off the steering wheel to allow RSPA to operate
•Then press and hold the Parking/ View button A while RSPA is operating - hold the button until the vehicle has finished exiting
To turn off RSPA at any point while it ’s operating, press the Parking View button A or Parking Safety button B, press the Park button on the Rotary Dial Shifter F or press the Remote Start button C on the Smart Key.
To adjust the warning volume, press the SETUP key/button on the Infotainment System, VEHICLE, DRIVER ASSISTANCE then WARNING VOLUME. Select high, medium, low (this will adjust the warning volume for other driver assistance features).
REMINDERS:
•
Remote Smar t Parking Assist will only operate if you are within 13 feet of the vehicle, with the Smar t Key in your possession
•
Remote Smar t Parking Assist will not function when:
-
There is a parking space open, with a vehicle on one side only
-When tr ying to park in a diagonal space
-
When the parking space is too narrow or near a wall
EV
R N
P
AUTO
HOLD
D
(But ton located below gear shift knob)
F
Page 38 of 70
36†LEGAL DISCL AIMERS ON BACK INSIDE COVER | *IF EQUIPPEDEV6 FEATURES & FUNCTIONS GUIDE
Refer to the inside front cover for more information on QR codes.www.youtube.com/KiaFeatureVideos
Head-Up Display Video
QR CODE
REMINDERS:
•
The HUD image on the windshield glass may not be visible in these cases:
-
The driver has poor sit ting posture
-The driver is wearing polarized sunglasses
-There is an object covering the HUD
-Driving on a wet road
-Excessive lighting inside or outside the vehicle
-
Modifications made to the windshield, such as tinting or other aftermarket treatments, could affect the HUD. When replacing the front windshield glass of vehicles equipped with the HUD, owners must replace it with windshield glass designed for HUD operation. Other wise, duplicated images may be displayed on the windshield glass
-If Turn By Turn (TBT) navigation information is selected as HUD content, TBT information will not be displayed on the LCDWhen engaged, HUD is a supplemental system. Do not solely rely on the system, always drive safely, and pay at tention to the driving conditions on the road.
Images are for illustrative purposes only and may not reflect actual feature or operation.
See section 5 in the Owner ’s Manual for more information.
ADVANCED DRIVER ASSISTANCE SYSTEMS (ADAS)
ADAS
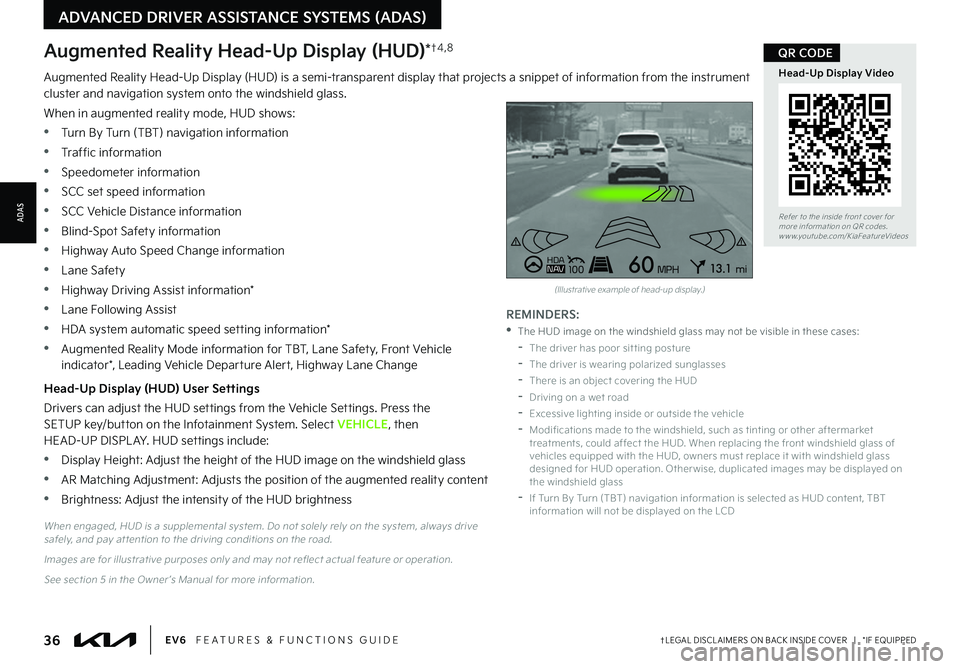
Augmented Reality Head-Up Display (HUD) is a semi-transparent display that projects a snippet of information from the instrument cluster and navigation system onto the windshield glass.
When in augmented reality mode, HUD shows:
•Turn By Turn (TBT) navigation information
•Traffic information
•Speedometer information
•SCC set speed information
•SCC Vehicle Distance information
•Blind-Spot Safety information
•Highway Auto Speed Change information
•Lane Safety
•Highway Driving Assist information*
•Lane Following Assist
•HDA system automatic speed setting information*
•Augmented Reality Mode information for TBT, Lane Safety, Front Vehicle indicator*, Leading Vehicle Departure Alert, Highway Lane Change
Head-Up Display (HUD) User Settings
Drivers can adjust the HUD settings from the Vehicle Settings. Press the SETUP key/button on the Infotainment System. Select VEHICLE, then HEAD-UP DISPL AY. HUD settings include:
•Display Height: Adjust the height of the HUD image on the windshield glass
•AR Matching Adjustment: Adjusts the position of the augmented reality content
•Brightness: Adjust the intensity of the HUD brightness
Augmented Reality Head-Up Display (HUD)*†4 , 8
0mph
0 KMH020 4060
202 m100 kWh/ 100m96%Lv 1READY66°F
2 72mCHG
PWR
Leading vehicle
is driving away
HD AN AV1006013 .1mi
MPH
(Illustrative example of head-up display.)
Page 39 of 70
37†LEGAL DISCL AIMERS ON BACK INSIDE COVER | *IF EQUIPPEDALWAYS CHECK THE OWNER ’S MANUAL FOR COMPLETE OPER ATING INFORMATION AND SAFET Y WARNINGS.
Refer to the inside front cover for more information on QR codes.www.youtube.com/KiaFeatureVideos
3D Surround ViewMonitor (SVM) Video
QR CODE
ADAS
ADVANCED DRIVER ASSISTANCE SYSTEMS (ADAS)
REMINDERS:
•
The SVM camera is equipped with an optical lens to provide a wider range of vision and may appear different from the actual distance
•
While the SVM is active, the volume will be lowered on all audio modes
•
Through normal use and after inclement weather or washing, the rear camera may become dir t y. Use a clean, microfiber cloth to remove any dir t, debris or spots that have accumulated on the lens
3D Surround View Monitor (SVM)*†4
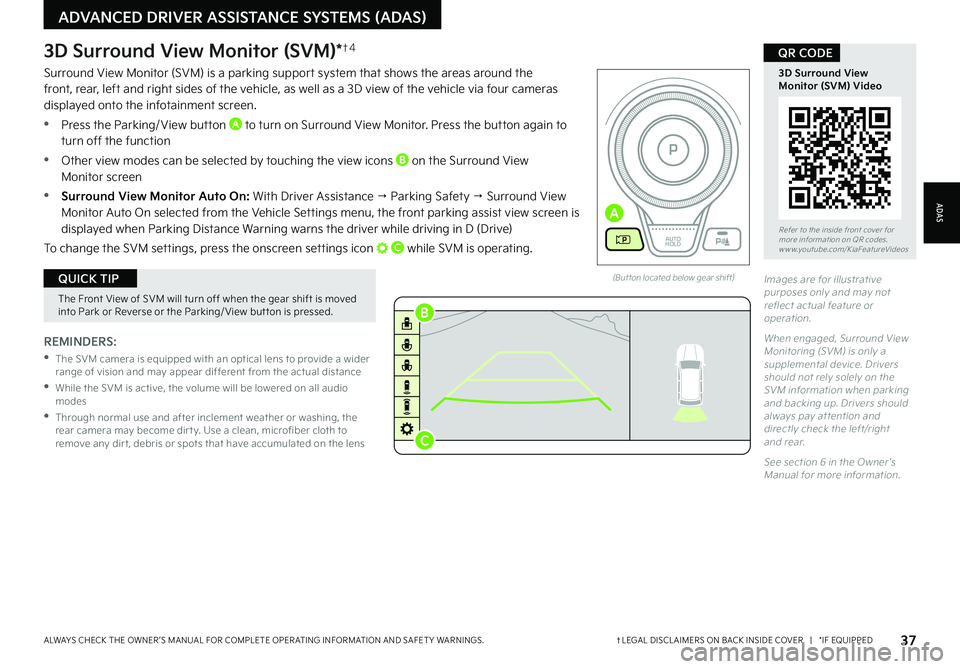
Surround View Monitor (SVM) is a parking support system that shows the areas around the front, rear, left and right sides of the vehicle, as well as a 3D view of the vehicle via four cameras displayed onto the infotainment screen.
•Press the Parking/ View button A to turn on Surround View Monitor. Press the button again to turn off the function
•Other view modes can be selected by touching the view icons B on the Surround View Monitor screen
•Surround View Monitor Auto On: With Driver Assistance → Parking Safety → Surround View Monitor Auto On selected from the Vehicle Settings menu, the front parking assist view screen is displayed when Parking Distance Warning warns the driver while driving in D (Drive)
To change the SVM settings, press the onscreen settings icon C while SVM is operating.
(But ton located below gear shift)
The Front View of SVM will turn off when the gear shift is moved into Park or Reverse or the Parking/ View but ton is pressed.
QUICK TIPImages are for illustrative purposes only and may not reflect actual feature or operation.
When engaged, Surround View Monitoring (SVM) is only a supplemental device. Drivers should not rely solely on the SVM information when parking and backing up. Drivers should always pay at tention and directly check the left/right and rear.
See section 6 in the Owner ’s Manual for more information.
EV
RN
P
AUTO
HOLD
D
A
B
C
Page 40 of 70
38†LEGAL DISCL AIMERS ON BACK INSIDE COVER | *IF EQUIPPEDEV6 FEATURES & FUNCTIONS GUIDE
Reverse Parking Collision-Avoidance Assist (PCA)†4
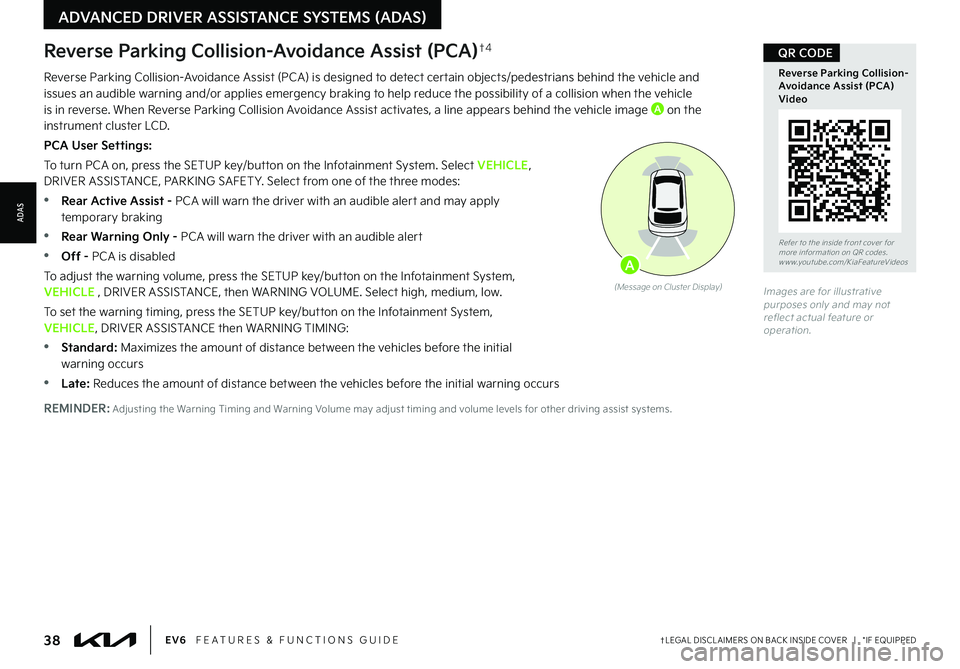
Reverse Parking Collision-Avoidance Assist (PCA) is designed to detect certain objects/pedestrians behind the vehicle and issues an audible warning and/or applies emergency braking to help reduce the possibility of a collision when the vehicle is in reverse. When Reverse Parking Collision Avoidance Assist activates, a line appears behind the vehicle image A on the instrument cluster LCD.
PCA User Settings:
To turn PCA on, press the SETUP key/button on the Infotainment System. Select VEHICLE, DRIVER ASSISTANCE, PARKING SAFET Y. Select from one of the three modes:
•Rear Active Assist - PCA will warn the driver with an audible alert and may apply temporary braking
•Rear Warning Only - PCA will warn the driver with an audible alert
•Off - PCA is disabled
To adjust the warning volume, press the SETUP key/button on the Infotainment System, VEHICLE , DRIVER ASSISTANCE, then WARNING VOLUME. Select high, medium, low.
To set the warning timing, press the SETUP key/button on the Infotainment System, VEHICLE, DRIVER ASSISTANCE then WARNING TIMING:
•
Standard: Maximizes the amount of distance between the vehicles before the initial warning occurs
•Late: Reduces the amount of distance between the vehicles before the initial warning occurs
Images are for illustrative purposes only and may not reflect actual feature or operation.
(Message on Cluster Display)
A
Refer to the inside front cover for more information on QR codes.www.youtube.com/KiaFeatureVideos
Reverse Parking Collision-Avoidance Assist (PCA) Video
QR CODE
REMINDER: Adjusting the Warning Timing and Warning Volume may adjust timing and volume levels for other driving assist systems.
ADVANCED DRIVER ASSISTANCE SYSTEMS (ADAS)
ADAS
Page 43 of 70
41*IF EQUIPPEDALWAYS CHECK THE OWNER ’S MANUAL FOR COMPLETE OPER ATING INFORMATION AND SAFET Y WARNINGS.
Electronic Child Safety
Lock System*
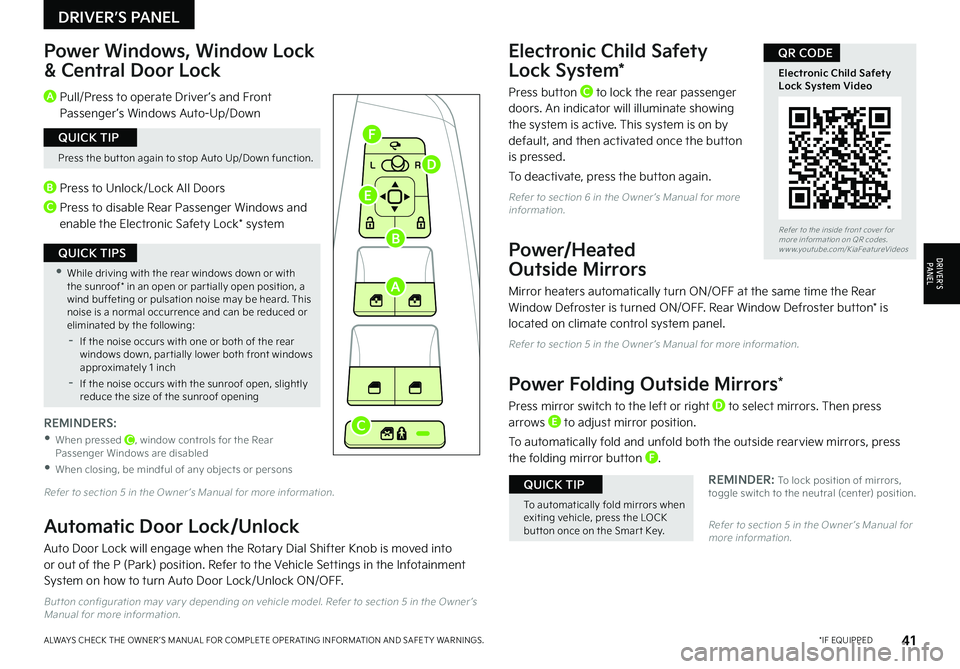
Press button C to lock the rear passenger doors. An indicator will illuminate showing the system is active. This system is on by default, and then activated once the button is pressed.
To deactivate, press the button again.
Refer to section 6 in the Owner ’s Manual for more information.
Power/Heated
Outside Mirrors
Mirror heaters automatically turn ON/OFF at the same time the Rear Window Defroster is turned ON/OFF. Rear Window Defroster button* is located on climate control system panel.
Refer to section 5 in the Owner ’s Manual for more information.
Power Folding Outside Mirrors*
Press mirror switch to the left or right D to select mirrors. Then press arrows E to adjust mirror position.
To automatically fold and unfold both the outside rearview mirrors, press the folding mirror button F.
REMINDER: To lock position of mirrors, toggle switch to the neutral (center) position.
Power Windows, Window Lock
& Central Door Lock
Refer to section 5 in the Owner ’s Manual for more information.
Refer to section 5 in the Owner ’s Manual for more information.
A Pull/Press to operate Driver ’s and Front Passenger ’s Windows Auto-Up/Down
B Press to Unlock/Lock All Doors
C Press to disable Rear Passenger Windows and enable the Electronic Safety Lock* system
REMINDERS:
•
When pressed C, window controls for the Rear Passenger Windows are disabled
•When closing, be mindful of any objects or persons
Press the but ton again to stop Auto Up/Down function.
QUICK TIP
•While driving with the rear windows down or with the sunroof* in an open or par tially open position, a wind buffeting or pulsation noise may be heard. This noise is a normal occurrence and can be reduced or eliminated by the following:
-If the noise occurs with one or both of the rear windows down, par tially lower both front windows approximately 1 inch
-If the noise occurs with the sunroof open, slightly reduce the size of the sunroof opening
QUICK TIPS
To automatically fold mirrors when exiting vehicle, press the LOCK but ton once on the Smar t Key.
QUICK TIP
L R
Refer to the inside front cover for more information on QR codes.www.youtube.com/KiaFeatureVideos
Electronic Child Safety Lock System Video
QR CODE
Automatic Door Lock/Unlock
Auto Door Lock will engage when the Rotary Dial Shifter Knob is moved into or out of the P (Park) position. Refer to the Vehicle Settings in the Infotainment System on how to turn Auto Door Lock/Unlock ON/OFF.
But ton configuration may var y depending on vehicle model. Refer to section 5 in the Owner ’s Manual for more information.
DRIVER’S PANEL
DRIVER’SPA N EL
A
B
C
D
E
F
Page 46 of 70
44†LEGAL DISCL AIMERS ON BACK INSIDE COVER | *IF EQUIPPEDEV6 FEATURES & FUNCTIONS GUIDE
A
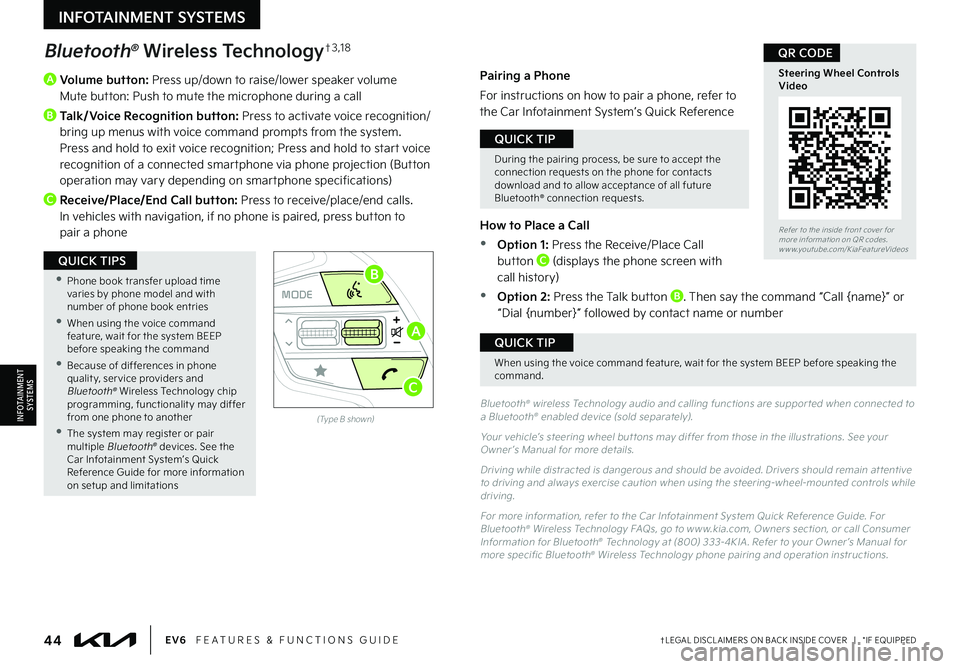
Volume button: Press up/down to raise/lower speaker volume Mute button: Push to mute the microphone during a call
B
Talk/Voice Recognition button: Press to activate voice recognition/bring up menus with voice command prompts from the system. Press and hold to exit voice recognition; Press and hold to start voice recognition of a connected smartphone via phone projection (Button operation may vary depending on smartphone specifications)
C Receive/Place/End Call button: Press to receive/place/end calls. In vehicles with navigation, if no phone is paired, press button to pair a phone
OKOKOK
OK
MODEMODEMODE
OKOK
MODEMODEMODE
OKOKOK
MODEMODEMODE
OKOKOK
MODEMODEMODE
Bluetooth® Wireless Technology†3 , 1 8
Bluetooth® wireless Technology audio and calling functions are suppor ted when connected to a Bluetooth® enabled device (sold separately).
Your vehicle’s steering wheel but tons may differ from those in the illustrations. See your Owner ’s Manual for more details.
Driving while distracted is dangerous and should be avoided. Drivers should remain at tentive to driving and always exercise caution when using the steering-wheel-mounted controls while driving.
For more information, refer to the Car Infotainment System Quick Reference Guide. For Bluetooth® Wireless Technology FAQs, go to w w w.kia.com, Owners section, or call Consumer Information for Bluetooth® Technology at (800) 333-4KIA . Refer to your Owner ’s Manual for more specific Bluetooth® Wireless Technology phone pairing and operation instructions.
(Type B shown)
Pairing a Phone
For instructions on how to pair a phone, refer to the Car Infotainment System’s Quick Reference
Guide or your vehicle’s Quick Start Guide.
How to Place a Call
•Option 1: Press the Receive/Place Call button C (displays the phone screen with call history)
•Option 2: Press the Talk button B. Then say the command “Call {name}” or “Dial {number}” followed by contact name or number
During the pairing process, be sure to accept the connection requests on the phone for contacts download and to allow acceptance of all future Bluetooth® connection requests.
QUICK TIP
When using the voice command feature, wait for the system BEEP before speaking the command.
QUICK TIP
•
Phone book transfer upload time varies by phone model and with number of phone book entries
•When using the voice command feature, wait for the system BEEP before speaking the command
•Because of differences in phone qualit y, ser vice providers and Bluetooth® Wireless Technology chip programming, functionalit y may differ from one phone to another
•The system may register or pair multiple Bluetooth® devices. See the Car Infotainment System’s Quick Reference Guide for more information on setup and limitations
QUICK TIPS
Refer to the inside front cover for more information on QR codes.www.youtube.com/KiaFeatureVideos
Steering Wheel Controls Video
QR CODE
INFOTAINMENT SYSTEMS
INFOTAINMENTSYSTEMS
A
B
C
Page 47 of 70
45†LEGAL DISCL AIMERS ON BACK INSIDE COVER | *IF EQUIPPEDALWAYS CHECK THE OWNER ’S MANUAL FOR COMPLETE OPER ATING INFORMATION AND SAFET Y WARNINGS.
Refer to the inside front cover for more information on QR codes.www.youtube.com/KiaFeatureVideos
Voice Recognition Tips Video
Steering Wheel Controls Video
Star, Favorite & Radio Presets Buttons Video
QR CODE
A
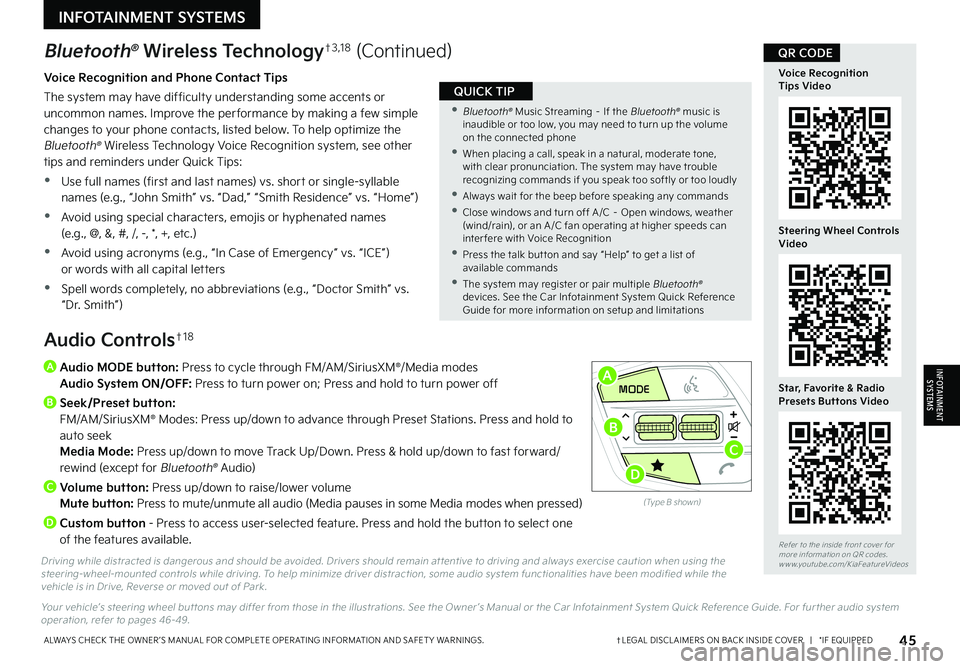
Audio MODE button: Press to cycle through FM/AM/SiriusXM®/Media modes Audio System ON/OFF: Press to turn power on; Press and hold to turn power off
B Seek/Preset button: FM/AM/SiriusXM® Modes: Press up/down to advance through Preset Stations. Press and hold to auto seek Media Mode: Press up/down to move Track Up/Down. Press & hold up/down to fast forward/rewind (except for Bluetooth® Audio)
C
Volume button: Press up/down to raise/lower volume Mute button: Press to mute/unmute all audio (Media pauses in some Media modes when pressed)
D
Custom button - Press to access user-selected feature. Press and hold the button to select one of the features available.
Driving while distracted is dangerous and should be avoided. Drivers should remain at tentive to driving and always exercise caution when using the steering-wheel-mounted controls while driving. To help minimize driver distraction, some audio system functionalities have been modified while the vehicle is in Drive, Reverse or moved out of Park.
Your vehicle’s steering wheel but tons may differ from those in the illustrations. See the Owner ’s Manual or the Car Infotainment System Quick Reference Guide. For fur ther audio system operation, refer to pages 46-49.
Audio Controls†1 8
Bluetooth® Wireless Technology†3 , 1 8 (Continued)
Voice Recognition and Phone Contact Tips
The system may have difficulty understanding some accents or uncommon names. Improve the per formance by making a few simple changes to your phone contacts, listed below. To help optimize the Bluetooth® Wireless Technology Voice Recognition system, see other tips and reminders under Quick Tips:
•Use full names (first and last names) vs. short or single-syllable names (e.g., “John Smith” vs. “Dad,” “Smith Residence” vs. “Home”)
•Avoid using special characters, emojis or hyphenated names (e.g., @, &, #, /, -, *, +, etc.)
•Avoid using acronyms (e.g., “In Case of Emergency” vs. “ICE”) or words with all capital letters
•Spell words completely, no abbreviations (e.g., “Doctor Smith” vs. “Dr. Smith”)
•
Bluetooth® Music Streaming – If the Bluetooth® music is inaudible or too low, you may need to turn up the volume on the connected phone
•
When placing a call, speak in a natural, moderate tone, with clear pronunciation. The system may have trouble recognizing commands if you speak too softly or too loudly
•
Always wait for the beep before speaking any commands
•
Close windows and turn off A /C – Open windows, weather (wind/rain), or an A /C fan operating at higher speeds can inter fere with Voice Recognition
•
Press the talk but ton and say “Help” to get a list of available commands
•
The system may register or pair multiple Bluetooth® devices. See the Car Infotainment System Quick Reference Guide for more information on setup and limitations
QUICK TIP
INFOTAINMENT SYSTEMS
INFOTAINMENTSYSTEMS
OKOKOK
OK
MODEMODEMODE
OKOK
MODEMODEMODE
OKOKOK
MODEMODEMODE
OKOKOK
MODEMODEMODE
(Type B shown)
A
B
D
C
Page 48 of 70
46†LEGAL DISCL AIMERS ON BACK INSIDE COVER | *IF EQUIPPEDEV6 FEATURES & FUNCTIONS GUIDE
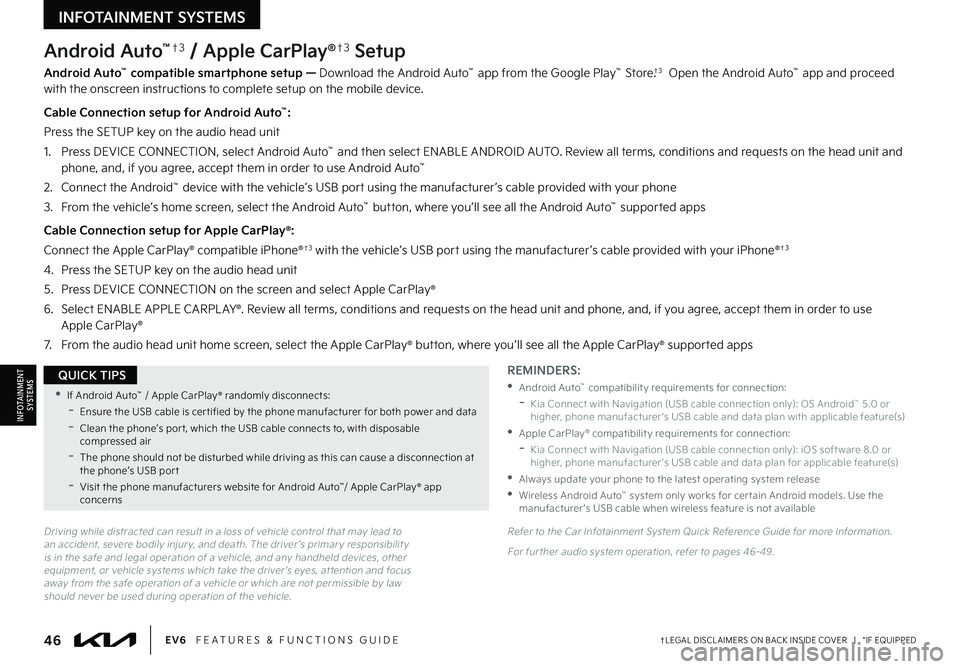
Android Auto™†3 / Apple CarPlay®†3 Setup
Android Auto™ compatible smartphone setup — Download the Android Auto™ app from the Google Play™ Store.†3 Open the Android Auto™ app and proceed with the onscreen instructions to complete setup on the mobile device.
Cable Connection setup for Android Auto™:
Press the SETUP key on the audio head unit
1. Press DEVICE CONNECTION, select Android Auto™ and then select ENABLE ANDROID AUTO. Review all terms, conditions and requests on the head unit and phone, and, if you agree, accept them in order to use Android Auto™
2. Connect the Android™ device with the vehicle’s USB port using the manufacturer ’s cable provided with your phone
3. From the vehicle’s home screen, select the Android Auto™ button, where you’ll see all the Android Auto™ supported apps
Cable Connection setup for Apple CarPlay®:
Connect the Apple CarPlay® compatible iPhone®†3 with the vehicle’s USB port using the manufacturer ’s cable provided with your iPhone®†3
4. Press the SETUP key on the audio head unit
5. Press DEVICE CONNECTION on the screen and select Apple CarPlay®
6. Select ENABLE APPLE CARPL AY®. Review all terms, conditions and requests on the head unit and phone, and, if you agree, accept them in order to use Apple CarPlay®
7. From the audio head unit home screen, select the Apple CarPlay® button, where you’ll see all the Apple CarPlay® supported apps
Driving while distracted can result in a loss of vehicle control that may lead to an accident, severe bodily injur y, and death. The driver ’s primar y responsibilit y is in the safe and legal operation of a vehicle, and any handheld devices, other equipment, or vehicle systems which take the driver ’s eyes, at tention and focus away from the safe operation of a vehicle or which are not permissible by law should never be used during operation of the vehicle.
REMINDERS:
•Android Auto™ compatibilit y requirements for connection:
-Kia Connect with Navigation (USB cable connection only): OS Android™ 5.0 or higher, phone manufacturer ’s USB cable and data plan with applicable feature(s)
•Apple CarPlay® compatibilit y requirements for connection:
-Kia Connect with Navigation (USB cable connection only): iOS soft ware 8.0 or higher, phone manufacturer ’s USB cable and data plan for applicable feature(s)
•
Always update your phone to the latest operating system release
•
Wireless Android Auto™ system only works for cer tain Android models. Use the manufacturer ’s USB cable when wireless feature is not available
Refer to the Car Infotainment System Quick Reference Guide for more information.
For fur ther audio system operation, refer to pages 46-49.
•If Android Auto™ / Apple CarPlay® randomly disconnects:
-Ensure the USB cable is cer tified by the phone manufacturer for both power and data
-
Clean the phone’s por t, which the USB cable connects to, with disposable compressed air
-
The phone should not be disturbed while driving as this can cause a disconnection at the phone’s USB por t
-
Visit the phone manufacturers website for Android Auto™/ Apple CarPlay® app concerns
QUICK TIPS
INFOTAINMENTSYSTEMS
INFOTAINMENT SYSTEMS