ESP KIA FORTE 2017 User Guide
[x] Cancel search | Manufacturer: KIA, Model Year: 2017, Model line: FORTE, Model: KIA FORTE 2017Pages: 595, PDF Size: 11.5 MB
Page 94 of 595
Features of your vehicle
22 4
Closing the trunk
To close, lower the trunk lid, then
press down on it until it locks. To be
sure the trunk lid is securely fas-
tened, always check by trying to pull
it up again.
Emergency trunk safety release
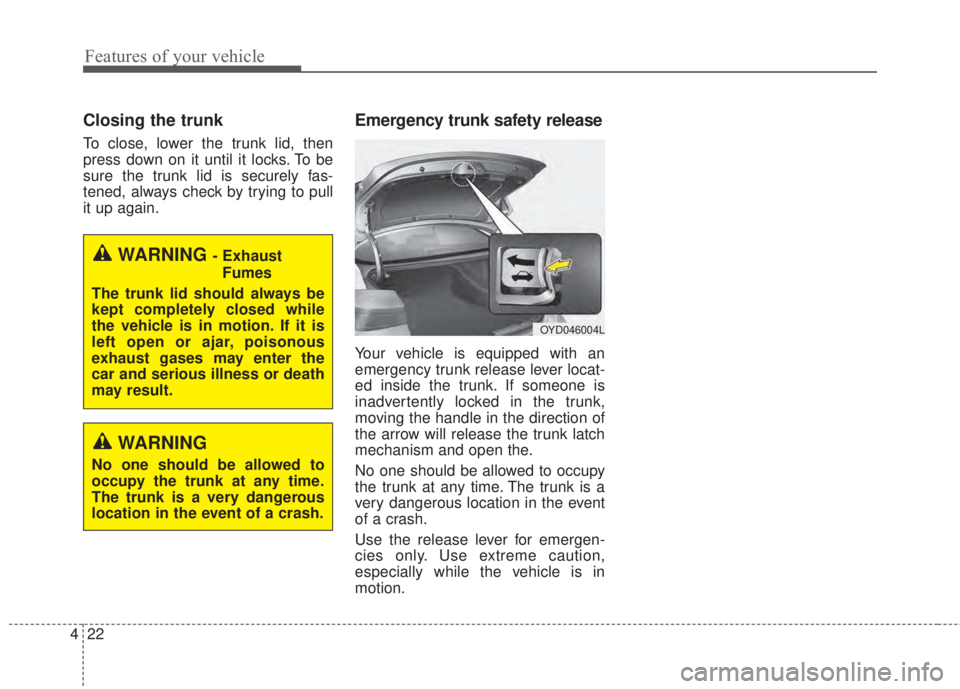
Your vehicle is equipped with an
emergency trunk release lever locat-
ed inside the trunk. If someone is
inadvertently locked in the trunk,
moving the handle in the direction of
the arrow will release the trunk latch
mechanism and open the.
No one should be allowed to occupy
the trunk at any time. The trunk is a
very dangerous location in the event
of a crash.
Use the release lever for emergen-
cies only. Use extreme caution,
especially while the vehicle is in
motion.
WARNING - Exhaust
Fumes
The trunk lid should always be
kept completely closed while
the vehicle is in motion. If it is
left open or ajar, poisonous
exhaust gases may enter the
car and serious illness or death
may result.
WARNING
No one should be allowed to
occupy the trunk at any time.
The trunk is a very dangerous
location in the event of a crash.
OYD046004L
Page 101 of 595
429
Features of your vehicle
You and your children should be fully
aware of the location of the emer-
gency liftgate safety release lever
and how to open the liftgate in case
you are accidently locked inside the
luggage compartment.✽NOTICE
Use the release lever for emergencies
only. Use with extreme caution,
especially while the vehicle is in
motion.
WARNING
No one should be allowed to
occupy the luggage compart-
ment of the vehicle at any time.
The luggage compartment is a
very dangerous location in the
event of a crash.
Page 103 of 595
431
Features of your vehicle
Power windows (if equipped)
The ignition switch must be in the ON
position for power windows to oper-
ate. Each door has a power window
switch that controls the door’s win-
dow. The driver has a power window
lock switch which can block the oper-
ation of passenger windows.
The power windows can be operated
for approximately 30 seconds after
the ignition key is removed or turned
to the ACC or LOCK position.
However, if the front doors are
opened, the power windows cannot
be operated even within the 30 sec-
ond period.
✽NOTICE
While driving with the rear windows
down or with the sunroof (if
equipped) in an open (or partially
open) position, your vehicle may
demonstrate a wind buffeting or pul-
sation noise. This noise is a normal
occurrence and can be reduced or
eliminated by taking the following
actions. If the noise occurs with one
or both of the rear windows down,
partially lower both front windows
approximately 2.5 cm (1 inch). If you
experience the noise with the sunroof
open, slightly reduce the size of the
sunroof opening.
Window opening and closing
(if equipped)
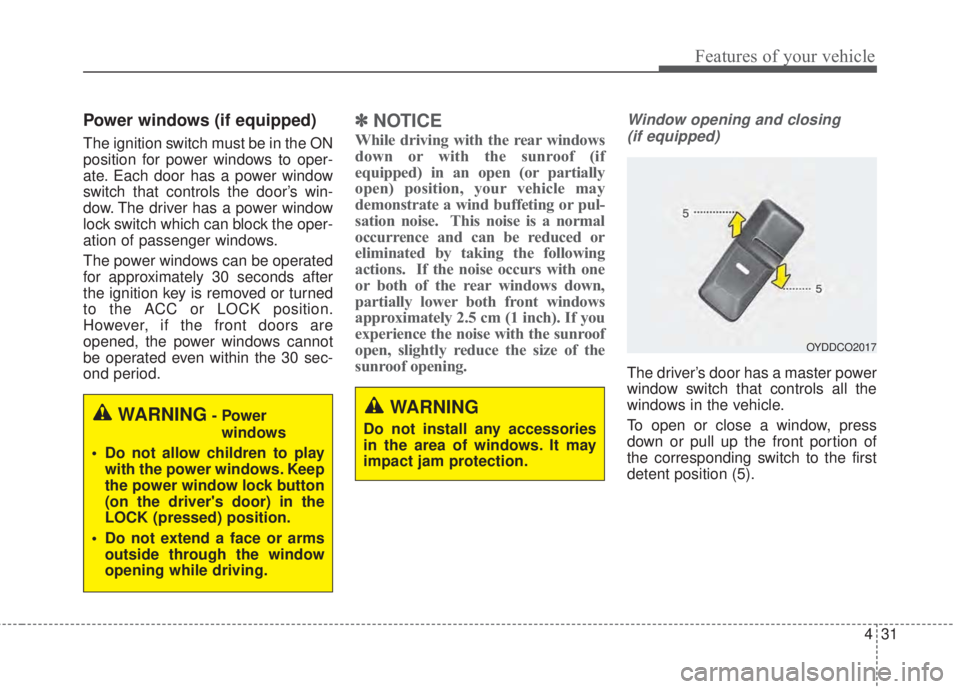
The driver’s door has a master power
window switch that controls all the
windows in the vehicle.
To open or close a window, press
down or pull up the front portion of
the corresponding switch to the first
detent position (5).
OYDDCO2017
WARNING
Do not install any accessories
in the area of windows. It may
impact jam protection.WARNING- Power
windows
• Do not allow children to play
with the power windows. Keep
the power window lock button
(on the driver's door) in the
LOCK (pressed) position.
• Do not extend a face or arms
outside through the window
opening while driving.
Page 111 of 595
439
Features of your vehicle
Make sure to refuel your vehicle
according to the “Fuel requirements”
suggested in chapter 1.
If the fuel filler cap requires replace-
ment, use only a genuine Kia cap or
the equivalent specified for your vehi-
cle. An incorrect fuel filler cap can
result in a serious malfunction of the
fuel system or emission control sys-
tem.
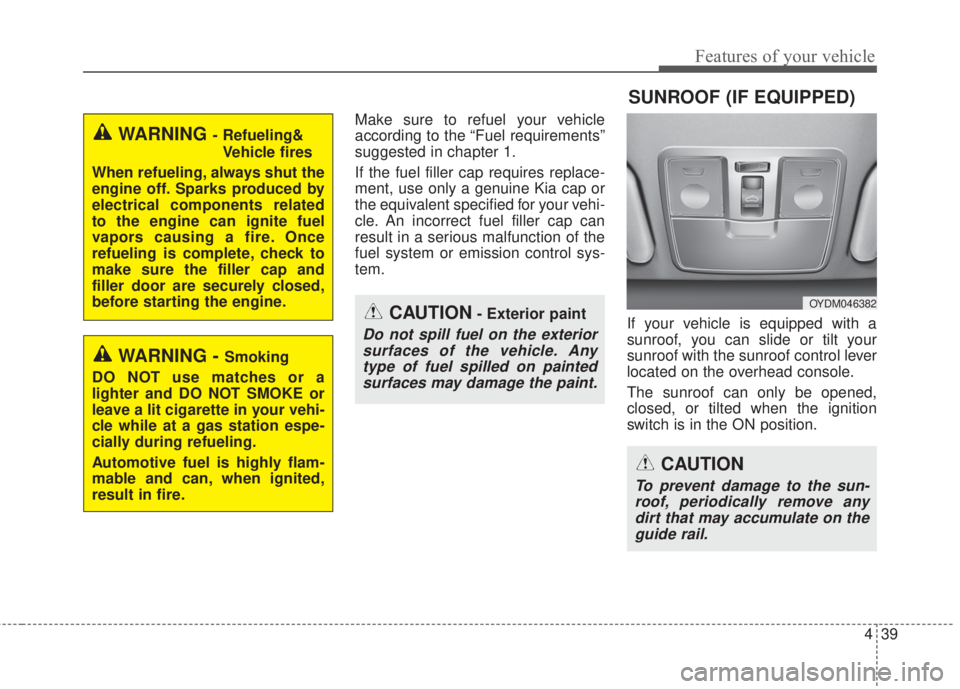
If your vehicle is equipped with a
sunroof, you can slide or tilt your
sunroof with the sunroof control lever
located on the overhead console.
The sunroof can only be opened,
closed, or tilted when the ignition
switch is in the ON position.
CAUTION- Exterior paint
Do not spill fuel on the exterior
surfaces of the vehicle. Any
type of fuel spilled on painted
surfaces may damage the paint.
WARNING - Refueling&
Vehicle fires
When refueling, always shut the
engine off. Sparks produced by
electrical components related
to the engine can ignite fuel
vapors causing a fire. Once
refueling is complete, check to
make sure the filler cap and
filler door are securely closed,
before starting the engine.
WARNING - Smoking
DO NOT use matches or a
lighter and DO NOT SMOKE or
leave a lit cigarette in your vehi-
cle while at a gas station espe-
cially during refueling.
Automotive fuel is highly flam-
mable and can, when ignited,
result in fire.
SUNROOF (IF EQUIPPED)
OYDM046382
CAUTION
To prevent damage to the sun-
roof, periodically remove any
dirt that may accumulate on the
guide rail.
Page 112 of 595
Features of your vehicle
40 4
In cold and wet climates, the sunroof
may not work properly due to freez-
ing conditions.
After the vehicle is washed or in a
rainstorm, be sure to wipe off any
water that is on the sunroof before
operating it.
The sunroof cannot slide when it is in
the tilt position nor can it be tilted
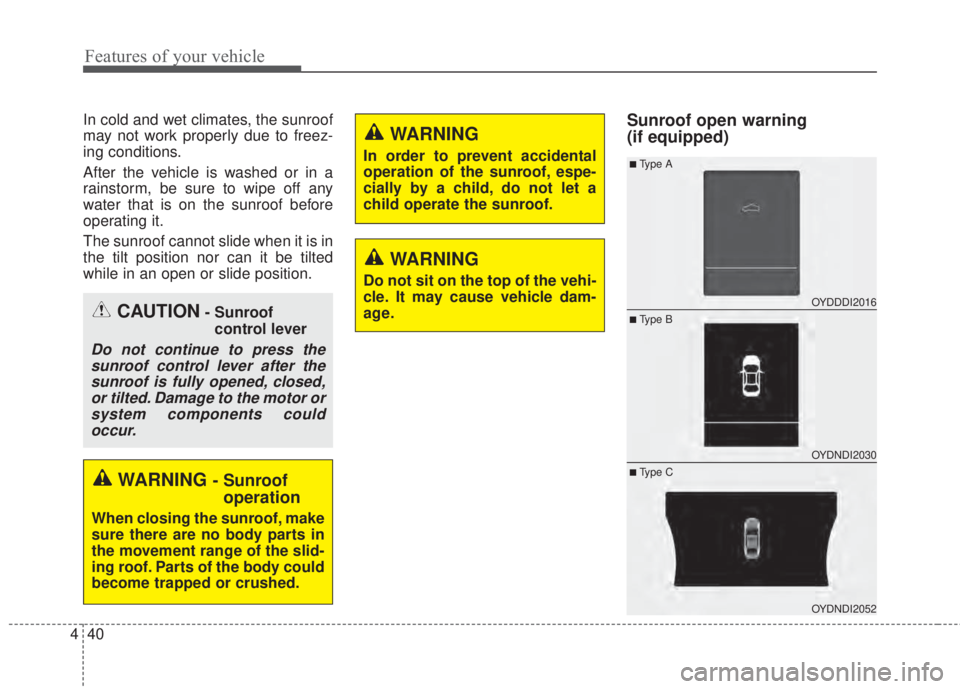
while in an open or slide position.Sunroof open warning
(if equipped)
CAUTION- Sunroof
control lever
Do not continue to press the
sunroof control lever after the
sunroof is fully opened, closed,
or tilted. Damage to the motor or
system components could
occur.
WARNING - Sunroof
operation
When closing the sunroof, make
sure there are no body parts in
the movement range of the slid-
ing roof. Parts of the body could
become trapped or crushed.
WARNING
In order to prevent accidental
operation of the sunroof, espe-
cially by a child, do not let a
child operate the sunroof.
WARNING
Do not sit on the top of the vehi-
cle. It may cause vehicle dam-
age.
OYDDDI2016
OYDNDI2030
OYDNDI2052
■ Ty p e B
■Type A
■ Ty p e C
Page 118 of 595
Features of your vehicle
46 4
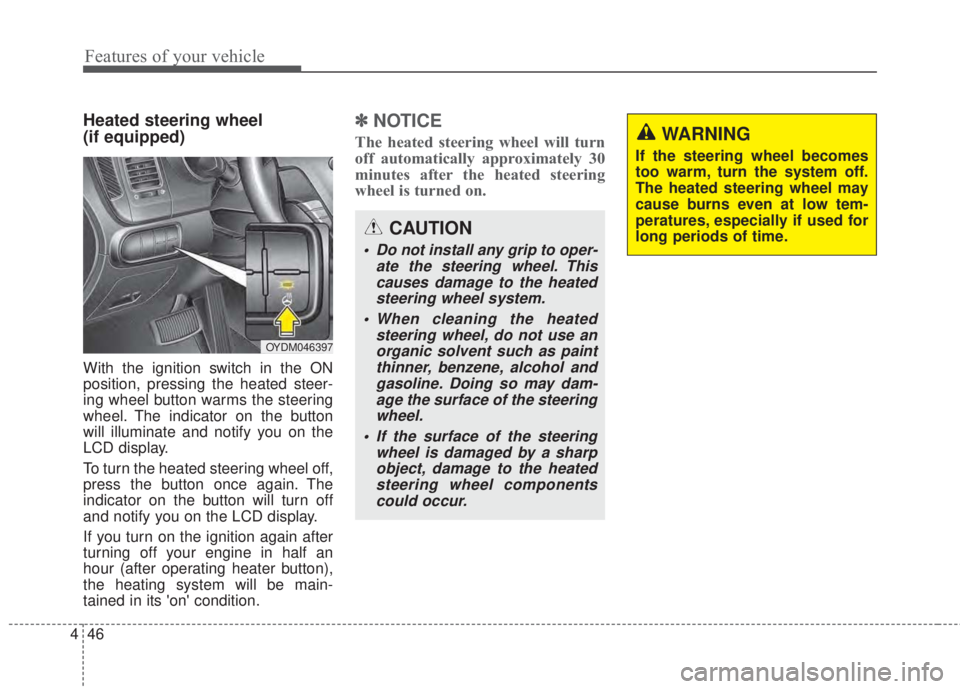
Heated steering wheel
(if equipped)
With the ignition switch in the ON
position, pressing the heated steer-
ing wheel button warms the steering
wheel. The indicator on the button
will illuminate and notify you on the
LCD display.
To turn the heated steering wheel off,
press the button once again. The
indicator on the button will turn off
and notify you on the LCD display.
If you turn on the ignition again after
turning off your engine in half an
hour (after operating heater button),
the heating system will be main-
tained in its 'on' condition.
✽NOTICE
The heated steering wheel will turn
off automatically approximately 30
minutes after the heated steering
wheel is turned on.
CAUTION
• Do not install any grip to oper-
ate the steering wheel. This
causes damage to the heated
steering wheel system.
• When cleaning the heated
steering wheel, do not use an
organic solvent such as paint
thinner, benzene, alcohol and
gasoline. Doing so may dam-
age the surface of the steering
wheel.
• If the surface of the steering
wheel is damaged by a sharp
object, damage to the heated
steering wheel components
could occur.
OYDM046397
WARNING
If the steering wheel becomes
too warm, turn the system off.
The heated steering wheel may
cause burns even at low tem-
peratures, especially if used for
long periods of time.
Page 126 of 595
Features of your vehicle
54 4
Accessories
If you would like additional informa-
tion on the Homelink
®Wireless
Control System, Homelink®compati-
ble products, or to purchase other
accessories such as the HomeLink
®
Lighting Package, please contact
Homelink®at 1-800-355-3515 or on
the internet at www.homelink.com.
This device complies with Industry
Canada licence-exempt RSS stan-
dard(s).
Operation is subject to the following
two conditions:
(1) This device may not cause inter-
ference, and
(2) This device must accept any
interference, including interfer-
ence that may cause undesired
operation of the device.The HomeLink
®transmitter has been
tested and complies with FCC and
DOC/MDC rules. Changes or modifi-
cations not expressly approved by
the party responsible for compliance
could void the user’s authority to
operate the equipment.
IC: 4112104541A Gentex
MODEL/FCC ID: NZLSTDHL3Outside rearview mirror
Be sure to adjust mirror angles
before driving.
Your vehicle is equipped with both
left-hand and right-hand outside
rearview mirrors. The mirrors can be
adjusted remotely with the remote
switch (if equipped). The mirror
heads can be folded to prevent dam-
age during an automatic car wash or
when passing through a narrow
street.
The right outside rearview mirror is
convex. Objects seen in the mirror
are closer than they appear.
Use your interior rearview mirror or
direct observation to determine the
actual distance of following vehicles
when changing lanes.
Page 127 of 595
455
Features of your vehicle
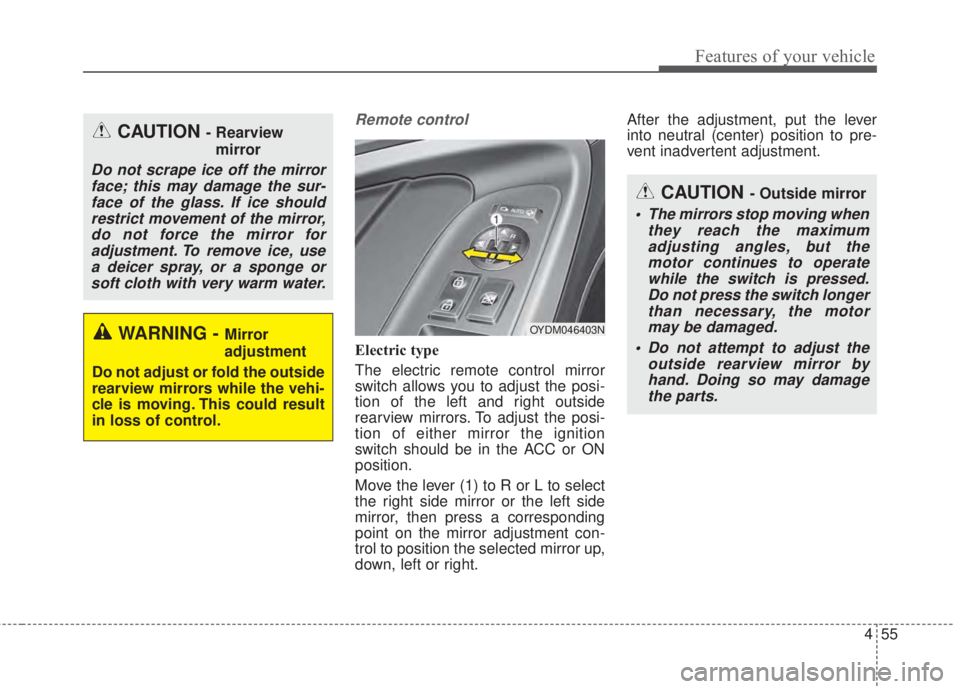
Remote control
Electric type
The electric remote control mirror
switch allows you to adjust the posi-
tion of the left and right outside
rearview mirrors. To adjust the posi-
tion of either mirror the ignition
switch should be in the ACC or ON
position.
Move the lever (1) to R or L to select
the right side mirror or the left side
mirror, then press a corresponding
point on the mirror adjustment con-
trol to position the selected mirror up,
down, left or right.After the adjustment, put the lever
into neutral (center) position to pre-
vent inadvertent adjustment.
CAUTION - Outside mirror
• The mirrors stop moving when
they reach the maximum
adjusting angles, but the
motor continues to operate
while the switch is pressed.
Do not press the switch longer
than necessary, the motor
may be damaged.
• Do not attempt to adjust the
outside rearview mirror by
hand. Doing so may damage
the parts.
OYDM046403N
CAUTION - Rearview
mirror
Do not scrape ice off the mirror
face; this may damage the sur-
face of the glass. If ice should
restrict movement of the mirror,
do not force the mirror for
adjustment. To remove ice, use
a deicer spray, or a sponge or
soft cloth with very warm water.
WARNING - Mirror
adjustment
Do not adjust or fold the outside
rearview mirrors while the vehi-
cle is moving. This could result
in loss of control.
Page 164 of 595
Features of your vehicle
92 4
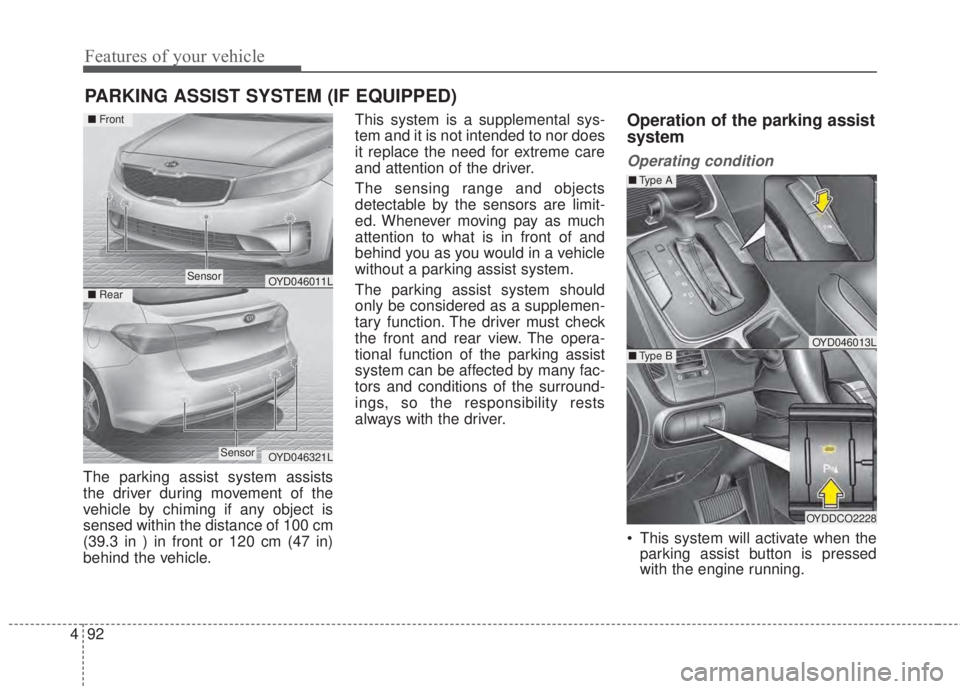
The parking assist system assists
the driver during movement of the
vehicle by chiming if any object is
sensed within the distance of 100 cm
(39.3 in ) in front or 120 cm (47 in)
behind the vehicle.This system is a supplemental sys-
tem and it is not intended to nor does
it replace the need for extreme care
and attention of the driver.
The sensing range and objects
detectable by the sensors are limit-
ed. Whenever moving pay as much
attention to what is in front of and
behind you as you would in a vehicle
without a parking assist system.
The parking assist system should
only be considered as a supplemen-
tary function. The driver must check
the front and rear view. The opera-
tional function of the parking assist
system can be affected by many fac-
tors and conditions of the surround-
ings, so the responsibility rests
always with the driver.
Operation of the parking assist
system
Operating condition
• This system will activate when the
parking assist button is pressed
with the engine running.
PARKING ASSIST SYSTEM (IF EQUIPPED)
OYD046013L
OYDDCO2228
■Ty p e B
■Ty p e A
OYD046011L
OYD046321L
■Rear
■Front
Sensor
Sensor
Page 168 of 595
Features of your vehicle
96 4
✽NOTICE
1. The warning may not sound
sequentially depending on the
speed and shapes of the objects
detected.
2. The parking assist system may
malfunction if the vehicle bumper
height or sensor installation has
been modified. Any non-factory
installed equipment or accessories
may also interfere with the sensor
performance.
3. Sensor may not recognize objects
less than 30 cm (11.81 in) from the
sensor, or it may sense an incor-
rect distance. Use with caution.
4. When the sensor is frozen or
stained with snow or water, the
sensor may be inoperative until
the stains are removed using a
soft cloth.
5. Do not push, scratch or strike the
sensor with any hard objects that
could damage the surface of the
sensor. Sensor damage could occur.
✽NOTICE
This system can only sense objects
within the range and location of the
sensors, it can not detect objects in
other areas where sensors are not
installed. Also, small or slim objects,
or objects located between sensors
may not be detected.
Always visually check in front and
behind the vehicle when driving.
Be sure to inform any drivers in the
vehicle that may be unfamiliar with
the system regarding the system’s
capabilities and limitations.WARNING- Parking
Assist System
Never rely solely on the parking
assist system when backing up.
Always perform a visual inspec-
tion to make sure the vehicle is
clear of all obstructions before
moving the vehicle in any direc-
tion. Pay close attention when
the vehicle is driven close to
objects on the road, particularly
pedestrians, and especially
children. Be aware that some
objects may not be detected by
the sensors, due to the objects
distance, size or material, all of
which can limit the effective-
ness of the sensor.