Window switch KIA FORTE 2017 User Guide
[x] Cancel search | Manufacturer: KIA, Model Year: 2017, Model line: FORTE, Model: KIA FORTE 2017Pages: 595, PDF Size: 11.5 MB
Page 138 of 595
Features of your vehicle
66 4
Average Fuel Economy (2)
• The average fuel economy is cal-
culated by the total driving dis-
tance and fuel consumption since
the last average fuel economy
reset.
- Fuel economy range: 0.0 ~ 99.9
L/100km or MPG
• The average fuel economy can be
reset both manually and automati-
cally.
Manual reset
To clear the average fuel economy
manually, press the RESET button
(Type A : RESET, Type B, C : ) on
the steering wheel for more than 1
second when the average fuel econo-
my is displayed.Automatic reset
To make the average fuel economy
be reset automatically whenever refu-
eling, select the “Auto Reset” mode in
User Setting menu of the LCD win-
dow (Refer to “LCD window”).
Under “Auto Reset” mode, the aver-
age fuel economy will be cleared to
zero (---) when the vehicle speed
exceeds 1.6 km/h (1 mph) after refu-
eling more than 6 liters (1.6 gallons).
✽NOTICE
The average fuel economy is not dis-
played for more accurate calculation
if the vehicle does not drive more
than 10 seconds or 50 meters (0.03
miles) since the ignition switch or
Engine Start/Stop button is turned
to ON.
Instant Fuel Economy (3)
• This mode displays the instant fuel
economy during the last few sec-
onds when the vehicle speed is
more than 10 km/h (6.2 MPH).
- Fuel economy range: 0.0 ~ 99.9
L/100km or 0.0 ~ 99.9 MPG
(Type A), 0.0 ~ 30.0 L/100km or
0.0 ~ 50.0 MPG (Type B, C)
Page 143 of 595
471
Features of your vehicle
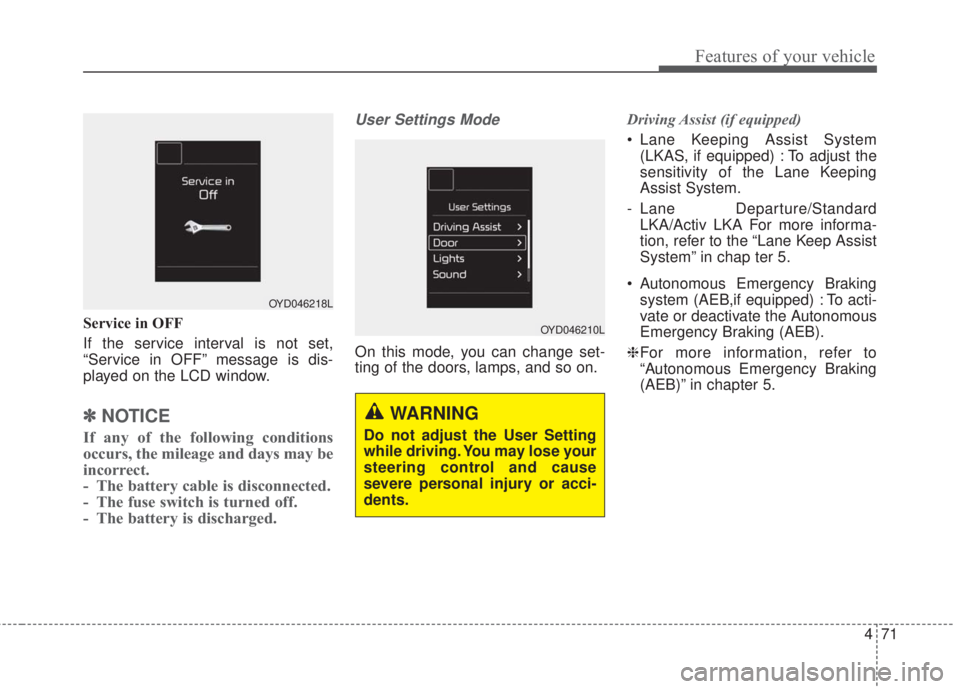
Service in OFF
If the service interval is not set,
“Service in OFF” message is dis-
played on the LCD window.
✽NOTICE
If any of the following conditions
occurs, the mileage and days may be
incorrect.
- The battery cable is disconnected.
- The fuse switch is turned off.
- The battery is discharged.
User Settings Mode
On this mode, you can change set-
ting of the doors, lamps, and so on.Driving Assist (if equipped)
• Lane Keeping Assist System
(LKAS, if equipped) : To adjust the
sensitivity of the Lane Keeping
Assist System.
- Lane Departure/Standard
LKA/Activ LKA For more informa-
tion, refer to the “Lane Keep Assist
System” in chap ter 5.
• Autonomous Emergency Braking
system (AEB,if equipped) : To acti-
vate or deactivate the Autonomous
Emergency Braking (AEB).
❈For more information, refer to
“Autonomous Emergency Braking
(AEB)” in chapter 5.
OYD046218L
OYD046210L
WARNING
Do not adjust the User Setting
while driving. You may lose your
steering control and cause
severe personal injury or acci-
dents.
Page 173 of 595
4 101
Features of your vehicle
Auto light position (if equipped)
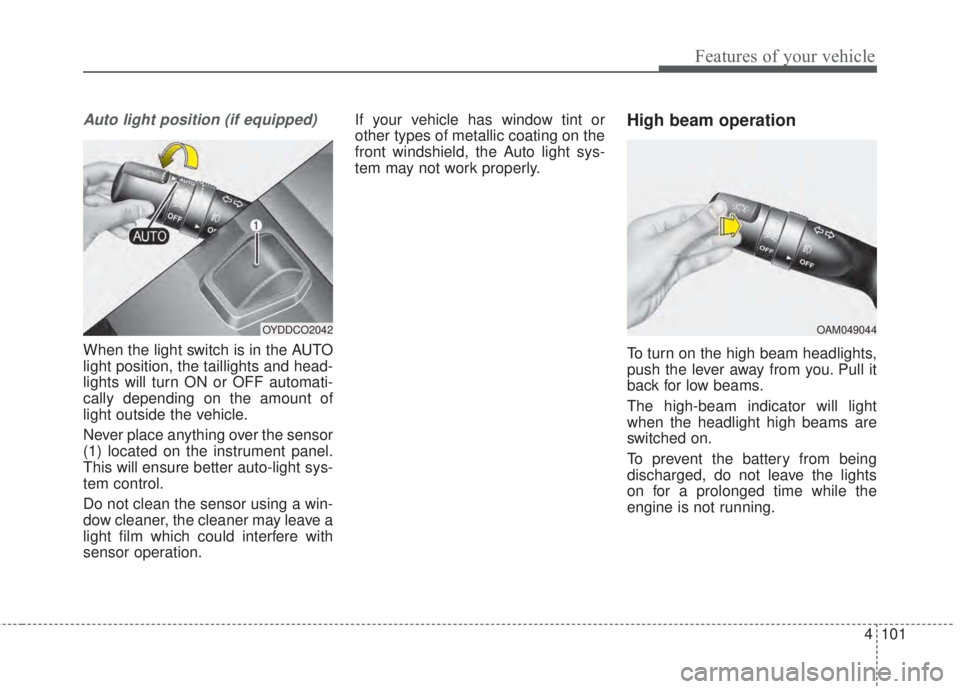
When the light switch is in the AUTO
light position, the taillights and head-
lights will turn ON or OFF automati-
cally depending on the amount of
light outside the vehicle.
Never place anything over the sensor
(1) located on the instrument panel.
This will ensure better auto-light sys-
tem control.
Do not clean the sensor using a win-
dow cleaner, the cleaner may leave a
light film which could interfere with
sensor operation.If your vehicle has window tint or
other types of metallic coating on the
front windshield, the Auto light sys-
tem may not work properly.
High beam operation
To turn on the high beam headlights,
push the lever away from you. Pull it
back for low beams.
The high-beam indicator will light
when the headlight high beams are
switched on.
To prevent the battery from being
discharged, do not leave the lights
on for a prolonged time while the
engine is not running.
OYDDCO2042OAM049044
Page 179 of 595
4 107
Features of your vehicle
Rear window wiper and wash-
er switch (5 door) (if equipped)
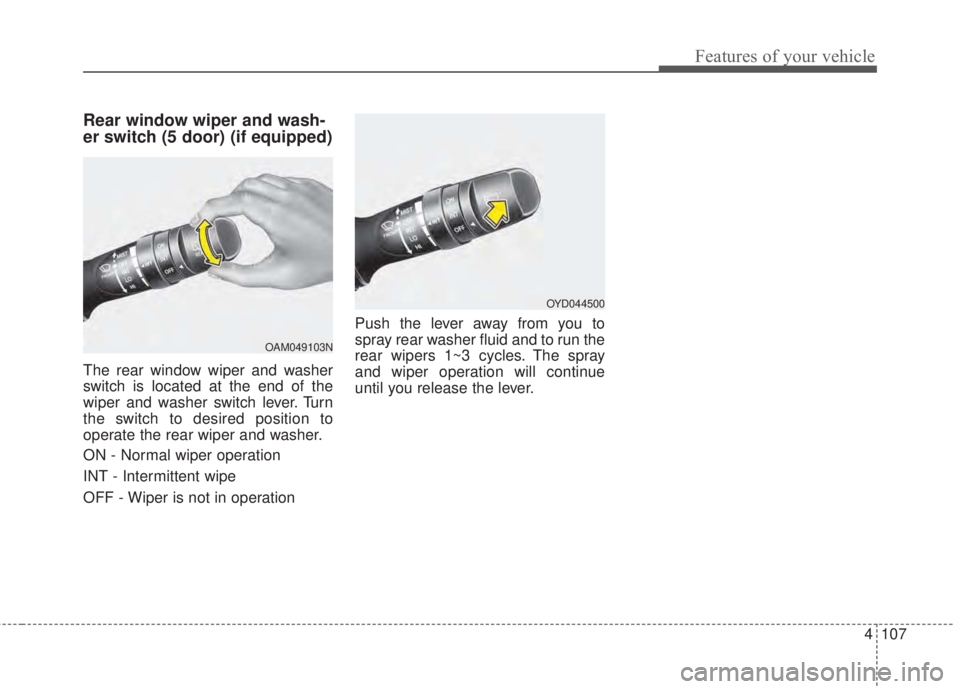
The rear window wiper and washer
switch is located at the end of the
wiper and washer switch lever. Turn
the switch to desired position to
operate the rear wiper and washer.
ON - Normal wiper operation
INT - Intermittent wipe
OFF - Wiper is not in operationPush the lever away from you to
spray rear washer fluid and to run the
rear wipers 1~3 cycles. The spray
and wiper operation will continue
until you release the lever.
OAM049103N
OYD044500
Page 185 of 595
4 113
Features of your vehicle
If you want to defrost and defog the
front windshield, refer to "Windshield
Defrosting and Defogging" in this
section.
Rear window defroster
The defroster heats the window to
remove frost, fog and thin ice from
the interior and exterior of the rear
window, while the engine is running.
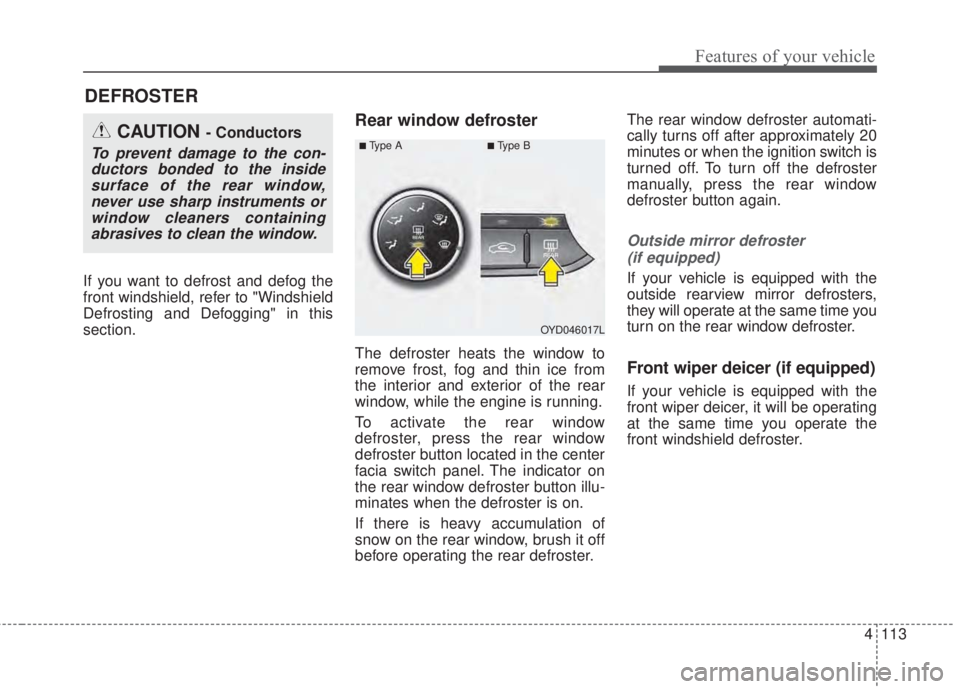
To activate the rear window
defroster, press the rear window
defroster button located in the center
facia switch panel. The indicator on
the rear window defroster button illu-
minates when the defroster is on.
If there is heavy accumulation of
snow on the rear window, brush it off
before operating the rear defroster.The rear window defroster automati-
cally turns off after approximately 20
minutes or when the ignition switch is
turned off. To turn off the defroster
manually, press the rear window
defroster button again.
Outside mirror defroster
(if equipped)
If your vehicle is equipped with the
outside rearview mirror defrosters,
they will operate at the same time you
turn on the rear window defroster.
Front wiper deicer (if equipped)
If your vehicle is equipped with the
front wiper deicer, it will be operating
at the same time you operate the
front windshield defroster.
DEFROSTER
OYD046017L
CAUTION - Conductors
To prevent damage to the con-
ductors bonded to the inside
surface of the rear window,
never use sharp instruments or
window cleaners containing
abrasives to clean the window.■Ty p e A■Type B
Page 196 of 595
Features of your vehicle
124 4
AUTOMATIC CLIMATE CONTROL SYSTEM (IF EQUIPPED)
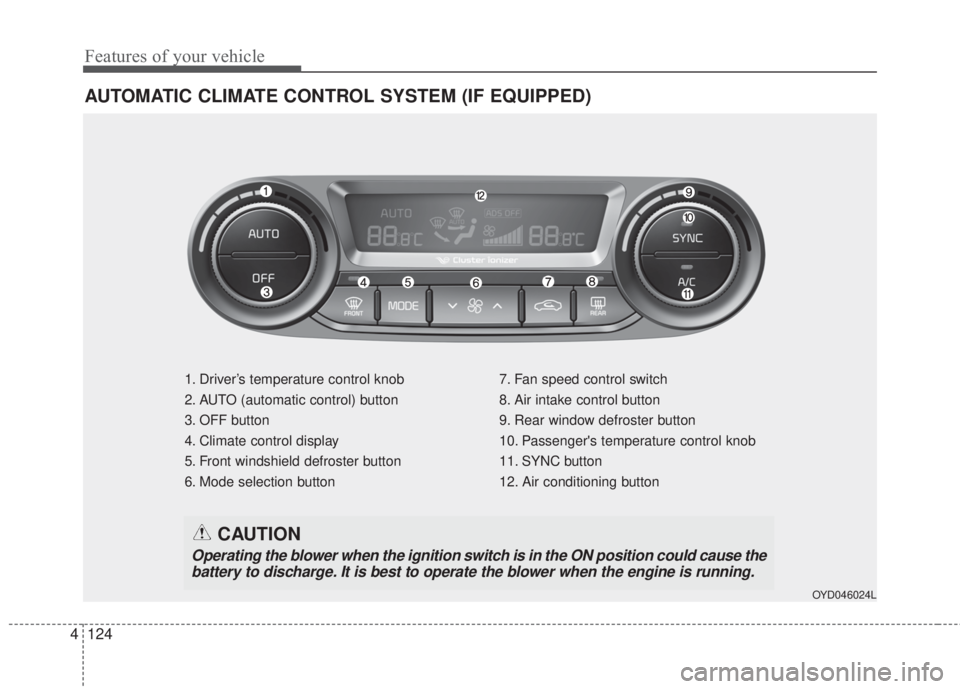
1. Driver’s temperature control knob
2. AUTO (automatic control) button
3. OFF button
4. Climate control display
5. Front windshield defroster button
6. Mode selection button7. Fan speed control switch
8. Air intake control button
9. Rear window defroster button
10. Passenger's temperature control knob
11. SYNC button
12. Air conditioning button
OYD046024L
CAUTION
Operating the blower when the ignition switch is in the ON position could cause the
battery to discharge. It is best to operate the blower when the engine is running.
Page 215 of 595
4 143
Features of your vehicle
Sunvisor
Use the sunvisor to shield direct light
through the front or side windows.
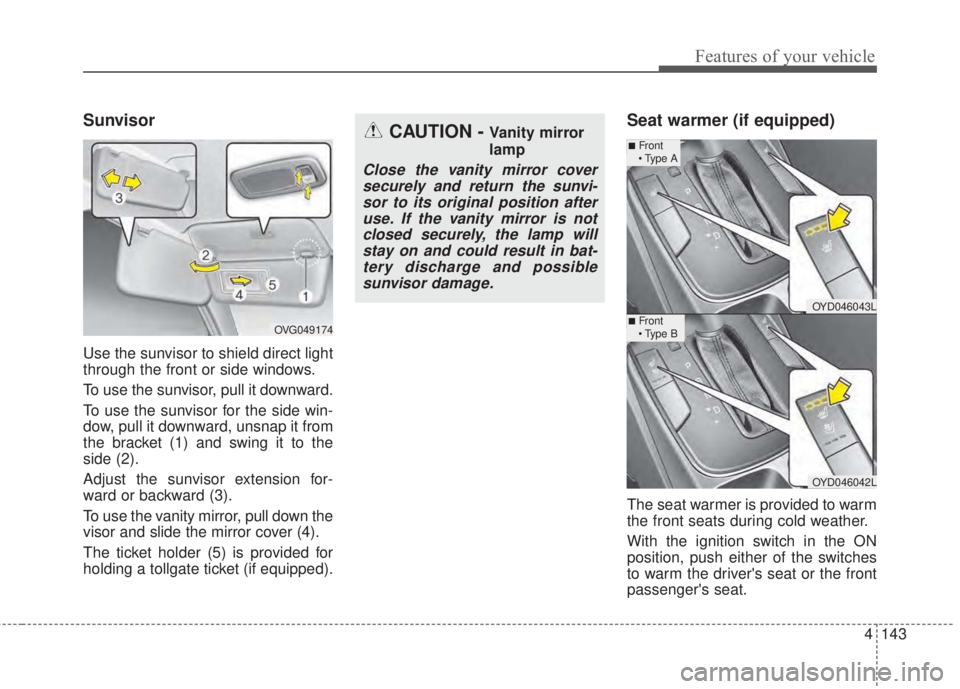
To use the sunvisor, pull it downward.
To use the sunvisor for the side win-
dow, pull it downward, unsnap it from
the bracket (1) and swing it to the
side (2).
Adjust the sunvisor extension for-
ward or backward (3).
To use the vanity mirror, pull down the
visor and slide the mirror cover (4).
The ticket holder (5) is provided for
holding a tollgate ticket (if equipped).
Seat warmer (if equipped)
The seat warmer is provided to warm
the front seats during cold weather.
With the ignition switch in the ON
position, push either of the switches
to warm the driver's seat or the front
passenger's seat.
CAUTION - Vanity mirror
lamp
Close the vanity mirror cover
securely and return the sunvi-
sor to its original position after
use. If the vanity mirror is not
closed securely, the lamp will
stay on and could result in bat-
tery discharge and possible
sunvisor damage.
OVG049174
OYD046043L
OYD046042L
■Front
• Type A
■Front
• Type B
Page 224 of 595
4 152
Features of your vehicle
✽NOTICE
If you install an after market HID
head lamp, your vehicle’s audio and
electronic device may malfunction.
Glass antenna (if equipped)
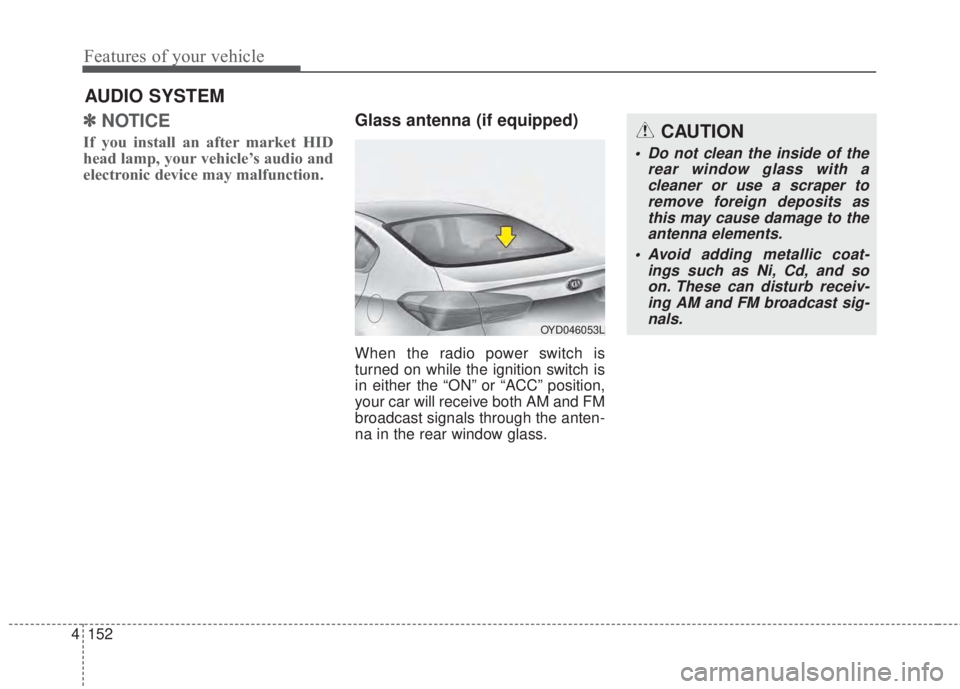
When the radio power switch is
turned on while the ignition switch is
in either the “ON” or “ACC” position,
your car will receive both AM and FM
broadcast signals through the anten-
na in the rear window glass.
AUDIO SYSTEM
CAUTION
• Do not clean the inside of the
rear window glass with a
cleaner or use a scraper to
remove foreign deposits as
this may cause damage to the
antenna elements.
• Avoid adding metallic coat-
ings such as Ni, Cd, and so
on. These can disturb receiv-
ing AM and FM broadcast sig-
nals.
OYD046053L
Page 347 of 595
Driving your vehicle
4 5
Before entering vehicle
• Be sure that all windows, outside
mirror(s), and outside lights are
clean.
• Check the condition of the tires.
• Check under the vehicle for any
sign of leaks.
• Be sure there are no obstacles
behind you if you intend to back up.
Necessary inspections
Fluid levels, such as engine oil,
engine coolant, brake fluid, and
washer fluid should be checked on a
regular basis, with the exact interval
depending on the fluid. Further
details are provided in Chapter 7,
“Maintenance”.
Before starting
• Close and lock all doors.
• Position the seat so that all con-
trols are easily reached.
• Buckle your seat belt.
• Adjust the inside and outside
rearview mirrors.
• Be sure that all lights work.
• Check all gauges.
• Check the operation of warning
lights when the ignition switch is
turned to the ON position.
• Release the parking brake and
make sure the brake warning light
goes off.
For safe operation, be sure you are
familiar with your vehicle and its
equipment.
BEFORE DRIVING
WARNING- Distracted
driving
Focus on the road while driving.
The driver's primary responsi-
bility is in the safe and legal
operation of the vehicle. Use of
any hand held devices, other
equipment or vehicle systems
that distract the driver should
not be used during vehicle
operation.
Page 516 of 595
Maintenance
54 7
Battery recharging
Your vehicle has a maintenance-free,
calcium-based battery.
• If the battery becomes discharged
in a short time (because, for exam-
ple, the headlights or interior lights
were left on while the vehicle was
not in use), recharge it by slow
charging (trickle) for 10 hours.
• If the battery gradually discharges
because of high electric load while
the vehicle is being used, recharge
it at 20-30A for two hours.When recharging the battery,
observe the following precautions:
• The battery must be removed from
the vehicle and placed in an area
with good ventilation.
• Watch the battery during charging,
and stop or reduce the charging
rate if the battery cells begin
gassing (boiling) violently or if the
temperature of the electrolyte of
any cell exceeds 49°C (120°F).
• Wear eye protection when check-
ing the battery during charging.
• Disconnect the battery charger in
the following order.
1. Turn off the battery charger main
switch.
2. Unhook the negative clamp from
the negative battery terminal.
3. Unhook the positive clamp from
the positive battery terminal.
• Before performing maintenance or
recharging the battery, turn off all
accessories and stop the engine.
• The negative battery cable must be
removed first and installed last
when the battery is disconnected.
Reset items
Items should be reset after the bat-
tery has been discharged or the bat-
tery has been disconnected.
• Auto down window (See chapter 4)
• Sunroof (See chapter 4)
• Trip computer (See chapter 4)
• Climate control system
(See chapter 4)
• Clock (See chapter 4)
• Audio (See chapter 4)