battery KIA FORTE 2019 Service Manual
[x] Cancel search | Manufacturer: KIA, Model Year: 2019, Model line: FORTE, Model: KIA FORTE 2019Pages: 550, PDF Size: 11.66 MB
Page 391 of 550
65
What to do in an emergency
EMERGENCY STARTING
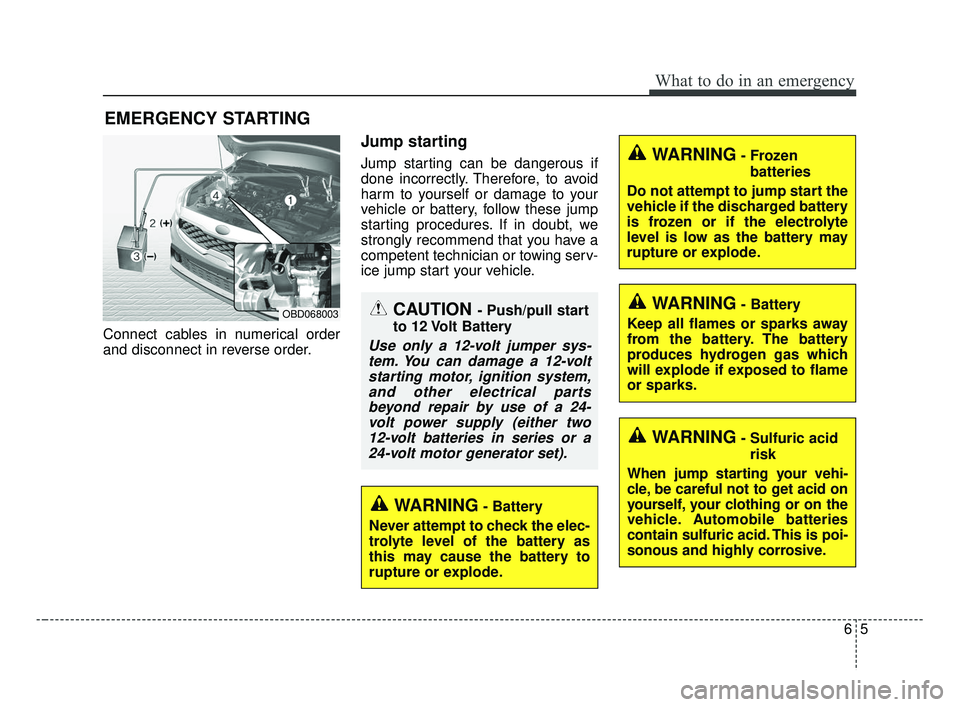
Connect cables in numerical order
and disconnect in reverse order.
Jump starting
Jump starting can be dangerous if
done incorrectly. Therefore, to avoid
harm to yourself or damage to your
vehicle or battery, follow these jump
starting procedures. If in doubt, we
strongly recommend that you have a
competent technician or towing serv-
ice jump start your vehicle.
CAUTION - Push/pull start
to 12 Volt Battery
Use only a 12-volt jumper sys- tem. You can damage a 12-voltstarting motor, ignition system,and other electrical partsbeyond repair by use of a 24-volt power supply (either two12-volt batteries in series or a24-volt motor generator set).
WARNING- Battery
Never attempt to check the elec-
trolyte level of the battery as
this may cause the battery to
rupture or explode.
WARNING- Frozen batteries
Do not attempt to jump start the
vehicle if the discharged battery
is frozen or if the electrolyte
level is low as the battery may
rupture or explode.
WARNING- Sulfuric acid risk
When jump starting your vehi-
cle, be careful not to get acid on
yourself, your clothing or on the
vehicle. Automobile batteries
contain sulfuric acid. This is poi-
sonous and highly corrosive.
WARNING- Battery
Keep all flames or sparks away
from the battery. The battery
produces hydrogen gas which
will explode if exposed to flame
or sparks.OBD068003
BDm CAN (ENG) 6.qxp 7/4/2018 10:20 AM Page 5
Page 392 of 550
What to do in an emergency
66
Jump starting procedure
1.Make sure the booster battery is12-volt and that its negative termi-
nal is grounded.
2.If the booster battery is in another vehicle, do not allow the vehicles to
come in contact.
3.Turn off all unnecessary electrical loads.
4.Connect the jumper cables in the exact sequence shown in the illus-
tration. First connect one end of a
jumper cable to the positive termi-
nal of the discharged battery (1),
then connect the other end to the
positive terminal of the booster
battery (2).
Proceed to connect one end of the
other jumper cable to the negative
terminal of the booster battery (3),
then the other end to a solid, sta-
tionary, metallic point (for example,
the engine lifting bracket) away
from the battery (4). Do not con-
nect it to or near any part that
moves when the engine is cranked. Do not allow the jumper cables to
contact anything except the correct
battery terminals or the correct
ground. Do not lean over the bat-
tery when making connections.
5.Start the engine of the vehicle with the booster battery and let it run at
2,000 rpm, then start the engine of
the vehicle with the discharged
battery.
If the cause of your battery discharg-ing is not apparent, you should haveyour vehicle checked by an author-ized Kia dealer.
Push-starting
Your manual transmission-equipped
vehicle should not be push-started
because it might damage the emis-
sion control system.
Vehicles equipped with intelligent
variable transmission cannot be
push-started.
Follow the directions in this section
for jump-starting.
WARNING - Tow starting
vehicle
Never tow a vehicle to start it.
When the engine starts, the
vehicle can suddenly surge for-
ward and could cause a colli-
sion with the tow vehicle.
WARNING - Battery cables
Do not connect the jumper cable
from the negative terminal of the
booster battery to the negative
terminal of the discharged bat-
tery. This can cause the dis-
charged battery to overheat and
crack, releasing battery acid.
Make sure to connect one end of
the jumper cable to the negative
terminal of the booster battery,
and the other end to a metallic
point, far away from the battery.
BDm CAN (ENG) 6.qxp 7/4/2018 10:20 AM Page 6
Page 411 of 550
625
What to do in an emergency
Notes on the safe use of the
Tire Mobility Kit
Park your car at the side of theroad so that you can work with the
Tire Mobility Kit away from moving
traffic.
To be sure your vehicle will not move, even when you're on fairly
level ground, always set your park-
ing brake.
Only use the Tire Mobility Kit for sealing/inflation passenger car
tires. Only punctured areas located
within the tread region of the tire
can be sealed using the Tire
Mobility Kit.
Do not use on motorcycles, bicy- cles or any other type of tires.
When the tire and wheel are dam- aged, do not use Tire Mobility Kit
for your safety. Use of the Tire Mobility Kit may not
be effective for tire damage larger
than approximately 6 mm (0.24 in).
Please contact the nearest Kia
dealership if the tire cannot be
made roadworthy with the Tire
Mobility Kit.
Do not remove any foreign objects such as nails or screws that have
penetrated the tire.
Provided the car is outdoors, leave the engine running. Otherwise
operating the compressor may
eventually drain the car battery.
Never leave the Tire Mobility Kit unattended while it is being used.
Do not leave the compressor run- ning for more than 10 min. at a time
or it may overheat.
Do not use the Tire Mobility Kit if the ambient temperature is below -30°C
(-22°F ).
WARNING
If sealant comes into contactwith skin, wash the affected
areas thoroughly. Seek med-
ical attention if irritation
develops and persists.
If sealant comes into contact with the eyes, flush eyes with
water for at least 15 minutes.
Seek medical attention if irri-
tation persists.
If sealant is swallowed, call a physician or poison control
center immediately.
WARNING
Do not use the Tire Mobility Kit if
a tire is severely damaged.
BDm CAN (ENG) 6.qxp 7/4/2018 10:21 AM Page 25
Page 425 of 550
Battery . . . . . . . . . . . . . . . . . . . . . . . . . . . . . . . . . . . 7-\
37
• For best battery service . . . . . . . . . . . . . . . . . . . . . . . 7-37
• Recharging the battery . . . . . . . . . . . . . . . . . . . . . . . . 7-38
• Reset items . . . . . . . . . . . . . . . . . . . . . . . . . . . . . . . . . . 7-39\
Tires and wheels . . . . . . . . . . . . . . . . . . . . . . . . . . . 7-40
• Tire care . . . . . . . . . . . . . . . . . . . . . . . . . . . . . . . . . . . . \
7-40
• Recommended cold tire inflation pressures . . . . . . . 7-40
• Tire pressure . . . . . . . . . . . . . . . . . . . . . . . . . . . . . . . . 7-41
• Checking tire inflation pressure. . . . . . . . . . . . . . . . . 7-41
• Tire rotation . . . . . . . . . . . . . . . . . . . . . . . . . . . . . . . . . 7-42
• Wheel alignment and tire balance . . . . . . . . . . . . . . . 7-43
• Tire replacement . . . . . . . . . . . . . . . . . . . . . . . . . . . . . 7-44
• Wheel replacement . . . . . . . . . . . . . . . . . . . . . . . . . . . 7-45
• Tire traction . . . . . . . . . . . . . . . . . . . . . . . . . . . . . . . . . 7-45
• Tire maintenance . . . . . . . . . . . . . . . . . . . . . . . . . . . . . 7-45
• Tire sidewall labeling . . . . . . . . . . . . . . . . . . . . . . . . . 7-45
• All season tires . . . . . . . . . . . . . . . . . . . . . . . . . . . . . . . 7-52
• Summer tires . . . . . . . . . . . . . . . . . . . . . . . . . . . . . . . . 7-52
• Snow tires . . . . . . . . . . . . . . . . . . . . . . . . . . . . . . . . . . . 7-\
52
• Radial-ply tires . . . . . . . . . . . . . . . . . . . . . . . . . . . . . . 7-53
• Low aspect ratio tire . . . . . . . . . . . . . . . . . . . . . . . . . . 7-54
Fuses . . . . . . . . . . . . . . . . . . . . . . . . . . . . . . . . . . . . \
7-55
• Inner panel fuse replacement . . . . . . . . . . . . . . . . . . . 7-57
• Engine compartment fuse replacement. . . . . . . . . . . 7-58
• Fuse/relay panel description. . . . . . . . . . . . . . . . . . . . 7-61
Light bulbs . . . . . . . . . . . . . . . . . . . . . . . . . . . . . . . 7-71
• Bulb replacement precaution . . . . . . . . . . . . . . . . . . 7-71
• Light bulb position (Front). . . . . . . . . . . . . . . . . . . . . 7-73
• Light bulb position (Rear) . . . . . . . . . . . . . . . . . . . . . 7-74
• Light bulb position (Side) . . . . . . . . . . . . . . . . . . . . . . 7-75
• Headlamp (Low beam) bulb replacement(Headlamp Type A,B) . . . . . . . . . . . . . . . . . . . . . . . . 7-75
• Headlamp (High beam) bulb replacement (Headlamp Type A,B) . . . . . . . . . . . . . . . . . . . . . . . . 7-77
• Side marker bulb replacement (Headlamp Type A,B) . . . . . . . . . . . . . . . . . . . . . . . . 7-78
• Position lamp / Day time running lamp (LED type) replacement (Headlamp Type B) . . . . . . . . . . . . . . . 7-79
• Headlamp (LED type) replacement (Headlamp Type C) . . . . . . . . . . . . . . . . . . . . . . . . . . 7-79
• Front turn signal lamp bulb replacement . . . . . . . . . 7-79
• Front fog lamp bulb replacement . . . . . . . . . . . . . . . 7-80
• Side repeater lamp (LED type) bulb replacement . . 7-80
• Side repeater lamp (Bulb type) bulb replacement . . 7-80
• Stop and tail lamp/side marker (Bulb type) bulb replacement (Rear combination lamp Type A) . . . 7-81
• Tail lamp (inside) (Bulb type) bulb replacement (Rear combination lamp Type A) . . . . . . . . . . . . . . 7-82
• Stop and tail lamp (LED type) bulb replacement (Rear combination lamp Type B) . . . . . . . . . . . . . . 7-83
7
BDm CAN (ENG) 7.qxp 7/4/2018 10:23 AM Page 2
Page 427 of 550
Maintenance
47
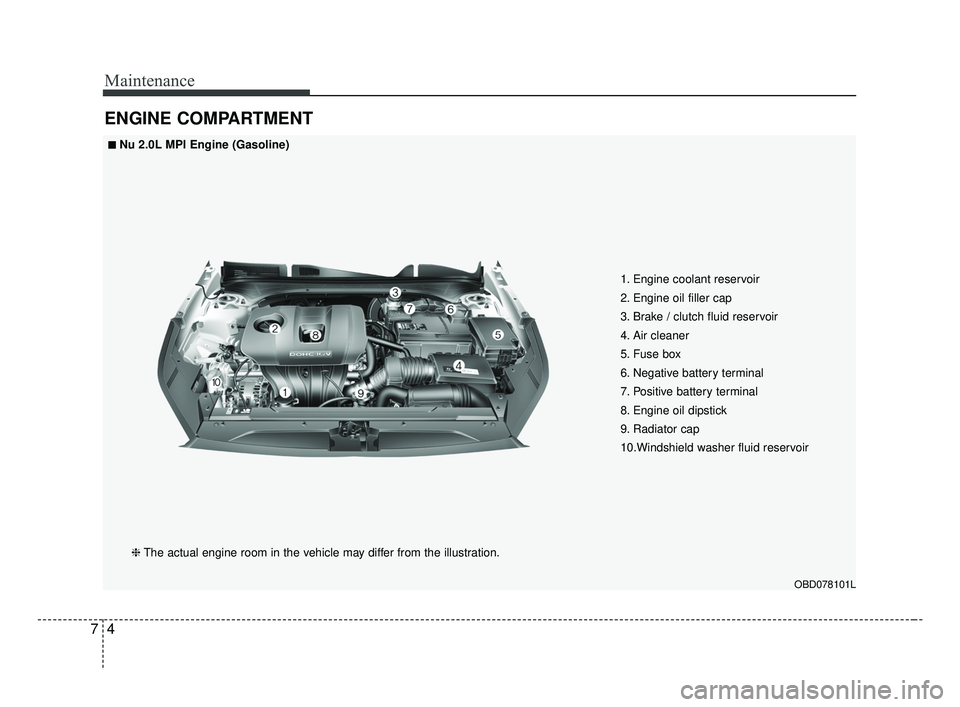
ENGINE COMPARTMENT
OBD078101L
❈The actual engine room in the vehicle may differ from the illustration. 1. Engine coolant reservoir
2. Engine oil filler cap
3. Brake / clutch fluid reservoir
4. Air cleaner
5. Fuse box
6. Negative battery terminal
7. Positive battery terminal
8. Engine oil dipstick
9. Radiator cap
10.Windshield washer fluid reservoir
■ ■Nu 2.0L MPI Engine (Gasoline)
BDm CAN (ENG) 7.qxp 7/4/2018 10:23 AM Page 4
Page 432 of 550
79
Maintenance
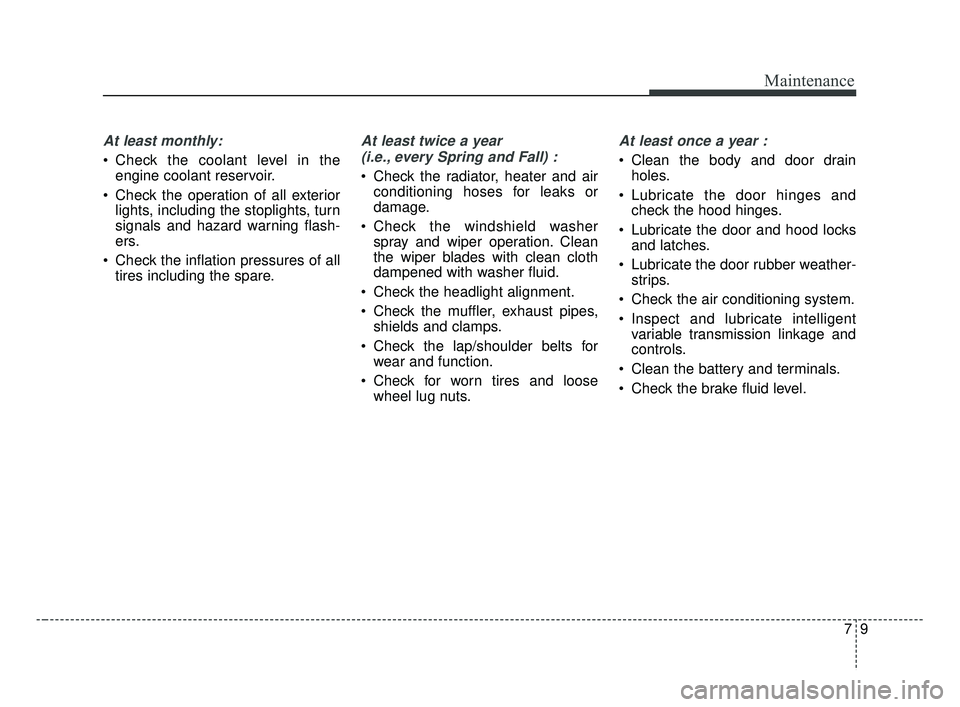
At least monthly:
Check the coolant level in theengine coolant reservoir.
Check the operation of all exterior lights, including the stoplights, turn
signals and hazard warning flash-
ers.
Check the inflation pressures of all tires including the spare.
At least twice a year
(i.e., every Spring and Fall) :
Check the radiator, heater and air conditioning hoses for leaks or
damage.
Check the windshield washer spray and wiper operation. Clean
the wiper blades with clean cloth
dampened with washer fluid.
Check the headlight alignment.
Check the muffler, exhaust pipes, shields and clamps.
Check the lap/shoulder belts for wear and function.
Check for worn tires and loose wheel lug nuts.
At least once a year :
Clean the body and door drainholes.
Lubricate the door hinges and check the hood hinges.
Lubricate the door and hood locks and latches.
Lubricate the door rubber weather- strips.
Check the air conditioning system.
Inspect and lubricate intelligent variable transmission linkage and
controls.
Clean the battery and terminals.
Check the brake fluid level.
BDm CAN (ENG) 7.qxp 7/4/2018 10:23 AM Page 9
Page 435 of 550
Maintenance
12
7
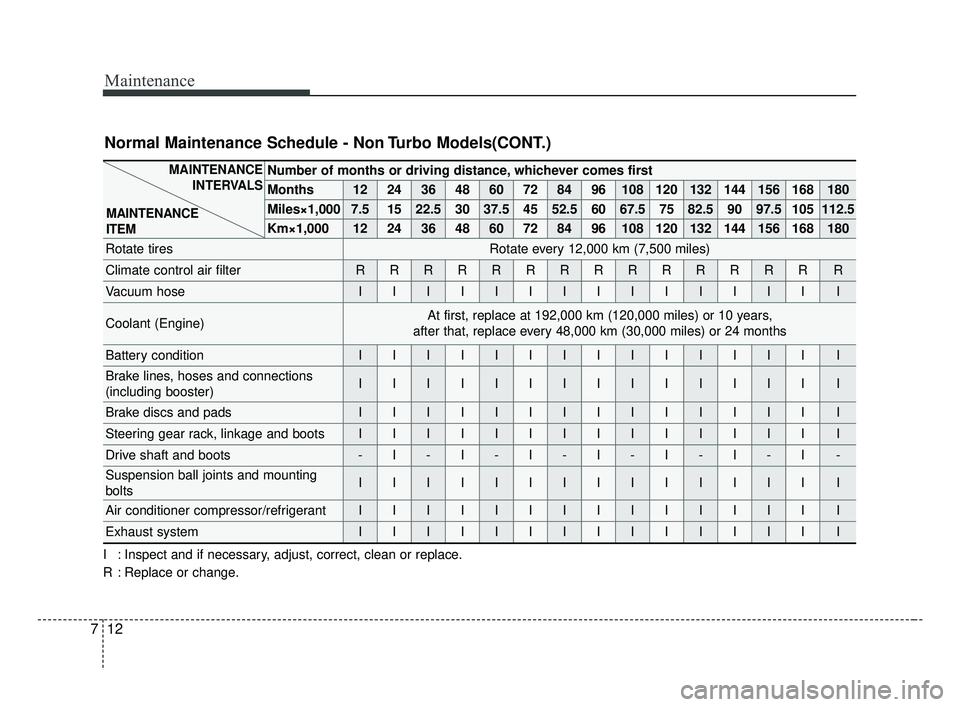
Number of months or driving distance, whichever comes first
Months1224364860728496108120132144156168180
Miles×1,0007.51522.530 37.5 45 52.5 60 67.5 75 82.5 90 97.5 105 112.5
Km×1,00012 24 36 48 60 72 84 96 108 120 132 144 156 168 180
Rotate tiresRotate every 12,000 km (7,500 miles)
Climate control air filterRRRRRRRRRRRRRRR
Vacuum hoseIIIIIIIIIIIIIII
Coolant (Engine)At first, replace at 192,000 km (120,000 miles) or 10 years,
after that, replace every 48,000 km (30,000 miles) or 24 months
Battery conditionIIIIIIIIIIIIIII
Brake lines, hoses and connections
(including booster)IIIIIIIIIIIIIII
Brake discs and padsIIIIIIIIIIIIIII
Steering gear rack, linkage and bootsIIIIIIIIIIIIIII
Drive shaft and boots-I-I-I-I-I-I-I-
Suspension ball joints and mounting
boltsIIIIIIIIIIIIIII
Air conditioner compressor/refrigerantIIIIIIIIIIIIIII
Exhaust systemIIIIIIIIIIIIIII
MAINTENANCE INTERVALS
MAINTENANCE
ITEM
Normal Maintenance Schedule - Non Turbo Models(CONT.)
I : Inspect and if necessary, adjust, correct, clean or replace.
R : Replace or change.
BDm CAN (ENG) 7.qxp 7/4/2018 10:23 AM Page 12
Page 460 of 550
737
Maintenance
BATTERY
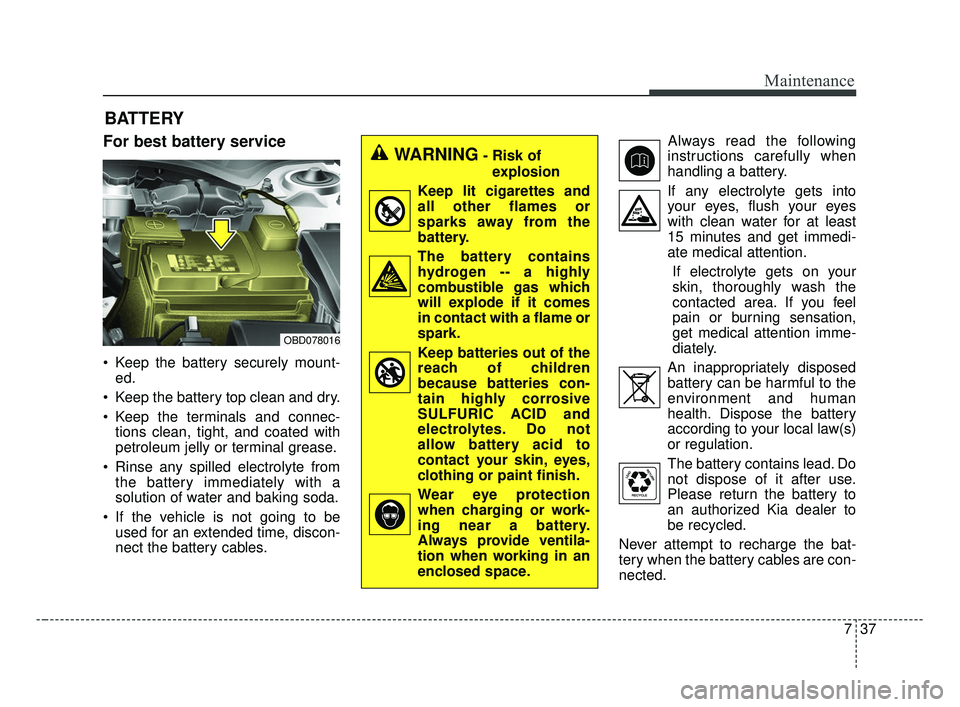
For best battery service
Keep the battery securely mount-ed.
Keep the battery top clean and dry.
Keep the terminals and connec- tions clean, tight, and coated with
petroleum jelly or terminal grease.
Rinse any spilled electrolyte from the battery immediately with a
solution of water and baking soda.
If the vehicle is not going to be used for an extended time, discon-
nect the battery cables. Always read the following
instructions carefully when
handling a battery.
If any electrolyte gets into your eyes, flush your eyes
with clean water for at least
15 minutes and get immedi-
ate medical attention.
If electrolyte gets on your
skin, thoroughly wash the
contacted area. If you feel
pain or burning sensation,
get medical attention imme-
diately.
An inappropriately disposed battery can be harmful to the
environment and human
health. Dispose the battery
according to your local law(s)
or regulation.
The battery contains lead. Do
not dispose of it after use.
Please return the battery to
an authorized Kia dealer to
be recycled.
Never attempt to recharge the bat-
tery when the battery cables are con-
nected.
WARNING- Risk of explosion
Keep lit cigarettes and
all other flames or
sparks away from the
battery.
The battery contains hydrogen -- a highly
combustible gas which
will explode if it comes
in contact with a flame or
spark.
Keep batteries out of the reach of children
because batteries con-
tain highly corrosive
SULFURIC ACID and
electrolytes. Do not
allow battery acid to
contact your skin, eyes,
clothing or paint finish.
Wear eye protection when charging or work-
ing near a battery.
Always provide ventila-
tion when working in an
enclosed space.
OBD078016
BDm CAN (ENG) 7.qxp 7/4/2018 10:25 AM Page 37
Page 461 of 550
Maintenance
38
7
✽ ✽
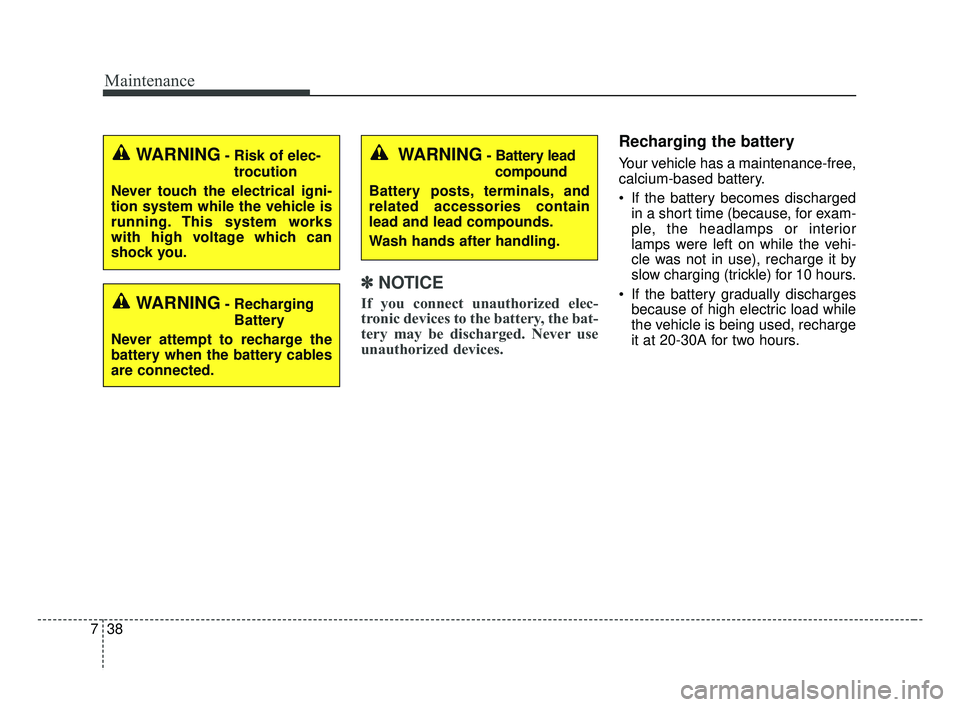
NOTICE
If you connect unauthorized elec-
tronic devices to the battery, the bat-
tery may be discharged. Never use
unauthorized devices.
Recharging the battery
Your vehicle has a maintenance-free,
calcium-based battery.
If the battery becomes discharged
in a short time (because, for exam-
ple, the headlamps or interior
lamps were left on while the vehi-
cle was not in use), recharge it by
slow charging (trickle) for 10 hours.
If the battery gradually discharges because of high electric load while
the vehicle is being used, recharge
it at 20-30A for two hours.WARNING- Risk of elec-
trocution
Never touch the electrical igni-
tion system while the vehicle is
running. This system works
with high voltage which can
shock you.
WARNING- Recharging Battery
Never attempt to recharge the
battery when the battery cables
are connected.
WARNING- Battery lead compound
Battery posts, terminals, and
related accessories contain
lead and lead compounds.
Wash hands after handling.
BDm CAN (ENG) 7.qxp 7/4/2018 10:25 AM Page 38
Page 462 of 550
739
Maintenance
When recharging the battery,
observe the following precautions:
The battery must be removed fromthe vehicle and placed in an area
with good ventilation.
Do not allow cigarettes, sparks, or flame near the battery.
Watch the battery during charging, and stop or reduce the charging
rate if the battery cells begin
gassing (boiling) violently or if the
temperature of the electrolyte of
any cell exceeds 49°C (120°F).
Wear eye protection when check- ing the battery during charging.
Disconnect the battery charger in the following order.
1. Turn off the battery charger main switch.
2. Unhook the negative clamp from the negative battery terminal.
3. Unhook the positive clamp from the positive battery terminal. Before performing maintenance or
recharging the battery, turn off all
accessories and stop the engine.
The negative battery cable must be removed first and installed last
when the battery is disconnected.Reset items
The following should be reset after
the battery has been discharged or
the battery has been disconnected.
Auto up/down window (See chapter 4)
Sunroof (See chapter 4)
Trip computer (See chapter 4)
Climate control system (See chapter 4)
Driver position memory system (See chapter 3)
Audio (See chapter 4)
BDm CAN (ENG) 7.qxp 7/4/2018 10:25 AM Page 39